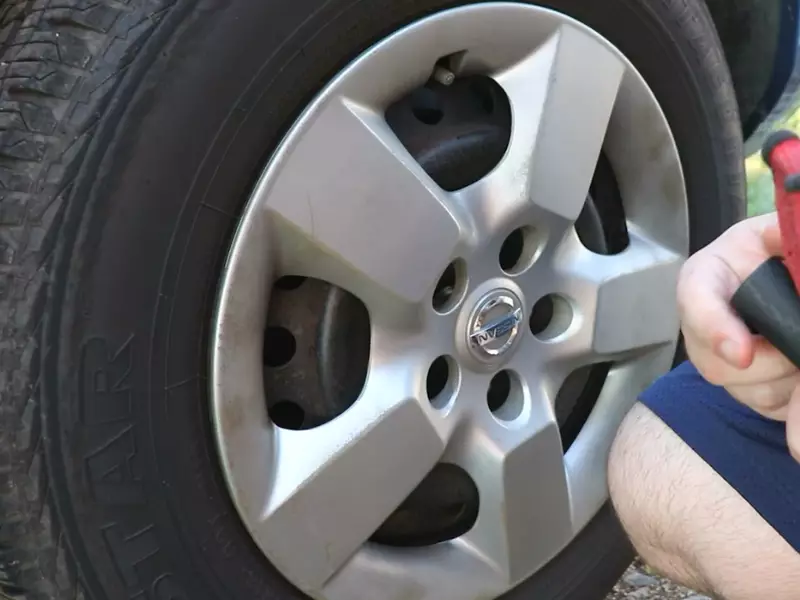
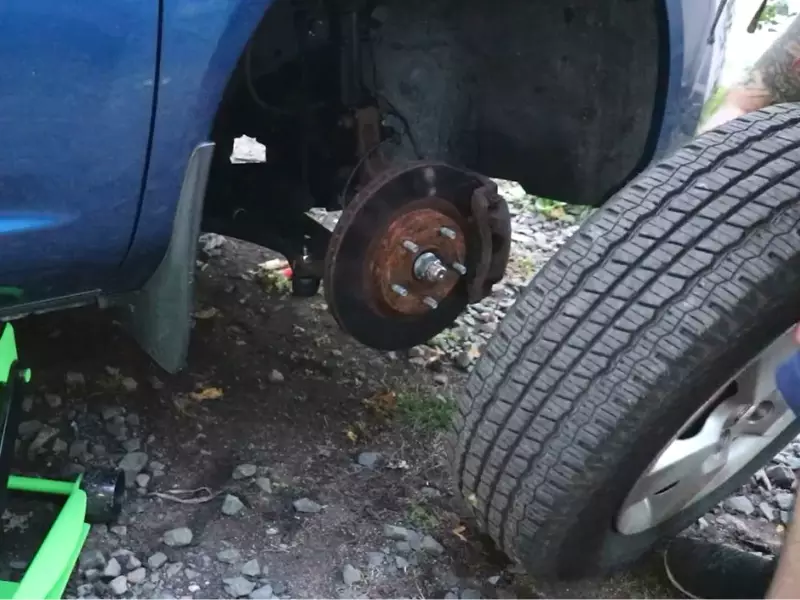
To install tie rods, first, lift the vehicle and remove the wheel on the side where you’ll be working. Then, detach the old tie rod by loosening the retaining nut and separating it from the steering knuckle.
Finally, install the new tie rod by screwing it onto the steering rack and tightening the retaining nut. Introducing the process of installing tie rods can seem daunting, but with a little know-how, it can be a straightforward task. Tie rods play a crucial role in connecting the steering knuckle to the steering rack, ensuring smooth and responsive steering.
Over time, they may wear out and require replacement. This guide will walk you through the steps involved in installing tie rods, enabling you to tackle the task with confidence. So, let’s dive in and discover how you can install tie rods effectively and efficiently.

Tools And Equipment Needed To Install Tie Rods
When it comes to installing tie rods, having the right tools and equipment is essential to ensure the job is done correctly and efficiently. In this section, we will discuss the various tools you will need to successfully install tie rods on your vehicle.
Wrench set
A wrench set is a must-have when it comes to installing tie rods. It is important to have a variety of wrench sizes on hand, as different vehicles may require different sizes. With a wrench set, you can easily loosen and tighten nuts and bolts, allowing you to securely attach the tie rods to your vehicle.
Socket set
A socket set is another essential tool for installing tie rods. Socket sets come with a variety of socket sizes, allowing you to find the perfect fit for the nuts and bolts you will be working with. With a socket set, you can easily apply the necessary torque to tighten the tie rods, ensuring they are securely fastened.
Tie rod end remover
A tie rod end remover is a specialized tool that is used to disconnect the tie rod ends from the steering knuckle. This tool is designed to safely and effectively remove the tie rod ends without damaging them or other components of the steering system. With a tie rod end remover, you can quickly and easily detach the old tie rods and replace them with new ones.
Hammer
A hammer may not be the first tool that comes to mind when installing tie rods, but it can be useful in certain situations. For example, if the tie rod end is stubborn and difficult to remove, a few taps with a hammer can help loosen it. Additionally, a hammer can be used to tap the new tie rods into place, ensuring they are seated securely in the steering knuckle.
Grease gun
A grease gun is a handy tool for lubricating the tie rod ends. Greasing the tie rod ends helps to reduce friction and wear, ensuring smooth operation and prolonging the lifespan of the components. With a grease gun, you can easily apply grease to the tie rod ends, keeping them properly lubricated.
Cotter pin
A cotter pin is a small metal pin that is used to secure nuts and bolts in place. When installing tie rods, it is important to use cotter pins to prevent the nuts from loosening over time. Cotter pins provide an added layer of security, ensuring that the tie rods remain firmly attached and do not come undone while driving.
Preparing The Vehicle
Before beginning the installation of tie rods, it is essential to prepare the vehicle properly. This includes parking the vehicle on a flat surface, turning off the engine, engaging the parking brake, inspecting the tie rod ends for any damage or wear, and measuring the distance between the wheel wells to ensure proper alignment.
Park the vehicle on a flat surface
Choose a flat surface to park your vehicle during the tie rod installation process. This will ensure stability and make it easier to work on the vehicle. Avoid sloped or uneven surfaces, as they can create complications and safety risks.
Turn off the engine and engage the parking brake
Prior to installing tie rods, it is crucial to turn off the engine and engage the parking brake. This will prevent any accidental movement of the vehicle and keep it securely in place. Safety should always be a priority when working on any automotive project.
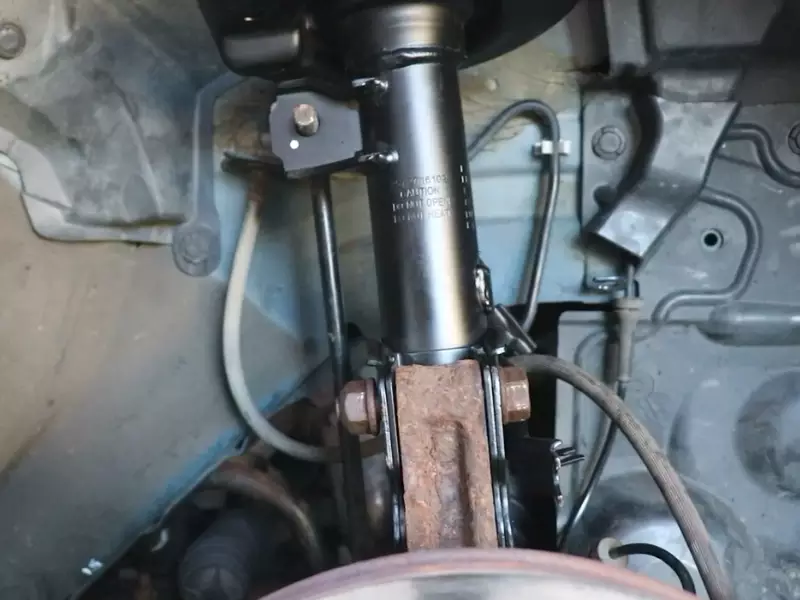
Locate the tie rod ends and inspect for damage or wear
Identify the tie rod ends, which are crucial components of the steering system. Inspect them thoroughly for any signs of damage or wear. Look out for bent or loose tie rod ends, as this can affect the overall steering performance and safety of the vehicle. If any issues are detected, replacement may be necessary.
Measure the distance between the wheel wells to ensure proper alignment
Proper alignment of the wheels is crucial for the overall performance and handling of the vehicle. To ensure accurate alignment, measure the distance between the wheel wells on each side. This measurement should be equal, indicating that the wheels are properly aligned. If there are any discrepancies, adjustments may be required to achieve optimal alignment.
By following these preparatory steps, you will ensure a smooth and hassle-free installation of tie rods in your vehicle. Taking the time to prepare the vehicle adequately will contribute to the overall success of the project and help maintain the safety and performance of your vehicle.
Removing The Old Tie Rods
Loosen the jam nuts on the tie rod ends
To begin removing the old tie rods, you’ll first need to loosen the jam nuts on the tie rod ends. Locate the jam nuts, which are typically located on either side of the tie rod where it connects to the steering knuckle. Use an adjustable wrench to loosen the nuts by turning them counterclockwise. Be sure to only loosen the jam nuts and not remove them completely, as you’ll need them later to adjust the new tie rods.
Use a wrench to detach the tie rod ends from the steering knuckle
After loosening the jam nuts, you can proceed to detach the tie rod ends from the steering knuckle. Use a wrench that fits the nut on the tie rod end and turn it counterclockwise to loosen and remove the nut. Once the nut is removed, you can slide the tie rod end out of the steering knuckle. Take caution to avoid damaging the threads on the tie rod end or the steering knuckle while removing it.
Use a tie rod end remover to separate the tie rod end from the steering knuckle
In some cases, the tie rod end may be tightly affixed to the steering knuckle and cannot be easily detached with a wrench alone. For such instances, it’s recommended to use a tie rod end remover tool. The tie rod end remover is designed to apply force and push the tie rod end out of the steering knuckle. Simply position the tool between the tie rod end and the steering knuckle, then use a wrench or socket set to turn the tool and separate the tie rod end from the steering knuckle.
Unscrew the tie rod ends from the inner tie rod using a wrench or socket set
Once the tie rod ends are detached from the steering knuckle, you can proceed to unscrew them from the inner tie rod. Use a wrench or socket set that fits the flats on the inner tie rod to turn and unscrew the tie rod ends in a counterclockwise direction. Ensure that you keep track of the number of turns required to remove the tie rod ends so that you can maintain the same alignment when installing the new tie rods.
Inspect the inner tie rod for any signs of damage or wear
Before installing the new tie rods, it’s essential to inspect the inner tie rod for any signs of damage or wear. Carefully examine the threads and the overall condition of the inner tie rod. Look for any signs of bending, rust, or excessive wear. If you notice any significant damage or wear, it’s recommended to replace the inner tie rod as well. Ensuring that the inner tie rod is in good condition will help maintain proper steering performance and alignment.
Installing The New Tie Rods
When it comes to installing new tie rods, it’s important to follow the right steps to ensure a secure and reliable installation. In this section, we’ll explore the process of installing the new tie rods step by step, guiding you through each stage of the installation. By following these instructions, you’ll be able to complete the installation with confidence and get your vehicle back on the road in no time.
Apply a thin layer of grease to the threads of the inner tie rod
Before starting the installation process, it’s crucial to apply a thin layer of grease to the threads of the inner tie rod. This will help to protect the threads and improve the ease of installation. Take a small amount of grease and apply it evenly along the length of the threads, ensuring that all areas are covered. This simple step can prevent unnecessary friction and ensure a smoother installation process.
Screw the new tie rod ends onto the inner tie rod by hand
Once you’ve applied the grease, it’s time to screw the new tie rod ends onto the inner tie rod. Start by holding the tie rod end in one hand and align the threads with those on the inner tie rod. Begin threading the tie rod end onto the inner tie rod by hand, making sure to turn it clockwise. By doing this manually, you’ll be able to feel any resistance or misalignment and make the necessary adjustments to ensure a proper fit.
Use a wrench or socket set to tighten the tie rod ends securely
After screwing the tie rod ends onto the inner tie rod by hand, it’s important to tighten them securely using a wrench or socket set. This will ensure that the tie rod ends are properly secured in place, preventing any potential loosening during operation. Grab a suitable wrench or socket that matches the size of the tie rod end and tighten it until it is snug. Be careful not to over-tighten, as this can cause damage.
Reattach the tie rod end to the steering knuckle and tighten the nut
Once the tie rod ends are securely tightened, it’s time to reattach them to the steering knuckle. Align the tie rod end with the steering knuckle and insert the bolt through the hole. Then, tighten the nut on the bolt using a wrench or socket set. Ensure that the nut is tightened enough to secure the tie rod end to the steering knuckle firmly, but be cautious not to over-tighten.
Tighten the jam nuts on the inner tie rod to secure the new tie rods in place
Lastly, to ensure that the new tie rods are locked in place, it’s essential to tighten the jam nuts on the inner tie rod. Jam nuts are the smaller nuts situated closer to the inner tie rod, and they help to lock the tie rods in position. Use a wrench or socket set to tighten the jam nuts, making sure that they are snug and secure. This step will prevent any unwanted movement or play in the tie rods, providing stability and reliability.
Aligning The Wheels
Aligning the wheels is a crucial step in installing tie rods. Proper wheel alignment ensures that the vehicle’s tires wear evenly and improves overall handling and steering. Here are some steps you can follow to align the wheels after installing new tie rods:
Consult a vehicle alignment guide or take the vehicle to a professional for wheel alignment
Before proceeding with aligning the wheels, it is recommended to consult a vehicle alignment guide or take the vehicle to a professional. Proper wheel alignment requires specialized equipment and expertise, and professionals can ensure precise alignment for optimal performance. Following manufacturer recommendations and specifications is crucial in this process.
Adjust the length of the new tie rods to align the wheels properly
Once you have installed the new tie rods, it’s important to adjust their length to align the wheels properly. This can be done by loosening the locking nuts on the inner and outer tie rod ends. Then, rotate the tie rods to either lengthen or shorten them until the desired alignment is achieved. Remember to tighten the locking nuts after making adjustments to secure the tie rods in place.
Measure the distance between the wheel wells again to ensure proper alignment
After adjusting the tie rods, it’s essential to measure the distance between the wheel wells again to confirm proper alignment. Use a measuring tape to measure the distance from the center of each wheel to the wheel well opening. Compare these measurements to manufacturer specifications or vehicle alignment guide recommendations to ensure proper alignment. Be sure to take measurements from the same reference points on each side of the vehicle for accuracy.
Recheck and adjust the tie rod ends as necessary to achieve the desired alignment
Once you have measured the wheel alignment, it’s important to recheck and adjust the tie rod ends as necessary to achieve the desired alignment. Start by physically inspecting the tie rod ends for any signs of misalignment. If necessary, make further adjustments to the tie rod ends by rotating them to lengthen or shorten the tie rods until the proper alignment is achieved. Double-check the measurements and make fine-tune adjustments if needed.
By following these steps, you can align the wheels after installing new tie rods. Remember to always consult a vehicle alignment guide or seek professional assistance if you are unsure about the alignment process. Proper wheel alignment plays a vital role in the overall performance and safety of your vehicle.
Final Steps
Once you have successfully removed and replaced your tie rods, you are almost done with the installation process. However, there are a few final steps that you need to follow to ensure that your tie rods are installed correctly and your vehicle’s steering is aligned properly. In this section, we will walk you through the final steps to complete the installation and make sure everything is in place.
Torque all the nuts and bolts to the manufacturer’s specifications
Before moving forward, it is essential to tighten all the nuts and bolts of the tie rods to the manufacturer’s specifications. This will ensure that the tie rods are securely in place and will not loosen over time. Refer to your vehicle’s manual or the manufacturer’s instructions for the specific torque values. Using a torque wrench, tighten each nut and bolt to the recommended torque, taking care not to overtighten them.
Insert a new cotter pin into the tie rod end nut and bend the ends to secure it
After torquing the nuts and bolts, it is important to insert a new cotter pin into the tie rod end nut. This cotter pin will add an extra layer of security and help prevent the nut from coming loose. Insert the cotter pin through the hole in the tie rod end nut and bend the ends in opposite directions to secure it firmly in place. Ensure that the cotter pin is fully inserted and adequately bent to prevent any movement or potential damage.
Test drive the vehicle to ensure the steering is smooth and aligned properly
With the installation process complete, it is now time to test drive your vehicle and check if the steering is smooth and aligned properly. Take your vehicle for a short drive, paying close attention to how the steering feels and responds. Notice any vibrations, pulling to one side, or difficulty in turning. If you experience any issues, it may indicate a misalignment or other problems that need to be addressed. In such cases, it is advisable to consult a professional mechanic to fix the issue and ensure your safety on the road.
Periodically check the tie rods for any signs of damage or wear and replace if necessary
Regular maintenance and inspection of your tie rods are crucial for your vehicle’s performance and safety. Periodically check the tie rods for any signs of damage, such as bends, cracks, or excessive wear. If you notice any signs of wear or damage, it is essential to replace the tie rods promptly. Failing to do so may result in steering issues, loss of control, or potential accidents. Always prioritize your safety and the safety of others on the road by ensuring that your tie rods are in good condition and properly functioning.
In conclusion, the final steps of installing tie rods involve torquing the nuts and bolts according to the manufacturer’s specifications, inserting a new cotter pin, testing the vehicle’s steering, and periodically checking the tie rods for any signs of damage or wear. By following these steps, you can ensure that your tie rods are properly installed, aligned, and functioning smoothly, promoting safer and more efficient driving.
Frequently Asked Questions On How To Install Tie Rods
Can I Replace A Tie Rod Myself?
Yes, you can replace a tie rod yourself. It is a straightforward task that can be done with basic tools and some mechanical knowledge. However, if you are unsure or lack experience, it is recommended to consult a professional mechanic for assistance.
How Do You Put A Tie Rod Back On?
To put a tie rod back on, follow these steps: 1. Align the tie rod with its mounting location on the steering knuckle. 2. Insert the tie rod end into the mounting hole and hand-tighten the retaining nut. 3. Use a torque wrench to tighten the nut to the specified torque setting.
4. Check the position of the tie rod and adjust if needed. 5. Repeat the process for the other tie rod, and then perform an alignment to ensure proper steering.
Is A Tie Rod Hard To Put On?
No, installing a tie rod is not hard. It can be done easily with basic tools and some mechanical knowledge.
How Long Does It Take To Install Tie Rods?
Typically, tie rod installation takes around 1 to 2 hours. However, it can vary depending on the vehicle’s make and model. It’s best to consult a professional mechanic for an accurate estimate.
Conclusion
Installing tie rods may seem daunting at first, but with the right tools and knowledge, it can be a straightforward process. By following the steps outlined in this blog post, you can ensure a safe and precise installation. Remember to regularly check and maintain your tie rods to prevent any potential issues in the future.
By mastering this skill, you can save both time and money by avoiding costly visits to the mechanic. So, get ready to confidently tackle tie rod installations and keep your vehicle running smoothly.