To install a remote car starter, first gather the necessary tools, locate the car’s ignition wires, and connect the starter to the ignition wires. This will enable you to start your car remotely.
Installing a remote car starter not only adds convenience to your daily routine, but it can also improve your comfort during harsh weather conditions. With a simple installation process, you can easily start your car from a distance, giving it ample time to warm up or cool down before you step inside.
We will guide you through the step-by-step process of installing a remote car starter. By following these instructions, you can enjoy the benefits of a remote car starter without the need for professional assistance. So, if you’re ready to add this practical feature to your vehicle, let’s get started.
Understanding Remote Car Starters
Remote car starters are becoming increasingly popular among car owners for their convenience and comfort. With just a push of a button, you can start your car’s engine from a distance, allowing it to warm up or cool down before you even step foot inside. In this section, we will delve deeper into what remote car starters are, the benefits they offer, and the factors you should consider before installing one.
What is a remote car starter?
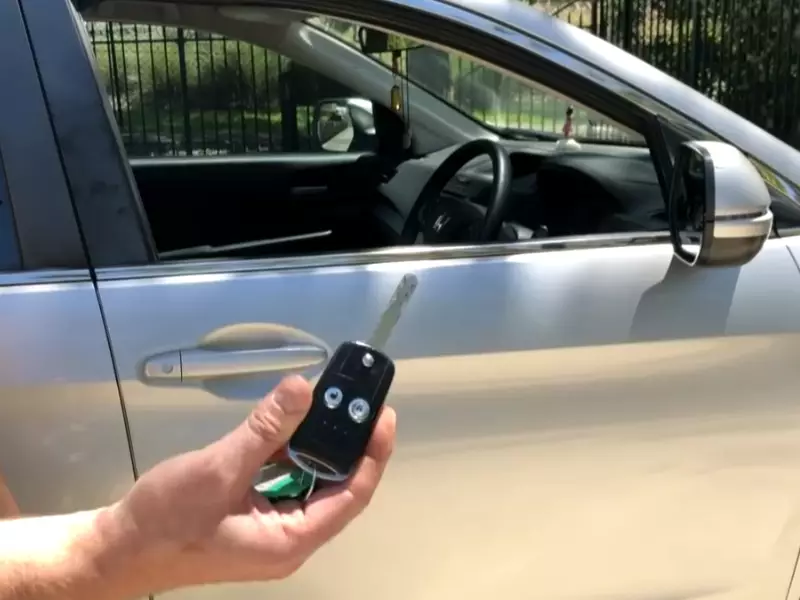
A remote car starter is a device that allows you to start your car’s engine from a remote location using a handheld transmitter. It consists of two main components: the remote transmitter and the receiver module that’s installed in your vehicle. When you press the start button on the transmitter, it sends a signal to the receiver, which then starts the engine. The range of the remote car starter depends on the model and can vary from a few hundred feet to several thousand feet.
Benefits of having a remote car starter
A remote car starter offers numerous benefits that enhance the comfort and convenience of owning a vehicle. Some of the key benefits include:
- Comfort: Imagine stepping into a warm car on a chilly winter morning or a cool car on a scorching summer day. With a remote car starter, you can pre-start your vehicle and have the perfect temperature waiting for you.
- Convenience: Remote car starters allow you to start your car from the comfort of your home, office, or any other location. This means no more rushing to your car in extreme weather conditions or waiting for it to warm up.
- Vehicle longevity: By letting your car warm up before driving, you reduce the wear and tear on the engine, prolonging its overall lifespan. Additionally, starting your car remotely allows the engine oil to circulate and lubricate all the internal components, ensuring smoother operation.
- Safety: Remote car starters enable you to defrost your windows, ensuring optimal visibility before you start your journey. This can be particularly useful during the winter months when frost or ice can impair your view.
Factors to consider before installing a remote car starter
Installing a remote car starter is a great investment, but it’s important to consider a few factors before making a decision. Here are some key factors to keep in mind:
- Compatibility: Ensure that the remote car starter you choose is compatible with your specific make and model of vehicle. Each car may have different requirements, so it’s important to consult the manufacturer or a professional installer to determine the compatibility.
- Range: Consider the range of the remote car starter and choose one that suits your needs. A longer range allows you to start your car from a greater distance, providing added convenience.
- Installation: While some remote car starters can be installed by DIY enthusiasts, it’s recommended to have a professional handle the installation. This ensures proper connectivity and minimizes the risk of damaging your vehicle’s electrical system.
- Warranty and Support: Look for a remote car starter that comes with a warranty and reliable customer support. This gives you peace of mind knowing that you can get assistance in case of any issues or concerns.
Considering these factors and understanding how remote car starters work can help you make an informed decision when selecting and installing one for your vehicle. Enjoy the convenience, comfort, and added safety that a remote car starter brings to your daily driving experience.
Preparing For Installation
Are you tired of stepping into a freezing car during the cold winter months or a sweltering vehicle in the scorching summer heat? Installing a remote car starter can alleviate this inconvenience and make your driving experience more comfortable. However, before delving into the installation process, it is crucial to adequately prepare. This article will guide you through the essential steps under the subheading ‘Preparing for Installation’.
Researching and Choosing the Right Remote Car Starter Kit
The first step in preparing for the installation of a remote car starter is to conduct thorough research and choose a suitable kit. As with any electronic device, the market is flooded with a plethora of options, varying in features, compatibility, and prices. To narrow down your choices, identify the specific features you need, such as range, smartphone compatibility, and additional security features. Take the time to read customer reviews and compare prices to ensure you make an informed decision.
Gathering the Necessary Tools and Materials
Once you have selected the appropriate remote car starter kit, it is essential to gather the necessary tools and materials before beginning the installation. Here is a list of items you may need:
| Tools | Materials |
|---|---|
| Screwdriver set | Electrical tape |
| Wire strippers | Butt connectors |
| Socket set | Zip ties |
| Tape measure | Fuse taps |
| (Additional tools based on your car’s make and model) | (Additional materials based on your car’s make and model) |
Familiarizing Yourself with Your Car’s Wiring System
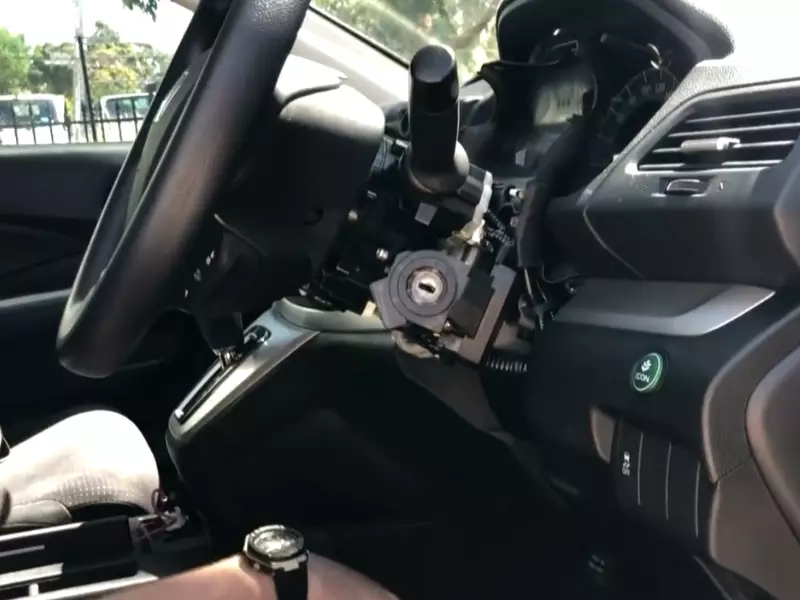
Before installing a remote car starter, it is crucial to familiarize yourself with your car’s wiring system. This step will enable you to understand the connections needed for the installation process. Locate the ignition switch wires and the wires associated with the car’s security system. In general, these wires are color-coded and can be found in the steering column or the ignition harness. Refer to your car’s manual or seek assistance from online resources to identify the correct wires.
Moreover, ensure you have a firm understanding of your car’s wiring diagram to avoid any potential mistakes during the installation process. Analyze the connections necessary to integrate the remote car starter kit with your vehicle’s electrical system. Taking the time to familiarize yourself with your car’s wiring system will make the installation process smoother and minimize the risk of causing damage to your vehicle.
By thoroughly researching and selecting the right remote car starter kit, gathering the necessary tools and materials, and familiarizing yourself with your car’s wiring system, you will be well-prepared for the installation process. In the next section, we will guide you through the step-by-step installation process to ensure a successful installation of your remote car starter.
Installing The Remote Car Starter
When it comes to upgrading the functionality of your car, installing a remote car starter is a game-changer. Not only does it allow you to start your vehicle from a distance, but it also provides added convenience and comfort, especially during those chilly winter mornings and scorching summer afternoons. In this guide, we will walk you through the process of installing a remote car starter, ensuring a smooth and successful installation.
Locating the right wires for installation
Before you can begin installing a remote car starter, it is crucial to locate the right wires in your vehicle. These wires are necessary for the proper functioning of the remote car starter system. Here’s a step-by-step guide on how to locate the wires:
- Consult your vehicle’s manual to identify the wire colors corresponding to the ignition switch and starter motor.
- Find the wire harness that connects to the ignition switch and the starter motor. This harness is usually located under the dashboard.
- Using a multimeter, test the voltage of the wires to confirm their functionality.
- Once you have identified the ignition switch and starter motor wires, mark them with colored tape for easy reference during the installation process.
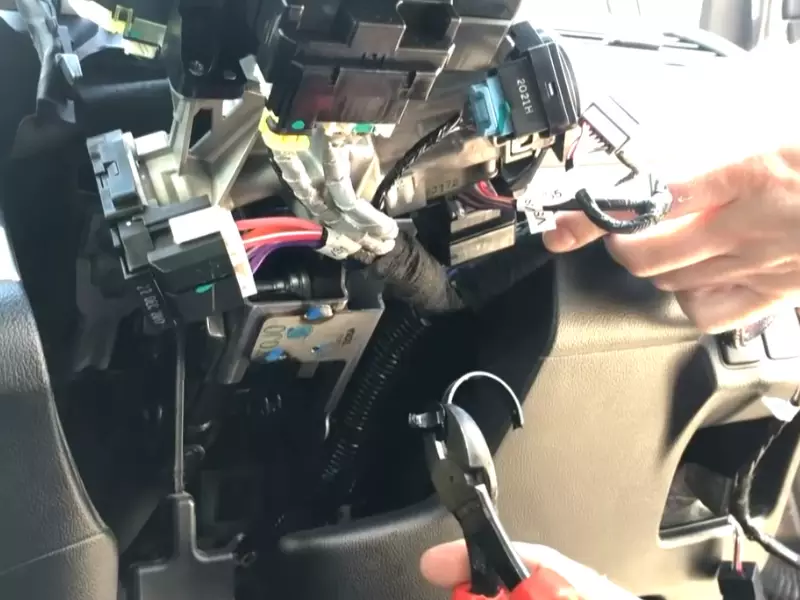
Properly connecting the wiring harness
Now that you have located the necessary wires, it’s time to properly connect the wiring harness of your remote car starter. Follow these steps to ensure a seamless connection:
- Begin by stripping the insulation off the ignition switch and starter motor wires, exposing a small section of bare metal.
- Take the corresponding wires from the remote car starter’s wiring harness and strip their insulation as well.
- Twist the exposed metal of the ignition switch and starter motor wires together with the corresponding wires from the remote car starter’s harness.
- Secure the connection by using electrical tape or heat shrink tubing, ensuring that there are no exposed wires.
- Double-check the connections to ensure they are secure and free from any loose wiring.
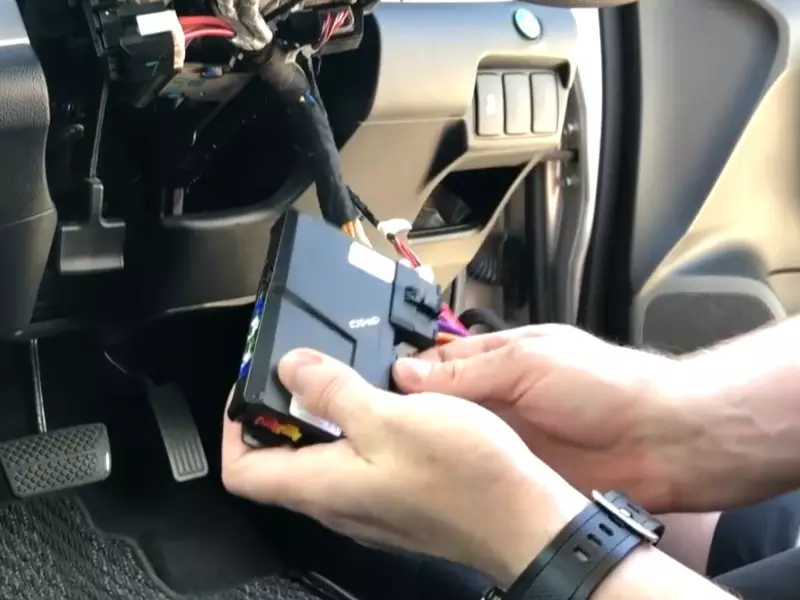
Mounting the remote car starter unit
Once the wiring is properly connected, the next step is to mount the remote car starter unit in a suitable location. Here’s how you can do it:
- Select a location inside your vehicle that allows easy access to the remote car starter unit.
- Using screws or adhesive tape, mount the remote car starter unit securely in the chosen location.
- Ensure that the unit is positioned away from any moving parts and is not obstructing the driver’s view.
- Double-check the mounting to ensure that the unit is firmly in place before continuing.
By following these steps and adhering to the manufacturer’s instructions, you can successfully install a remote car starter in your vehicle. Enjoy the convenience and comfort that comes with starting your car with just a push of a button!

Testing And Troubleshooting
Once you have successfully installed your remote car starter, it is important to test and troubleshoot to ensure that it is functioning properly. This will not only save you time and frustration, but it will also ensure that your car is safe to use. In this section, we will focus on testing the remote car starter for functionality, troubleshooting common installation issues, and ensuring that the safety features are working properly. Let’s dive in:
Testing the remote car starter for functionality
Testing your remote car starter is crucial to ensure it is working effectively. Follow these steps to test the functionality:
- Ensure that your car is parked in a safe and open area, away from any obstacles.
- Check the batteries in both the remote control and the car’s module. Replace them if needed.
- Stand at a reasonable distance from your car and press the lock button on the remote. This should activate the car’s doors to lock.
- Wait for a few moments and then press the remote’s start button. The car should start, and the engine should run smoothly. Be sure to listen for any unusual noises.
- Now, try out the remote features such as unlocking the doors, opening the trunk, or activating the panic button. Each feature should work seamlessly.
If any of these tests fail, ensure that the batteries are properly inserted and functioning. If the issues persist, consult the installation manual or contact the manufacturer for further assistance.
Troubleshooting common installation issues
During the installation process, you may encounter some common issues. Here are a few troubleshooting tips to help you overcome them:
| Issue | Troubleshooting Steps |
|---|---|
| The car does not respond to the remote |
|
| The car’s engine starts but immediately shuts off |
|
| The remote range is limited |
|
If you encounter any other issues during the testing process, refer to the installation manual or seek assistance from a professional installer.
Ensuring the safety features are working properly
One of the most essential aspects of a remote car starter is its safety features. To verify that these features are working as intended, follow these steps:
- Activate the remote start function and make sure the engine starts smoothly.
- Confirm that the car’s doors remain locked while the engine is running.
- Test the brake pedal shutdown feature by stepping on the brake pedal; this should shut off the engine immediately.
- Activate the remote start function while the hood is open. The engine should not start, indicating that the system recognizes the hood is open for safety purposes.
If any of these safety features are not functioning correctly, consult the installation manual for troubleshooting steps or consult with a professional installer to address the issue.
By conducting thorough testing and troubleshooting, you can ensure that your remote car starter is functioning properly and that your car remains safe to use. Now that you have completed the installation and testing process, you are ready to enjoy the convenience and comfort of a warm and ready-to-go car, even on the coldest mornings!
Finalizing The Installation
After successfully connecting the wiring and installing the remote car starter, it’s time to finalize the installation. This crucial step ensures that everything is secure, programmed properly, and the customer is well-informed about the usage and safety precautions of their new remote car starter.
Securing and Tidying Up the Wiring Connections
Securing and tidying up the wiring connections is essential to ensure the longevity and reliability of the remote car starter. Loose connections can lead to malfunctions and even potential hazards. Here’s how you can properly secure and tidy up the wiring connections:
- Double-check all the wiring connections to ensure they are properly connected.
- Use zip ties or cable organizers to bundle and organize the wiring neatly.
- Secure the wiring bundles to avoid interference with other components or moving parts within the vehicle.
- Tuck away any excess wiring to avoid clutter and potential damage.
- Verify that the wiring is protected from high-heat areas or sharp edges.
Following these steps will not only enhance the aesthetics of the installation but also improve the overall safety and functionality of the remote car starter.
Programming the Remote and Testing the Range
Once the wiring connections are secured, you need to program the remote and test its range to ensure optimal performance. Programming and range testing are crucial components of finalizing the installation. Here’s how you can do it:
- Consult the user manual provided by the manufacturer for specific instructions on how to program the remote.
- Follow the step-by-step programming guide to synchronize the remote with the vehicle’s system.
- After successful programming, test the range of the remote by standing at various distances from the vehicle.
- Note any limitations or weak spots in the range and communicate them to the customer.
- Make any necessary adjustments or troubleshoot, if required, to improve the range and functionality of the remote.
By programming the remote and testing its range, you can confidently assure the customer that their remote car starter is ready for seamless use.
Providing Customers with Instructions and Safety Precautions
Before handing over the vehicle to the customer, it’s important to provide them with comprehensive instructions and safety precautions to ensure proper usage. Take the following steps to educate the customer:
- Give the customer a detailed demonstration of how to operate the remote car starter.
- Explain the functions of each button or feature on the remote.
- Highlight any specific safety precautions related to the remote car starter.
- Provide a written manual or guide for future reference.
- Encourage the customer to ask questions and address any concerns they may have.
Equipping the customer with the necessary knowledge and understanding will not only enhance their experience but also ensure their safety while using the remote car starter.
Additional Considerations And Tips
Installing a remote car starter can greatly enhance the convenience and comfort of your driving experience. However, before you dive into the installation process, there are a few additional considerations and tips you should keep in mind. These will help you customize your remote car starter features, seek professional help if needed, and properly maintain and service your remote car starter.
Customizing your remote car starter features
One of the perks of a remote car starter is the ability to customize its features to suit your personal preferences. Before you start the installation process, take some time to familiarize yourself with the various options available. You can usually determine the specific configuration of your remote car starter by referring to the user manual or manufacturer’s instructions.
Once you have a clear understanding of the available features, you can customize your remote car starter to meet your needs. For example, you might choose to adjust the range at which the remote can start your car, or set a specific duration for the engine to run before automatically shutting off. Some remote car starters even offer additional features like keyless entry or trunk release capabilities.
By customizing your remote car starter features, you can create a setup that aligns perfectly with your driving habits and preferences, enhancing both convenience and security.
Seeking professional help if unsure about the installation
While some car enthusiasts may feel confident in their ability to install a remote car starter themselves, it’s important to recognize that every vehicle has its own unique wiring system. If you’re uncertain about the installation process or don’t have experience working with car electronics, it’s highly recommended to seek professional help.
Installing a remote car starter involves connecting wires to the appropriate terminals and integrating the system with your car’s electrical system. Making a mistake in the installation process could potentially damage your vehicle or even pose a safety hazard. To ensure a safe and successful installation, it’s best to rely on the expertise of a professional car electronics technician or a certified installer.
Maintaining and servicing your remote car starter
Proper maintenance and servicing are essential for the longevity and optimal performance of your remote car starter. Regularly inspecting and cleaning the system can help prevent unnecessary issues and keep it running smoothly.
Here are some tips for maintaining and servicing your remote car starter:
- Regularly check the battery in your remote transmitter and replace it as needed to ensure uninterrupted functionality.
- Inspect the wiring connections and ensure they are secure and free from corrosion.
- Keep the remote car starter unit clean and free from dirt and debris, as these can interfere with its operation.
- If you notice any issues or abnormal behavior with your remote car starter, such as a failed start or weak signal reception, consult the user manual or contact the manufacturer for troubleshooting steps.
- If troubleshooting steps do not resolve the issue, it’s best to seek professional assistance for diagnosis and repairs.
By following these maintenance practices, you can prolong the lifespan of your remote car starter and avoid potential problems down the road.
Frequently Asked Questions For How To Install Remote Car Starter
Can I Install A Remote Car Starter Myself?
Yes, you can install a remote car starter yourself. However, it requires careful attention to detail and knowledge of automotive electrical systems. It is recommended to refer to your car’s specific instructions and consult a professional if you are unsure about the process.
How Much Does It Cost To Put A Remote Start In A Vehicle?
The cost of installing a remote start in a vehicle can vary. It depends on factors such as the make and model of the car and the type of remote start system chosen. Prices typically range from $200 to $500, including installation.
Can You Add a Remote Start To Existing Car?
Yes, you can add remote start to your existing car. It’s a convenient feature that allows you to start your car from a distance using a remote.
Is Installing A Remote Car Starter Hard?
No, installing a remote car starter is not hard. It’s a simple process that can be done by a professional in just a few hours. Just make sure to hire a trusted technician to ensure a proper and secure installation.
Enjoy the convenience of starting your car remotely!
Conclusion
To sum up, installing a remote car starter is a practical and convenient solution that allows you to start your vehicle from a distance. By following the step-by-step instructions provided in this blog post, you can successfully install a remote car starter on your own.
Enjoy the comfort of a warm car in winter or a cool one in summer with this handy device. Don’t wait any longer – give it a try and experience the benefits for yourself!