To install a rearview mirror, first, locate the mounting bracket on the windshield and remove any old adhesive. Then, attach the mirror to the bracket and secure it in place using adhesive or screws.
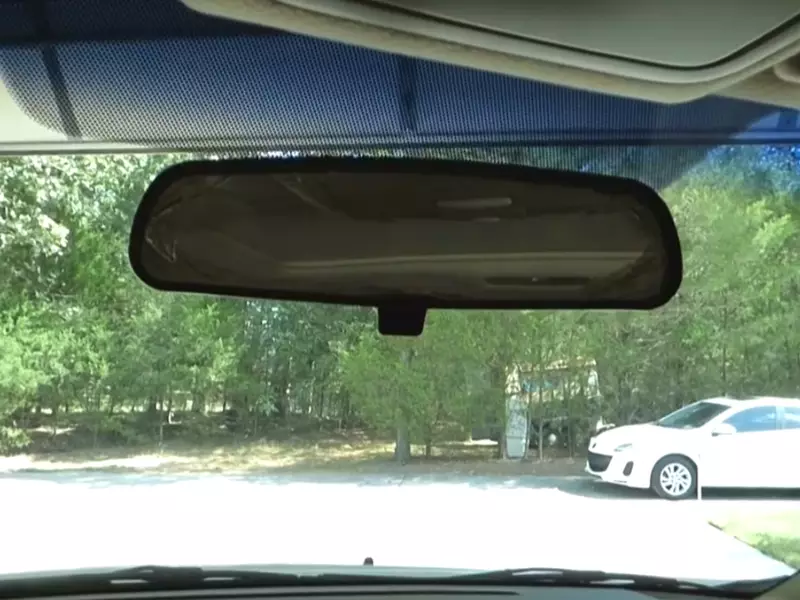
Driving safely requires proper visibility, and a rearview mirror plays a crucial role in providing a clear view of what’s happening behind your vehicle. Whether you need to replace a broken mirror or upgrade to a newer model, knowing how to install it correctly is essential.
We’ll guide you through the steps to install a rearview mirror easily and securely. By following these instructions, you’ll be able to ensure accurate rear visibility and enhance your overall driving experience. So, let’s dive into the process of installing a rearview mirror without any further delay.
Required Tools And Materials For Rearview Mirror Installation
When it comes to installing a rearview mirror, having the right tools and materials is crucial for a successful installation. In this section, we will discuss the required tools and materials you will need to effectively install a rearview mirror in your vehicle.
Screwdriver
A screwdriver is an essential tool for installing a rearview mirror. You will need it to remove the screws holding the old mirror in place and to secure the new mirror onto the windshield bracket or the windshield itself. Make sure the screwdriver you choose is the appropriate size for the screws used in your vehicle’s rearview mirror.
Cleaning Agent
A clean surface is vital for a secure and long-lasting rearview mirror installation. Before attaching the new mirror, clean the windshield bracket or the windshield where the mirror will be mounted. Use a cleaning agent suitable for automotive use to remove any dirt, grime, or residue from the surface. This will ensure proper adhesion and prevent the mirror from falling off or becoming loose over time.
Adhesive or Mirror Mount Kit
Depending on the type of rearview mirror you have, you will either need adhesive or a mirror mount kit for installation. Adhesive is commonly used for rearview mirrors that attach directly to the windshield. Ensure that the adhesive you choose is designed specifically for automotive applications and can withstand extreme temperatures.
If your rearview mirror requires a mirror mount kit, make sure to purchase one that is compatible with your vehicle’s make and model. The kit typically includes a mounting bracket, screws, and other necessary hardware for installation. Follow the instructions provided with the kit and use the appropriate tools to ensure a secure and stable mounting of the mirror.
Preparing For Rearview Mirror Installation
Installing a rearview mirror in your vehicle can greatly enhance your driving experience by improving visibility and safety. Before embarking on this installation project, it’s important to make sure you are properly prepared. This section will guide you through the necessary steps to ensure a successful installation.
Choosing the right location in the vehicle
When it comes to installing a rearview mirror, choosing the right location is crucial. You want to ensure that the mirror is positioned in a spot that provides you with the best possible view of the road behind you. Here are some factors to consider when selecting the location:
- The mirror should be placed high enough to allow for a clear view without obstructing your vision of the road ahead.
- Consider the size and height of the mirror – a larger mirror might require more space, so choose a location that can accommodate it.
- Make sure the chosen location allows for easy adjustment of the mirror to suit your unique driving position.
Cleaning the mounting area
Before installing the rearview mirror, it’s essential to clean the mounting area thoroughly. A clean surface will ensure proper adhesion of the mirror and prevent it from falling off while you’re driving. Follow these steps to clean the mounting area:
- Start by wiping the surface with a clean, lint-free cloth to remove any dust or debris.
- If there are any sticky residues or grease on the surface, use a mild cleaning solution and a cloth to gently remove them.
- Allow the area to dry completely before moving on to the next step.
Checking the rearview mirror compatibility
Not all rearview mirrors are compatible with every vehicle. It’s important to ensure that the mirror you have chosen is compatible with your specific make and model. Here’s how to check for compatibility:
- Refer to the user manual or the manufacturer’s instructions to determine the recommended mirror type for your vehicle.
- Check the dimensions and design of the mirror to see if it matches the specifications given in the manual.
- If you are uncertain, reach out to the manufacturer or consult an automotive expert for guidance.
By following these steps in preparing for rearview mirror installation, you can ensure that your mirror is positioned correctly, securely mounted, and compatible with your vehicle. This will help you enjoy a clear and unobstructed view of the road behind you, making your driving experience safer and more enjoyable.
Detaching The Existing Rearview Mirror
Removing the old mirror bracket or mount
Before you can install a new rearview mirror, you need to detach the existing one from your windshield. This process requires careful attention to avoid any damage or injuries. Follow these steps to safely remove the old mirror bracket or mount:
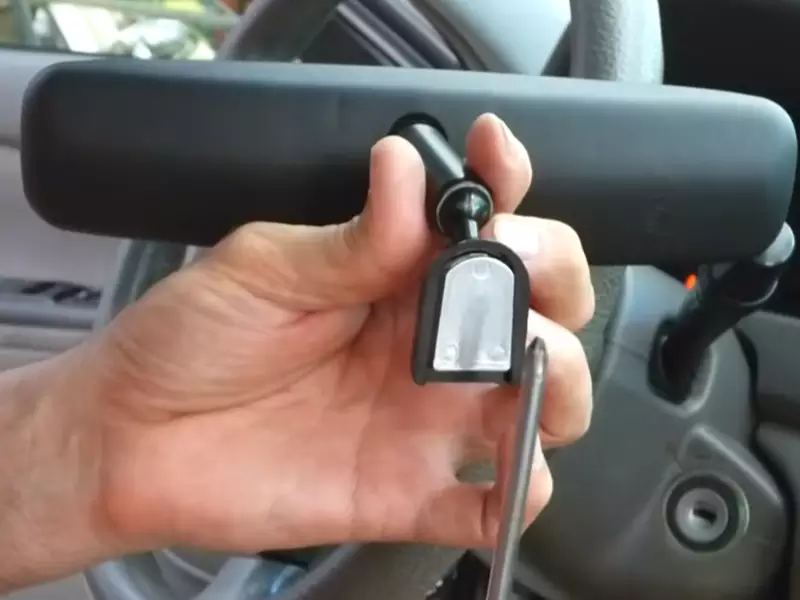
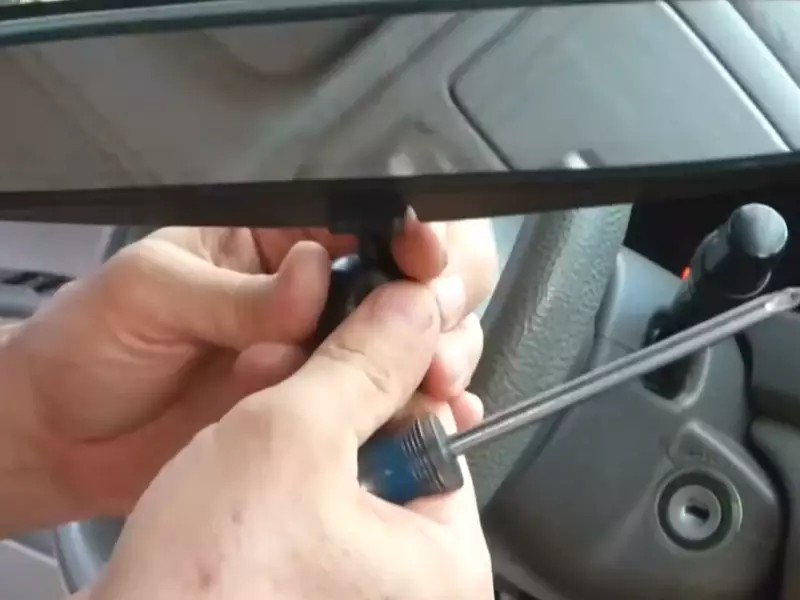
- First, loosen the set screw located on the bottom of the mirror bracket using an appropriate screwdriver or Allen wrench. This will release the tension on the mounting bracket.
- Once the set screw is loose, gently slide the mirror bracket upwards or downwards to detach it from the mounting button on the windshield.
- During this step, it’s important to provide support for the mirror to prevent it from falling and causing any accidental damage. Hold the mirror securely while removing the bracket.
- When the mirror bracket is free from the mounting button, carefully lift the rearview mirror away from the windshield. Be cautious not to scratch or crack the glass surface while doing so.
- Place the old mirror bracket in a safe location for later disposal, or if it is still in good condition, you may consider keeping it as a spare.
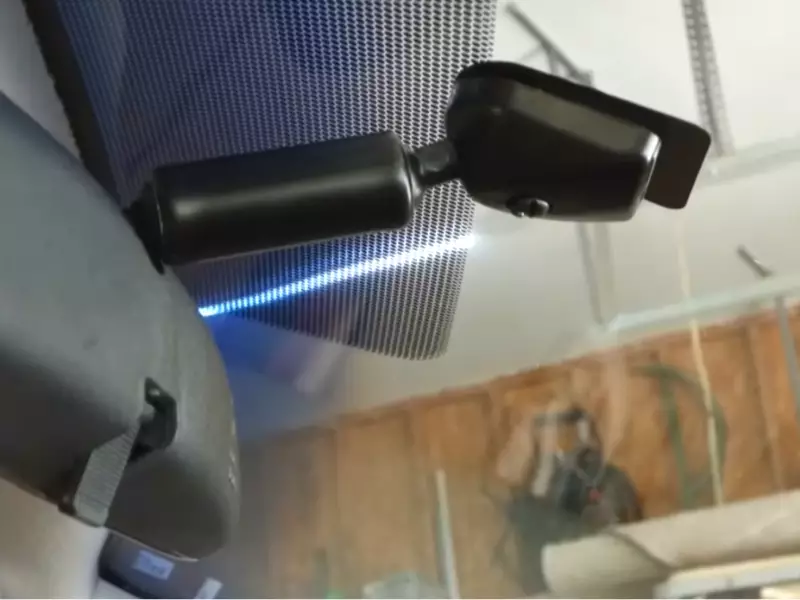
Disconnecting any electrical connections if applicable
If your vehicle has a rearview mirror equipped with electrical features, such as auto-dimming or built-in compass, you’ll need to disconnect any electrical connections before fully removing the mirror. This ensures a smooth installation process and prevents any damage to the wiring or components.
- Start by locating the electrical connector on the back of the mirror. It may be covered by a small plastic cap or trim piece.
- Once you’ve identified the connector, carefully remove the cap or trim piece to expose the electrical terminals.
- Next, gently press the release tab on the connector using your fingers or a small flathead screwdriver. This will unlock the connector and allow you to disconnect it from the mirror.
- Make sure to support the mirror while disconnecting the electrical connection to avoid any strain on the wiring or accidental drops.
- Once the connector is detached, place the cap or trim piece back in its original position for safekeeping.
By following these steps, you can detach the existing rearview mirror and disconnect any electrical connections if applicable. Once these tasks are complete, you’ll be ready to proceed with the installation of your new rearview mirror.
Installing The New Rearview Mirror
When it comes to installing a rearview mirror, it may seem like a daunting task, but rest assured, with the right tools and proper guidance, you’ll have your new mirror securely in place in no time. This section will walk you through the step-by-step process of installing the mirror, ensuring stability and adjustability for a safe and comfortable driving experience.
Attaching the mirror bracket or mounting it to the windshield
The first step in installing your new rearview mirror is to attach the mirror bracket or mount to the windshield. This bracket or mount acts as the base on which the mirror will be secured. Follow these simple steps to ensure a proper attachment:
- Clean and dry the area of the windshield where the mirror will be attached. This will ensure maximum adhesion.
- Position the mirror bracket or mount on the windshield, aligning it with your desired viewing angle.
- Apply pressure to the bracket or mount for a few seconds to ensure a strong bond.
Securing the mirror using screws or adhesive
Once the bracket or mount is securely attached to the windshield, the next step is to secure the mirror itself. Depending on the type of mirror you have, you will either use screws or adhesive to achieve this. Follow these instructions accordingly:
Screws:
- Align the holes on the mirror with the holes on the bracket or mount.
- Insert the screws through the holes and tighten them using a screwdriver or suitable tool.
Adhesive:
- Clean the surface of the mirror and the area of the bracket or mount where they will come into contact.
- Apply a generous amount of adhesive to both surfaces.
- Press the mirror firmly onto the bracket or mount, ensuring a strong bond.
Testing the stability and adjustability of the installed mirror
Once the mirror is securely attached to the bracket or mount, it’s essential to test its stability and adjustability before hitting the road. Follow these steps to ensure everything is in perfect working order:
- Give the mirror a gentle tug to ensure it is firmly in place and doesn’t wobble.
- Adjust the mirror to your desired viewing angle, checking if it holds its position.
- Test the mirror’s adjustability by moving it from side to side and up and down. It should move smoothly but remain stable in the desired position.
Installing a rearview mirror may seem like a complex task, but by following these simple steps, you can have your new mirror securely attached in no time. Remember to clean the surfaces, attach the bracket or mount, secure the mirror with screws or adhesive, and test its stability and adjustability. By doing so, you’ll ensure a safe and comfortable driving experience with your brand-new rearview mirror.
Troubleshooting Common Installation Issues
Installing a rearview mirror may seem like a simple task, but sometimes you can encounter some common installation issues. In this section, we will discuss some troubleshooting tips to help you resolve these issues and ensure a successful installation.
Mirror not sticking properly
If you’re finding that your rearview mirror is not sticking properly to the windshield or mounting bracket, there are a few things you can try:
- Make sure the surface is clean and free from any dirt or debris. Use a glass cleaner and a lint-free cloth to wipe both the windshield and the adhesive pad on the mirror.
- Apply steady pressure to the mirror for at least one minute after sticking it to the windshield. This will help the adhesive bond properly.
- If the adhesive pad is old or damaged, consider replacing it. You can purchase adhesive pads specifically designed for rearview mirrors at an auto parts store.
Electrical connections not working
If you’ve installed a rearview mirror with electrical connections for features like compass, temperature display, or backup camera, and you’re experiencing issues with the electrical connections, here are a few troubleshooting steps:
- Check the wiring connections to ensure they are securely attached. Sometimes loose connections can cause electrical problems.
- If the connections are secure, inspect the wiring for any signs of damage or fraying. Replace any damaged wiring as necessary.
- Ensure that the electrical connections are compatible with your vehicle’s electrical system. Some vehicles may require additional adapters or harnesses to properly connect the rearview mirror.
Mirror adjustment difficulties
If you’re having trouble adjusting the rearview mirror to the desired position, follow these troubleshooting tips:
- Check if there are any obstructions blocking the movement of the mirror. Clear any obstacles that may be hindering the adjustment.
- Refer to the manufacturer’s instructions on how to adjust the mirror. Follow the recommended steps to ensure you are adjusting it correctly.
- If the mirror adjustment mechanism is not functioning properly, consider reaching out to the manufacturer for further assistance or to inquire about a replacement.
By following these troubleshooting tips, you can overcome common installation issues when installing a rearview mirror. Remember to take your time and pay attention to the details for a successful installation.
Additional Tips And Considerations For Rearview Mirror Installation
Adhering to local regulations and legal requirements
When installing a rearview mirror, it is crucial to adhere to local regulations and legal requirements. Different jurisdictions may have specific rules regarding the positioning and size of rearview mirrors in vehicles. Make sure to familiarize yourself with these regulations before installing a new mirror. Failure to comply with these laws could result in penalties or difficulties passing vehicle inspections.
Seeking professional help for complex installations
In some cases, installing a rearview mirror can be a complex task that requires technical expertise. If you are unsure about how to install the mirror or if it requires additional modifications to your vehicle, seeking professional help is highly recommended. Automotive technicians or specialty shops can provide expert assistance and ensure the proper installation of your rearview mirror.
Properly maintaining and cleaning the rearview mirror
Maintaining and cleaning your rearview mirror is essential to ensure clear visibility and safety while driving. Regularly wipe down the mirror’s surface with a microfiber cloth and a mild glass cleaner to remove any dust, fingerprints, or smudges. Avoid using abrasive materials or harsh chemicals that could damage the mirror’s coating or interior mounting.
Frequently Asked Questions On How To Install Rearview Mirror
How Do I Put My Rear View Mirror Back On?
To put your rearview mirror back on, follow these steps:
- Clean the windshield and mirror bracket with alcohol.
- Apply a small amount of adhesive to the bracket and mirror base.
- Align the bracket with the windshield mount and press firmly.
- Let the adhesive dry for the recommended time.
- Test the mirror for stability and readjust if necessary.
Are Rear View Mirrors Glued On?
No, rear view mirrors are not glued on. They are typically attached to the windshield using a special mounting bracket.
What To Do If Your Rear View Mirror Falls Off?
To fix a fallen rearview mirror, follow these steps:
- Use a specialty adhesive designed for automotive use.
- Clean the area where the mirror fell off with rubbing alcohol.
- Apply the adhesive according to the instructions on the package.
- Press the mirror firmly against the windshield for a few seconds.
- Let it dry for the recommended time before using it again.
Can You Use Gorilla Glue On A Rear View Mirror?
Yes, you can use Gorilla glue on a rearview mirror.
Conclusion
Installing a rearview mirror is a simple yet important task that can significantly enhance your driving experience. By following the step-by-step instructions provided in this blog post, you can successfully install a rearview mirror without any hassle. Remember, proper installation ensures a clear view of vehicles behind you and improves overall safety on the road.
So, take the time to install your rearview mirror correctly and enjoy a better driving experience.