Installing rear car window glass involves a series of steps. First, remove any trim or weather stripping around the window frame.
Then, carefully lift out the old glass and clean the frame. Finally, place the new glass in the frame and reattach the trim and weather stripping.
Understanding The Importance Of Proper Rear Car Window Glass Installation
When it comes to ensuring the safety and functionality of your vehicle, proper installation of the rear car window glass is of utmost importance. The rear car window plays a critical role in maintaining structural integrity, visibility, and overall safety while driving. In this section, we will explore the vital role of the rear car window glass in vehicle safety and the potential consequences of improper installation. It is important to understand why investing time and effort into proper installation is crucial for the well-being of your vehicle and yourself.

The Role of Rear Car Window Glass in Vehicle Safety
The rear car window glass serves multiple essential functions when it comes to maintaining the safety of your vehicle. Firstly, it provides structural support to the car’s body, enhancing its overall rigidity and strength.
This structural support not only keeps the car’s shape intact but also ensures the effectiveness of other safety features like airbags and seatbelts. Additionally, the rear car window glass acts as a barrier, sealing the vehicle from external elements such as rain, dust, and wind, providing a comfortable driving experience.
- Structural support and rigidity for the vehicle
- Enhances the effectiveness of other safety features
- Acts as a barrier against external elements
The Consequences of Improper Installation
Improper installation of the rear car window glass can lead to a multitude of problems that compromise the safety and functionality of your vehicle. One of the primary consequences is water leakage, which can result in interior damage, such as the growth of mold and mildew, electronic system malfunctions, and potential rusting of metal components.
Moreover, improper installation can affect visibility through the rear window, creating blind spots and reducing the driver’s ability to maneuver and spot potential hazards on the road. Finally, a poorly installed rear car window glass may also become a weak point in the vehicle’s structure, compromising its overall safety during a collision or impact.
- Water leakage leads to interior damage and electronic malfunctions
- Reduced visibility and increased blind spots
- Compromised structural integrity during accidents
In conclusion, understanding the significance of proper rear car window glass installation is crucial for the safe and efficient operation of your vehicle. The rear car window glass provides structural support, enhances safety features, and protects against external elements. Improper installation can result in water leakage, reduced visibility, and compromised structural integrity. By ensuring that the rear car window glass is installed correctly, you can enhance both the safety and overall performance of your vehicle, giving you peace of mind on the road.
Gathering The Necessary Tools And Materials
Before you begin installing a rear car window glass, it’s crucial to gather all the tools and materials you’ll need. Having everything prepared in advance will make the installation process smoother and more efficient. In this section, we will discuss the essential tools for the installation process and how to ensure you have the correct replacement glass.
Essential tools for the installation process
Proper tools are essential for a successful rear car window glass installation. Here are the tools that you will need:
| Tool | Description |
| A pair of gloves | To protect your hands from sharp edges and glass fragments. |
| Protective goggles | To shield your eyes from flying debris. |
| Masking tape | To secure the glass in place during installation. |
| Glass cleaner | Remove any dirt or residue from the window before installation. |
| Window Adhesive | To bond the glass securely to the frame. |
| Caulking gun | Apply the adhesive evenly and smoothly. |
| Putty knife | Remove the old glass and any excess adhesive. |
| Rubber mallet | Gently tap the glass and ensure a secure fit. |
| Trim tool | Remove any trim or molding around the window. |
| Tape measure | To accurately measure the dimensions of the replacement glass. |
Make sure you have all these tools ready before you start the installation process. This will save you time and frustration.
Ensuring you have the correct replacement glass
Having the correct replacement glass is crucial for a successful installation. Here’s how to ensure you have the right glass:
- Check the specifications of your vehicle: Consult your vehicle’s manual or contact the manufacturer to find out the exact size and type of glass required for your rear window.
- Visit a reputable auto glass supplier: Purchase the replacement glass from a trusted supplier who specializes in auto glass. Provide them with the specifications of your vehicle to ensure you get the correct glass.
- Compare the new glass to the old one: Before starting the installation, compare the new glass to the old one to ensure they match in size, shape, and curvature. This will guarantee a proper fit.
By following these steps, you can be confident that you have the correct replacement glass for your rear car window.
Removing The Damaged Rear Car Window Glass
If you’ve noticed a crack or damage on your rear car window glass, it’s important to address the issue promptly. Removing the damaged glass is the first step in the process of installing a new one. In this section, we will guide you through the necessary precautions to take before starting the removal process, as well as provide step-by-step instructions for removing the old glass.
Precautions to take before starting the removal process
Prior to removing the damaged rear car window glass, it’s crucial to consider the following precautions:
- Wear protective gear: Put on safety glasses, gloves, and a face mask to protect yourself from potential injuries and glass particles.
- Park on a level surface: Ensure your car is parked on a stable and level surface to prevent any accidents or instability while working.
- Protect the interior: Cover the seats and surrounding areas with a plastic sheet or tarp to prevent any broken glass or debris from damaging the interior of your vehicle.
- Tape the damaged area: Use clear adhesive tape to secure the cracked or damaged glass. This will prevent any accidental shattering during the removal process.
Step-by-step instructions for removing the old glass
Follow these step-by-step instructions to successfully remove the damaged rear car window glass:
| Step | Instruction |
|---|---|
| 1 | Start by locating the access points to the glass. These are usually found on the interior of the vehicle. |
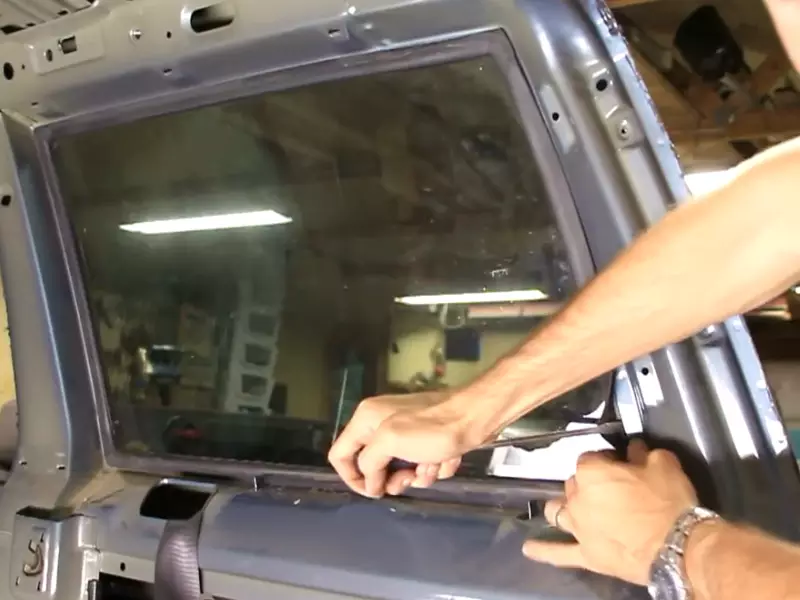
| 2 | Using an appropriate tool, carefully remove any trim or molding that may be covering the edges of the glass. Take your time to avoid causing any additional damage. |
| 3 | Once the trim or molding is removed, you can now access the mounting hardware. This may include bolts, screws, or clips. Carefully remove these using the appropriate tools, taking note of their positions for later installation. |
| 4 | With the mounting hardware removed, carefully push the glass from the inside to loosen it from its frame. Be cautious not to apply excessive force, as this may cause the glass to break or shatter. |
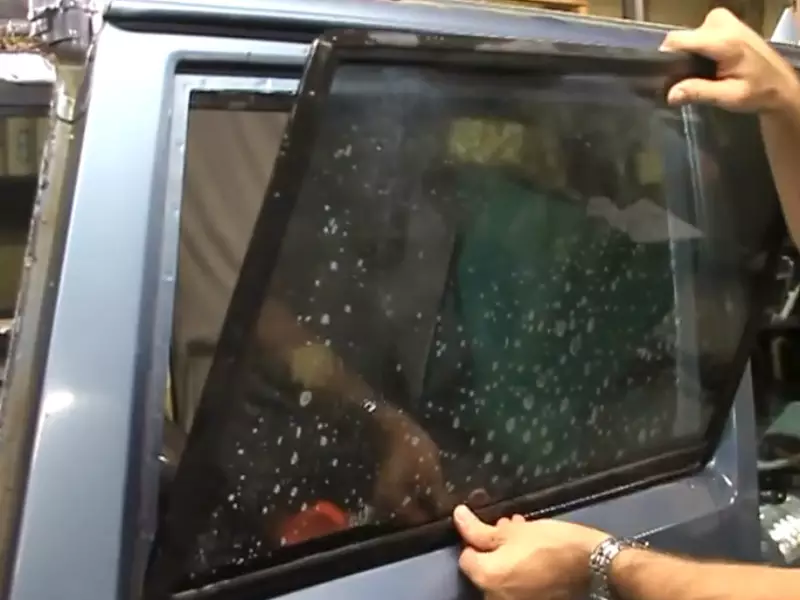
| 5 | Once the glass is loosened, carefully remove it from the frame, making sure to support its weight to avoid any sudden drops or accidents. |
By following these precautions and step-by-step instructions, you can safely remove the damaged rear car window glass. Remember to handle the glass with care and seek professional assistance if you are unsure or uncomfortable with the process. In the next section, we will guide you through the installation of the new rear car window glass.

Preparing The Vehicle And Replacement Glass
Properly installing rear car window glass is crucial for both the safety and aesthetics of your vehicle. Whether you’re replacing a damaged window or upgrading to a new one, following the right steps is essential. In this section, we will walk you through the process of preparing your vehicle and replacement glass for a successful installation. To ensure a seamless process, we will focus on two key aspects: cleaning the window frame and properly aligning and sizing the replacement glass.
Cleaning the window frame
The first step in installing rear car window glass is to clean the window frame thoroughly. A clean and smooth surface will ensure proper adhesion and prevent any debris from interfering with the installation process. Here’s how you can effectively clean the window frame:
- Start by removing any loose dirt or dust using a soft brush or cloth.
- Prepare a mixture of mild soap or glass cleaner and water.
- Using a clean cloth or sponge, apply the cleaning solution to the window frame.
- Gently scrub the frame in circular motions to remove any grime or residue.
- Rinse the window frame with clean water and wipe it dry with a lint-free cloth.
By following these steps, you’ll have a clean and prepared window frame that is ready for the installation of the replacement glass.
Properly aligning and sizing the replacement glass
Once the window frame is clean, it’s time to properly align and size the replacement glass. This ensures that the glass fits perfectly and functions correctly. Here’s what you need to do:
- Carefully measure the dimensions of the window frame using a measuring tape.
- Compare the measurements with the replacement glass to ensure a proper fit.
- If necessary, trim the replacement glass using a glass cutter or seek professional assistance for precise sizing.
- Place the replacement glass on a soft surface, such as a blanket or rubber mat, to prevent any damage.
- Gradually align the replacement glass with the window frame, making sure it sits evenly and securely.
- Apply a high-quality adhesive or sealant around the edges of the window frame to secure the glass in place.
- Allow the adhesive or sealant to cure as per the manufacturer’s instructions.
Following these steps will help you properly align and size the replacement glass, ensuring a secure installation.
Applying The Sealant And Installing The Replacement Glass
Choosing the Right Sealant for the Installation
When it comes to installing a rear car window glass, one of the most crucial steps is selecting the right sealant. Choosing a high-quality sealant not only ensures a secure and water-tight fit but also guarantees durability and longevity for your vehicle. It is important to opt for a sealant specifically designed for automotive glass installations.
There are several types of sealants available in the market, including polyurethane, butyl, and silicone-based sealants. Polyurethane sealants are widely used and highly recommended for their exceptional adhesive properties and resistance to weathering. These sealants are commonly found in windshield installations due to their superior strength and durability. Alternatively, butyl sealants are known for their excellent sealing capabilities and flexibility, making them a suitable choice for rear car window glass installations.
Ultimately, it is essential to read the manufacturer’s instructions and consult a trusted automotive professional to determine the most suitable sealant for your specific car window installation needs.
Step-by-Step Instructions for Applying the Sealant and Installing the New Glass
Properly applying the sealant and installing the replacement glass is crucial to ensure a successful rear car window installation. Follow these step-by-step instructions to complete the process:
- Ensure that the surface is clean and dry before starting the installation. Any dirt, debris, or moisture can compromise the effectiveness of the sealant.
- Prepare the sealant according to the manufacturer’s instructions. This may involve mixing specific components or using the sealant directly from the container.
- Apply a continuous bead of sealant along the edge of the replacement glass. Make sure the sealant covers the entire perimeter, leaving no gaps or spaces.
- Carefully position the replacement glass onto the window frame, ensuring a proper fit. Take note of any alignment marks or guides to assist in the correct placement.
- Gently press the glass against the frame to allow the sealant to make contact and create a secure bond. Take care not to apply excessive force that may damage the glass or the surrounding components.
- Check for any excess sealant and remove it using a clean cloth or a suitable tool. Ensure that the sealant is evenly distributed and does not obstruct the window’s movement or functionality.
- Allow the sealant to cure as directed by the manufacturer. This typically involves leaving the installation undisturbed for a specific period to ensure a complete and reliable bond.
- After the sealant has cured, perform a thorough inspection to verify the integrity of the installation. Look for any signs of leaks, loose glass, or irregularities and address them promptly.
By following these step-by-step instructions and selecting the appropriate sealant, you can confidently install rear car window glass and restore the functionality and aesthetics of your vehicle.
Finishing Touches And Final Steps
Once you have successfully installed the rear car window glass, it’s time to focus on those finishing touches and final steps that will ensure a seamless and professional look. Taking the time to clean and inspect the installed glass, as well as disposing of the old glass and materials properly, are crucial steps to complete the installation process.
Cleaning and Inspecting the Installed Glass
After successfully installing the rear car window glass, it’s essential to thoroughly clean and inspect it to ensure it’s free from any dirt, dust, or residue. Here’s a step-by-step guide on how to clean and inspect your installed glass:
- Start by preparing a solution of mild soap or automotive glass cleaner and water.
- Dampen a soft, lint-free cloth or sponge with the cleaning solution.
- Gently wipe the entire surface of the glass, paying special attention to the edges and corners.
- Rinse the glass with clean water to remove any soapy residue.
- Inspect the glass for any signs of defects, such as cracks, chips, or scratches.
- If you notice any issues, consult a professional to address them before proceeding.
| Step | Description |
|---|---|
| 1 | Prepare a solution of mild soap or automotive glass cleaner and water |
| 2 | Dampen a soft, lint-free cloth or sponge with the cleaning solution |
| 3 | Gently wipe the entire surface of the glass |
| 4 | Rinse the glass with clean water to remove any soapy residue |
| 5 | Inspect the glass for any signs of defects |
| 6 | Consult a professional if any issues are found |
Proper Disposal of the Old Glass and Materials
Disposing of old glass and materials in an environmentally friendly and responsible manner is crucial. Here’s what you need to keep in mind when it comes to proper disposal:
- Wear thick gloves and protective eyewear to prevent any injuries during the disposal process.
- Carefully remove the old glass and place it in a secure container to avoid any accidental breakage.
- If the glass has shattered or cracked during the removal, carefully gather all the broken pieces and place them in a puncture-resistant bag.
- Label the bag as “broken glass” to alert others of its contents.
- Dispose of the bag in accordance with your local regulations and guidelines.
- Recycle the glass if possible or consult with your local recycling facilities for proper disposal methods.

Testing And Ensuring Proper Installation
When it comes to installing rear car window glass, testing and ensuring proper installation is crucial to ensure the glass fits correctly and functions as intended. In this section, we will cover two important aspects of testing: checking for proper fit and alignment, and testing the functionality of the rear defroster and wiper (if applicable).
Checking for Proper Fit and Alignment
Before testing the functionality of the rear car window glass, it is important to check for proper fit and alignment. This step ensures that the glass is installed correctly and securely to prevent any future issues. Here’s how you can do it:
- Inspect the edges of the glass to ensure they align properly with the window frame.
- Check for equal gaps between the glass and the window frame on all sides.
- Make sure the glass is flush with the surrounding body panels.
- Double-check that all the mounting brackets and clips are securely fastened.
- Test the window by opening and closing it to ensure smooth operation.
Testing the Functionality of the Rear Defroster and Wiper
If your rear car window is equipped with a defroster and wiper, it is crucial to test their functionality after installation. Here’s how you can do it:
- Activate the rear defroster and make sure it evenly heats the entire glass surface. Look for any areas that do not seem to be defrosting properly.
- Turn on the rear wiper and observe its movement. Ensure that it wipes the entire glass surface without any hesitation or skipping.
- Check the rubber strip of the rear wiper for any signs of damage or wear. Replace it if necessary to ensure effective wiping.
In conclusion, testing and ensuring proper installation of the rear car window glass is essential to maintain its functionality and prevent future issues. By following the steps outlined above, you can ensure that the glass fits properly, aligns correctly, and operates smoothly. Don’t forget to test the rear defroster and wiper, if applicable, to ensure they are functioning as intended.
Additional Tips And Considerations
Installing rear car window glass can be a tricky process, but with the right tips and considerations, you can ensure a successful installation that will stand the test of time. In this section, we will discuss some recommended maintenance practices for rear car window glass and common mistakes to avoid during the installation process.
Recommended maintenance practices for rear car window glass
Maintaining your rear car window glass properly is crucial to its longevity and performance. Here are some recommended maintenance practices to keep in mind:
- Regular cleaning: Cleaning your rear car window glass regularly not only improves visibility but also helps prevent the buildup of dirt, grime, and other debris. Use a glass cleaner and a lint-free cloth to wipe the glass surface gently.
- Avoid harsh cleaners: While it’s important to clean your rear car window glass, make sure to avoid using harsh cleaners or abrasive materials. These can damage the glass or its coating, leading to premature deterioration.
- Inspect for damage: Routinely inspect your rear car window glass for any signs of cracks, chips, or scratches. Promptly addressing these issues can prevent further damage and ensure your safety on the road.
- Protect from extreme temperatures: Extreme temperatures can weaken the structural integrity of your rear car window glass. Park your vehicle in shaded areas or use sunshades to minimize exposure to direct sunlight.
- Replace damaged glass promptly: If you notice any significant damage to your rear car window glass, it’s best to replace it as soon as possible. Delaying the replacement can compromise the safety and security of your vehicle.
Common mistakes to avoid during the installation process
Installing rear car window glass requires precision and attention to detail. Avoiding these common mistakes can help ensure an effective and hassle-free installation:
- Improper measurements: Accurate measurements are essential for a proper fit. Double-check your measurements to avoid the costly mistake of ordering the wrong size or shape of the window glass.
- Rushing the installation: Take your time during the installation process. Rushing increases the chances of making errors, such as misalignments or improper sealing.
- Skipping the priming step: Applying a proper primer to the frame before installing the rear car window glass helps ensure a secure bond. Skipping this step can result in leaks and potential damage to the glass.
- Using improper tools: Using the wrong tools can damage the glass or the vehicle’s frame. Invest in high-quality tools specifically designed for rear car window glass installation.
- Ignoring the manufacturer’s instructions: Each rear car window glass may have specific installation instructions provided by the manufacturer. Ignoring these instructions can lead to suboptimal fit and performance.
By following these recommended maintenance practices and avoiding common installation mistakes, you can enjoy a properly installed rear car window glass that provides optimal functionality and longevity.
Frequently Asked Questions Of How To Install Rear Car Window Glass
How Long Does It Take To Replace Rear Glass?
The time it takes to replace the rear glass varies, but it typically takes about 1-2 hours. However, this can depend on the specific vehicle and any additional damage or complications. It’s best to consult with a professional for an accurate estimate.
What To Do When Your Back Windshield Shattered?
If your back windshield is shattered, follow these steps:
- Safely park your vehicle and turn on hazard lights.
- Remove any broken glass fragments carefully.
- Contact a professional auto glass repair service.
- Avoid driving until the windshield is repaired or replaced.
- Document the damage for insurance purposes.
What Is The Rear Glass Of A Car Called?
The rear glass of a car is commonly referred to as the back window. It is a transparent panel located at the rear of the vehicle, allowing for visibility behind the car.
Can I Drive With A Shattered Back Window?
Yes, you can drive with a shattered back window, but it is not recommended. It can compromise visibility, and safety, and may be against the law in some places. It is best to get it repaired or replaced as soon as possible.
Conclusion
Replacing the rear car window glass may seem daunting, but with the right tools and following the step-by-step instructions provided in this blog post, you can effortlessly install it yourself. Remember to take safety precautions, be patient, and enlist the help of a friend if needed.
By following these guidelines, you’ll save time and money by avoiding a trip to the mechanic. Don’t let a broken rear car window glass ruin your day; take control and fix it yourself!