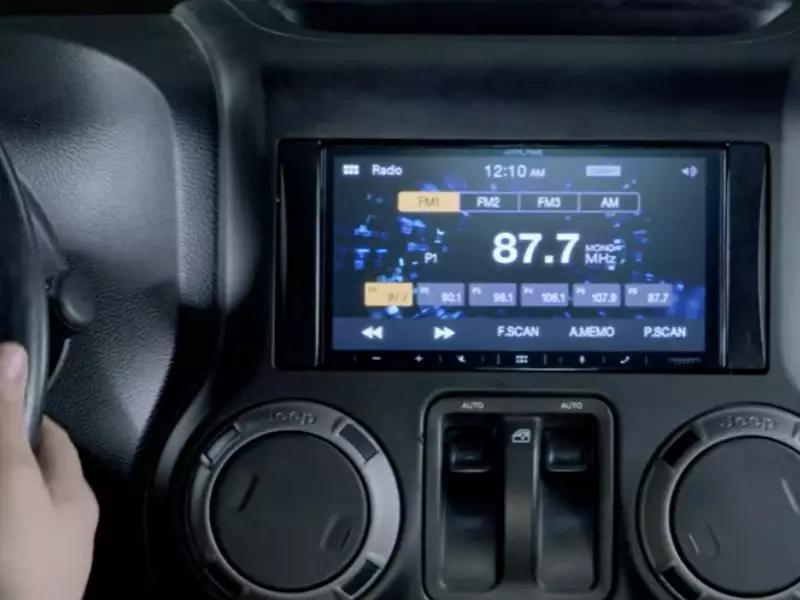
To install a radio interface, first, gather the necessary tools and equipment. Then, follow the manufacturer’s instructions for connecting and integrating the interface with your radio system.
Choosing The Right Radio Interface
Factors to Consider when Selecting a Radio Interface
Choosing the right radio interface for your vehicle is an important decision that can greatly enhance your driving experience. With a wide range of options available in the market, it can be overwhelming to make the right choice. To help you navigate through the selection process, here are some key factors to consider:
Understanding Compatibility with Your Vehicle
One of the first things you need to consider when choosing a radio interface is the compatibility with your vehicle. Each car model may have different specifications and requirements, making it essential to choose a radio interface that is specifically designed for your vehicle.
Before making a purchase, it is crucial to check the compatibility of the radio interface with your car’s make, model, and year. This information can usually be found in the product description or specifications provided by the manufacturer. Ensuring compatibility ensures a seamless installation process and optimal performance.
In addition to compatibility, understanding the wiring harness of your car is also crucial. Some vehicles may require additional adapters or harnesses to connect the radio interface properly. Taking note of these requirements beforehand will save you time and potential headaches during the installation process.
It’s important to note that some newer vehicles may have integrated electronics or advanced features that are interconnected with the factory radio. In such cases, it’s recommended to consult a professional or refer to the manufacturer’s guidelines to ensure compatibility and avoid any potential issues.
Another consideration when it comes to compatibility is the type of car stereo system you currently have. Some vehicles may have a single DIN or double DIN stereo, which defines the height and width of the unit. It’s essential to choose a radio interface that matches the dimensions of your current stereo to ensure a proper fit.
In conclusion, understanding the compatibility of the radio interface with your vehicle is crucial to ensure a seamless installation process and optimal performance. Taking note of the make, model, and year of your vehicle, as well as any additional requirements or wiring harnesses, will help you choose the right radio interface for your needs.
Gathering The Necessary Tools And Equipment
Installing a radio interface in your car can enhance your driving experience by providing access to different audio sources. Before starting the installation process, it is essential to gather all the necessary tools and equipment required for a smooth installation. This will help you save time and ensure you have everything you need.
List of Tools and Equipment Required for Installation
Here is a comprehensive list of the tools and equipment you will need to install a radio interface:
| Tools | Equipment |
|---|---|
|
|
Understanding the Function and Importance of Each Tool
Each tool and equipment listed above serves a specific purpose in the installation process. Let’s take a closer look at their functions and why they are essential:
Screwdriver set
The screwdriver set is crucial for removing screws and fasteners that hold the existing radio unit in place. It allows you to safely detach the unit without causing damage to the surrounding components.
Pliers
Pliers perform various tasks during the installation process, such as gripping and bending wires, crimping connectors, and removing stubborn clips or fasteners.
Wire strippers
Wire strippers are used to remove the insulation from the wire ends, allowing you to make secure connections between the radio interface and your car’s electrical system.
Electrical tape
Electrical tape is used to protect and insulate wire connections, preventing short circuits and ensuring reliable electrical conductivity.
Socket wrench set
A socket wrench set is necessary for removing and tightening bolts or nuts, especially when installing the mounting kit for the new radio interface.
Trim removal tools
These tools are designed to safely remove delicate interior trim pieces without causing damage to the surrounding surfaces. They are essential for accessing the existing radio unit and installing the new one.
Wire crimpers
Wire crimpers are used to create secure and durable electrical connections by compressing connectors onto bare wire ends.
Heat gun
A heat gun helps in shrinking heat shrink tubing and ensures a tight seal over wire connections, adding an extra layer of protection.
These are just a few examples of the tools and equipment you will need for a successful radio interface installation. Having the right tools at your disposal will make the process easier and more efficient, allowing you to enjoy your new audio system in no time.
Preparing Your Vehicle For Installation
Before you can install the radio interface in your vehicle, it’s important to prepare your vehicle by removing the necessary dashboard panels and locating and disconnecting the factory radio. This step is crucial in ensuring a smooth and successful installation process.
Removing the Dashboard Panels
The first step in preparing your vehicle for the radio interface installation is to remove the dashboard panels. These panels may vary depending on the specific make and model of your vehicle, so it’s essential to consult the vehicle’s user manual or seek professional assistance if needed.
Here’s a general guide to removing the dashboard panels:
- Start by locating the screws or clips that hold the dashboard panels in place. These are usually located along the edges of the panels or underneath any visible trim.
- Once you’ve identified the fasteners, use a screwdriver or trim removal tool to carefully remove them. Take caution not to damage the panels or surrounding areas during this process.
- Once the fasteners are removed, gently pry the panels away from the dashboard using your hands or a trim removal tool. Apply even pressure to avoid breakage.
- Continue removing the necessary panels until you have clear access to the factory radio area.
Locating and Disconnecting the Factory Radio
After removing the dashboard panels, the next step is to locate and disconnect the factory radio. The location of the radio can vary depending on the vehicle, but it’s commonly found in the center console or the dashboard.
Follow these steps to locate and disconnect the factory radio:
- Refer to the vehicle’s user manual to locate the position of the factory radio.
- Once located, carefully detach any wiring harnesses or antenna cables connected to the radio by gently pressing the release tabs and pulling them apart.
- Take note of the connectors and cables that were detached for easier installation of the new radio interface.
- Set the factory radio aside in a safe place, as it may no longer be needed after the new radio interface is installed.
By removing the necessary dashboard panels and disconnecting the factory radio, you’ve now completed step 2 of preparing your vehicle for the radio interface installation. In the next step, we will guide you through the installation process of the new radio interface.
Installing The Radio Interface
Now that you have gathered all the necessary tools and prepared the vehicle for the installation, it’s time to move on to the next step: installing the radio interface. This crucial step ensures that your new radio blends seamlessly with your vehicle’s existing wiring, ensuring a smooth and efficient installation process.
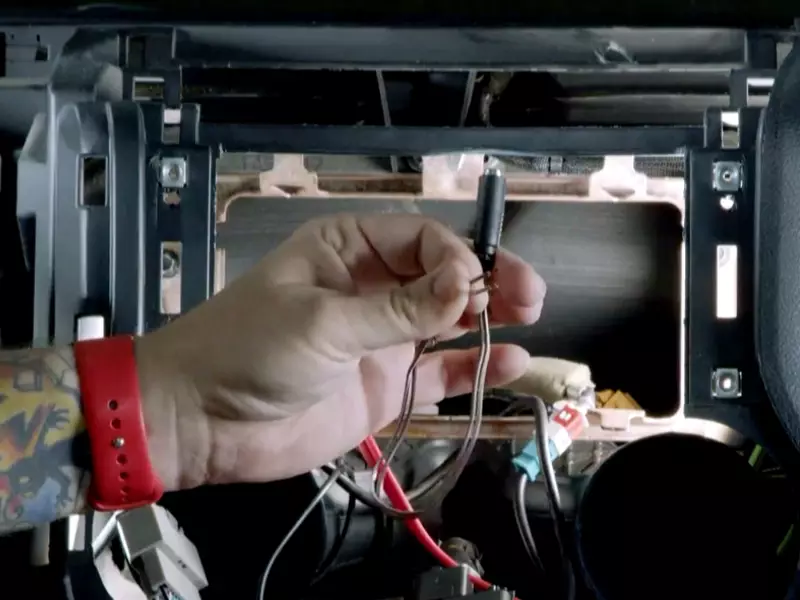
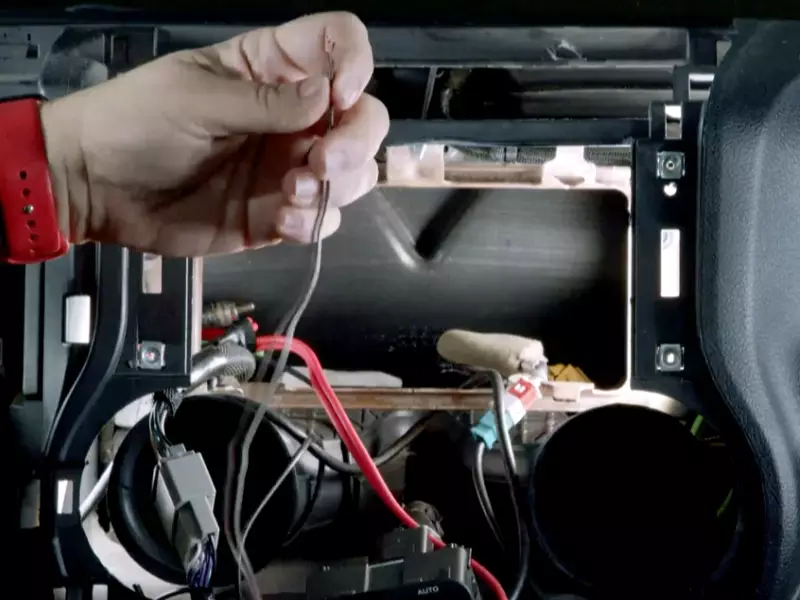
Connecting the Wiring Harness
The first task in installing the radio interface is connecting the wiring harness. The wiring harness acts as a bridge between your vehicle’s electrical system and the new radio. To ensure a proper connection, carefully follow these steps:
- Locate the wiring harness that came with your radio interface package. This harness will have multiple wires, each labeled with specific functions such as power, ground, speaker wires, and so on.
- Identify the corresponding wires in your vehicle’s wiring system. The colors of the wires may vary, so refer to the wiring diagram provided with your vehicle or consult a trusted car manual.
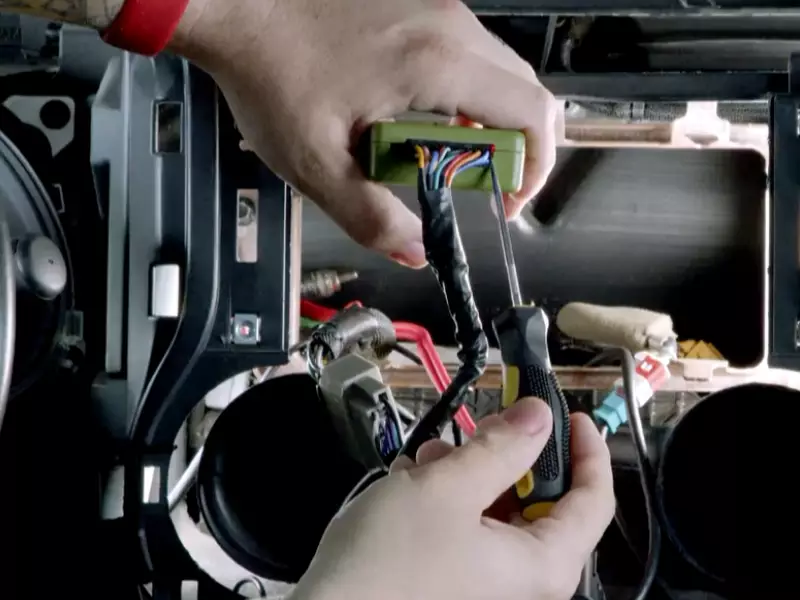
- Strip the ends of the wires on both the harness and the vehicle’s wiring system to expose the metal strands.
- Twist together the exposed ends of each wire, ensuring a secure and tight connection.
- Once the connections are made, insulate them with electrical tape or heat shrink tubing to protect against potential short circuits.
Remember, a proper and secure connection is crucial to avoid any electrical malfunctions or damage to the radio or vehicle’s electrical system.
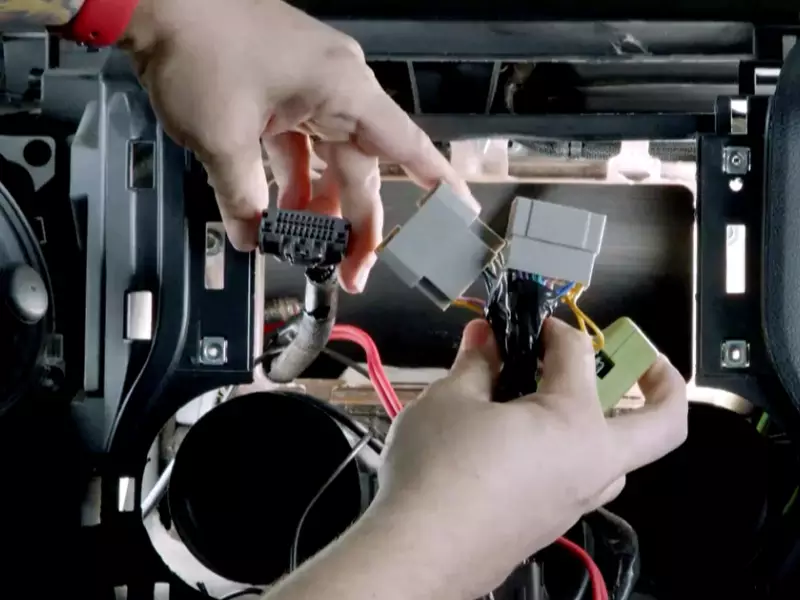
Matching the Interface Connectors with the Vehicle’s Wiring
The next step is to match the interface connectors with the vehicle’s wiring connectors. This step ensures compatibility and proper functioning of the new radio interface. Follow these simple steps:
- Identify the interface connectors that came with your radio interface package. These connectors are designed to fit into specific slots in your vehicle’s wiring system.
- Examine the vehicle’s wiring connectors for corresponding slots or terminals that match the interface connectors.
- Carefully plug the interface connectors into the corresponding slots or terminals, ensuring a snug fit.
- Gently tug on each connector to make sure they are securely attached and won’t come loose during use.
| Interface Connector | Vehicle’s Wiring Connector |
|---|---|
| Red Wire | Positive Battery Terminal |
| Black Wire | Ground Terminal |
| Blue Wire | Antenna Terminal |
| Green Wire | Speaker Terminal |
By correctly matching the interface connectors with the vehicle’s wiring connectors, you ensure that all the necessary connections are established and the new radio interface operates seamlessly.
With the wiring harness properly connected and the interface connectors in place, you are one step closer to enjoying your new radio. In the next step, we will cover how to secure the radio interface in your vehicle for a professional and secure installation.
Mounting The Radio Interface
Once you have the radio interface and wiring ready, the next step is to mount the radio interface. This step plays a crucial role in ensuring the interface stays secure and functional. Follow these steps to properly mount your radio interface:
Finding an Appropriate Location for Mounting
The first step in mounting the radio interface is finding an appropriate location for it. The ideal spot to mount the interface should be easily accessible, yet ensure that it does not obstruct your driving or interfere with any other components in your vehicle.
Here are some tips on finding the right location:
- Look for a flat surface that is large enough to accommodate the radio interface.
- Avoid areas that experience excessive heat, such as near the engine or exhaust system.
- Check for any obstructions, like wires or other components that may interfere with the installation process.
- Consider the reachability of the interface for any adjustments or maintenance in the future.
Take your time to explore different locations within your vehicle until you find the one that meets all these criteria.
Securing the Interface in Place
Once you have selected the appropriate location, it’s time to secure the radio interface in place. This ensures that the interface stays firmly attached and minimizes any chance of it moving or becoming loose during use.
Here’s how you can secure the interface:
- Use screws or double-sided adhesive tape to fix the interface onto the chosen location. Make sure to align the screw holes or stick it firmly using the tape.
- Ensure that the interface is centered and straight to maintain a neat and professional installation look.
- Double-check the tightness of the screws or the adhesive strength of the tape to ensure the interface is securely fastened.
Once you have completed these steps, the radio interface should be secured in place and ready for operation.
Congratulations! You have successfully mounted your radio interface, and you’re one step closer to enjoying a seamless audio experience in your vehicle.
Testing And Troubleshooting
After successfully connecting the radio interface to your vehicle’s audio system, it’s time to move on to the crucial step of testing and troubleshooting. This step ensures that the interface is working correctly and that any potential issues are resolved before your radio is fully functional.
Verifying the Interface Connections
Before proceeding with the testing phase, it’s essential to double-check all the connections you made during the installation process. By ensuring that all cables and wires are securely connected, you can prevent any unexpected issues that may arise.
To verify the interface connections, refer back to the installation manual provided with your radio interface kit. It should have detailed instructions and diagrams specific to your vehicle and radio model. Take your time to carefully review each step to ensure that you haven’t missed any crucial connections.
Once you’ve reviewed the manual, physically inspect each connection point and make sure they are firmly attached. Look out for any loose or damaged connections and address them accordingly. For peace of mind, give each connection a gentle tug to ensure they are secure.
Troubleshooting Common Installation Issues
Even with proper installation, it’s not uncommon to encounter issues during the testing phase. Fortunately, many common installation problems can be resolved with a few troubleshooting steps. By identifying and addressing these issues, you can make your radio interface fully functional.
Here are a few common installation issues and some troubleshooting suggestions:
- No audio output: If you aren’t getting any sound from your speakers after connecting the radio interface, first check that the volume is turned up and not muted. Additionally, ensure that all the audio cables are correctly connected to the interface and your vehicle’s audio system.
- Static or distorted sound: If you are experiencing static or distorted sound, try adjusting the volume and audio settings on your radio. It’s also worth checking the grounding of your interface and making sure that all connections are secure.
- Interference or reception issues: In some cases, installation may lead to interference or reception problems. To address this, make sure that the antenna cable is properly connected to the radio interface and that the antenna itself is in good condition. Additionally, consider relocating the antenna to a better position if needed.
- Compatibility problems: If you are facing compatibility issues between your radio interface and your vehicle’s audio system, check the manufacturer’s website or contact customer support for assistance. They may be able to provide guidance or software updates to resolve any compatibility-related problems.
By troubleshooting these common installation issues, you can resolve most problems that may arise during the testing phase. However, if you encounter more complex problems or the troubleshooting steps don’t yield the desired results, it’s advisable to consult a professional or reach out to the customer support of your radio interface manufacturer for further assistance.
Reassembling The Dashboard
Now that you have successfully installed the radio interface in your vehicle, it’s time to put the dashboard back together. This step is crucial in ensuring a seamless and professional-looking installation. Here’s a detailed guide on how to reassemble the dashboard, reconnect the panels, and achieve a proper fit and finish.
Reconnecting the Dashboard Panels
After removing the necessary panels to install the radio interface, carefully realign them to their original positions. Take extra caution while handling the panels to prevent any scratches or damage. Refer to your vehicle’s manual or consult online resources for any specific instructions pertaining to your vehicle model.
To reconnect the dashboard panels, follow these steps:
- Begin by aligning the panels properly and ensuring that all the connectors line up with their respective slots.
- Gently push the panels back into place, making sure they fit snugly. Apply gentle pressure until you hear a click, indicating that they are securely connected.
- Double-check that all the panels are aligned correctly and sit flush with the surrounding areas. This will ensure a seamless appearance and prevent any gaps or misalignment.
Ensuring a Proper Fit and Finish
Once the dashboard panels are reconnected, it’s essential to pay attention to the fit and finish to achieve a professional look. Here are some tips to ensure a proper fit and finish:
- Inspect the panels and surrounding areas for any gaps or misalignments. If you notice any, carefully adjust the panels until they sit perfectly flush with the rest of the dashboard.
- Check the edges of the panels for any protrusions or unevenness. Use a soft cloth or your fingertips to smooth out any imperfections.
- If you encounter difficulty in achieving a seamless fit, consider using foam tape or other suitable materials to fill the gaps and create a smoother transition between the panels and the dashboard.
By taking the time to reconnect the dashboard panels correctly and ensuring a proper fit and finish, you can enjoy a professional-looking installation. This attention to detail will not only enhance the aesthetics of your vehicle’s interior but also give you a sense of satisfaction in the completed project.
Additional Tips And Recommendations
In this section, we will provide you with some additional tips and recommendations for installing a radio interface. Following these best practices will ensure that your installation is done correctly and that your radio interface maintains a clean and professional look.
Best Practices for Proper Installation
To start off, here are some best practices to keep in mind when installing your radio interface:
- Before beginning the installation process, carefully read through the user manual or installation guide provided by the manufacturer. This will give you a better understanding of the specific steps and requirements for your particular radio interface model.
- Make sure to choose a suitable location for your radio interface that allows for easy access and operation. Keep in mind factors such as visibility, convenience, and available space.
- Prioritize safety by disconnecting the vehicle’s battery before beginning the installation process. This will help prevent any electrical mishaps or damage to your vehicle’s electrical system.
- Use the appropriate tools and equipment as recommended by the manufacturer. This will ensure that you have the necessary tools to properly install your radio interface without causing any damage.
- Take your time during the installation process, paying close attention to each step. Rushing through the installation can lead to mistakes or overlooking important details.
- Double-check all connections and wires to ensure they are properly secured and tightened. Loose connections can lead to malfunctioning or poor performance of your radio interface.
- Test your radio interface thoroughly after the installation process to make sure it is functioning correctly. This includes checking the sound quality, display functionality, and all other features of the interface.
Maintaining a Clean and Professional Look
In addition to proper installation practices, it is also important to consider the aesthetics and overall appearance of your radio interface installation. Here are some tips for maintaining a clean and professional look:
- When running wires, try to conceal them as much as possible. Use wire looms or conduits to keep the wires organized and hidden from view.
- Avoid leaving any excess or loose wires hanging out. Take the time to neatly tuck away any extra wiring to create a cleaner look.
- Consider using mounting brackets or adapters to securely attach the radio interface to your vehicle’s dashboard or console. This will help prevent any wobbling or movement of the interface.
- Use masking tape to mark any areas where you plan to make cuts or modifications to your vehicle’s interior. This will help prevent any accidental damage and ensure precise and clean cuts.
- Lastly, regularly clean and maintain your radio interface to keep it looking fresh and professional. Use a soft, lint-free cloth and gentle cleaning solutions to remove any dust, fingerprints, or smudges.
By following these additional tips and recommendations, you can ensure that your radio interface installation is not only done correctly but also maintains a clean and professional appearance. Remember to always refer to the manufacturer’s instructions and take your time during the installation process to ensure the best possible outcome.
Frequently Asked Questions Of How To Install Radio Interface
What Is A Radio Interface?
A radio interface is a technology that allows communication between a device and a radio network. It enables the transfer of data, voice, or video over the airwaves, facilitating wireless communication. The interface bridges the gap between a device and the radio network, ensuring seamless connectivity.
Why Do You Need A Radio Interface?
A radio interface is essential as it allows you to connect and communicate wirelessly with devices, such as cell phones and computers. It enables you to access networks, send and receive data, and make calls without the need for physical cables.
It provides convenient and efficient communication options.
What Color Wires Go Together In A Car Stereo?
The color wires that go together in a car stereo vary, depending on the car manufacturer and model. It’s important to refer to the car stereo’s wiring diagram or manual for accurate information. Incorrect wiring can harm the stereo and lead to poor audio quality.
How Do You Connect A Wire Harness To A Radio?
To connect a wire harness to a radio, match the colors and connections on the harness with those on the radio. Use crimp connectors or solder the wires together, ensuring a tight and secure connection. Then, plug in the harness to the radio’s corresponding ports.
Double-check the connection and test the functionality.
Conclusion
To sum up, installing a radio interface doesn’t have to be a daunting task. By following the step-by-step guide outlined in this blog post, you can easily set up your radio interface and enjoy seamless connectivity and enhanced audio experience in your vehicle.
Remember to gather all the necessary tools, carefully follow the instructions, and take your time to ensure everything is properly installed. With a little patience and effort, you’ll be enjoying your favorite tunes on the road in no time!