To install a radio in an old car, first ensure you have the necessary tools and a compatible radio model. Then, disconnect the car’s battery, remove the old radio, and connect the new radio following its specific instructions.
Preparing For The Installation
Before you begin installing a new radio in your old car, there are a few important steps you need to take to ensure a successful installation. This section will guide you through the necessary preparations, including checking your car’s compatibility, gathering the required tools and materials, and disconnecting the car’s battery for safety.
Check the car’s compatibility with aftermarket radios
In order to install a radio in your old car, it’s essential to confirm that your vehicle is compatible with aftermarket radios. This can vary depending on the make and model of your car, so it’s important to check the documentation or speak to a professional if you’re unsure. Most aftermarket radios are designed to fit a wide range of vehicles, but compatibility issues can still arise.
Here’s a table outlining some common compatibility considerations:
| Compatibility Factors | Contact a Professional if… |
|---|---|
| The radio dimensions do not match | Your car has custom modifications that may affect fitment |
| Additional wiring is required | Your car has complex wiring system or specific audio features |
| The radio is not compatible with your car’s amplifiers | Your car has a premium audio system |
Gather the necessary tools and materials
Once you’ve confirmed your car’s compatibility, it’s time to gather the tools and materials needed for the installation. Having everything prepared and within reach will make the process smoother and more efficient.
Here’s a list of commonly required tools and materials:
- Aftermarket radio
- Dash kit
- Wire harness
- Antenna adapter
- Wire crimping tool
- Electrical tape
- Screwdriver set
- Trim removal tools
Disconnect the car’s battery for safety
Prior to starting the installation, it’s essential to disconnect the car’s battery to prevent any electrical mishaps. This step ensures your safety and protects the car’s electrical system from potential damage. To disconnect the battery, follow these steps:
- Locate the car battery in your old car’s engine bay.
- Identify the negative terminal, usually indicated by a “-” symbol.
- Using a wrench or socket, loosen the nut securing the negative cable.
- Once the nut is loose, remove the negative cable from the terminal.
- Secure the negative cable away from the battery terminal to prevent accidental reconnection.
Now that you’ve properly prepared for the installation, you’re ready to move on to the next steps in installing your new radio in your old car. Stay tuned for the next section of this guide where we’ll cover the actual installation process!
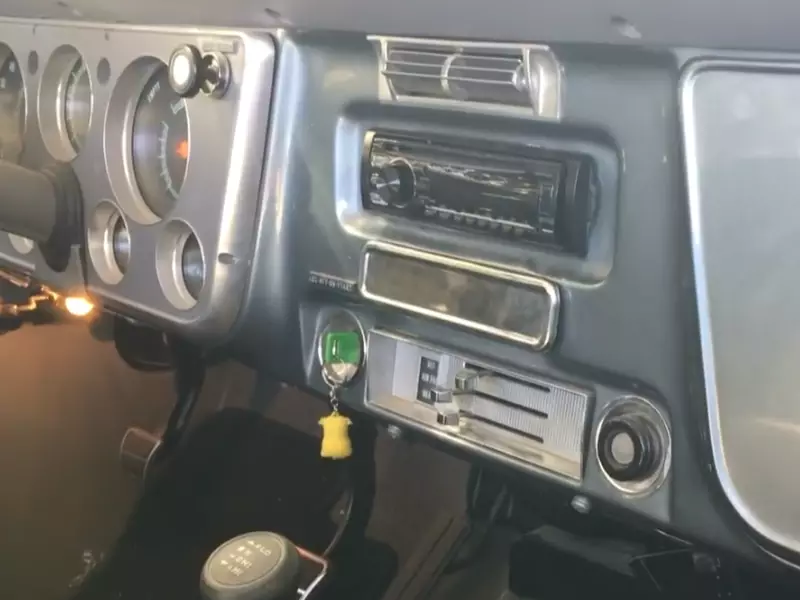
Removing The Old Radio
Locate and remove the trim panel and mounting brackets
Before you can begin installing a new radio in your old car, you need to first remove the old one. To do this, you’ll need to locate and remove the trim panel and mounting brackets that are holding the old radio in place.
Start by carefully examining the trim panel surrounding the radio. Look for any screws, clips, or fasteners that may be securing it to the dash. Once you’ve identified these, use a screwdriver or trim panel removal tool to gently pry the trim panel away from the dash.
Next, you’ll need to locate the mounting brackets that are holding the old radio in place. These brackets are typically secured with screws or bolts, so you’ll need the appropriate tools to remove them.
Take your time and be careful not to damage the trim panel or any surrounding components as you remove the brackets. Once the brackets are removed, the old radio should be free to slide out of the dash.
Disconnect the wiring harness and antenna
With the trim panel and mounting brackets removed, you can now focus on disconnecting the wiring harness and antenna that are connected to the old radio.
Start by locating the wiring harness connected to the back of the radio. This harness is typically a bundle of wires with a plug at the end. Gently press down on the release tab and pull the harness connector out of the radio.
Next, locate the antenna cable that is connected to the radio. Depending on your car, the antenna cable may be a traditional coaxial cable or a wire with a connector. Remove the cable by gently pulling it out of the antenna port on the back of the radio.
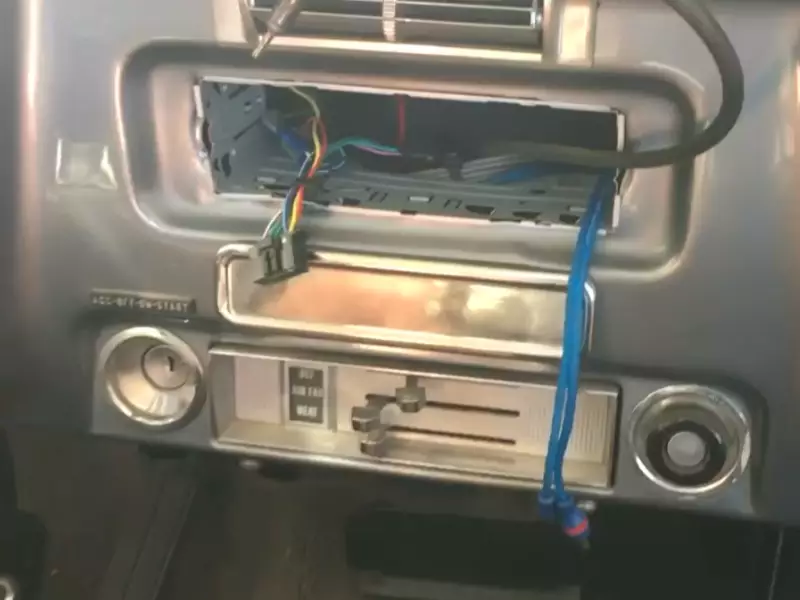
Remove the old radio from the dash
Now that you’ve disconnected the wiring harness and antenna, you can remove the old radio from the dash completely.
Depending on your car, the radio may be secured to the dash with screws, clips, or a combination of both. Take a moment to inspect the area around the radio and identify any securing mechanisms that need to be removed.
Using the appropriate tools, carefully remove any screws or clips that are keeping the old radio in place. Be gentle but firm, ensuring that you don’t scratch or damage any surrounding components.
Once the securing mechanisms have been removed, you should be able to slide the old radio out of the dash. Take care not to pull on any wires that may still be connected to the radio, as this could cause damage to the wiring harness or antenna.
Congratulations! You’ve successfully removed the old radio from your car, and you’re now ready to install a new one.
Installing The New Radio
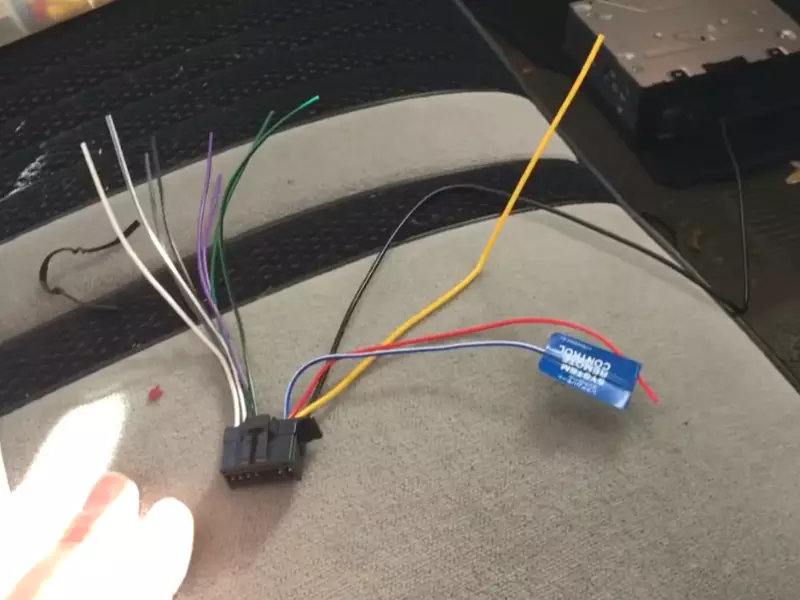
Connect the wiring harness and antenna to the new radio
Before you can enjoy the sweet sounds of your new radio, you need to connect the wiring harness and antenna properly. This step may vary depending on the make and model of your old car, so it’s important to consult the user manual or seek professional advice if you’re unsure.
First, locate the wiring harness that came with your new radio. This harness serves as the bridge between your car’s electrical system and the radio. Carefully match the wires from the harness to the corresponding wires in your car. It’s essential to make secure connections, so consider using crimp connectors or soldering the wires together for added stability. Once the connections are made, insulate them with electrical tape to prevent any short circuits.
Next, you’ll need to connect the antenna to your new radio. This step is typically straightforward, as most radios feature a designated antenna port. Simply plug in the antenna cable until you hear a click or feel it securely in place. This connection ensures that you’ll receive a clear reception and enjoy your favorite radio stations without any interruptions.
Insert the new radio into the dash and secure it with mounting brackets
With the wiring and antenna connections in place, it’s time to install your new radio into the dash. To do this, follow these steps:
- Remove the trim panel surrounding the radio slot by gently prying it away from the dash. Be careful not to damage the trim or any surrounding components.
- Once the trim panel is removed, carefully slide your new radio into the vacant slot. Make sure it fits snugly and is aligned properly with any mounting holes or brackets.
- If your new radio came with mounting brackets, attach them to the sides of the radio using the provided screws or clips. These brackets will help secure the radio in place and prevent any movement while driving.
- Double-check that the radio is securely installed and doesn’t wobble or shift. This step is crucial for optimal performance and to prevent any damage to the radio or dash.
Remember to be gentle and patient during this process, as excessive force or haste can result in broken parts or an improper fit.
Reattach the trim panel
With the new radio securely installed, it’s time to reattach the trim panel to give your installation a polished look. Follow these steps:
- Carefully align the trim panel with the dash and the radio. Ensure that any clips or mounting points are properly aligned to avoid any future rattling or loose fits.
- Apply gentle pressure to each section of the trim panel until you hear a satisfying click or see it fully seated in place. Be cautious not to use excessive force that may damage the panel or its clips.
Once the trim panel is back in place, take a step back and admire your handy work. Your old car now boasts a brand-new radio that’s ready to provide endless hours of entertainment and enjoyment on your future journeys.
Testing And Troubleshooting
Once you have successfully installed the new radio in your old car, it is crucial to test its functionality and troubleshoot any potential issues. This step will ensure that everything is properly connected and working as expected.
Reconnect the car’s battery
The first step in testing and troubleshooting is to reconnect the car’s battery. This is necessary because disconnecting the battery is for safety purposes during the installation process. To reconnect the battery:
- Locate the positive (+) and negative (-) terminals on the car’s battery.
- Remove the protective covers from the terminals.
- Connect the positive (+) terminal of the battery to the positive (+) terminal of the radio.
- Connect the negative (-) terminal of the battery to the negative (-) terminal of the radio.
- Ensure that the connections are secure and tight.
By reconnecting the car’s battery, you restore power to the radio and enable it to function properly.
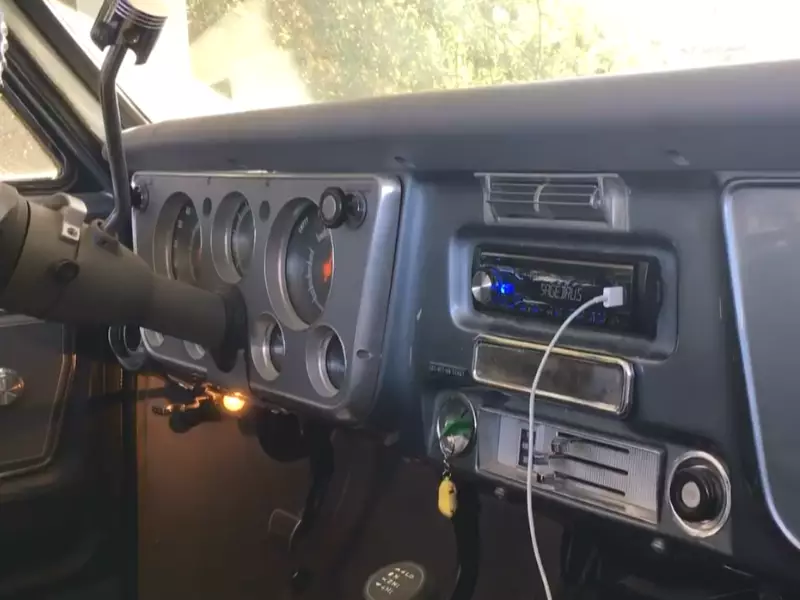
Test the functionality of the new radio
After reconnecting the car’s battery, it’s time to test the functionality of the new radio. Follow these steps to ensure everything is working as it should:
- Turn on the car’s ignition.
- Adjust the volume and check if you can hear audio from the speakers.
- Tune in to different radio stations to ensure the radio is receiving signals correctly.
- Test any additional features of the radio, such as Bluetooth connectivity or CD player, if applicable.
If everything is working properly, congratulations! You have successfully installed and tested the new radio in your old car. However, if you encounter any issues during the testing phase, don’t panic. There are troubleshooting steps you can take to identify and resolve the problem.
Troubleshoot any potential issues
If you experience any issues with the new radio, follow these troubleshooting steps:
- Check the wiring connections to ensure they are securely connected.
- Inspect the fuses related to the radio to see if any are blown.
- Refer to the user manual or manufacturer’s instructions for troubleshooting tips specific to your radio model.
- If necessary, consult a professional or seek assistance from a car audio technician.
By following these troubleshooting steps, you can identify and resolve any potential issues with the new radio installation.
Remember, testing and troubleshooting are essential to ensure a successful installation and optimal functionality of the new radio in your old car. Take the time to thoroughly test and troubleshoot, and enjoy your upgraded audio experience on the road.
Tips And Recommendations
When it comes to installing a radio in an old car, there are a few important tips and recommendations to keep in mind. Upgrading your car’s speakers, using a wiring harness adapter, and ensuring proper grounding are all key aspects of a successful installation. Let’s dive into each of these in more detail.
Consider upgrading the car’s speakers for better audio quality
If you’re looking to take your audio experience to the next level, it’s worth considering upgrading your car’s speakers. The speakers that came with your old car may not provide the best sound quality, and upgrading them can make a huge difference. Look for speakers that are compatible with your car’s make and model, and consider factors like power handling and sensitivity. By investing in quality speakers, you can enjoy crystal-clear audio while driving.
Use a wiring harness adapter for easier installation
When it comes to installing a new radio in an old car, dealing with wiring can be a daunting task. However, using a wiring harness adapter can simplify the process significantly. A wiring harness adapter is a plug-and-play solution that connects your car’s existing wiring to the new radio without any cutting or splicing. This saves you time and frustration while ensuring a proper, secure connection. Before purchasing a wiring harness adapter, make sure it is compatible with your car’s make and model.
Ensure proper grounding for optimal performance
An often overlooked but critical aspect of installing a radio in an old car is ensuring proper grounding. Good grounding is essential for optimal performance and preventing interference. Before installing the radio, identify a suitable grounding point in your car’s chassis. This could be a metal bolt or screw that connects directly to the car’s body. Make sure the connection is secure and free of corrosion to maintain a strong ground. Proper grounding will help eliminate any unwanted noise and ensure a clean audio signal.
Frequently Asked Questions On How To Install Radio In Old Car
Can You Put A New Radio System In An Old Car?
Yes, you can install a new radio system in an old car. It’s a simple process that can improve your car’s audio capabilities.
Is It Hard To Install A Radio In A Car?
Installing a radio in a car is not difficult. Follow the instructions provided with the radio and use basic tools. It can be done by anyone with a little patience and some mechanical knowledge.
Can You Put A Touch Screen Radio In An Older Car?
Yes, it is possible to install a touchscreen radio in an older car.
Can You Install A Radio In Any Car?
Yes, you can install a radio in any car.
Conclusion
Installing a radio in an old car is a simple and rewarding DIY project that allows you to enjoy your favorite tunes on the road. By following the step-by-step guide discussed in this blog post, you can effortlessly upgrade your vintage vehicle’s audio system.
Remember to gather the necessary tools, remove the old radio, make the necessary electrical connections, and install the new radio correctly. With a little patience and know-how, you’ll be enjoying your favorite music in no time.