To install new speakers in a car, first, disconnect the car battery and remove the old speakers by unscrewing the mounting screws and disconnecting the wiring harness. Then, connect the wiring harness of the new speakers to the car’s stereo system and secure the speakers with mounting screws.
Finally, reconnect the car battery to test the sound quality. If you’re looking to upgrade your car’s audio system, installing new speakers can greatly enhance the sound quality. Whether you’re a music enthusiast or simply want a better audio experience during your daily commute, adding new speakers is a relatively easy process.
We’ll guide you through the steps to install new speakers in your car, from removing the old ones to connecting the wiring harness and testing the sound output. With a few simple tools and a basic understanding of car wiring, you can improve your car’s audio system in no time.
Factors To Consider When Selecting Car Speakers:
Sound Quality
One of the most important factors to consider when selecting car speakers is the sound quality. After all, what’s the point of installing speakers if they don’t deliver the audio experience you desire? When assessing sound quality, pay attention to factors such as frequency response, distortion levels, and overall clarity.
A wide frequency response range ensures that your speakers can effectively reproduce both high and low frequencies, resulting in a more balanced and immersive sound. Low distortion levels are also important to maintain the integrity of the audio signal, preventing any unwanted distortion or buzzing sounds. Ultimately, prioritize speakers that offer exceptional sound quality to elevate your in-car listening experience.
Power Handling
Power handling is another crucial consideration when selecting car speakers. It refers to the amount of power the speakers can handle to produce their maximum volume without damage. A speaker’s power handling capacity is usually described in terms of the maximum RMS (Root Mean Square) power it can handle.
It’s important to match the power handling capabilities of your speakers to the power output of your car’s audio system. If you have a high-power audio system, you’ll need speakers that can handle the increased power without distortion or damage. On the other hand, if you have a lower-power system, you may not need speakers with a high power handling capacity. Consider your car’s audio system and choose speakers with appropriate power handling capabilities for optimal performance.
Speaker Size and Fit
The size and fit of the speakers are important practical considerations when selecting car speakers. Not all speakers will fit seamlessly into every car. Therefore, before making a purchase, you need to determine the available space in your car for the speakers.
Measure the dimensions of your existing speakers or the available space in your car’s speaker enclosures to ensure compatibility with the new speakers you intend to install. Besides size, you also need to consider the mounting depth, as some speakers require more space behind them when installed. By carefully assessing the speaker size and fit, you can ensure a hassle-free installation process and avoid any potential issues down the road.
Speaker Sensitivity
Speaker sensitivity, also referred to as efficiency, plays a crucial role in determining how effectively speakers convert power into sound. It refers to the speaker’s ability to produce volume based on the given input power. A higher sensitivity rating indicates that the speaker can produce more sound with less power, making it a great choice for low-powered audio systems.
On the other hand, if you have a high-powered audio system, speakers with lower sensitivity ratings may be more appropriate. Keep in mind that a small difference in sensitivity can have a significant impact on the perceived loudness. Therefore, understanding the sensitivity rating of your speakers is essential to achieve the desired volume level and overall listening experience.
Tools Required For Installing Car Speakers:
Screwdriver
One of the essential tools you’ll need to install new speakers in your car is a screwdriver. This tool will come in handy for removing any screws or bolts holding the old speakers in place. It’s important to have both a flathead and a Phillips head screwdriver, as different types of screws may be used in your car’s speaker installation. Make sure the screwdriver is the correct size to fit the screws securely, as using the wrong size can strip the screw heads and make them difficult to remove or reinstall.
Pliers
Another useful tool for installing car speakers is a pair of pliers. These are handy for a variety of tasks, such as removing wire connections or bending metal tabs. Pliers with a comfortable grip and a sharp cutting edge are recommended, as they can help you tackle any wiring or fastening challenges you may encounter during the installation process.
Wire stripper
A reliable wire stripper is a must-have tool when it comes to installing car speakers. It allows you to remove the insulation from the speaker wires, exposing the bare metal strands for proper connections. Look for a wire stripper with adjustable settings to accommodate different wire gauges commonly found in car audio systems. This tool will ensure secure and reliable connections between the speakers and the wiring harness.
Crimping tool
To ensure strong and durable connections between wires, you’ll need a crimping tool. This tool allows you to secure the bare wire ends together with connectors, creating a reliable electrical connection. Crimping the wires properly will prevent them from coming loose and causing audio disruptions. Choose a high-quality crimping tool that suits the size and type of connectors you’ll be using in your car speaker installation.
Socket set
Last but not least, a socket set is a versatile tool that will come in handy during the installation process. It can be used for various tasks, such as removing and installing screws, nuts, and bolts. A socket set with a variety of sizes and extensions will ensure that you have the right tool for the job. This tool will save you time and effort as you work on your car’s speaker installation.
Supplies Needed For Car Speaker Installation:
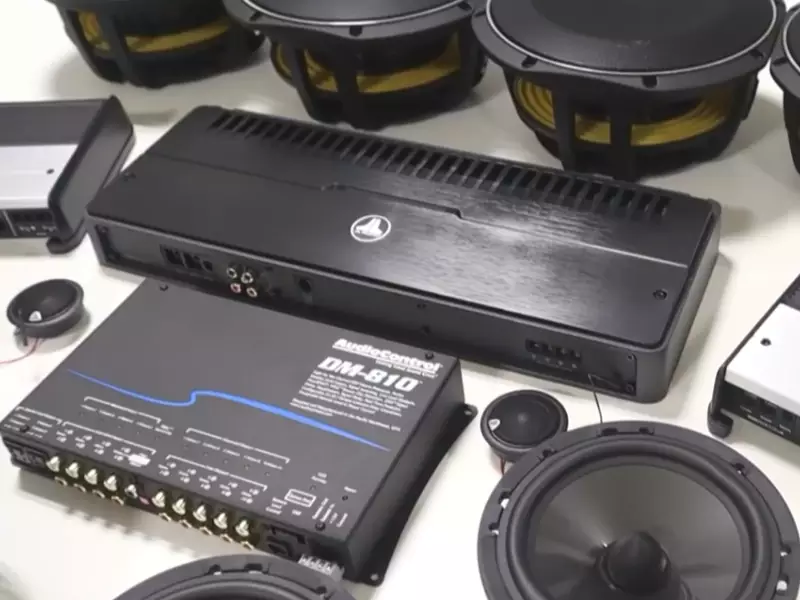
Installing new speakers in your car can greatly enhance your audio experience while driving. However, before you get started, it’s important to have the right supplies on hand. Here are the essential supplies you’ll need for a successful car speaker installation.
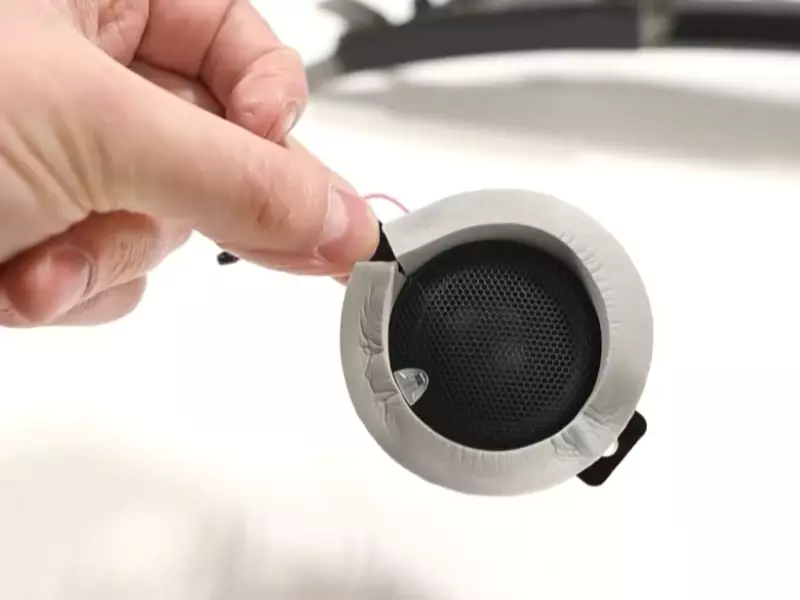
New speakers
Of course, the first thing you’ll need is a set of new speakers. Choose speakers that are compatible with your car’s make and model, and consider the type and size of speakers that will fit well in your vehicle. Look for speakers that offer good sound quality and suit your audio preferences.
Speaker wire
To connect your new speakers to your car’s audio system, you’ll need speaker wire. Speaker wire is essential for transmitting the audio signal from the stereo to the speakers. Make sure to choose a wire that is long enough to reach from the stereo to each speaker location.
Wiring harness adapter
A wiring harness adapter is a crucial component when installing new speakers in your car. This adapter allows you to easily connect the speakers to your car’s factory wiring without the need for cutting or splicing the wires. It simplifies the installation process and ensures a clean and professional-looking connection.
Mounting brackets
In order to secure your new speakers in the car’s speaker openings, you’ll need mounting brackets. These brackets are designed to hold the speakers firmly in place and prevent any rattling or vibrations. Choose brackets that are compatible with both your car and the speakers you’ve selected.
Screws and connectors
Lastly, you’ll need screws and connectors to secure the speakers and wiring in place. These small but important components ensure that everything stays in position and maintains a solid connection. Be sure to use the appropriate screws and connectors for your specific car and speaker setup.
By gathering these essential supplies, you’ll be well-prepared to install new speakers in your car and enjoy a superior audio experience on the road. Remember to follow the manufacturer’s instructions and take your time to ensure a proper and secure installation.
Removing The Door Panel:
When it comes to installing new speakers in your car, the first step is to remove the door panel. This process might seem a bit intimidating at first, but with the right know-how, you’ll have it off in no time. In this section, we’ll discuss the step-by-step process of removing the door panel to make way for your shiny new speakers.
Removing screws and fasteners:
The first thing you need to do is to locate and remove any screws or fasteners holding the door panel in place. These screws are usually located around the edges of the panel or in the door handle assembly.
To locate the screws, you may need to refer to your car’s manual or do a quick search online for your specific make and model. Once you’ve found the screws, use a screwdriver or a trim panel removal tool to carefully unscrew and remove them.
Detaching electrical connectors and window controls:
Next, you’ll need to detach any electrical connectors and window controls that are attached to the door panel. These connectors are usually located near the window switches and door handles. To detach them, gently pull the connectors away from their sockets. Be careful not to apply too much force or you may damage the connectors or wiring. It may be helpful to use a small flathead screwdriver or a trim panel removal tool to assist you in this process.
Pulling the panel off:
With the screws, fasteners, and electrical connectors removed, you can now start pulling the door panel off. Begin by gripping the bottom edge of the panel firmly and giving it a gentle tug. You should feel the panel start to loosen from the door frame. Work your way around the edges of the panel, applying steady pressure until the panel is completely free. Be sure to take your time and be gentle to avoid breaking any clips or damaging the panel.
In some cases, there may be additional clips or hooks holding the panel in place. If you encounter resistance when pulling the panel off, check for any hidden clips or hooks and release them carefully. Once the panel is free, set it aside in a safe place where it won’t get damaged.
In conclusion, removing the door panel is the first crucial step in installing new speakers in your car. By following the proper steps and being gentle with the panel, you’ll have it off in no time. Now that you’ve successfully removed the door panel, you’re one step closer to upgrading your car’s sound system!
Accessing And Removing The Old Speakers:
Accessing and Removing the Old Speakers:
Before installing new speakers in your car, you’ll need to access and remove the old speakers. This process involves locating the speakers, unplugging the electrical connectors, and removing the screws or clips that secure them in place. Follow these steps to ensure a smooth removal process:
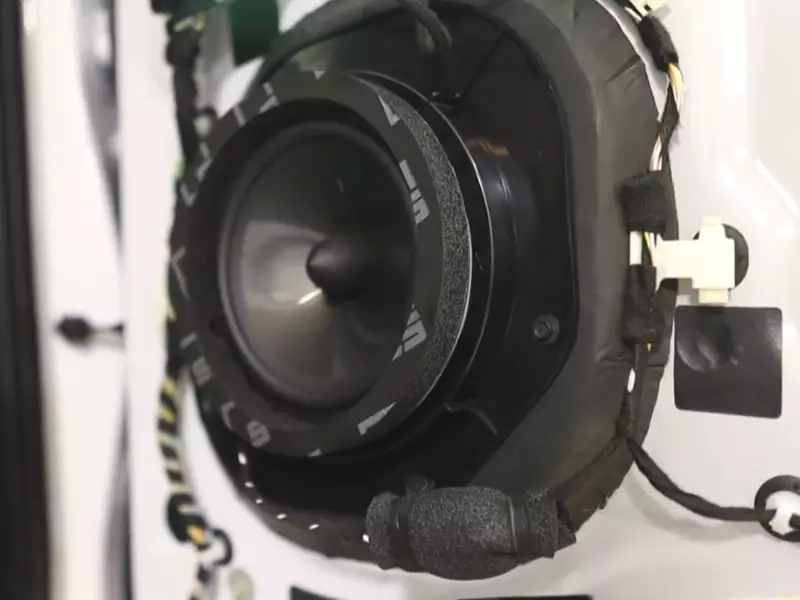
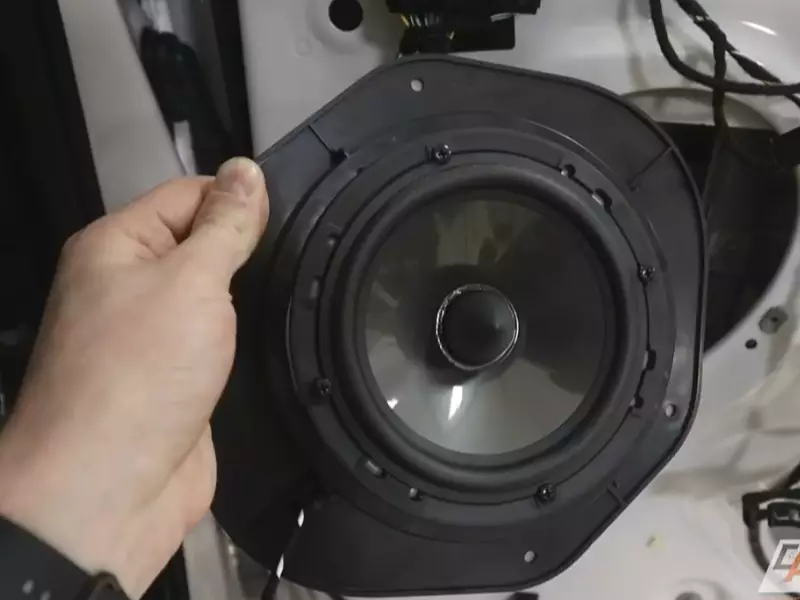
Locating the speakers
The first step is to locate the speakers in your car. In most cars, the speakers are typically found in the front and rear doors, the dashboard, or the rear deck. Take a moment to visually inspect the interior of your car and identify the speaker locations. Refer to your car’s manual if you need assistance in finding them.
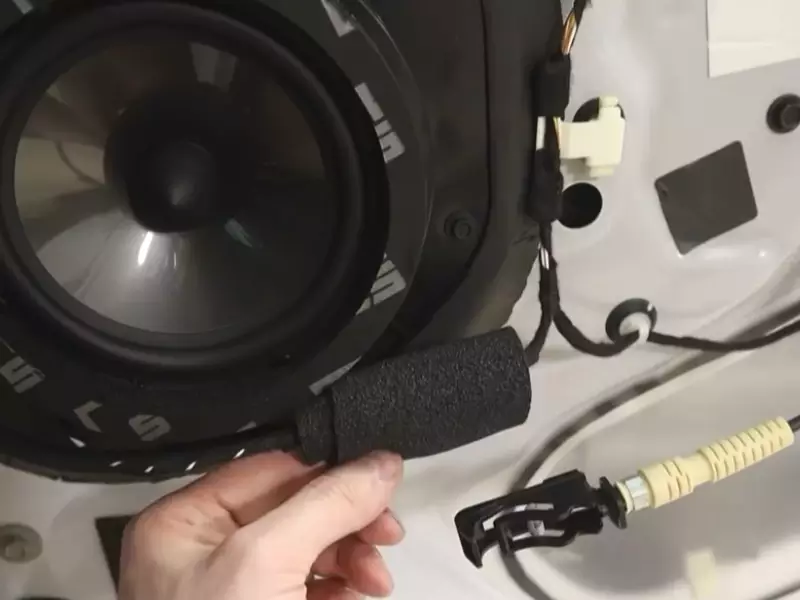
Unplugging the electrical connectors
Once you have located the speakers, you’ll need to unplug the electrical connectors. These connectors are typically located at the back of the speakers. Carefully examine the connectors to identify any latches or clips that may be securing them in place. Gently press or release these clips to disengage the connector and then pull it away from the speaker. Remember to handle the connectors with care to avoid any damage.
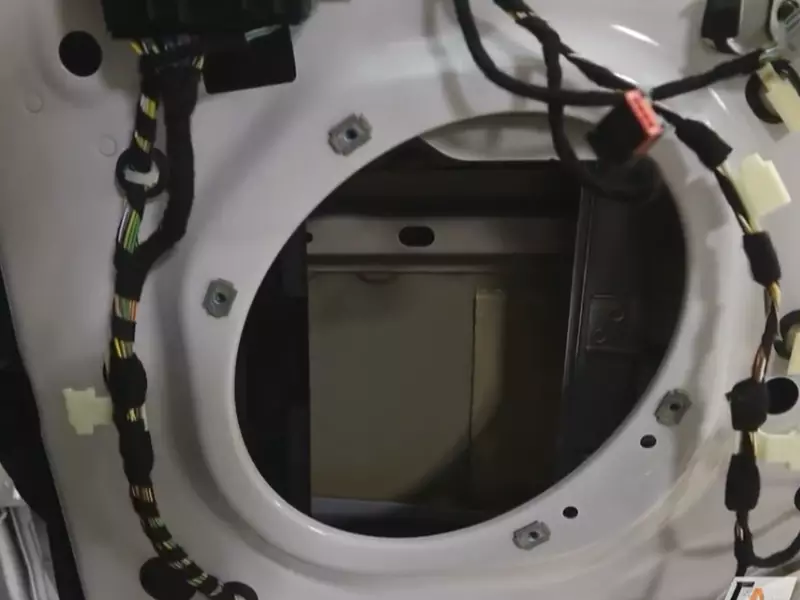
Removing the screws or clips
After unplugging the electrical connectors, you can proceed to remove the screws or clips that secure the speakers in place. Grab a screwdriver or a panel removal tool, depending on the type of fasteners used in your car. Inspect the speaker mountings and identify the screws or clips that need to be removed. Carefully unscrew or unclip them to release the old speakers from their mounts. Keep track of these screws or clips as you will need them for the installation of the new speakers.
By following these steps, you can easily access and remove the old speakers from your car. Remember to take your time and be gentle during the process to avoid any damage to the speakers or the car’s interior. With the old speakers removed, you’re now ready to install the new ones and enjoy an enhanced audio experience in your car.
Preparing The Door Panel For The New Speakers:
Installing new speakers in your car can greatly enhance your audio experience and add a touch of personalization to your vehicle. But before you can enjoy your new sound system, you need to properly prepare the door panel to accommodate the speakers. This involves cleaning the panel surface, marking the speaker placement, and drilling holes for the new speakers. In this guide, we will walk you through each step to ensure a successful installation.
Cleaning the Panel Surface
The first step in preparing your door panel for new speakers is to clean the panel surface. This is important as any dirt or grime on the panel can affect the adhesion of the speaker and lead to subpar sound quality. To clean the panel:
- Use a damp cloth or sponge to wipe away any dust or debris from the surface.
- Apply a mild detergent or car interior cleaner to a clean cloth and gently scrub the panel surface. Be sure to focus on any areas that are particularly dirty or sticky.
- Once you have cleaned the panel, use a dry cloth to remove any excess moisture and ensure the surface is completely dry.
By cleaning the panel surface, you are creating a clean and smooth surface for the speakers to be installed, allowing for optimal sound quality.
Marking the Speaker Placement
After cleaning the panel surface, the next step is to mark the speaker’s placement. This will help ensure that the speakers are correctly positioned for optimal sound distribution. To mark the speaker placement:
- Locate the area on the door panel where you intend to install the speakers.
- Use a pencil or a removable marker to mark the center point where each speaker will be placed.
- Measure the distance between the center point of each speaker and ensure they are equidistant from each other for a balanced sound.
By marking the speaker placement, you are creating a guide for drilling the holes and ensuring the speakers are properly aligned.
Drilling Holes for the New Speakers
Now that you have cleaned the panel and marked the speaker placement, it’s time to drill holes for the new speakers. Before proceeding, make sure you have the appropriate tools, such as a drill and the necessary drill bits. To drill holes for the new speakers:
- Double-check the marked center points for each speaker.
- Select a drill bit that matches the size specified by the speaker manufacturer.
- Securely hold the drill perpendicular to the panel and carefully drill a hole at each marked center point.
- After drilling the holes, use a file to smooth out any rough edges around the holes.
By drilling holes for the new speakers, you are creating a secure and proper mounting point for the speakers, ensuring they are firmly attached to the door panel.
Now that you have successfully prepared the door panel for the new speakers, you are ready to move on to the next step of the installation process. Stay tuned for our upcoming blog post on How to Connect and Wire the New Speakers in Your Car.
Connecting The Wiring:
Connecting the speaker wire to the new speakers
Connecting the speaker wire to the new speakers is a crucial step in installing new speakers in your car. It ensures that the audio signals are properly transmitted to the speakers, allowing you to enjoy clear and high-quality sound. Here’s how you can go about it:
- Start by identifying the positive and negative terminals on your new speakers. Usually, the positive terminal is marked with a “+” symbol, while the negative terminal is marked with a “-” symbol.
- Strip a small portion of the insulation from the end of the speaker wire using wire strippers. This will expose the copper wire beneath.
- Twist the exposed copper wire on the end of the speaker wire.
- Connect the twisted end of the speaker wire to the corresponding terminals on the new speakers. Make sure to match the positive terminal on the speaker with the positive wire, and the negative terminal with the negative wire.
- If your new speakers use spring clips instead of terminals, simply press down on the clip to open it, insert the twisted wire, and release the clip to secure the connection.
- Once the speaker wire is securely connected to the new speakers, double-check the connections to ensure they are tight and secure. Loose or poorly connected wires can result in distorted sound or even damage to the speakers.
By following these steps, you can confidently connect the speaker wire to your new speakers, setting the stage for an immersive audio experience in your car.
Connecting the wiring harness adapter to the car’s wiring
After successfully connecting the speaker wire to the new speakers, the next step is to connect the wiring harness adapter to the car’s wiring. This adapter serves as a bridge between the car’s existing wiring and the new speakers, allowing for a hassle-free installation. Here’s how you can do it:
- Determine the type of wiring harness adapter you will need for your specific car make and model. These adapters are typically vehicle-specific, so ensure you have the correct one.
- Locate the wiring harness connector in your car. This connector is usually found behind the factory stereo unit or in the kick panel area.
- Match the wire colors on the wiring harness adapter with the wire colors on the car’s wiring harness. Many wiring harness adapters feature a color-coded scheme to simplify the process.
- Connect each wire from the wiring harness adapter to the corresponding wire from the car’s wiring using crimp connectors or wire nuts. Ensure that the connections are secure and tight.
- Once all the wires are connected, gently tug on each connection to confirm they are firmly in place. Loose connections can lead to intermittent electrical issues or poor sound quality.
- Finally, tuck the excess wiring neatly into the dash area and secure any loose wires with zip ties or electrical tape. This will help prevent any rattling noises and maintain a clean installation.
By following these steps, you can safely and effectively connect the wiring harness adapter to your car’s wiring, ensuring a seamless integration of your new speakers into your car’s audio system.
Mounting The New Speakers:
Now that you have chosen the perfect speakers for your car audio system, it’s time to tackle the next step: mounting them. Properly mounting the new speakers is essential for optimal sound quality and performance. In this section, we will go over the necessary steps to attach and secure the speakers to the mounting brackets. Let’s get started!
Attaching the new speakers to the mounting brackets
First and foremost, make sure you have the appropriate mounting brackets that are compatible with your car and speakers. These brackets will act as the interface between the speakers and your car’s mounting locations. Here’s how to attach the new speakers to the mounting brackets:
- Place the speaker upside down on a clean and flat surface.
- Position the mounting bracket over the speaker, aligning the screw holes of the bracket with the ones on the speaker.
- Using the provided screws, insert them through the mounting bracket holes and tighten them securely into the screw holes on the speaker.
- Repeat this process for each speaker and ensure that they are securely attached to their respective mounting brackets.
Securing the speakers with screws
Once you have attached the speakers to the mounting brackets, it’s time to secure them to the car’s mounting locations using screws. Follow these steps to ensure secure mounting:
- Identify the mounting location in your car where the speakers will be installed. This is usually indicated by pre-existing screw holes or mounting brackets.
- Hold the speaker alongside the mounting location and align the screw holes of the speaker with those on the car.
- Using screws appropriate for your car’s mounting holes, insert them through the speaker’s screw holes and tighten them securely into the car’s mounting holes.
- Make sure to tighten the screws just enough to secure the speakers, but avoid overtightening as it may damage the speaker or the car’s mounting surface.
- Repeat this process for each speaker, ensuring they are all securely fastened.
By following these steps to mount the new speakers properly, you can enjoy enhanced sound quality and an immersive audio experience while driving. Now that the speakers are securely mounted, you’re one step closer to a top-notch car audio system!
Reattaching The Door Panel:
Once you have successfully installed the new speakers in your car, it’s time to reattach the door panel. This step is important to ensure that the panel is securely in place and that all the electrical connectors and window controls are properly connected. Follow these steps to reattach the door panel:
Aligning the panel with the door frame
To start, carefully align the panel with the door frame. Pay close attention to the alignment of any screw holes or clips on the panel with the corresponding holes on the door. This will ensure a proper fit and a secure attachment.
Reconnecting electrical connectors and window controls
Next, it’s time to reconnect the electrical connectors and window controls. Take a moment to identify each connector and match it to its corresponding socket. Carefully plug them in, making sure they are securely connected. If you had previously labeled the connectors before removing the panel, now is the perfect time to refer to those labels.
Additionally, don’t forget to reconnect the window controls if they were detached during the installation process. Make sure they are functioning properly by testing each window control button.
Fastening the panel with screws and clips
Once all the electrical connectors and window controls are reconnected, it’s time to fasten the panel back on the door. This can typically be done using a combination of screws and clips. Refer to the manufacturer’s instructions or the markings on the panel itself to determine the correct placement of each screw and clip.
Start by inserting and tightening the screws into their respective holes. Be careful not to overtighten, as this may damage the panel or the door. Next, locate the clips on the panel and align them with the corresponding slots on the door. Apply gentle pressure and ensure that each clip securely engages with the slot.
If you encounter any resistance, double-check that all the screws are properly tightened and that the clips are correctly aligned. With careful and diligent effort, the door panel should fit snugly in place.
In conclusion, reattaching the door panel is an important final step in installing new speakers in your car. By aligning the panel with the door frame, reconnecting all electrical connectors and window controls, and fastening the panel with screws and clips, you can ensure a secure and properly functioning door panel. Now that everything is in place, you’re ready to enjoy the enhanced audio experience in your car!
Testing The Sound Quality:
One of the most exciting parts of installing new speakers in your car is finally testing out the sound quality. After all, what’s the point of having new speakers if they don’t deliver an exceptional audio experience? In this section, we’ll walk you through the steps to ensure that your speakers are performing at their best.
Turning on the car stereo:
The first step in testing the sound quality is turning on the car stereo. Make sure the volume is set to a reasonable level before proceeding. Turning on the stereo allows you to hear the default sound settings and gives you a baseline to compare the new speakers against.
Checking for any distortion or imbalances in sound:
Once the stereo is on, carefully listen for any distortion or imbalances in sound. Distortion can occur when the speakers are pushed to their limits and can significantly impact audio quality. Test different genres of music to see if there are any specific frequencies or sounds that result in distortion.
Furthermore, pay attention to any imbalances in sound between different speakers. Each speaker should produce similar volume levels and clarity to ensure a consistent audio experience throughout the car. Use a balance and fade feature, if available, to adjust the audio distribution between speakers and identify any anomalies.
If you notice any distortion or imbalances, it might be necessary to make adjustments to the sound settings on your stereo or amplifier. Refer to the user manual for your specific audio system to learn how to access and adjust these settings.
Take note that the positioning of the speakers in your car can also affect the sound quality. It’s essential to mount the speakers securely and ensure they are facing the correct direction. Any obstructions or improper alignment can result in poor sound reproduction.
Overall, the testing phase allows you to assess the performance of your new speakers and make any necessary adjustments to optimize the sound quality. By carefully listening for distortion and imbalances, you can fine-tune your audio system to achieve the best possible listening experience. Don’t settle for subpar sound when you can enjoy crystal-clear audio with your new speakers!
Adjusting The Speaker Settings:
Balancing the sound between left and right speakers
One of the most important steps in adjusting the speaker settings in your car is to balance the sound between the left and right speakers. This ensures that the audio is evenly distributed and provides an immersive listening experience. To achieve this, follow these simple steps:
- Start by playing a song or an audio clip that has distinct left and right audio channels.
- Adjust the balance control on your car stereo. This control is usually represented by the letters “L” and “R” or the symbols ◁ and ▷. Gradually move the balance control towards the left or right until the audio sounds equally balanced.
- Pay close attention to any noticeable difference in sound output from each speaker. If one speaker is significantly louder or softer than the other, adjust the balance accordingly until the sound is evenly distributed.
- Continue to fine-tune the balance control until you are satisfied with the audio experience. It’s essential to achieve a precise balance to fully enjoy all aspects of your audio.
Adjusting the equalizer settings as desired
Another vital aspect of adjusting the speaker settings in your car involves tweaking the equalizer settings. The equalizer allows you to control the different frequency ranges, such as bass, mid-range, and treble, to customize the sound output according to your personal preferences. To adjust the equalizer settings effectively, keep the following tips in mind:
- Identify the equalizer controls on your car stereo. These controls may be accessible through an equalizer app or directly on the stereo interface.
- Listen to a variety of audio tracks that represent different genres and styles. This will help you understand the areas you may want to enhance or reduce.
- Experiment with each equalizer control to find the desired sound profile. For example, increasing the bass can add depth and richness to songs with heavy beats, while boosting the treble can enhance the clarity of vocals and instruments.
- Take note of any distortion or imbalance caused by extreme equalizer adjustments. It’s crucial to find a balance where the sound remains natural and pleasing to the ears.
- Save your customized equalizer settings for future use, so you don’t have to readjust every time you start your car.
By carefully balancing the sound between left and right speakers and adjusting the equalizer settings, you can optimize your car’s audio system to deliver an exceptional listening experience. Take the time to fine-tune these settings, and you’ll be rewarded with immersive sound quality that enhances your journey.
Enjoying The Enhanced Audio Experience:
Once you have successfully installed new speakers in your car, get ready to immerse yourself in a whole new world of audio enjoyment. The enhanced sound quality brings a breath of fresh air to your driving experience, allowing you to truly appreciate your favorite music, podcasts, and radio shows. In this section, we will explore two important aspects of maximizing your newfound audio experience in the car: appreciating the improved sound quality and making any necessary adjustments for optimal listening.
Appreciating the Improved Sound Quality in the Car
The moment you start your car and play your favorite tunes, you’ll instantly notice the remarkable difference in sound quality. The new speakers will effortlessly deliver crisp highs, rich lows, and a well-balanced midrange, ensuring that every note and beat is reproduced accurately.
With this improved sound quality, you’ll notice that the vocals sound more natural and pronounced, while the instruments become more defined and detailed. The bass response will also be significantly enhanced, providing a deep and punchy presence that adds an extra layer of excitement to your music.
Whether you’re a casual listener or a hardcore audiophile, the improved sound quality will undoubtedly bring a new level of enjoyment to your driving experience. From the subtle nuances in your favorite songs to the immersive audio experience during a thrilling podcast, every audio source will be brought to life like never before.
Making Any Necessary Further Adjustments for Optimal Listening Experience
While the new speakers alone will greatly enhance your audio experience, you may want to make additional adjustments to ensure optimal listening pleasure. Consider the following tips:
- Balance the audio: Use the balance control settings in your car stereo system to adjust the audio distribution between the left and right speakers. Find the perfect balance that suits your listening preference and the acoustics of your car.
- Fine-tune the equalizer: Experiment with the equalizer settings to fine-tune the audio frequencies according to your personal preference. Boost the bass for a more powerful low-end or increase the treble for crisper highs. The equalizer gives you the freedom to customize the sound to your liking.
- Minimize external noise: To fully immerse yourself in the enhanced audio experience, consider investing in soundproofing materials for your car. These materials help reduce external noise, allowing you to enjoy your music or podcasts without any distractions.
By making these adjustments, you’ll be able to further optimize the sound quality in your car, ensuring an audio experience that is tailored to your unique preferences and listening environment.
Frequently Asked Questions Of How To Install New Speakers In A Car
Can I Install New Car Speakers Myself?
Yes, you can install new car speakers yourself. It’s a simple process requiring basic tools and following instructions. It can save you money and let you customize your car’s audio system to your preferences. However, if you’re unsure or uncomfortable, professional installation is recommended for best results.
How Hard Is It To Install New Speakers In A Car?
Installing new speakers in a car can be fairly simple. Begin by disconnecting the old speakers and removing them. Then, connect the new speakers to the wiring harness using a crimp connector or solder. Finally, mount the new speakers into the designated areas.
Done!
How Do I Install New Car Speakers?
To install new car speakers, follow these steps:
- Disconnect the negative battery terminal.
- Remove the old speakers by unscrewing them and disconnecting the wiring.
- Connect the new speakers by matching the wires and screwing them into place.
- Reattach the battery terminal and test the new speakers for proper functionality.
- Enjoy your upgraded car audio system.
How Much Does It Cost To Install A New Speaker System In A Car?
The cost of installing a new speaker system in a car varies depending on the brand, quality, and complexity of the system. However, on average, it can range from $100 to $500 or more. It is best to consult with a car audio professional for an accurate estimate.
Conclusion
To sum it up, installing new speakers in your car can greatly enhance your audio experience on the road. By following the step-by-step guide provided in this blog post, you can easily replace your old speakers and enjoy crisp and clear sound while driving.
Don’t hesitate to explore different speaker options and find the perfect fit for your vehicle. So, what are you waiting for? Upgrade your car’s audio system today and enjoy the ultimate driving soundtrack.