Installing a navigator in a car involves connecting the device to the car’s power supply and mounting it securely on the dashboard or windshield. Additionally, the device needs to be synced with the car’s GPS system and updated with the latest maps and software for optimal performance.
By following these steps, you can easily install a navigator in your car and enjoy convenient and accurate navigation while driving. Car navigation systems have become an essential tool for modern-day drivers, helping them navigate unfamiliar roads and reach their destinations efficiently.
With the advancements in technology, installing a navigator in a car has become a hassle-free process, allowing drivers to enjoy the benefits of GPS navigation on the go. We will guide you through the steps to install a navigator in your car, ensuring a smooth and trouble-free installation process. Whether you are a beginner or an experienced driver, this guide will help you navigate the installation process seamlessly and get you on the road with your new navigator in no time. So, let’s dive in and explore the steps to install a navigator in your car.
Choosing The Right Navigator For Your Car
When it comes to installing a navigator in your car, choosing the right one is crucial to ensure a smooth and enjoyable driving experience. With a wide range of options available in the market, it can be overwhelming to make the right decision. However, by considering the compatibility and features, researching and comparing different options, as well as reading customer reviews and ratings, you can narrow down your choices and find the perfect navigator for your car.
Consider the compatibility and features
Before purchasing a navigator, it is important to consider its compatibility with your car’s make and model. Some navigators may be specifically designed for certain car brands, while others offer universal compatibility. Reading the product description or consulting with the manufacturer can help you determine if the navigator is suitable for your car.
In addition to compatibility, it is crucial to evaluate the features of the navigator. Look for features that align with your needs and preferences. For example, if you often drive in remote areas, a navigator with offline map capabilities would be ideal. On the other hand, if you are a tech-savvy driver, a navigator with smartphone integration and voice control features might be more suitable.
Research and compare different navigator options
Once you have identified your compatibility requirements and desired features, it is time to research and compare different navigator options. Start by browsing online marketplaces and car accessory stores to explore the available models. Pay attention to the specifications, design, and user interface of each navigator.
Create a list of potential options and then dive deeper into each product. Read customer reviews and ratings to get insights into the performance and reliability of the navigators. Look for reviews from customers who have similar car models to yours, as their experiences can give you a better understanding of how the navigator will work in your specific vehicle.
Read customer reviews and ratings
When it comes to making any purchase, customer reviews and ratings are a valuable source of information. They provide real insights into the pros and cons of the product, as well as the overall customer satisfaction. Before finalizing your choice, spend some time reading customer reviews and ratings of the navigators you are considering.
Pay attention to any common issues or recurring praises mentioned by multiple customers. This will help you identify any potential drawbacks or advantages of the navigators. Keep in mind that while reviews can be helpful, opinions can vary, so consider multiple sources to get a fair assessment.
In conclusion, choosing the right navigator for your car is essential for a successful installation. By considering the compatibility, and features, researching and comparing different options, and reading customer reviews and ratings, you can make an informed decision that will enhance your driving experience and navigation capabilities.

Preparing Your Car For Installation
Before you can install a navigator in your car, there are a few important steps you need to take to ensure a smooth and successful installation. Preparing your car for installation involves gathering all the necessary tools and equipment, ensuring your car’s battery is fully charged, and cleaning the mounting location on the car’s dashboard.
Gather all the necessary tools and equipment
To begin the installation process, it’s essential to gather all the tools and equipment you’ll need. This will help you complete the installation efficiently and avoid any unnecessary delays. Make sure to have the following items on hand:
| Tools | Equipment |
|
|
Ensure your car’s battery is fully charged
Having a fully charged battery in your car is crucial during the installation process. It provides the necessary power to connect and set up the navigator without any interruptions. Before starting the installation, use a portable battery charger or plug your vehicle into a power source to ensure that the battery is charged to its full capacity. This will prevent any issues during the installation and help maintain the stability of the car’s electrical system.
Clean the mounting location on the car’s dashboard
Before attaching the mounting bracket for the navigator, it’s important to clean the mounting location on your car’s dashboard. This helps ensure a secure and stable installation. Start by wiping the area with a clean, lint-free cloth to remove any dust or debris. Then, use a mild soap solution to gently clean the surface, paying close attention to any sticky residue or dirt. Once the dashboard is clean and dry, you can proceed with attaching the mounting bracket according to the manufacturer’s instructions.
By following these simple steps to prepare your car for installation, you’ll be well on your way to enjoying the convenience and functionality of a navigator in your vehicle. Remember, taking the time to gather the necessary tools and equipment, ensuring a fully charged battery, and cleaning the mounting location will help ensure a successful and hassle-free installation process.
Step-By-Step Installation Process
Installing a navigator in your car can greatly enhance your driving experience by providing you with clear and accurate directions. With a few simple steps, you can have a navigation system up and running in no time. In this guide, we will walk you through the step-by-step installation process, from gathering the required components to mounting the navigator securely on the dashboard.
Step 1: Gathering the required components
The first step in installing a navigator in your car is to gather all the necessary components. These typically include:
- The navigator unit
- Mounting bracket or suction cup mount
- Power cable
- USB cable for updates and syncing
Make sure you have all these components ready before starting the installation process.
Once you have gathered all the required components, proceed to the next step.

Step 2: Positioning the navigator on the dashboard
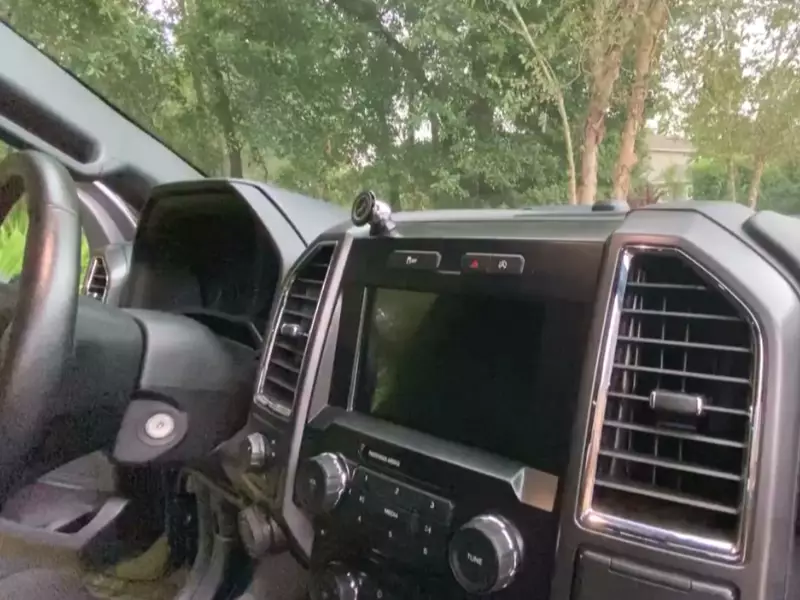
Next, you need to find an appropriate position on the dashboard to place the navigator. Select an area that provides easy visibility and accessibility while driving. A common spot is near the center of the dashboard, directly in line with your line of sight.
Use the mounting bracket or suction cup mount to secure the navigator in your desired position. Ensure that the mount is firmly attached to the dashboard to prevent any movement or vibrations while driving.
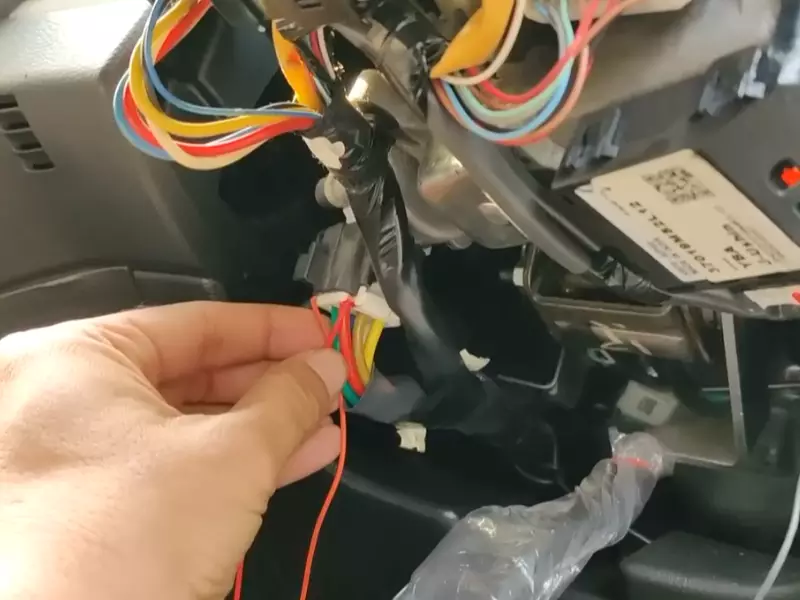
Step 3: Connecting the navigator to the car’s power supply
Once the navigator is in position, it’s time to connect it to the car’s power supply. Most navigators come with a power cable that needs to be plugged into a power outlet in your car.
Locate the cigarette lighter or accessory power outlet in your car and insert the power cable into it firmly. Make sure the connection is secure to ensure uninterrupted power supply to your navigator.
Step 4: Adjusting the angle and position of the navigator
With the navigator connected to the power supply, you can now adjust the angle and position for optimal viewing. Tilt the navigator’s screen to a comfortable angle that provides clear visibility without causing any distractions.
Some navigators also allow you to customize the orientation to either landscape or portrait mode as per your preference. Experiment with different angles and orientations until you find the most comfortable setting for you.
Step 5: Mounting the navigator securely on the dashboard
Once you have finalized the position and angle of the navigator, it’s important to mount it securely on the dashboard. This step ensures that the navigator remains in place even during sudden movements or vibrations.
Make sure the mounting bracket or suction cup is tightly secured to the dashboard and double-check if there are any additional screws or locking mechanisms that need to be tightened.
Test the stability of the mount by gently tapping on the navigator. If it doesn’t move or wobble, then it is securely mounted on the dashboard.
Congratulations! You have successfully installed the navigator in your car. Enjoy hassle-free navigation during your journeys!
Testing And Troubleshooting
Testing and Troubleshooting
When it comes to installing a navigator in your car, ensuring its proper functionality is essential. After securing all the connections, it is crucial to test the navigation system and troubleshoot any potential issues that may arise. This section will guide you through the process of testing and troubleshooting your car’s navigator. Let’s get started!
Ensure all the connections are properly secured
Before proceeding with the testing phase, it is important to double-check that all the connections of your car’s navigator are properly secured. This includes ensuring that the power cables, antenna connections, and data cables are firmly plugged in. Loose connections can lead to a malfunctioning navigation system, so ensure that everything is securely connected.
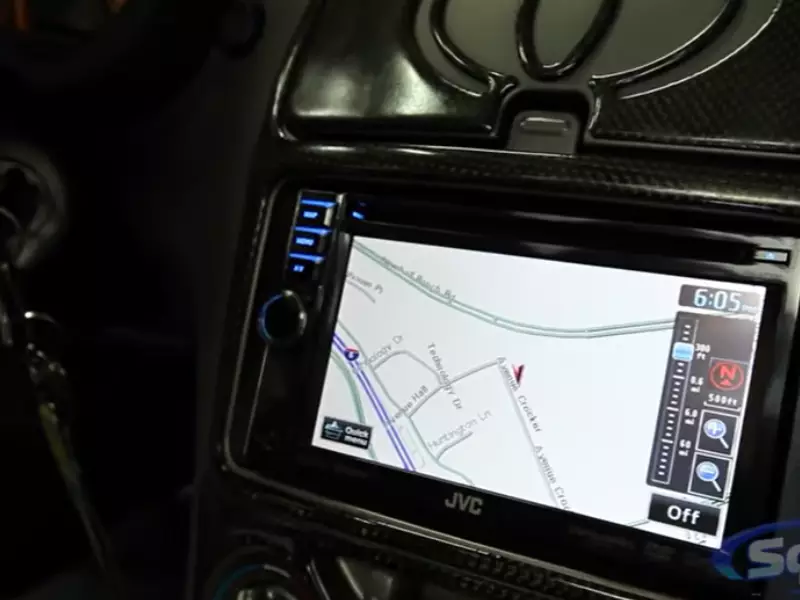
Test the functionality of the navigator
Once you have secured all the connections, it’s time to test the functionality of your car’s navigator. Below are some steps to help you effectively test it:
- Power on the navigator by turning on your car’s ignition.
- Check if the navigation system boots up properly and displays the interface on the screen.
- Try entering a destination using the touchscreen or control buttons to ensure that the input is registered accurately.
- Verify if the voice-guided directions are audible and clear. Adjust the volume if necessary.
- Test the responsiveness of the touchscreen by swiping through different menus and options.
By following these steps, you will be able to assess whether your car’s navigator is functioning as expected or if any issues need to be addressed.
Troubleshoot common issues
Despite your best efforts, it’s possible to encounter some common issues while testing your car’s navigator. Here are a few troubleshooting techniques you can employ:
Connection problems
If you notice that the navigator is not powering on or the screen remains blank, it could indicate a connection problem. Double-check all the connections once again, ensuring they are secure. If the issue persists, consider consulting a professional technician to diagnose and fix the problem.
GPS signal issues
In some instances, your car’s navigator may have trouble acquiring a GPS signal. If this occurs, try the following steps:
- Ensure the navigator is in an open area with a clear view of the sky.
- Verify that the antenna is properly connected and not obstructed by any objects.
- Update the navigator’s software to the latest version, as it may include improvements in GPS signal acquisition.
- If all else fails, contact the manufacturer or the navigator’s support team for further assistance.
By troubleshooting these common issues, you can enhance the performance and reliability of your car’s navigator. Enjoy hassle-free navigation on your journeys!
In conclusion, testing and troubleshooting your car’s navigator is crucial to ensure optimal performance. By following the steps outlined above, you can confidently install and use your navigator, troubleshooting any issues that may arise along the way. Happy navigating!
Additional Tips And Recommendations
When it comes to installing a navigator in your car, there are a few additional tips and recommendations to keep in mind. These small steps can make a big difference in ensuring that your navigator functions optimally and lasts for a long time. Below, we have listed some essential tips and recommendations to help you get the most out of your navigator installation.
1. Updating the Navigator’s Software and Maps
Regularly updating your navigator’s software and maps is crucial to ensure accurate directions and access to the latest features. To update the software and maps, follow these steps:
- Connect your navigator to your computer using the provided USB cable.
- Visit the manufacturer’s website and download the latest software and map updates for your specific model.
- Once downloaded, open the software on your computer and follow the on-screen instructions to install the updates onto your navigator.
- Disconnect the navigator from the computer once the installation is complete, and ensure that the updates have been successfully applied.
2. Using a Screen Protector to Protect the Navigator’s Display
To keep your navigator’s display in pristine condition and protect it from scratches, fingerprints, and smudges, consider using a high-quality screen protector. Here’s why it’s beneficial:
- A screen protector acts as a protective barrier, preventing damage caused by daily use and exposure to elements such as dust and debris.
- It maintains the clarity and visibility of the display, ensuring a smooth and seamless navigation experience.
- Applying a screen protector is simple and hassle-free. Follow the manufacturer’s instructions to carefully clean the screen and align the protector correctly.
- By using a screen protector, you can extend the lifespan of your navigator’s display and avoid unnecessary repairs or replacements.
3. Setting Up Voice-Guided Navigation
One of the most convenient features of modern navigators is voice-guided navigation. Setting up this feature will allow you to receive turn-by-turn directions without taking your eyes off the road. Here’s how to set up voice-guided navigation:
- Access the settings menu on your navigator and locate the “Navigation” or “Voice Settings” option.
- Select your preferred language for voice guidance.
- Choose the desired volume level for voice prompts to ensure they are clear and audible.
- Enable any additional features or settings related to voice guidance, such as lane assistance or speed limit alerts, if available.
- Save the changes and exit the settings menu. Your navigator is now ready to provide voice-guided navigation.
4. Keeping the Navigator Clean and Free from Dust or Debris
To maintain the optimal performance of your navigator, it’s essential to keep it clean and free from dust or debris. Here are some tips to follow:
- Regularly wipe the screen with a soft, lint-free cloth to remove fingerprints, smudges, and dust.
- Avoid using harsh chemicals or abrasive materials as they can damage the display or its protective coating.
- If necessary, use a small amount of water or a specialized electronics cleaning solution on the cloth to clean stubborn marks or stains.
- Ensure that the navigator is securely mounted to prevent excessive vibrations or movement that may cause internal damage.
- Store the navigator in a safe and dust-free space when not in use, such as a dedicated compartment or protective case.
By following these additional tips and recommendations, you can maximize the functionality and lifespan of your navigator. Enjoy accurate and hassle-free navigation wherever the road takes you!
Frequently Asked Questions Of How To Install Navigator In Car
Can I Install A Navigation System In My Car?
Yes, you can install a navigation system in your car. It’s a popular feature that provides directions and helps you navigate on the road.
How Much Does It Cost To Install A Navigation System In My Car?
The cost to install a navigation system in your car varies, depending on the brand and model. It can range from $200 to $1,500, depending on the features and complexity. Expert installation may add to the cost but ensures proper functioning.
Can You Put A Navigation System In An Old Car?
Yes, you can install a navigation system in an old car. It’s possible to add aftermarket options to upgrade your car’s technology and enjoy the convenience of GPS navigation.
Is It Worth Getting A Navigation System In A Car?
Yes, it is worth getting a navigation system in a car as it helps with accurate and efficient route guidance, saving time and reducing stress. It ensures you never get lost, providing real-time directions for a hassle-free travel experience.
Conclusion
To wrap up, installing a navigator in your car can greatly enhance your driving experience by providing accurate and convenient directions. By following the step-by-step guide mentioned in this blog post, you can easily install a navigator in your car without any hassle.
So, why wait? Upgrade your car’s navigation system and enjoy stress-free travel to your destinations. Happy driving!