To install interior car lights: First, choose the type of lights you want, such as LED or neon. Next, find a suitable location inside the car to mount the lights.
Then, connect the power source to the lights, making sure to follow the manufacturer’s instructions. Finally, test the lights to ensure they are working properly. Introducing interior car lights can enhance the ambiance and provide a stylish touch to your vehicle’s interior.
Whether you want to add a subtle glow or create a vibrant lighting display, installing interior car lights is a relatively simple process. We will guide you through the step-by-step process of installing interior car lights, helping you transform your car’s interior into a captivating space. So let’s get started and bring the wow factor to your rides with custom lighting effects.
Gather The Necessary Tools And Materials
Before you begin installing interior car lights, it’s essential to gather all the necessary tools and materials. Being well-prepared will ensure a smooth installation process and save you from unnecessary setbacks. In this section, we will discuss the key items you need to have in order to proceed with installing interior car lights.
Choosing the Right Car Lights for Your Interior
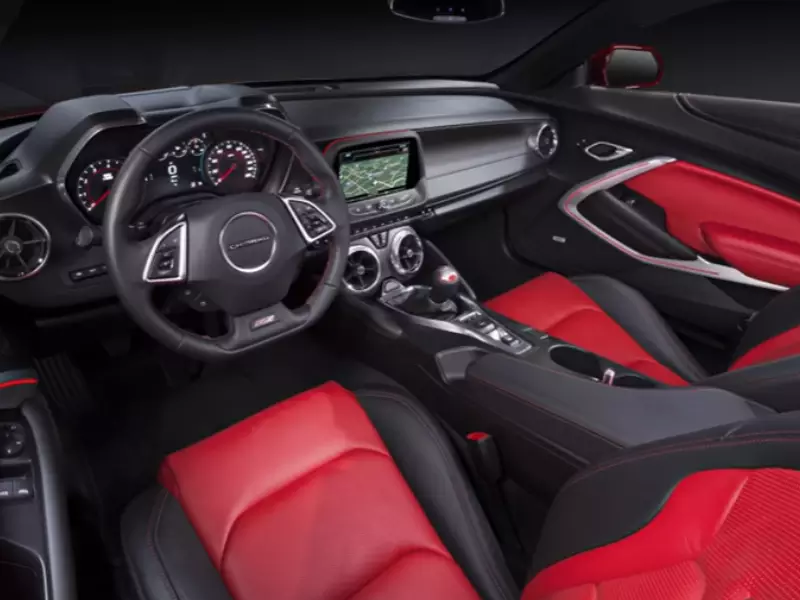
The first step in gathering tools and materials is to choose the right car lights for your interior. There are various options available in the market, so it’s important to consider your specific needs and preferences. You can opt for LED strip lights, dome lights, floor lighting, or any other type of lighting that suits your style. Make sure to select lights that are compatible with your car’s voltage and size.
Tools Needed for Installation
Once you have decided on the type of car lights you want, it’s time to gather the tools needed for installation. Here is a list of essential tools:
| Tool | Description |
|---|---|
| Screwdriver | A screwdriver set with different heads will be required to remove panels and access wiring. |
| Trim Removal Tools | These tools are designed to help you remove the interior trims without causing damage. |
| Wire Cutter | A wire cutter will be needed to trim excess wires and ensure a clean and tidy installation. |
| Electrical Tape | Electrical tape is crucial for securing connections and preventing wire damage. |
| Adhesive | You may need adhesive to mount the lights securely in your chosen locations. |
Make sure to have these tools ready before you start the installation process. Having everything within reach will save you time and frustration.
By gathering the necessary tools and materials, you are setting yourself up for a successful installation of interior car lights. Once you have everything ready, it’s time to proceed with the installation process, which we will cover in the next section.
Preparing Your Car For Installation
Park Your Car in a Safe and Well-Lit Area
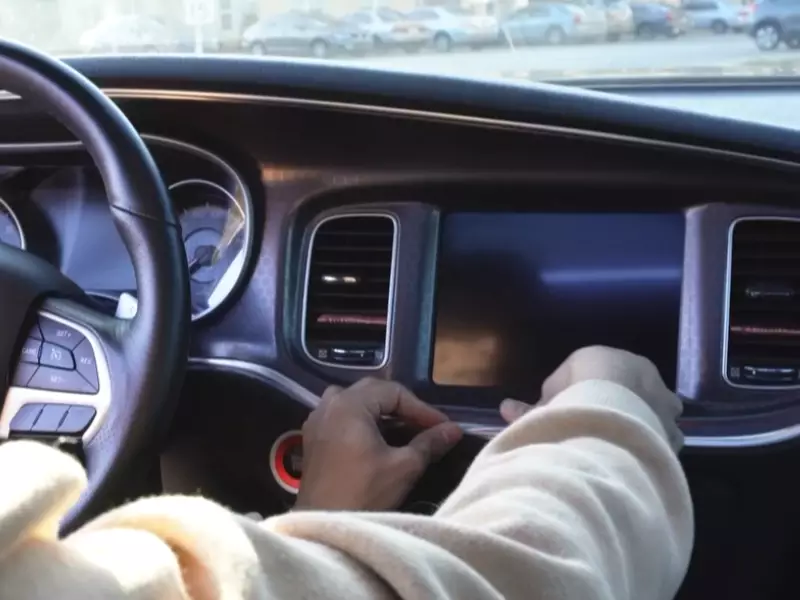
Before you begin installing interior car lights, it is crucial to park your car in a safe and well-lit area. This will not only ensure your own security but also make the installation process easier. Look for a designated parking space or a flat surface that provides ample space to move around your vehicle. A well-lit area will enable you to clearly see the interior of your car and make precise connections.
Disconnect the Car Battery
Removing Existing Interior Trims And Panels
Before installing interior car lights, you need to remove the existing trims and panels in your vehicle. This will provide access to the necessary areas where the lights will be installed. By following these steps, you can ensure a smooth and hassle-free installation process.
Determine the Location for Installing the Lights
First, determine the location where you want to install the interior car lights. This can be in various areas such as the footwell, doors, dashboard, or ceiling. Consider the purpose of the lights and choose a location that will enhance the overall ambiance of your vehicle.
Removing Door Panels and Trims
To remove the door panels and trims, follow these steps:
- Start by identifying the screws or clips securing the door panel to the frame.
- Using a screwdriver or trim removal tool, carefully remove the screws or clips. Be gentle to avoid damaging the panel or trim.
- Once the screws or clips are removed, gently pull the door panel away from the frame. You may need to apply a bit of force, but be cautious not to break any plastic clips.
- Disconnect any electrical connectors attached to the door panel, such as power window switches or door locks, by detaching the connectors.
- Set the door panel aside in a safe place.
Removing Dashboard Trims
When removing dashboard trims, follow these steps:
- Use a trim removal tool or a flathead screwdriver covered with a cloth to avoid scratching the surface.
- Locate the screws or clips securing the dashboard trims in place.
- Carefully remove the screws or unclip the trims by applying gentle pressure with your tool.
- Once the screws or clips are removed, gently pry the trims off the dashboard.
- Be cautious not to disconnect any cables or wires attached to the trims, such as those for the air conditioning controls or radio.
- If necessary, label or take note of the cable connections to ensure proper reinstallation later.
By following these steps, you can successfully remove the existing interior trims and panels to prepare for the installation of your interior car lights. Remember to keep all screws, clips, and trims in a safe and organized manner, so you can easily reinstall them at a later stage.
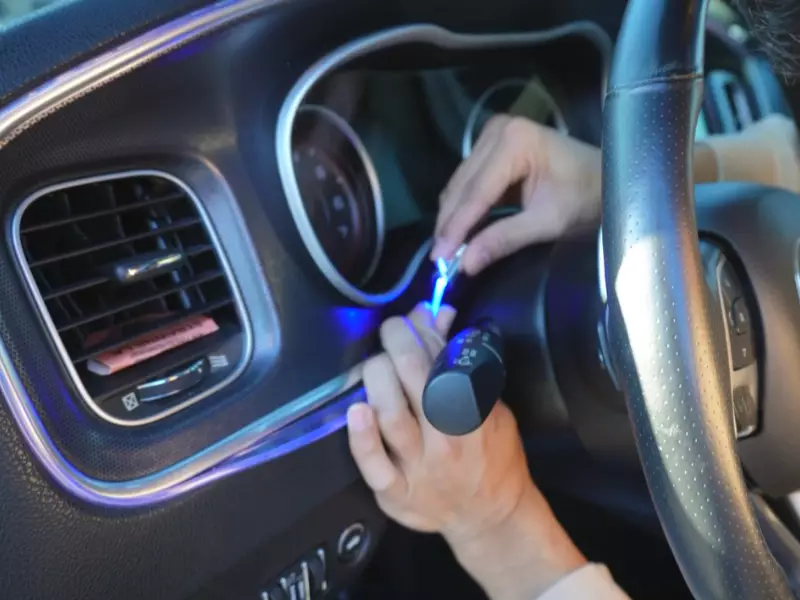
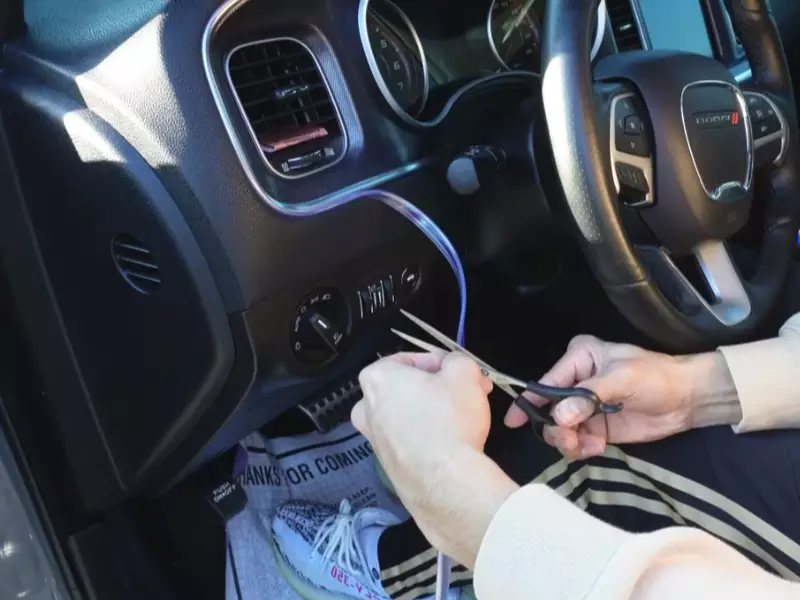
Wiring And Connecting The Lights
Once you have planned the installation of your interior car lights and gathered all the necessary materials, it’s time to tackle the wiring and connecting process. This step involves determining the most suitable route for the wiring, connecting the wires to the power source, and securely hiding them for a clean and professional finish.
Planning the Wiring Route
Before you begin routing the wires, take some time to plan out the best path for them. This will ensure a neat and organized installation as well as reduce the risk of any damage to the wires. Here are a few steps to follow when planning the wiring route:
- Start by identifying the areas where you want to place the interior car lights. This will help you determine the length of wire required and the best path to connect them.
- Consider the existing wiring in your car and try to follow the same routes whenever possible. This will make the installation process easier and minimize the need for modifications.
- If you need to access power from the car’s battery, plan your route accordingly, making sure to avoid any areas that may interfere with other electrical components of the vehicle.
- Take into account any potential obstacles or obstructions along the way, such as sharp edges or moving parts, and plan your wiring route to avoid them.
By carefully planning the wiring route, you can ensure a smooth and hassle-free installation.
Connecting the Wires to the Power Source
Now that you have determined the wiring route, it’s time to connect the wires to the power source. This step will vary depending on the type of interior car lights you have and whether you are connecting them to the car’s battery or an auxiliary power source.
To connect the wires to the power source, follow these steps:
- Identify the power source you will be using. This can be the car’s battery or an auxiliary power adapter.
- Prepare the wires by stripping a small section of insulation from the ends, exposing the metal conductors.
- Connect the positive (+) wire from the lights to the positive terminal of the power source and the negative (-) wire to the negative terminal. Use appropriate connectors, such as crimp connectors or soldering, to ensure a secure and reliable connection.
- Double-check the connections to make sure they are secure and properly insulated to prevent any short circuits.
Remember to follow the manufacturer’s instructions and take any necessary safety precautions when connecting the wires to the power source.
Securing and Hiding the Wires
Once the wires are connected to the power source, it’s essential to secure and hide them for a clean and professional-looking installation. This step not only ensures a neat appearance but also prevents any potential hazards or damage to the wires.
Here are a few tips for securing and hiding the wires:
- Use adhesive-backed cable clips or zip ties to secure the wires along the planned wiring route.
- Avoid running the wires near any heat sources or moving parts that could cause damage.
- If necessary, use wire loom or conduit to protect the wires from any potential abrasion or exposure.
- Whenever possible, tuck the wires behind existing panels or trim pieces to keep them hidden from view.
By properly securing and hiding the wires, you can achieve a clean and professional-looking installation while also ensuring the safety and longevity of your interior car lights.
With the wiring and connecting process complete, your interior car lights are ready to shine brightly and enhance the ambiance of your vehicle’s interior. Enjoy the enhanced visual appeal, convenience, and functionality that these lights can bring to your driving experience!
Mounting The Interior Lights
Installing interior car lights can dramatically enhance the ambiance and style of your vehicle. Not only do these lights add a touch of personalization, but they also provide you with improved visibility inside the car at night. One of the important aspects of the installation process is the proper mounting of the interior lights. In this section, we will explore different mounting options for various areas of the car, including the footwell and dashboard.
Mounting Options for Different Areas of the Car
When it comes to mounting interior lights in your car, you need to consider the specific areas where you want to install them. Depending on the location, you have different options for mounting the lights. Here are some of the common mounting options:
Installing Lights in the Footwell
Mounting lights in the footwell is a popular choice for many car owners. This provides a soft and subtle glow that enhances the overall interior ambiance. To install lights in the footwell, follow these simple steps:
- Locate the desired position in the footwell where you want to mount the lights. This is typically on the driver and passenger side.
- Clean the mounting surface to ensure proper adhesion. Use a mild cleaning agent to remove any dirt or grime.
- Apply double-sided adhesive tape to the back of the light strip.
- Peel off the protective backing from the double-sided adhesive tape and press the light strip firmly onto the mounting surface in the footwell.
- If necessary, secure the light strip further using zip ties or clips to prevent it from coming loose.
- Repeat the process for the opposite side of the footwell.
Remember, it’s important to position the lights in a way that they are not obstructing the driver’s foot movement, ensuring safety while driving.
Installing Lights on the Dashboard
The dashboard is another area where you can install interior lights to create an eye-catching effect. Here’s a step-by-step guide on mounting lights on the dashboard:
- Select the desired location on the dashboard where you want to mount the lights. Consider placing them in areas that will provide sufficient illumination without causing distractions.
- Clean the mounting surface using a mild cleaning agent to remove any dirt or dust.
- Apply double-sided adhesive tape to the back of the light strip.
- Peel off the protective backing from the double-sided adhesive tape and firmly press the light strip onto the chosen spot on the dashboard.
- Ensure that the adhesive has properly adhered by applying gentle pressure for a few seconds.
- Conceal the wires by tucking them into the gaps or using adhesive cable clips.
- If needed, connect the lights to a power source using a suitable connector or adapter.
Installing lights on the dashboard adds a stylish touch to the interior while providing functional lighting options.
Testing And Adjusting The Lights
Once you have successfully installed the interior car lights, the next step is to test and adjust them to ensure they are working properly and meet your desired intensity and color preferences. In this section, we will guide you through the process of reconnecting the car battery, testing the lights, and making adjustments for intensity and color.
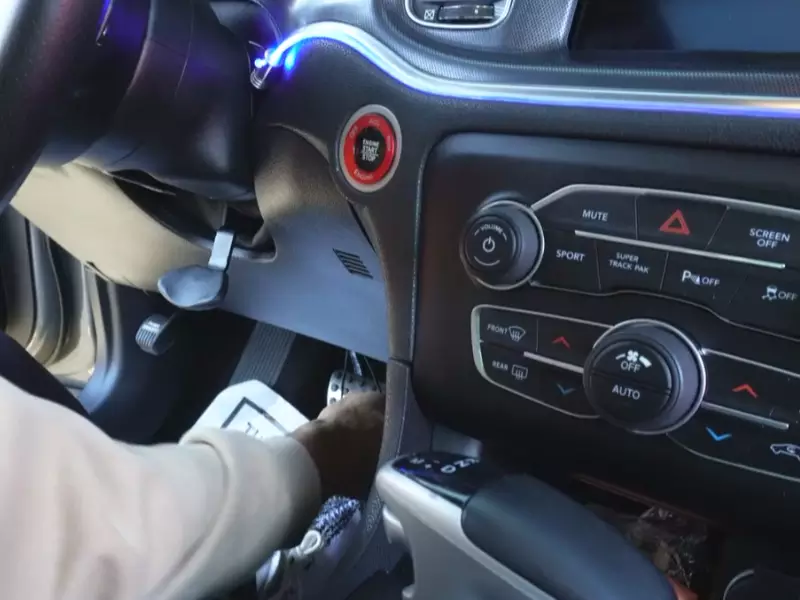
Reconnecting the Car Battery
Before you can test the interior car lights, you’ll need to reconnect the car battery if you disconnected it during the installation process. Start by locating the positive and negative terminals of your car battery. The positive terminal is usually marked with a plus sign (+) or the letters “POS,” while the negative terminal is usually marked with a minus sign (-) or the letters “NEG.”
If you have disconnected the battery, begin by carefully attaching the positive cable or connector to the positive terminal and tightening it securely with a wrench or pliers. Then, proceed to attach the negative cable or connector to the negative terminal and tighten it as well. Be sure to double-check that both connections are secure to ensure the proper functioning of the interior car lights.
Testing the Lights
With the car battery reconnected, it’s time to test the lights to ensure they are functioning correctly. Start by turning on your car’s ignition and activating the interior lights. Observe each individual light and check for any flickering, dimness, or irregularities in their brightness. Make sure to test all the different colors and settings of the lights if applicable.
If you notice any issues during the testing phase, go back and recheck the installation to ensure all connections are secure and properly aligned. It’s also worth checking the wiring harness and any additional controls or switches that came with the interior car lights.
Making Adjustments for Intensity and Color
Once you have tested the lights and ensured they are working correctly, you can make adjustments to their intensity and color to suit your preferences. Many interior car lights come with adjustable settings, allowing you to customize the brightness and color tone.
To adjust the intensity, refer to the user manual provided with your interior car lights. It will guide you through the process of increasing or decreasing the brightness levels. Make small adjustments and evaluate the effect until you achieve the desired level of brightness without causing discomfort or distracting glare while driving.
For adjusting the color, some interior car lights offer a wide range of options. Use the controls or switches provided to cycle through the color spectrum and find the hue that best suits your taste. Experiment with different colors and combinations until you find the perfect ambiance for your car’s interior.
Remember, when making adjustments, be mindful of any local laws or regulations regarding the use of interior car lights. Some jurisdictions have restrictions on specific colors or intensities that could be considered distracting or dangerous for other drivers on the road.
In conclusion, testing and adjusting your interior car lights is an essential step to ensure they are functioning properly and meet your desired intensity and color preferences. By following the steps provided in this section, you can confidently enjoy the enhanced ambiance and personalization that interior car lights bring to your driving experience.
Securing And Reassembling The Trims And Panels
Once you have successfully installed the interior car lights and completed the wiring process, it’s time to secure and reassemble the trims and panels. This final step will give your car’s interior a polished and professional finish. In this section, we will guide you through securing wires and hiding excess wiring, reattaching door panels and trims, and reinstalling dashboard trims.
Securing Wires and Hiding Excess Wiring
Before reattaching any trims or panels, it is crucial to secure the wires and ensure that no excess wiring is visible. This will not only enhance the aesthetics of your car but also prevent any potential hazards. Here’s how you can secure wires and hide excess wiring:
- Tape or use zip ties to bundle the wires together neatly.
- Utilize adhesive clips or cable clamps to secure the wires along the existing wiring harness or any metal surface.
- When running wires through tight spaces or crevices, make sure to protect them with wire loom or split tubing.
- If there are any visible excess wires, neatly coil them and tuck them away behind trims or panels.
Reattaching Door Panels and Trims
Now that the wires are secured, it’s time to reattach the door panels and trims.
- Line up the clips or fasteners on the door panel with the corresponding holes on the door frame.
- Gently press the panel against the frame, ensuring that all clips engage and the panel is flush.
- Using a trim tool or your hands, apply even pressure along the edges of the panel to snap it back into place.
- Repeat the process for each door panel, ensuring they are all securely attached.
Reinstalling Dashboard Trims
The final step in securing and reassembling the trims and panels is reinstalling the dashboard trims.
- Carefully align the dashboard trim piece with the corresponding slots or clips on the dashboard.
- Gently press the trim piece into place, ensuring that it fits snugly and aligns with the surrounding trims.
- Using a trim tool or your hands, apply gentle pressure along the edges to secure the trim.
- Repeat the process for each dashboard trim, making sure they are all reinstalled correctly.
With the trims and panels securely reassembled, your interior car lights installation is complete. Take a moment to admire your work, and enjoy the enhanced ambiance and style that the lights bring to your car’s interior.
Maintaining And Troubleshooting Interior Car Lights
Regular cleaning and maintenance are important to ensure that your interior car lights function optimally. Additionally, being aware of common issues and troubleshooting tips can help you resolve any problems that may arise. In this section, we will explore how to keep your interior car lights clean and well-maintained, as well as provide some tips to troubleshoot any potential issues.
Regular Cleaning and Maintenance
Keeping your interior car lights clean is essential for maintaining their performance and longevity. Regular cleaning can prevent dust buildup and ensure that the lights illuminate your car’s interior effectively. Here are some simple steps to help you clean and maintain your interior car lights:
- Start by turning off the vehicle’s ignition to avoid any electrical mishaps.
- Gently remove the light covers or lenses. This can usually be done by applying slight pressure or twisting them counterclockwise.
- Use a soft cloth or sponge with mild soap and water to wipe away any dirt or grime from the covers or lenses. Avoid using abrasive cleaners or solvents that could damage the surface.
- Rinse the covers or lenses thoroughly with clean water to remove any soap residue.
- Dry the covers or lenses completely before reinstalling them.
- Once they are dry, carefully align the covers or lenses and secure them by twisting them clockwise or applying slight pressure.
- Turn on the vehicle’s ignition to test if the lights are working properly.
- If you notice any flickering or dimness, repeat the cleaning process or consider replacing the bulbs for optimal performance.
By following these steps and making regular cleaning and maintenance a habit, you can ensure that your interior car lights stay in top condition.
Common Issues and Troubleshooting Tips
Despite regular maintenance, you may encounter some common issues with your interior car lights. Understanding these problems and having some troubleshooting tips on hand can make it easier to resolve them. Here are a few common issues and some tips to help you troubleshoot:
| Issue | Troubleshooting Tip |
|---|---|
| Blown Fuse | Check the fuse box and replace any blown fuses with new ones of the same rating. Be sure to consult your vehicle’s manual for the correct fuse specifications. |
| Loose Wiring | Inspect the wiring connections behind the lights. If you find any loose or disconnected wires, carefully reconnect them to restore functionality. |
| Dim or Flickering Lights | Check for loose light bulb connections. If the connections are secure, try replacing the bulbs with new ones to improve brightness. |
| No Lights Illuminating | Ensure that the lights are switched on and that the dimmer switch is not set to the lowest level. If there are still no lights, consider checking the fuse, and wiring, or consulting a professional for assistance. |
These troubleshooting tips can help you address common issues with your interior car lights. However, if you encounter more complex problems or are unsure how to proceed, it is always advisable to consult a professional automotive technician.
Frequently Asked Questions For How To Install Interior Car Lights
Can You Add Lights To The Inside Of Your Car?
Yes, you can add lights to the inside of your car.
How Do You Install Car Light Strips?
To install car light strips, follow these steps: 1. Prepare the car by cleaning the desired area for installation. 2. Measure and cut the light strip to fit the desired length. 3. Peel off the backing of the adhesive tape and carefully attach the strip to the car surface.
4. Secure the strip in place by gently pressing it down. 5. Connect the power source and test the lights to ensure they are working properly.
How Much Does It Cost To Install Ambient Lighting In Car?
The cost of installing ambient lighting in a car varies, but it can range from $100 to $400. Prices depend on factors like the type of lighting, complexity of the installation, and the brand selected. It’s recommended to consult a professional for an accurate quote specific to your vehicle.
Where Do You Wire Led Lights In A Car?
Wire LED lights in a car by connecting them to the vehicle’s power supply. Locate a suitable 12-volt power source, such as the fuse box or the battery terminals. Use insulated wire and connectors to make the necessary connections. Ensure proper grounding and secure all connections.
Conclusion
Transform your car’s interior with the installation of interior car lights. By following these step-by-step instructions, you can bring a touch of style and functionality to your vehicle. From choosing the right lights to wiring them properly, the installation process is made simple.
So, don’t wait any longer, enhance your driving experience with custom interior lighting that reflects your personality and taste. Get started today and enjoy a well-lit, visually appealing car interior like never before.