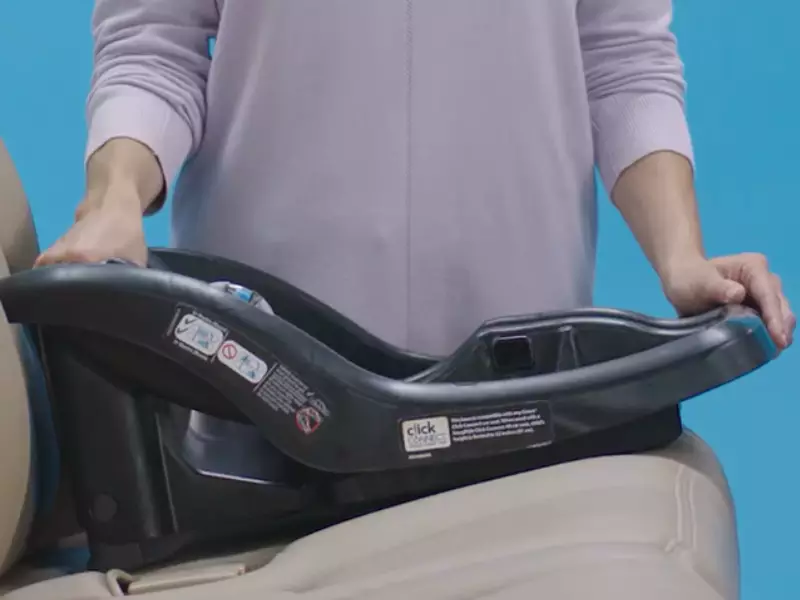
To install an infant car seat with a base, first position the base securely on the car’s rear seat using the seat belt or LATCH system. Then attach the infant car seat to the base, ensuring a tight fit by pressing firmly down and checking for no more than one inch of movement in any direction.
Transporting your baby safely in a car requires the correct installation of an infant car seat. Installing an infant car seat with a base provides added stability and ease of use. By following a few simple steps, you can ensure that your little one is securely fastened in the car, giving you peace of mind while on the road.
In this guide, we will walk you through the precise process of installing an infant car seat with a base, so you can confidently safeguard your baby during car travels. With proper installation, you can rest assured that your infant will be well-protected in case of any unexpected events.

Factors To Consider When Selecting An Infant Car Seat
When it comes to ensuring the safety of your little one while traveling, nothing is more important than choosing the right infant car seat. With so many options available on the market, it can be overwhelming to know where to start. However, by considering a few key factors, you can make an informed decision and find the perfect car seat for your baby.
Safety features
Safety is paramount when selecting an infant car seat for your precious bundle of joy. Look for seats that are equipped with essential safety features, such as a five-point harness system, adjustable straps, and side-impact protection. These features ensure that your baby is securely strapped in and protected in the event of a crash or sudden impact.
Ease of installation
Installing an infant car seat should be a straightforward process, as your main focus should be on your baby’s safety rather than struggling with complicated installations. Look for car seats that feature an easy installation system, such as a latch system or clear and straightforward instructions that guide you through the installation process step by step. A car seat that can be installed quickly and correctly will give you peace of mind and save you valuable time.
Compatibility with your vehicle
Before making a final decision, it is crucial to ensure that the infant car seat you choose is compatible with your vehicle. Not all car seats fit securely in all vehicles. Therefore, it is vital to check the car seat’s compatibility with your specific make and model of car. Some car seats may also come with additional base options that offer secure installation and flexibility when moving the seat between vehicles. Take into account the dimensions of your car and consider compact car seat models if space is a concern.
Weight and size limits
Infant car seats have weight and size limits, and it is important to choose a seat that meets your baby’s current size and weight requirements. Each car seat will have specifications regarding the minimum and maximum weight and height limits, so be sure to choose a seat that your baby can safely and comfortably use. Additionally, consider the future growth of your baby and whether the car seat will accommodate their changing needs.
Reading The Car Seat Manual And Vehicle Manual
Before you begin the process of installing your infant car seat with base, it is crucial to read both the car seat manual and the vehicle manual. These manuals provide vital information and instructions that will ensure your car seat is installed correctly and safely. By taking the time to understand and follow the instructions provided, you can rest assured that your precious little one will be protected on every journey.
Understanding the instructions
The car seat manual is your go-to resource for detailed instructions on how to install your infant car seat with a base. It will provide you with step-by-step guidance and diagrams that illustrate the installation process. It is important to read the manual carefully, making sure you comprehend each instruction before proceeding. Highlight any important instructions or safety precautions to ensure you don’t miss any vital details.

Identifying the LATCH anchors in your vehicle
The LATCH (Lower Anchors and Tethers for Children) system provides an alternative method for securing your car seat. In your vehicle manual, you will find information on the location of the LATCH anchors. These anchors are typically found between the seat cushions in the back seat of your vehicle. Take note of the number and position of the anchors, as this will be useful information during the installation process.
Locating the vehicle seat belt path
If you prefer to install your car seat using the vehicle seat belt, it is essential to locate the seat belt path. The car seat manual will guide you on how to thread the seat belt through the correct path to secure the seat. Take note of any specific instructions regarding the placement and securing of the seat belt. Making sure the belt is properly threaded is crucial for ensuring a secure installation.
Remember, reading both the car seat manual and the vehicle manual may seem time-consuming, but it is an important step in ensuring the safety of your infant. Take the time to familiarize yourself with the instructions provided, and you will be well on your way to installing your infant car seat with base correctly and providing your little one with the utmost protection during every car ride.
Gathering The Necessary Tools And Equipment
Before installing an infant car seat with a base, it’s crucial to gather the necessary tools and equipment to ensure a safe and secure installation. With the right tools on hand, you’ll be able to properly install the car seat, giving you peace of mind when traveling with your little one.
Car seat base
The first tool you’ll need is the car seat base itself. This is the part that remains in your vehicle and serves as the foundation for securing the infant car seat. Make sure you have the correct base for your car seat model as different car seats may have different base designs.
Infant car seat
Next, you’ll need the infant car seat. This is the seat in which your baby will ride. It’s important to choose a car seat that meets safety standards and is compatible with the base you have. Check the specifications to ensure that the car seat and the base are a match.
LATCH connectors
LATCH stands for Lower Anchors and Tethers for Children. LATCH connectors are attachment points located in your vehicle specifically designed to secure car seats. These connectors provide a more secure and convenient method of installation compared to using the vehicle seat belt. Check your vehicle manual to locate the LATCH connectors and make sure they are easily accessible.
Vehicle seat belt
If your vehicle doesn’t have LATCH connectors or if you prefer using the seat belt to secure the car seat, you’ll need the vehicle seat belt. Ensure that your vehicle has functioning seat belts and that they are in good condition. The seat belt will be used to secure the base to your vehicle’s seat.
Towels or pool noodles (if necessary for leveling)
To achieve the proper recline angle and positioning of the car seat, you may need to use towels or pool noodles. These handy items can be used to level the car seat base if it doesn’t sit flat on your vehicle seat. Placing towels or pool noodles under the base can help achieve the correct angle and ensure a safe installation.
By gathering these necessary tools and equipment, you’ll be well-prepared to install your infant car seat with a base. Having everything at your disposal will make the installation process easier and more efficient, giving you peace of mind and ensuring your little one’s safety on the road.

Installing Using The Latch System
When it comes to installing an infant car seat with a base, using the LATCH (Lower Anchors and Tethers for Children) system is a popular and convenient option. The LATCH system provides an extra layer of security, ensuring that your car seat is properly installed and your little one stays safe during every journey.
Attaching the LATCH connectors to the car seat base
To begin installing your infant car seat using the LATCH system, locate the LATCH connectors on the base of the car seat. The LATCH connectors are usually found at the bottom of the car seat.
Gently lift the cover flap to reveal the LATCH connectors. These connectors are typically made of sturdy metal or plastic and have a hook-like shape. Ensure that both LATCH connectors are easily accessible and free from any obstructions.
Next, position the car seat base on the vehicle’s backseat. Most vehicles have LATCH anchor points located between the seat cushions. These anchor points can typically be found where the seatback and seat cushions meet or near the seat crease.
Locating and connecting the LATCH anchors in the vehicle
Take a moment to locate the LATCH anchor points in your vehicle. Refer to your vehicle’s owner’s manual for the exact location of the anchors if needed. LATCH anchor points are typically marked with a symbol, such as a small button or label that indicates their position.
Once you’ve located the LATCH anchors, align the car seat base with the anchor points. Attach the LATCH connectors to the LATCH anchors by sliding them onto the anchor rods. You should hear a satisfying click or feel a secure connection when the LATCH connectors are properly attached.
Adjusting the LATCH straps for a secure fit
After attaching the LATCH connectors to the car seat base, it’s time to ensure a secure fit by adjusting the LATCH straps. Locate the LATCH straps, which are connected to the LATCH connectors, and gently pull them to tighten the straps.
Check the tension of the LATCH straps by pressing down on the car seat base. The base should not move more than an inch in any direction. If there is excessive movement, recheck the LATCH connectors and tighten the straps accordingly. Remember, a snug and secure fit is crucial for optimal safety.
Once you have confirmed a secure and tight fit, double-check all the connections and ensure there are no twists or tangles in the LATCH straps. Finally, test the stability of the car seat base by giving it a firm shake. It should remain firmly in place.
By following these simple steps, you can confidently install your infant car seat using the LATCH system. The LATCH system is designed to make installation quick and hassle-free, giving you peace of mind knowing that your precious passenger is well protected on the road ahead.
Installing Using The Vehicle Seat Belt
Installing an infant car seat with a base is an essential step to ensure your baby’s safety during car rides. While there are various methods of installation, one popular option is using the vehicle seat belt to secure the base. This method provides a reliable and secure fit, giving parents peace of mind on the road.
Placing the car seat base in the correct position
Before proceeding with the installation, it’s crucial to place the car seat base in the appropriate position within your vehicle. Start by locating the seat that will accommodate the car seat base. Consult your vehicle’s owner’s manual to identify the safest seating position for your infant. Once determined, position the car seat base rear-facing in that designated spot.

Feeding the seat belt through the car seat base belt path
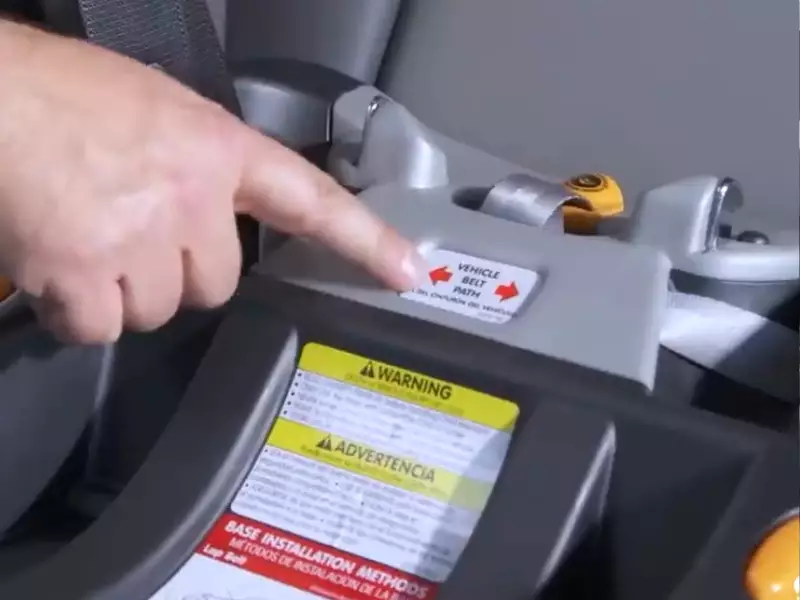
After placing the car seat base in the correct position, the next step is to feed the vehicle seat belt through the car seat base’s belt path. The belt path is usually indicated with clear markings on the base itself. Refer to the car seat’s user manual for specific instructions on locating the belt path. Once found, follow these steps to ensure a proper fit:
- Extend the vehicle seat belt fully and ensure it is not twisted.
- Insert the vehicle seat belt through the belt path, making sure it goes under any designated slots or guides. This ensures the belt is properly routed for secure installation.
- Draw the seat belt tight, removing any slack or excess length. This step is essential to prevent the car seat base from shifting during travel.
Buckling and tightening the seat belt to secure the base
Once the seat belt is properly routed through the car seat base’s belt path, it’s time to buckle and tighten the seat belt to secure the base in place. Follow these steps to ensure a secure and snug fit:
- Insert the seat belt tongue into the buckle and ensure it clicks securely.
- With one hand, press down firmly on the car seat base while using your other hand to tighten the seat belt. Pull the seat belt tight, eliminating any remaining slack.
- Push down on the car seat base with both hands to confirm a secure installation. The base should not move more than one inch side to side or front to back.
By following these steps, you can install your infant car seat with a base using the vehicle seat belt method. Remember, each car seat and vehicle may have unique installation requirements, so always consult your car seat’s user manual and your vehicle’s owner’s manual for specific guidelines. Taking the time to install the car seat base correctly ensures your little one’s safety and peace of mind on every journey.
Placing The Infant Car Seat On The Base
Aligning the car seat with the base
Before placing the infant car seat on the base, it’s important to ensure that it is properly aligned for a secure fit. Follow these steps to align the car seat with the base:
- Step 1: Position the car seat so that the back of the seat is facing toward the front of the vehicle.
- Step 2: Locate the guides on the base that are designed to align with the hooks on the car seat.
- Step 3: Gently lower the car seat onto the base, making sure the guides align with the hooks on the car seat.
Ensuring a secure connection
Once the car seat is aligned with the base, it’s crucial to ensure a secure connection to keep your little one safe during travel. Here’s how to ensure a secure connection:
- Step 1: Firmly press down on the car seat, applying pressure to the base.
- Step 2: Check that the car seat is securely latched onto the base by attempting to lift the car seat from various angles. It should not come loose.
- Step 3: Verify that the car seat’s indicator shows a correct installation, whether it’s a built-in indicator or a visual marker on the base.
Adjusting The Harness And Straps
Properly adjusting the harness and straps of your infant car seat is crucial for ensuring your little one’s safety and comfort while on the road. In this section, we will guide you through the essential steps to achieve a secure and snug fit for your baby. By following these instructions, you can have peace of mind knowing that your precious bundle of joy is well-protected during every car journey.
Positioning the harness straps at the correct height
One of the first things you should do is to position the harness straps at the correct height for your baby’s body. Adjusting the straps to the right level will ensure that they are both secure and comfortable for your little one.
To determine the correct height, place your infant car seat in the rear-facing position and check your car seat’s manual for guidance on harness strap height adjustment. Typically, the straps should be located at or slightly below your baby’s shoulders when rear-facing.
Securing the straps snugly but not too tight
When it comes to securing the straps, it’s important to find a balance between snugness and comfort. You want the straps to be tight enough to keep your baby securely in place, but not so tight that it causes discomfort or restricts their movements.
To achieve the right fit, fasten the harness buckle and pull on the shoulder straps to remove any slack. Check that the straps lie flat against your baby’s chest and shoulders, without any twists or folds. You should be able to fit no more than two fingers between your baby’s collarbone and the harness straps.
Checking for proper chest clip position
The chest clip, also known as the harness retainer or buckle, plays a vital role in securing your baby in the car seat. Positioning the chest clip correctly is crucial for your little one’s safety.
To ensure proper chest clip position, buckle up the harness and adjust the clip so that it is level with your baby’s armpits. It should rest snugly over the sternum or breastbone, not too high or too low on the body.
By following these steps and guidelines for adjusting the harness and straps, you can provide your baby with a secure and comfortable ride in your car. Remember to refer to your specific car seat’s manual for any additional instructions or recommendations. Your little one’s safety is just as important as your peace of mind while traveling together.

Performing The Inch Test
When it comes to installing your infant car seat with a base, it is crucial to perform the inch test. This test ensures that the car seat is securely installed and will provide optimum safety for your little one. In this section, we will guide you through the process of performing the inch test step by step, giving you the peace of mind that your precious bundle is snugly and firmly protected.
Gripping the car seat near the belt path
To begin the inch test, start by firmly gripping the car seat near the belt path. This is the area where the seat belt or latch system attaches to the seat. By placing your hand here, you will be able to gauge the movement of the car seat more accurately.
Attempting to move the car seat side-to-side and front-to-back
Once you have a good grip on the car seat, it’s time to test its stability. Firstly, try moving the car seat side-to-side. Apply gentle pressure and see if the seat budges. It’s important to note that a minor amount of movement is considered acceptable, as long as it is less than an inch. However, if you notice the car seat shifting more than an inch, you will need to re-install it to ensure a secure fit.
Next, attempt to move the car seat front-to-back. Again, apply gentle pressure and observe any movement. Ideally, the car seat should not move more than an inch in this direction as well. If you find that the car seat is shifting excessively, it’s essential to recheck the installation and make any necessary adjustments.
By performing the inch test and ensuring proper stability of the car seat, you can rest assured knowing that your little one’s safety is prioritized. Remember to double-check the installation instructions provided by the manufacturer, and if you have any doubts or questions, it’s always best to consult a certified car seat technician. With these simple steps, you can confidently install your infant car seat with a base and embark on worry-free adventures with your precious cargo.
Performing The Pinch Test
Checking if there is any slack in the harness straps
One important step in installing an infant car seat with a base is checking if there is any slack in the harness straps. This is crucial for ensuring the safety of your little one during the ride. To perform the pinch test, follow these simple steps:
- Place your child in the car seat and fasten the harness straps.
- Ensure that the harness straps lie flat, without any twists or tangles.
- Position the chest clip at armpit level to provide a secure fit.
- Attempt to pinch the straps at your child’s shoulder level. If you are able to pinch any excess strap material, then the straps are too loose.
- Adjust the straps to remove any slack until you cannot pinch any excess material.
- Recheck the tightness of the straps by performing the pinch test again.
Remember that properly securing the harness straps is vital to prevent your baby from slipping out or being injured in the event of a sudden stop or crash. It is recommended to perform the pinch test after each adjustment and before every car journey to ensure your child’s safety.
Ensuring the harness is properly secured
Aside from checking for slack, another crucial aspect of installing an infant car seat with a base is ensuring the harness is properly secured. Follow these steps to guarantee a safe and snug fit:
- Make sure the harness is threaded through the correct slots in the car seat shell.
- Place your child in the seat and fasten the harness straps, making sure they are not twisted.
- Ensure the chest clip is positioned at armpit level.
- Pull the harness tight, removing any remaining slack, until you are unable to pinch any excess material at your child’s shoulder level.
- To ensure a proper fit, check that the harness straps lie flat and are not twisted.
- Verify that the harness is securely fastened by giving it a gentle tug. It should not loosen or slide off your child’s shoulders.
By following these steps, you can have peace of mind knowing that your little one is safely secured in the car seat, and ready for the journey ahead.
Frequently Asked Questions For How To Install Infant Car Seat With Base
How Do You Install An Infant Car Seat Base?
To install an infant car seat base, start by placing the base in the backseat of your vehicle. Make sure it’s level and secure. Then, thread the seatbelt through the base and buckle it. Pull the seatbelt tight and ensure there’s no slack.
Finally, check that the base is secure and doesn’t move.
How Should An Infant Car Seat Be Placed?
Place an infant car seat following these guidelines:
- Position it rear-facing in the back seat.
- Secure it using seat belts or a LATCH system.
- Ensure the base is installed snugly.
- Adjust straps to fit baby snugly.
- Recline seat at the recommended angle.
Should Baby Seat Be Behind Driver Or Passenger?
Baby seats should be placed in the rear of the car, either behind the driver or passenger seat. It is important to secure the seat properly and follow the manufacturer’s instructions. This positioning ensures maximum safety and protection for the child in case of an accident.
What Angle Should Your Car Seat Base Be Set At?
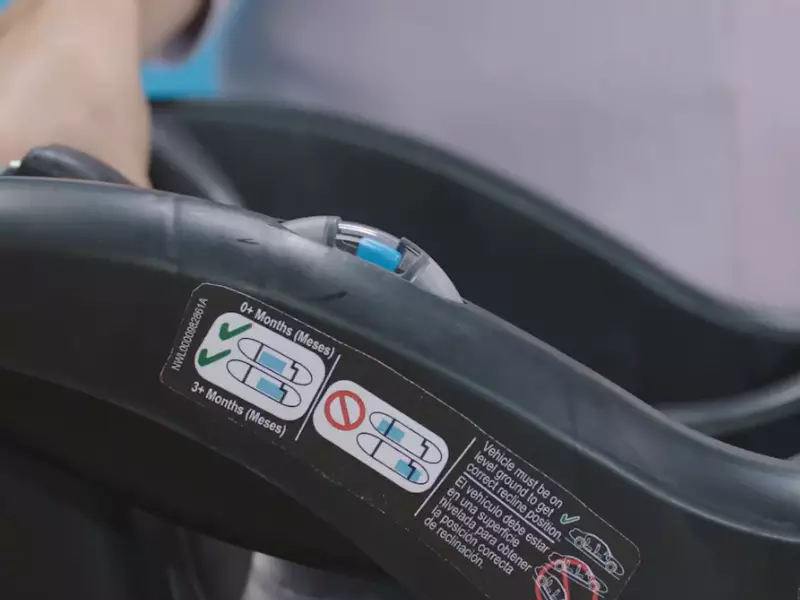
Set your car seat base at the appropriate angle to ensure your child’s safety. Avoid tipping forward or reclining too far by following the manufacturer’s instructions. Make sure the base is installed securely and the seat is level to best protect your little one during travel.
Conclusion
Installing an infant car seat with a base is crucial for your baby’s safety during car rides. By following the step-by-step instructions in this guide, you can ensure a secure and hassle-free installation process. Remember to always check the car seat’s manufacturer guidelines and consult a certified technician if needed.
Implementing these techniques will provide you with peace of mind knowing that your little one is protected on the road. Happy travels with your baby!
