To install flex LED lights under the dash, simply clean the under dash area, measure and cut the LED strip to fit, peel off the adhesive backing, and firmly press the lights into place.
Why Choose Flex Led Lights For Your Car’s Dash
Flex LED lights are a fantastic addition to your car’s dash, offering a range of benefits that make them a popular choice among car enthusiasts. Whether you’re looking to enhance the ambiance and aesthetics of your vehicle or improve visibility and safety on the road, the flexibility and versatility of flex LED lights make them an ideal choice. In this article, we’ll explore why you should consider installing flex LED lights under your car’s dash, highlighting the benefits they bring to your driving experience.
Enhancing Ambiance and Aesthetics
One of the primary reasons car owners choose flex LED lights for their dash is for the enhancement they bring to the ambiance and aesthetics of the vehicle. With their vibrant and customizable lighting options, flex LED lights allow you to create a unique and personalized atmosphere inside your car. Whether you prefer a calming blue tone or an energetic red color, these lights offer endless possibilities to match your mood and style.
Flex LED lights can be easily installed in various locations under the car’s dash, highlighting specific features or providing a subtle overall glow. The ability to adjust brightness and change colors using a remote control further adds to their convenience and versatility. Whether you’re driving during the day or night, the right combination of LED lights can create a stylish and visually pleasing environment that reflects your personality.
Improving Visibility and Safety
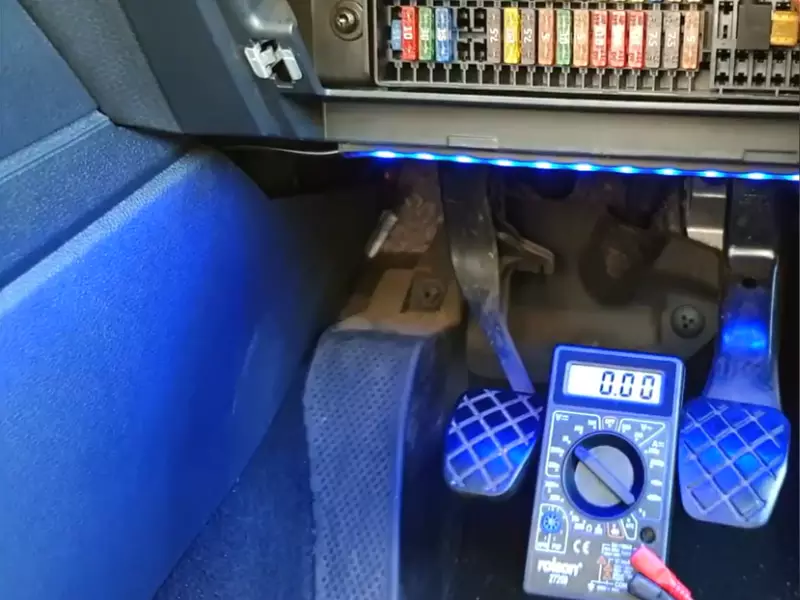
Aside from their aesthetic appeal, flex LED lights play a crucial role in improving visibility and safety while driving. These lights can be strategically placed to illuminate the footwell area, making it easier to locate pedals and navigate the controls. This is particularly helpful during night-time driving or in low-light conditions, as it reduces distractions and allows you to focus on the road ahead.
In addition to enhancing visibility within the car, flex LED lights also enhance visibility of the car itself. When installed under the dash, the soft glow of the lights creates a subtle halo effect, making your vehicle more noticeable to other drivers. This added visibility can be especially useful in situations where you want to be easily spotted, such as during heavy traffic or when parked on the side of the road.
Furthermore, the installation of flex LED lights can contribute to overall safety by reducing the chance of accidents caused by driver distraction. With their customizable features, these lights offer an enjoyable and less distracting driving experience, allowing you to focus on the road while still enjoying a visually appealing interior.
Overall, choosing flex LED lights for your car’s dash is a smart decision that brings both style and practicality. Not only do they enhance the ambiance and aesthetics of your vehicle, but they also improve visibility and safety. Whether you’re a car enthusiast or simply want to enhance your driving experience, installing flex LED lights under your car’s dash is a worthwhile investment.
Tools And Materials Required For Installation
Installing flex LED lights under your car’s dashboard is a great way to add a touch of style and ambiance to your vehicle’s interior. To ensure a successful installation, you will need a few tools and materials. Here are the essentials:
Flex LED light strip
A flex LED light strip is the key component in this installation. It is a thin strip of lights that can easily be bent and maneuvered to fit the contours of your dashboard. These lights come in various lengths and colors, allowing you to choose the one that best matches your preferences.
Wire cutters and strippers
Wire cutters and strippers are necessary for cutting the LED light strip to the desired length and removing the insulation from the wire ends. This ensures a clean and secure connection.
Electrical tape
Electrical tape is used to secure the connections and prevent any exposed wires from coming into contact with other surfaces. It provides insulation and further protects the electrical connections from unwanted moisture or damage.
Zip ties or adhesive clips
Zip ties or adhesive clips are essential for securing the flex LED light strip to the dashboard. These help to keep everything in place and prevent the lights from moving or falling off while driving.
12-volt power source
A 12-volt power source is needed to provide electricity to the flex LED light strip. This can be a car’s battery or any other 12-volt power outlet available in your vehicle.
Heat shrink tubing (optional)
Heat shrink tubing can be used to provide an additional layer of insulation and protection to the wire connections. Although optional, it is recommended for a more professional and secure installation.
Ruler or measuring tape
A ruler or measuring tape is essential for ensuring that the flex LED light strip is cut to the desired length and properly aligned along the dashboard. This ensures a clean and symmetrical installation.
Now that we have covered the tools and materials required, let’s move on to the step-by-step installation process to help you achieve a stunning and customized lighting effect under your car’s dashboard.
Step-By-Step Guide To Installing Flex Led Lights
If you’re looking to add a touch of style and ambiance to your vehicle’s interior, installing flex LED lights under the dash is a great way to do it. Not only do these lights provide a vibrant glow, but they also offer a customizable lighting experience that can be tailored to your preferences. In this step-by-step guide, we will walk you through the process of installing flex LED lights under the dash, ensuring a seamless and professional-looking installation.
Deciding on the placement and layout of the lights
Before you begin the installation process, it’s important to first decide on the placement and layout of the flex LED lights. This will help you determine the length of the strip needed and plan the wiring accordingly. Consider the areas under the dash where you want the lights to be positioned and envision how the lighting will enhance the overall interior design.
Measuring the length of the strip needed
Once you have decided on the placement and layout, it’s time to measure the length of the flex LED strip needed. Using a measuring tape, carefully measure the distance between the starting and ending points of the installation area. Note down the measurement, as this will help you later when cutting the LED light strip to the desired length.
Cleaning and preparing the surface for adhesion
Next, ensure that the installation area is clean and free of any debris or dust. Use a mild cleaning solution and a soft cloth to gently clean the surface. This step is crucial for ensuring proper adhesion of the LED strip and preventing any potential dirt particles from interfering with the installation process.
Removing any obstacles or obstructions
Before attaching the LED strip, check for any obstacles or obstructions that may hinder the installation process. Ensure that there are no cables, wires, or any other objects that could interfere with the placement of the lights. Remove or reposition any such objects to create a smooth and obstacle-free surface for the LED strip installation.
Cutting the LED light strip to the desired length
Using the measurement you previously noted down, carefully cut the flex LED light strip to the desired length. Ensure that you follow the manufacturer’s guidelines for cutting the strip, as each model may have specific instructions. It’s important to cut the strip precisely to avoid any wasted material or incorrect fitting.
Wiring the power leads to ensure proper connection
With the LED strip cut to the desired length, it’s time to wire the power leads to ensure a proper connection. Strip the ends of the power leads and match them to the corresponding colors on the LED strip. Twist the wires together, ensuring a secure connection, and cover the exposed wires with electrical tape or heat shrink tubing for added protection.
Attaching the LED strip using adhesive clips or zip ties
Next, it’s time to attach the LED strip to the surface under the dash. Depending on the surface and your preference, you can use adhesive clips or zip ties for securing the strip. Adhesive clips provide a clean and discreet look, while zip ties offer a more secure fastening. Ensure that the strip is evenly attached and aligned, creating a seamless visual effect.
Ensuring that the lights are securely fastened
Once the LED strip is attached, double-check that it is securely fastened and not prone to come loose. Gently tug on the strip to test its stability and make any necessary adjustments to ensure it’s properly fitted. Properly fastening the lights is essential to prevent any potential hazards or damage during travel.
Locating a 12-volt power source in the vehicle
Before wiring the lights to the power source, you need to locate a 12-volt power supply in your vehicle. This can be found by referencing your vehicle’s manual or consulting with a professional if needed. It’s important to ensure that the power source is compatible with the power requirements of the LED lights to avoid any electrical issues or damage.
Wiring the lights to the power source
Once you have located the 12-volt power source, it’s time to wire the LED lights to it. Connect the positive and negative power leads from the LED strip to the corresponding terminals on the power source. Double-check the connection to ensure a secure and proper fit. It’s essential to follow the proper wiring guidelines to prevent any electrical issues and ensure optimal functionality.
Testing the lights to ensure they are functioning properly
After wiring the LED lights to the power source, it’s crucial to test them to ensure they are functioning properly. Switch on the power source and check that the lights illuminate as expected. If any issues arise, double-check the wiring and connections, making any necessary adjustments before proceeding.
Making any necessary adjustments to the positioning or wiring
With the lights tested and functioning properly, take a moment to assess their positioning and the overall effect. Make any necessary adjustments to the positioning or wiring, ensuring the lights align with your desired aesthetic and provide the desired illumination. Attention to detail in this step will result in a flawless installation.
Securing any loose wires with electrical tape or heat shrink tubing
After making adjustments, secure any loose wires with electrical tape or heat shrink tubing. This will prevent the wires from moving or coming loose during the vehicle’s movements. It’s essential to ensure the wires are neatly organized and well-protected for long-lasting performance.
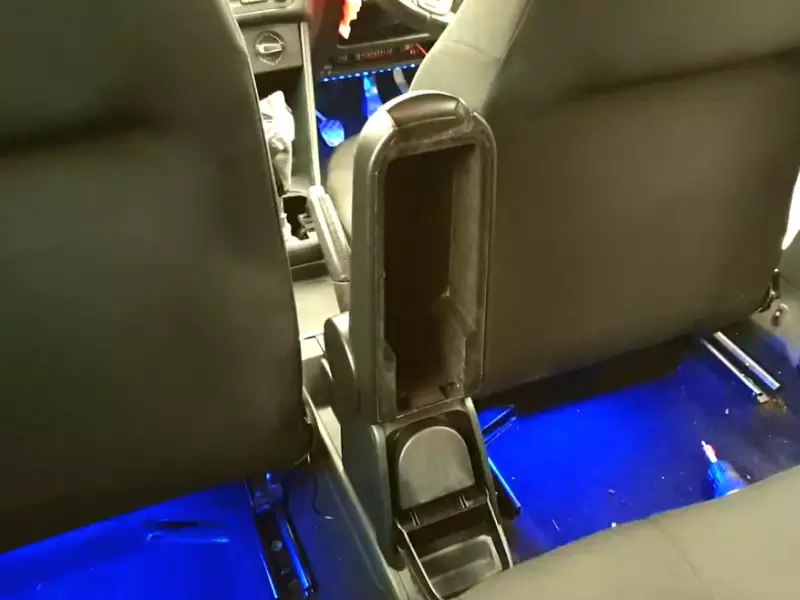
Admiring the finished installation
Finally, take a moment to admire the finished installation of your flex LED lights under the dash. Turn on the lights and appreciate the enhanced ambiance and visual appeal they bring to your vehicle’s interior. With proper installation and attention to detail, this simple addition can transform your driving experience.
Troubleshooting Common Issues
If you’ve recently installed flex LED lights under your dash and are experiencing some issues, don’t worry – you’re not alone. It’s common to encounter a few hiccups along the way. In this section, we’ll address common problems that may arise during the installation process and provide you with some troubleshooting solutions to help you get your lights shining brightly and flawlessly.
Issues with Flickering or Dim Lights
Flickering or dim lights can be frustrating, especially when you’re looking to create a vibrant lighting display. Here are a few possible causes and solutions:
- Insufficient Power Supply: Ensure that you have a sufficient power supply for your flex LED lights. Check the specifications of your lights and compare them to the power supply you are using. If necessary, upgrade to a power supply with higher wattage to ensure your lights receive the power they need.
- Loose Wiring: Loose connections or wiring can also lead to flickering or dim lights. Double-check all connections to ensure they are secure and properly connected. If you find any loose connections, tighten them up and test the lights again.
- Ballast or Driver Issues: If you’re using LED lights that require a ballast or driver, these components may be causing the flickering or dimming. Check the ballast or driver for any faults or defects. If necessary, replace them with a new and compatible component.
Problems with Loose Connections
Loose connections can be a common issue when installing flex LED lights under the dashboard. Here are some troubleshooting tips to address this problem:
- Tightening Connections: Check all connections and ensure they are securely tightened. Loose connections can disrupt the flow of electricity and cause your lights to malfunction. Use a wrench or pliers to tighten any loose connections, making sure not to overtighten.
- Proper Grounding: Proper grounding is essential for the effective functioning of your LED lights. Ensure that the ground connection is secure and free from any corrosion. Clean the ground connection if necessary and make sure it is tightly connected.
Addressing Potential Electrical Interference
Electrical interference can interfere with the performance of your flex LED lights. Here are a few measures you can take to minimize or eliminate electrical interference:
- Separate Wiring: Keep the wiring for your LED lights separate from other high-power wires or components. This can help prevent electrical interference and ensure a smooth illumination.
- Use Filter Modules: Consider using filter modules to reduce electrical noise and interference. These modules can help create a cleaner and brighter lighting display by eliminating unwanted signals.
- Check for Loose Connections: As mentioned earlier, loose connections can lead to electrical interference. Ensure all connections are tight and securely fastened to minimize the chances of interference.
- Move Away from Interference Sources: If your flex LED lights are still experiencing interference, try moving them away from potential interference sources such as radios, speakers, or other electromagnetic devices. This can help improve the overall performance of your lights.
By troubleshooting and addressing these common issues, you’ll be able to enjoy the full beauty and functionality of your flex LED lights. Remember to follow the installation instructions carefully and make any necessary adjustments along the way. Happy lighting!
Safety Tips And Precautions
When installing flex LED lights under the dash of your vehicle, it’s important to prioritize safety. Here are some crucial tips and precautions to follow:
Disconnecting the Power Source before Starting the Installation
Before you begin installing flex LED lights, make sure to disconnect the power source to avoid any electrical accidents. This step is essential to prevent accidental shocks or short circuits. To disconnect the power source:
- Locate the vehicle’s battery.
- Use the necessary tools to safely remove the negative terminal cable.
- Once the cable is removed, set it aside in a safe location.
Avoiding Contact with Any Moving Parts or Hot Surfaces
During the installation process, it’s important to be mindful of moving parts and hot surfaces to prevent injuries or damage to the vehicle. Follow these precautions:
- Before reaching under the dash, ensure the engine is turned off and has cooled down.
- Avoid placing your hands or any tools near fans, belts, or other moving parts that may cause harm.
- Be cautious of areas that might become hot during normal vehicle operation, such as the exhaust system.
Taking Precautions to Prevent Damage to the Vehicle’s Electrical System
Installing flex LED lights requires careful handling to prevent any harm to the vehicle’s electrical system. Keep the following precautions in mind:
- Double-check the voltage compatibility of the LED lights with your vehicle’s electrical system.
- Ensure proper insulation of wires to prevent short circuits or power surges.
- Avoid overloading the electrical system by checking the recommended wattage for the LED lights.
- If you are unsure about any step, consult a professional or refer to the manufacturer’s instructions.
By following these safety tips and precautions, you can ensure a smooth and secure installation of flex LED lights under your vehicle’s dash. Always prioritize your safety and take necessary precautions to prevent any accidents or damage.
Frequently Asked Questions On How To Install Flex Led Lights Under Dash
How Do You Connect Flexible Led Lights?
To connect flexible LED lights, follow these steps: First, identify the positive and negative terminals. Then, use soldering or connectors to join the wires accordingly. Ensure a secure connection. Finally, test the lights to verify they are functioning properly. Enjoy your flexible LED lighting setup!
How Do You Install Flexible Led Strip Lights?
To install flexible LED strip lights, first, measure and cut the strip to desired length. Clean and dry the surface where you want to install the lights. Peel off the backing and stick the strip on the surface. Connect the power source, and you’re good to go!
How Do You Stick Led Lights Under A Car?
To stick LED lights under a car, follow these steps:
- Clean the surface where you want to stick the lights.
- Use adhesive tape or mounting brackets to secure the lights underneath.
- Ensure the wiring is properly connected and routed to a power source.
- Test the lights to ensure they are working properly.
- Double-check the adhesive to make sure the lights stay in place during driving.
How Do You Install Led Under Cabinet Tape Lighting?
To install LED under cabinet tape lighting, follow these steps:
- Measure the cabinet length for accurate tape lighting placement.
- Clean the area thoroughly before installation.
- Peel off the backing and stick the LED tape securely under the cabinet.
- Connect the power supply to the tape and plug it in.
- Test the lights to ensure they are working properly.
Conclusion
Installing flex LED lights under the dash is a simple and effective way to add a stylish and vibrant touch to your vehicle’s interior. By following the step-by-step guide provided in this blog post, you can achieve professional-looking results without any hassle.
With these lights, you can enhance your driving experience and express your unique style. So, why wait? Get started on your installation project today and enjoy the stunning effects of flex LED lights in your own vehicle.