To install a DVD player in your car, follow these steps: Gather the necessary tools, such as a screwdriver and wire cutters; locate an appropriate location for the player that is easily accessible; remove any panels or trim to access the wiring; connect the power and ground wires to the battery; connect the audio and video cables to the player and the car’s multimedia system; secure the player in place using screws or brackets; test the player to ensure it is working properly. Installing a DVD player in your car allows you to enjoy your favorite movies and shows while on the go.
By following these steps, you can easily install a DVD player in your car and enhance your traveling experience.
Choosing The Right DVD Player For Your Car
Installing a DVD player in your car can be a great way to keep your passengers entertained during long journeys or to provide some entertainment options for children. However, with so many options available in the market, it’s important to choose the right DVD player that is compatible with your car and meets your specific requirements. In this section, we will explore some considerations for selecting a compatible DVD player, how to research and compare different options, and how to determine the installation requirements for your specific car model.
Considerations for selecting a compatible DVD player
When choosing a DVD player for your car, there are several factors to consider to ensure compatibility. Here are some essential factors to keep in mind:
- Size and Fit: Measure the available space in your car’s dashboard or headrest where you intend to install the DVD player. Choose a player that fits perfectly without obstructing any other controls or functions.
- Power Supply: Check whether the DVD player can be powered directly through your car’s electrical system or if it requires an additional power source. Determine if your car has the necessary ports or if you need to install any adapters.
- Playback Options: Consider what type of media you want the DVD player to support. Make sure it is compatible with different formats such as DVD, CD, USB, or SD card. Some players even offer Bluetooth connectivity for wireless streaming.
- Screen Size and Quality: Decide whether you want a small screen integrated into the player or a larger one that can be mounted on the headrests. Pay attention to screen resolution and overall picture quality.
- Additional Features: Look for additional features that enhance your experience, such as built-in speakers, headphone jacks, remote controls, or touchscreen interfaces.
Researching and comparing different options
Before making a decision, it’s important to research and compare different DVD player options available on the market. Here are some steps to help you in your research:
- Online Reviews: Read reviews and ratings from trusted sources to get an understanding of other customers’ experiences with different DVD players. Look for reviews that specifically mention compatibility and installation.
- Manufacturer’s Website: Visit the official websites of manufacturers to gather detailed information about their DVD player models. Pay attention to specifications, features, and compatibility information provided by the manufacturer.
- Compare Prices: Compare prices from different retailers to find the best deals. Be sure to consider any additional installation or accessory costs that may arise.
- Ask for Recommendations: Seek recommendations from friends, family, or car enthusiasts who have already installed DVD players in their vehicles. They can provide valuable insights based on their own experiences.
Determining installation requirements for your specific car model
Every car model has its unique specifications and installation requirements. To determine the installation requirements for your specific car model, follow these steps:
- Car Manual: Refer to your car’s manual to understand the specific installation procedures and requirements provided by the manufacturer.
- Consult Professionals: If you are unsure or uncomfortable with the installation process, consider consulting a professional car audio installer. They have the expertise and experience to ensure a proper and secure installation.
- DIY Guides: Search for DIY installation guides or videos specific to your car make and model. These resources can provide step-by-step instructions tailored to your vehicle.
By considering these factors, conducting thorough research, and understanding your car’s installation requirements, you can confidently choose the right DVD player that perfectly fits your car and meets your entertainment needs.
Installing A DVD player In Car
Installing a DVD player in your car can enhance your road trips, allowing you and your passengers to enjoy movies and TV shows on the go. This step-by-step guide will walk you through the process of installing a DVD player in your car, helping you create a more entertaining and enjoyable driving experience.
Gather the necessary tools and materials
Before you begin the installation process, make sure you have all the tools and materials you’ll need. Here is a list of items you should have on hand:
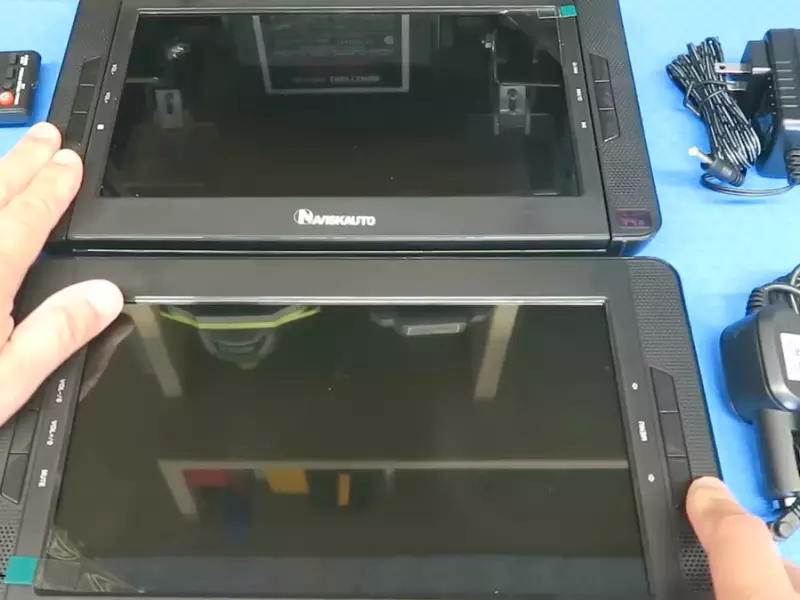
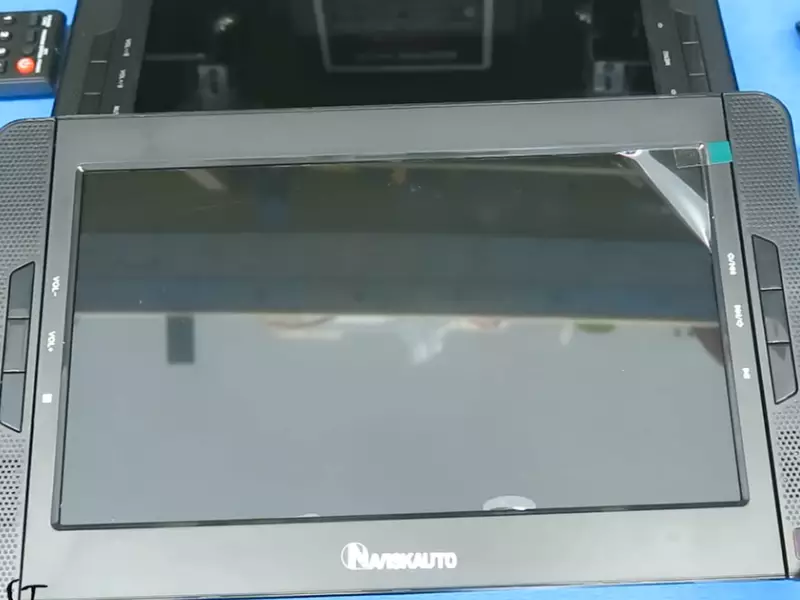
- Portable DVD player with mounting bracket
- Car power inverter or 12-volt adapter
- Plastic zip ties or adhesive tape
- Screwdriver set
- Wire crimpers and connectors
- Electrical tape
- Mounting screws
Preparing the car for installation
Once you have gathered all the necessary tools and materials, it’s time to prepare your car for the installation process. Follow these steps:
- Choose the ideal location for your DVD player. Consider factors such as visibility and accessibility for both the driver and passengers.
- Securely attach the mounting bracket to the chosen location using the appropriate screws. Make sure it is mounted securely to prevent vibrations during driving.
- Find a suitable power source for your DVD player. You can either use a car power inverter connected to your car’s cigarette lighter socket or a 12-volt adapter that connects directly to your car’s electrical system.
- Connect the power cables from the DVD player to the power source, ensuring a secure and reliable connection using wire crimpers and connectors.
- Ensure all connections are properly insulated with electrical tape to prevent any shorts or electrical hazards.
Installing the DVD player in the desired location
Now that your car is prepared, it’s time to install the DVD player in the desired location:
- Attach the DVD player to the mounting bracket using the provided screws or any suitable mounting method recommended by the manufacturer.
- Ensure the DVD player is securely fastened and does not obstruct any important view or control within the car.
- Test the DVD player to ensure it powers on and functions properly before securing any loose wires or cables.
- Use plastic zip ties or adhesive tape to secure any loose wires or cables, preventing them from interfering with the driving experience or posing a safety hazard.
By following these steps, you can easily install a DVD player in your car, adding a new level of entertainment to your travels. Remember to always prioritize safety and functionality when carrying out any modifications to your car.
Wiring And Connections
Installing a DVD player in your car can bring entertainment on those long road trips or daily commutes. One crucial aspect of the installation process is understanding the wiring and making the right connections. Taking the time to carefully follow the wiring diagram and ensure proper connections will ensure a smooth and successful installation. In this guide, we will take you through the step-by-step process of wiring and making the necessary connections for your car’s DVD player.
Understanding the wiring diagram
The first step in installing a DVD player in your car is to study and understand the wiring diagram. This diagram provides a visual representation of how the various components of the DVD player, such as the power source, audio cables, and video cables, should be connected. It is essential to have a clear understanding of the wiring diagram to avoid any confusion or mistakes during the installation process. Take your time to analyze the diagram and familiarize yourself with each component and its corresponding connection.
Connecting the power source
Once you have a good understanding of the wiring diagram, you can begin connecting the power source for your DVD player. The power source is typically connected to the car’s battery or the fuse box. However, it is crucial to refer to your car’s specific wiring instructions or consult a professional if you are unsure about the correct power source connection for your specific car model. Follow the provided instructions and make the necessary connections, ensuring that all connections are secure and well-insulated to prevent any electrical issues.
Connecting the audio and video cables
After successfully connecting the power source, it’s time to connect the audio and video cables for your DVD player. These cables transmit the audio and video signals from the DVD player to the car’s audio system and display screen. Refer to the wiring diagram to identify the designated ports for the audio and video signals. Connect the respective cables securely, ensuring that the connections are tight and secure. Additionally, follow any specific instructions provided with your DVD player regarding audio and video cable connections to ensure optimal performance.
Remember, taking the time to understand the wiring diagram and making accurate connections is crucial for a successful DVD player installation in your car. Ensure that all connections are secure, and follow any specific instructions provided by the manufacturer for your DVD player and car model. Following these steps will help ensure an enjoyable and hassle-free entertainment experience during your car journeys.
Integration With The Car’S Audio System
Connecting the DVD player to the car speakers
To integrate the DVD player with your car’s audio system, connecting it to the car speakers is essential. Follow these steps to ensure a seamless audio experience during your car journeys.
- Step 1: Locate the audio outputs on your DVD player. These are usually labeled as “Audio Out” or “Output”.
- Step 2: Identify the audio inputs on your car’s head unit or amplifier. These may be labeled as “Audio In” or “Input”.
- Step 3: Use RCA cables to connect the audio outputs of the DVD player to the corresponding audio inputs on your car’s audio system. Ensure that the colors of the cables match the jacks on both devices. Typically, red connectors represent the right audio channel, while white connectors represent the left audio channel.
- Step 4: Once the connections are securely made, turn on the DVD player and the car’s audio system, and test the audio output. Adjust the volume levels as needed.
By following these steps, you can effectively connect your DVD player to your car speakers and enjoy rich sound quality during your drives.
Adjusting the audio settings
Just connecting the DVD player to the car speakers is not enough. You need to adjust the audio settings to optimize the sound quality. Here’s how:
- Step 1: Access the audio settings menu on your car’s audio system. This can usually be done by navigating the menu options on the head unit or control panel.
- Step 2: Adjust the bass, treble, and balance settings according to your preference. Experiment with different levels to find the perfect balance.
- Step 3: Some DVD players also offer built-in equalizer settings. Explore these options to further enhance the audio output.
Remember, fine-tuning the audio settings can significantly improve your listening experience while using the DVD player in your car.
Testing the audio quality
After connecting the DVD player to your car’s audio system and adjusting the settings, it’s crucial to test the audio quality to ensure everything is working correctly. Here’s how you can do this:
- Step 1: Play a DVD or CD with audio content on the DVD player.
- Step 2: Listen carefully for any distortions, uneven sound levels, or static noise.
- Step 3: Adjust the volume and audio settings as needed to achieve the desired audio quality.
- Step 4: Pay attention to the clarity, depth, and balance of the sound coming from the car speakers.
By conducting these tests, you can ensure that the audio quality produced by the DVD player in your car meets your expectations.
Mounting And Securing The Dvd Player
Mounting and Securing the DVD Player
Installing a DVD player in your car can enhance your travel experience by providing entertainment for the passengers. However, it is important to properly mount and secure the DVD player to ensure safety and avoid any potential accidents while driving.
Choosing a suitable mounting option
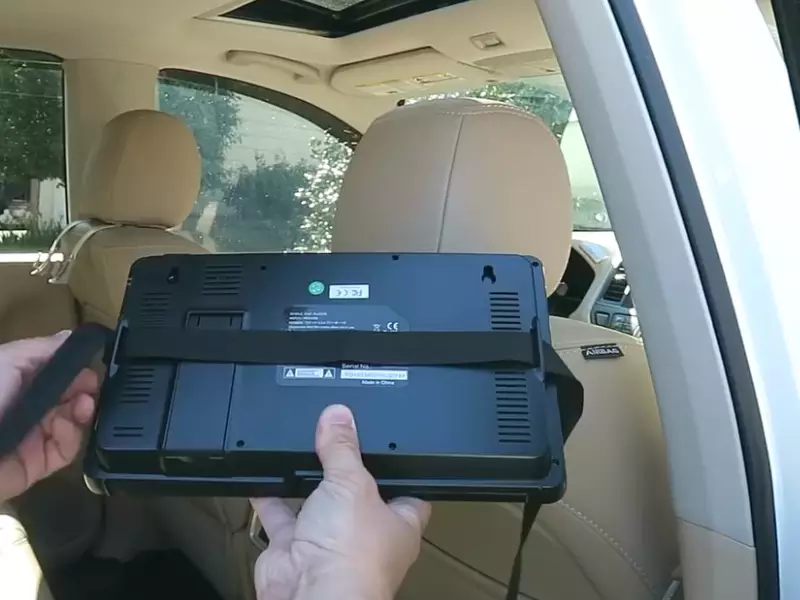
Before installing the DVD player, it’s crucial to choose a suitable mounting option that suits your car’s interior and accommodates the size and weight of the DVD player. One popular mounting option is using a headrest mounting bracket, which attaches the DVD player to the headrest of the front seats. This allows passengers in the back seats to enjoy the entertainment without any hassle.
Another option is the overhead mounting option, where the DVD player is installed on the car’s ceiling. This option is ideal if you have limited space in your car or if you want the DVD player to be easily visible to every passenger.
Securing the DVD player to avoid vibrations
To prevent any possible vibrations or movement of the DVD player during the car ride, it is vital to secure it properly. One simple way to achieve this is by using adjustable mounting straps or brackets, which can be tightened securely around the headrest or overhead mounting option.
Additionally, you can also use foam pads or anti-vibration mats to create a stable base for the DVD player and absorb any vibrations or shocks that may occur during the drive. This will not only ensure a smoother viewing experience but also prolong the lifespan of the DVD player by preventing any damage caused by excessive movement.
Ensuring easy access and safety
While mounting the DVD player, it is important to consider easy access for the passengers. Ensure that the screen is positioned at a suitable height and angle, allowing everyone to comfortably view it without straining their necks or eyes.
Moreover, safety should always be a priority. Make sure that the DVD player’s cables and power cords are properly organized and concealed to avoid any potential trip hazards. Route the cables alongside the car’s interior trim or use cable clips to keep them neatly tucked away.
In conclusion, when installing a DVD player in your car, it is crucial to focus on the mounting and securing process. Choose a suitable mounting option, secure the DVD player to prevent vibrations, and ensure easy access and safety for all passengers. By following these steps, you can enjoy a seamless entertainment experience while on the road.
Testing And Troubleshooting
After successfully installing a DVD player in your car, it’s important to test its functionality to ensure that you can enjoy your favorite movies and videos on the go. In this section, we will guide you through the process of checking the functionality of the DVD player, troubleshooting common installation issues, and seeking professional help if needed.
Checking the functionality of the DVD player
Once the installation is complete, it’s essential to verify that the DVD player is working correctly. Follow these steps to check its functionality:
- Power On: Start by turning on the car’s ignition and the DVD player. Ensure that the power is properly connected and that the player is receiving enough voltage to operate.
- Video Output: Check the video output by playing a DVD disc or connecting an external video source. Make sure that the video signal is being transmitted to the car’s display system. Adjust the display settings if necessary.
- Audio Output: Test the audio output of the DVD player by playing a DVD disc with sound or connecting an audio source. Check that the sound is being reproduced accurately and adjust the volume and audio settings as needed.
- Disc Loading: Open and close the DVD tray to confirm that the disc loading mechanism is functioning properly. Insert different discs and observe if they play without any issues.
- Remote Control: Test the remote control functionality, ensuring all the buttons are responsive and capable of performing the desired functions.
Troubleshooting common installation issues
Though the installation process is relatively straightforward, it’s common to encounter some challenges. Here are the most common issues and their possible solutions:
| Common Installation Issues | Possible Solutions |
|---|---|
| No Power | Check the power connections and ensure they are correctly wired. Verify the fuse and replace if necessary. |
| No Video or Audio Output | Inspect the cables and connections between the DVD player and the display system. Ensure they are securely plugged in and not damaged. Adjust the display and audio settings if needed. |
| Interference or Distorted Sound | Check if any nearby electronic devices are causing interference. Ensure the audio cables are properly shielded and connected securely. |
| Disc Reading Errors | Clean the DVD lens using a lens cleaning kit or a soft cloth. Check if the disc itself is scratched or damaged. Try playing different discs to determine if the issue is with the player or the disc. |
If you encounter any other issue that is not listed here, refer to the user manual or contact the manufacturer for specific troubleshooting instructions.
Seeking professional help if needed
If you have followed all the troubleshooting steps and are still unable to resolve the issue, it might be time to seek professional assistance. Consider reaching out to a certified car audio technician or the manufacturer’s customer support for expert help. They will have the knowledge and experience to diagnose and fix complex problems that may require specialized tools or expertise.
Remember, regular maintenance and periodic checks can help you identify potential issues before they become major problems. By ensuring that your DVD player is functioning optimally, you can have a pleasant and seamless entertainment experience during your car journeys.
Extra Tips For Enhancing The Dvd Player Experience
Installing a DVD player in your car can greatly enhance your driving experience, allowing you and your passengers to enjoy movies, music, and more during long journeys. However, there are additional accessories and modifications that you can implement to take your DVD player experience to the next level. Here are some extra tips to enhance your DVD player setup:
Setting up additional accessories
To truly customize your DVD player experience, consider adding some extra accessories to your setup. These can include:
- Wireless headphones: Invest in a pair of wireless headphones to allow your passengers to enjoy their favorite movies or music without distracting the driver.
- Remote control: A remote control can make operating the DVD player more convenient for both the driver and passengers.
- USB ports: Install USB ports near the DVD player so that you can easily charge your devices or connect external storage devices.
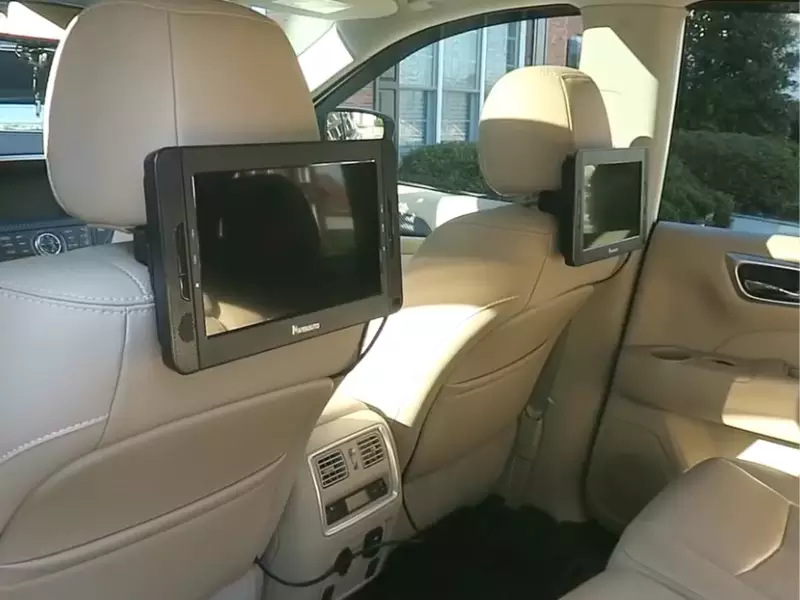
Installing headrest monitors
If you have passengers sitting in the backseat, installing headrest monitors can make their journey more enjoyable. These monitors can be integrated into the back of the front seats, allowing passengers to watch their favorite movies or play games. Consider choosing headrest monitors with touch screen capabilities for easier navigation.
Implementing wireless audio options
Wires can be cumbersome and limit the flexibility of your DVD player setup. To eliminate wire clutter and provide a seamless audio experience, consider implementing wireless audio options. This can be done through the use of Bluetooth adapters or FM transmitters, allowing you to connect your DVD player to the car’s audio system wirelessly. This way, you can listen to the audio through the car’s speakers and enjoy a surround sound experience.
By implementing these extra tips and accessories, you can take your DVD player experience in the car to the next level. Whether you’re embarking on a road trip or simply running errands, you and your passengers can now enjoy an immersive and entertaining journey.
Maintenance And Care
When it comes to installing a DVD player in your car, it’s essential to not only focus on the installation process but also on the maintenance and care of the device. Proper maintenance will ensure that your DVD player functions smoothly and remains in good condition for a long time. In this section, we will discuss three important aspects of maintenance and care: cleaning the DVD player regularly, protecting it from dust and damage, and handling and storing DVDs safely.
Cleaning the DVD player regularly
Cleaning the DVD player regularly is crucial for maintaining its optimal performance. Over time, dust and dirt can accumulate on the player, affecting its functionality. To clean the DVD player, follow these simple steps:
- Gently remove the DVD player from its mount or slot in your car.
- Use a soft, lint-free cloth to wipe the exterior of the player, removing any dust or smudges.
- Carefully open the DVD tray and inspect it for any debris or dirt. Use a can of compressed air to blow away any particles.
- You can also use a DVD lens cleaning disc to clean the lens of the player. Follow the instructions provided with the cleaning disc for best results.
- Once the cleaning process is complete, reinsert the DVD player into its mount or slot in your car.
Protecting it from dust and damage
In addition to regular cleaning, it’s important to protect your DVD player from dust and potential damage. Dust can not only affect the player’s performance but also cause overheating. Here are a few tips for protecting your DVD player effectively:
- Keep the DVD player covered when not in use. If it’s a portable player, store it in a protective case when not in use.
- Consider using a screen protector to avoid scratches on the display.
- Avoid placing the player in direct sunlight or extreme temperatures, as this can damage the internal components.
- Ensure that the mounting or installation of the DVD player is secure and stable to prevent any damage that may occur during driving or sudden stops.
Handling and storing DVDs safely
Lastly, to prolong the lifespan of your DVD player, it’s vital to handle and store DVDs with care. Mishandling or improper storage can lead to scratches or even permanent damage to your favorite movies or music CDs. Here are some tips to help you handle and store DVDs safely:
- Hold DVDs by the edges or the center hole to avoid touching the surface that contains the data.
- Store your DVDs in a cool and dry place away from direct sunlight, excessive heat, or humidity.
- Use DVD cases or storage wallets specifically designed for DVDs to protect them from dust, scratches, and accidental damage.
- Avoid stacking DVDs on top of each other, as this can cause scratches.
- If you need to transport DVDs, use a CD/DVD travel case to keep them secure and protected.
Maintaining and caring for your DVD player is essential for optimal performance and longevity. By following these maintenance tips, you can enjoy uninterrupted entertainment during your car journeys and ensure the longevity of your DVD player.
Legal Considerations And Restrictions
When it comes to installing a DVD player in your car, it’s important to be aware of the legal considerations and restrictions in your area. Familiarizing oneself with local laws, respecting passenger safety regulations, and avoiding distractions while driving are all vital aspects to take into account.
Familiarizing Oneself with Local Laws
In order to install a DVD player in your car legally, it is crucial to familiarize yourself with the local laws and regulations. Different jurisdictions may have specific rules regarding the use of such devices while driving. Conducting thorough research and understanding the applicable laws will help ensure compliance and prevent any potential legal consequences.
Respecting Passenger Safety Regulations
Passenger safety should always be a top priority when considering the installation of a DVD player in your car. Compliance with passenger safety regulations is not only imperative for the well-being of your passengers but also for your own peace of mind. Installing the DVD player in a secure and appropriate location, such as the backseat or headrest, can help minimize the risk of injuries or accidents caused by loose objects in the vehicle.
Additionally, it is vital to ensure that the installation process does not interfere with any safety features of the vehicle, such as airbags or seat belts. Proper installation and adherence to safety guidelines will contribute to creating a safe and enjoyable environment for all occupants of the car.
Avoiding Distractions While Driving
One of the major concerns associated with installing a DVD player in a car is the potential distraction it can cause while driving. Distracted driving poses a significant risk to both the driver and others on the road. Therefore, it is essential to adopt measures that minimize distractions and ensure maximum focus on the task of driving.
Here are some recommendations to avoid distractions while driving with a DVD player:
- Set up the DVD player and choose your desired content before you start driving.
- Utilize headphones or wireless audio systems to allow the passengers to enjoy the audio without disturbing the driver.
- Position the screen in a place where it is not directly within the driver’s line of sight, preventing unnecessary distractions.
By following these tips and adhering to local laws and regulations, you can safely and legally enjoy the benefits of a DVD player in your car without compromising your safety or the safety of others on the road.
Frequently Asked Questions Of How To Install DVD Player In Car
Can I Install A DVD player In My Car?
Yes, you can install a DVD player in your car. It’s a convenient way to enjoy movies or shows while on the go.
Where Do The Red Yellow And White Cables Go For A Dvd Player?
The red, yellow, and white cables from your DVD player need to be connected to the corresponding colored inputs on your TV. The red cable goes into the red input, the yellow cable into the yellow input, and the white cable into the white input.
How Do You Hook Up A Portable DVD Player?
To hook up a portable DVD player, connect the player to the TV using the provided AV cables. Plug one end of the cables into the DVD player’s audio/video output jacks and the other end into the corresponding input jacks on the TV.
Power on both devices and select the right input source on the TV to enjoy your DVD.
What Cables Do You Need For A DVD Player?
To connect a DVD player, you’ll need audio/video cables. The most common types are HDMI or RCA cables. HDMI offers better quality, while RCA cables have red, white, and yellow plugs. Choose the cables that match the ports on your DVD player and TV.
Conclusion
Installing a DVD player in your car can greatly enhance your driving experience, providing entertainment for both the driver and passengers. By following the step-by-step guide in this blog post, you can easily install a DVD player yourself, saving you time and money.
Remember to consider safety precautions and choose a reliable DVD player that suits your car’s specifications. So, go ahead and gear up your car for a more enjoyable and entertaining journey! Happy driving!