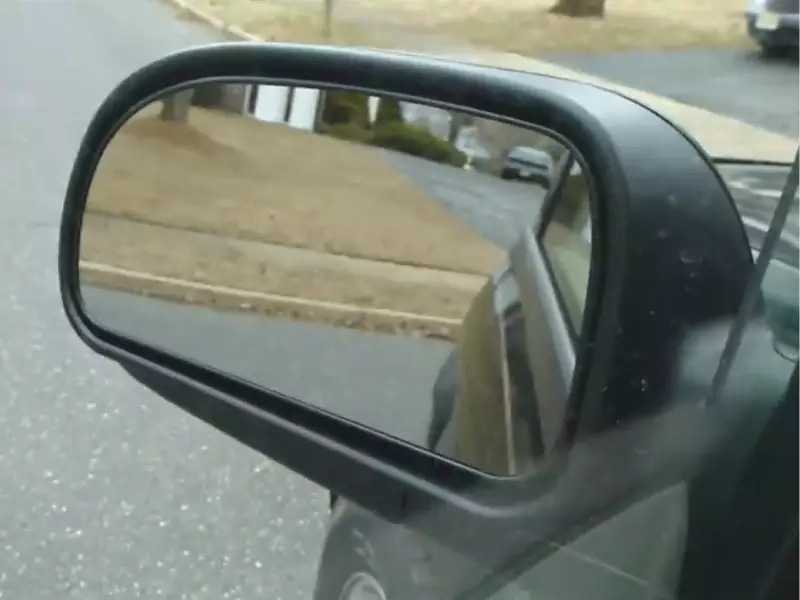
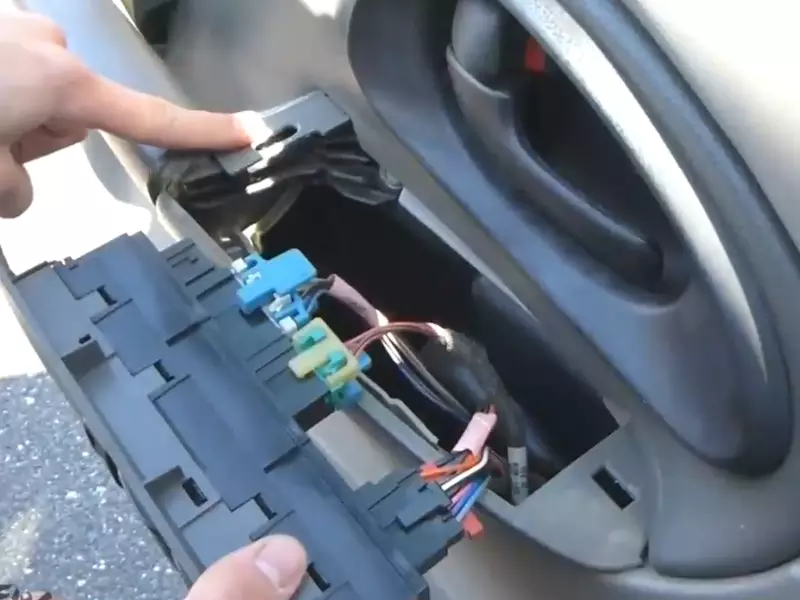
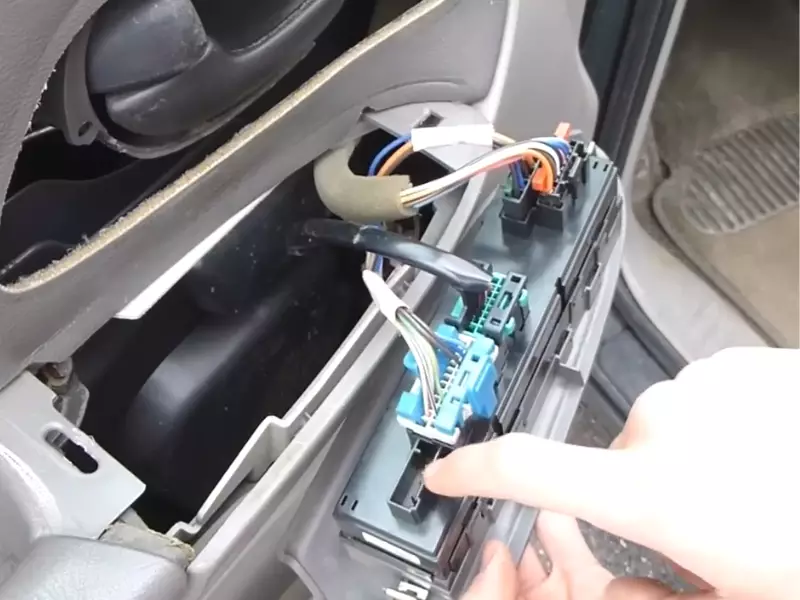
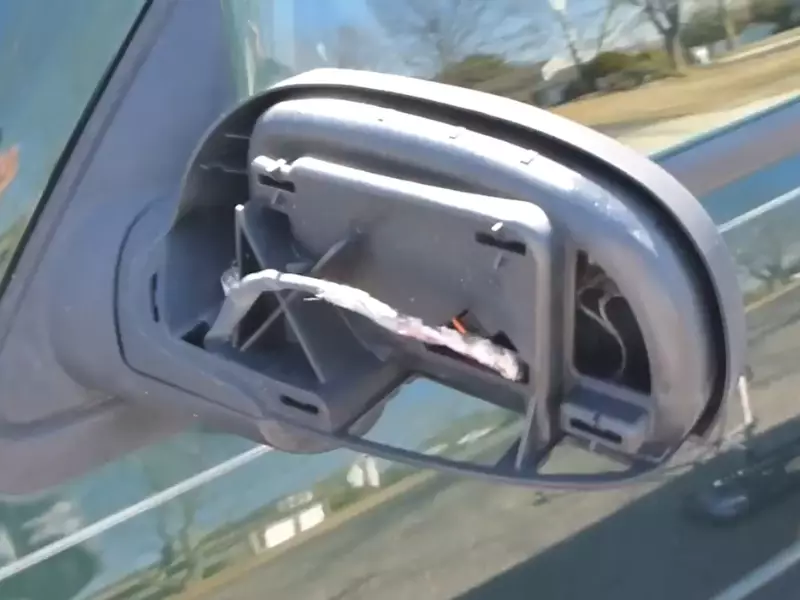
To install the driver-side mirror, first, remove any screws or bolts securing the old mirror, then disconnect any wiring connectors, and finally, attach the new mirror and secure it with the appropriate screws or bolts. Installing a driver side mirror is a straightforward process that anyone can do with a few tools and some patience.
Whether your mirror is damaged, outdated, or simply needs an upgrade, replacing it is a relatively simple task that can be completed in a matter of minutes. In this guide, we will walk you through the step-by-step process of installing a new driver side mirror on your vehicle.
By following these instructions carefully, you can restore your visibility and ensure your safety while driving. So, let’s get started with the installation process.

Why You Need To Replace Your Driver Side Mirror
Importance of a functioning driver side mirror
Having a functioning driver side mirror is essential for a safe and convenient driving experience. This mirror provides a clear view of the road and any potential obstacles or vehicles approaching from the side. Whether you are changing lanes or maneuvering through tight spaces, a properly installed driver side mirror allows you to make informed decisions quickly and confidently.
It offers enhanced visibility, making it easier to spot pedestrians, cyclists, and other vehicles, reducing the risk of accidents and ensuring a smoother driving experience.
Safety implications of a broken or damaged mirror
A broken or damaged driver side mirror poses serious safety risks that should not be underestimated. When the mirror is cracked or completely shattered, not only does it hinder your vision, but it also compromises your ability to detect potential dangers. Whether it’s a blind spot or an oncoming vehicle that you couldn’t see due to a faulty mirror, these unexpected obstacles can lead to accidents and injuries.
Moreover, a damaged driver side mirror may fail to meet legal requirements, depending on your local regulations. Authorities often mandate that all mirrors, including the driver side mirror, be in proper working condition. Failure to comply with these regulations can result in fines or even legal consequences. Therefore, it is crucial to prioritize the replacement of a broken or damaged driver side mirror to ensure compliance with the law and promote overall road safety.
In addition to safety concerns and legal implications, a damaged mirror can also have financial implications. A simple repair or replacement of the mirror is usually more cost-effective than dealing with potential accidents, injuries, or legal consequences resulting from a compromised field of vision.
Overall, it is essential to address any damage to your driver side mirror promptly and replace it if necessary. By doing so, you’ll not only enhance your safety and driving experience but also comply with legal requirements and potentially save yourself from unnecessary expenses. Remember, a small investment in a new driver side mirror can go a long way in ensuring your safety on the road.
Tools And Materials You Will Need
In order to install a driver side mirror, you will need a few tools and materials to get the job done right. By having the necessary equipment ready, you can make the installation process go smoothly and efficiently. Below is a list of the tools and materials you will need:
List of necessary tools and materials for the installation:
- Screwdriver: A screwdriver is an essential tool for removing the screws that hold the old mirror in place. Make sure to have both a Phillips and flathead screwdriver on hand, as different car models may have different types of screws.
- Socket wrench: This tool comes in handy for removing any bolts or nuts that may be securing the mirror to the door panel. Ensure that you have the correct size socket to fit the bolts or nuts on your particular vehicle.
- New mirror: It is important to choose the right replacement mirror for your car. Measure the dimensions of your old mirror or consult your vehicle’s manual to find the correct size and style of mirror. Additionally, check if your replacement mirror comes with all the necessary accessories and mounting hardware.
- Gloves: Protect your hands from any sharp edges or debris by wearing a pair of gloves throughout the installation process.
- Clean cloth: It is always a good idea to have a clean cloth on hand to wipe away any dirt or fingerprints that may accumulate during the installation.
- Adhesive or adhesive tape: Depending on the type of mirror you are installing, you may need some adhesive or adhesive tape to secure the mirror in place. Make sure to choose a high-quality adhesive that is specifically designed for automotive use.
- Protective goggles: Safety should always be a priority when working on your vehicle. Protect your eyes from any debris by wearing a pair of protective goggles.
- Patience and care: Installing a driver side mirror requires attention to detail and a steady hand. Take your time during the installation process to ensure that everything is properly aligned and secured.
By gathering these tools and materials beforehand, you can ensure that you have everything you need to install your driver side mirror successfully. Remember to follow the instructions provided by the manufacturer and take necessary precautions to avoid any accidents or damages to your vehicle.

Step-By-Step Guide To Installing The Driver Side Mirror
Replacing a broken or damaged driver side mirror is an important maintenance task that can be easily done at home, saving you time and money. In this step-by-step guide, we will walk you through the process of installing a new driver side mirror, ensuring proper visibility and functionality. Follow these instructions carefully to ensure a seamless installation and enjoy a clear view of the road ahead.
Preparing for the installation
- Park your car in a safe and well-lit area. This will provide you with enough space to work comfortably and reduce the risk of accidents.
- Put on protective gloves and eyewear to safeguard yourself from any potential injuries. This ensures your safety throughout the installation process.
Removing the old mirror
Before installing the new mirror, you need to remove the old one. Follow these steps:
Accessing the mirror from inside the car
- Start by rolling down the window on the same side as the mirror you are replacing. This will provide better access to the mirror assembly.
- Locate the interior panel that covers the mirror’s mounting bolts. This panel is usually located on the inside of the car door, near the mirror assembly.
- Using a screwdriver or a panel removal tool, carefully remove the screws or clips holding the panel in place. Set the panel aside, making sure not to damage it.
Detaching the mirror from its mount
- Once you have access to the mirror assembly, locate the mounting bolts that secure the mirror to the door.
- Using the appropriate tool, loosen and remove the bolts, keeping them in a safe place for reassembly later.
- Gently slide the mirror assembly off the mount, taking care not to damage any electrical connections.
Disconnecting any electrical connections
If your car is equipped with electrical features such as power mirrors, you will need to disconnect the electrical connections before fully removing the mirror. Follow these steps:
- Locate the electrical connector behind the mirror assembly.
- Gently disconnect the wiring harness by pressing the tab and pulling the connector apart.
Installing the new mirror
Now that you have removed the old mirror, it’s time to install the new one. Follow these steps:
Positioning the new mirror on the mount
- Take the new mirror and align it with the mount on the door. Make sure to line up the bolt holes correctly.
- Slide the mirror assembly onto the mount until it sits flush against the door.
Reconnecting electrical connections (if applicable)
If your new mirror has electrical features, you will need to reconnect the wiring harness. Follow these steps:
- Locate the electrical connector on the new mirror assembly.
- Align the connector with the wiring harness from the car and push them together until they click into place.
Securing the mirror in place
- Using the original mounting bolts, reattach and tighten them to secure the new mirror in place. Be sure not to overtighten.
Testing the new mirror
Once the new mirror is securely in place, it’s time to test its functionality. Follow these steps:
Adjusting the mirror for proper visibility
- Get inside the car and sit in the driver’s seat.
- Using the mirror adjustment controls, adjust the new mirror until you have a clear view of the road behind you.
Verifying the mirror’s functionalities
Test the mirror’s functionalities, including manual or power adjustments, heating (if applicable), and any other features specific to your vehicle.

Final steps and precautions
Cleaning the installed mirror
Use a soft, lint-free cloth and a glass cleaner to clean the surface of the installed mirror. This will ensure a clear reflection and optimal visibility.
Checking for any loose parts or connections
Before wrapping up the installation, double-check that all bolts are tightened, electrical connections are secure, and there are no loose parts. This will prevent any issues or potential hazards in the future.
Tips For A Successful Installation
When it comes to installing a driver side mirror, following a few tips can make the process smoother and ensure a successful outcome. From double-checking compatibility to seeking professional assistance when needed, paying attention to these details can save time and frustration. Let’s explore these tips in more detail:
Following the manufacturer’s instructions
One of the first and most important steps in installing a driver side mirror is to carefully read and follow the manufacturer’s instructions. Each vehicle and mirror model may have specific requirements, so paying close attention to these instructions is crucial. The instructions typically provide the necessary steps, tools, and safety precautions to complete the installation correctly and efficiently. By following the instructions, you can avoid common pitfalls and prevent damage to the mirror or your vehicle.
Double-checking the compatibility of the replacement mirror
Before starting the installation process, it is essential to double-check the compatibility of the replacement mirror with your vehicle. Every car has different specifications, so ensuring that the mirror is compatible will prevent frustration and potential safety issues. Check the part number, size, and design to match it with your vehicle’s requirements. If you are unsure about determining compatibility, you can consult a professional or use online resources that provide compatibility databases.
Seeking professional help if unsure or uncomfortable with the process
If you are unsure about any aspect of the installation process or feel uncomfortable with handling it yourself, it is always better to seek professional help. Auto repair shops and technicians have the expertise and experience to handle the installation correctly and efficiently. They can ensure that the mirror is securely installed, aligned properly, and functioning correctly. While seeking professional assistance may involve additional cost, it can provide peace of mind knowing that the driver side mirror is installed correctly and will function as intended.
In conclusion, following the manufacturer’s instructions, double-checking compatibility, and seeking professional assistance when needed are essential tips for a successful driver side mirror installation. By paying attention to these details, you can ensure that the mirror is installed properly, enhancing your visibility and safety while driving.

Common Mistakes To Avoid
Installing a driver side mirror may seem like a straightforward task, but if you’re not careful, you might end up making some common mistakes that can affect the functionality and durability of the mirror. To ensure a successful installation, it’s important to be aware of these mistakes and know how to avoid them. In this article, we will discuss two common mistakes to avoid when installing a driver side mirror: incorrect handling of delicate electrical connections and not properly aligning the mirror during installation.
Incorrect Handling of Delicate Electrical Connections
One of the most important things to remember when installing a driver side mirror is to handle the delicate electrical connections with care. These connections are responsible for powering the mirror’s motor and heating functions, and any mishandling can lead to electrical issues or even permanent damage to the mirror. To avoid this mistake, follow these steps:
- Before attempting any installation, make sure to disconnect the vehicle’s battery to prevent any electrical shocks.
- Identify the electrical connector located at the back of the mirror. This connector typically has a tab or latch that needs to be pressed or lifted to release the connection.
- Gently unplug the electrical connector from the mirror by pulling it straight out. Avoid applying excessive force or twisting motion as it can damage the connector or its pins.
- When reconnecting the electrical connector to the new mirror, make sure it is securely plugged in and the latch or tab is properly engaged. Give it a gentle tug to ensure a tight connection.
- Once the electrical connection is properly secured, you can proceed with the rest of the installation process.
Not Properly Aligning the Mirror During Installation
Another common mistake people make when installing a driver side mirror is not properly aligning it. A misaligned mirror can affect visibility and increase the risk of accidents on the road. Here’s how you can avoid this mistake:
- Before removing the old mirror, take note of its position and alignment by comparing it to the other mirrors on your vehicle.
- When installing the new mirror, make sure it is aligned correctly with the existing mounting bracket on your vehicle. Refer to the manufacturer’s instructions or consult a professional if needed.
- Adjust the mirror’s position and angle to ensure proper visibility when seated in the driver’s seat. Use the mirror’s adjustment controls or manual adjustment if necessary.
- Once the mirror is properly aligned, tighten the mounting screws or bolts securely, taking care not to overtighten and risk damaging the mirror or the vehicle’s body.
- Give the mirror a final test by adjusting it and checking the visibility from the driver’s seat. Make any necessary adjustments before completing the installation.
By avoiding these common mistakes, you can ensure a successful and hassle-free installation of your driver side mirror. Remember to be patient and follow the instructions carefully. If you’re unsure about any step in the process, it’s always best to seek professional assistance to ensure a proper installation. Properly installing and aligning your mirror will not only enhance your driving experience but also contribute to your overall safety on the road.
Frequently Asked Questions Of How To Install Driver Side Mirror
Can You Install A Side Mirror Yourself?
Yes, you can install a side mirror yourself. It is a relatively simple process that can save you time and money. Just make sure to gather the necessary tools and follow a step-by-step guide to ensure proper installation.
How Do You Put A Side Mirror Back On A Car?
To put a side mirror back on a car, follow these steps: 1. Remove the old mirror by loosening the screws or bolts. 2. Place the new mirror in position and align it correctly. 3. Tighten the screws or bolts to secure the mirror in place.
4. Check the mirror’s adjustment and make any necessary tweaks. 5. Ensure the mirror is firmly attached before driving.
How Much Does It Cost To Install A Driver Side Mirror?
The cost of installing a driver side mirror varies, but on average, it can range from $150 to $400. The exact price depends on factors like the make and model of the vehicle, the type of mirror needed, and any additional labor charges from the installer.
Will Autozone Replace My Side Mirror?
Yes, AutoZone will replace your side mirror. They offer a wide range of automotive services, including side mirror replacements.
Conclusion
Installing a driver side mirror is a manageable task that can greatly enhance the safety and functionality of your vehicle. By following the step-by-step instructions outlined in this blog post, you can successfully replace your old mirror with a new one.
Remember to take proper safety precautions and consult your vehicle’s manual for any specific instructions. With a little patience and the right tools, you’ll have a brand new driver side mirror installed in no time. Safe driving!
