To install a double din car stereo, follow these steps: disconnect the car battery, remove the existing stereo, connect the wiring harness and antenna adapter, mount the new stereo, and test the functionality. Upgrading your car stereo to a double din unit can enhance your driving experience and provide access to advanced features like Bluetooth connectivity and navigation.
Whether you prefer listening to music or want to make hands-free calls, a double din car stereo is a fantastic addition to your vehicle. In this guide, we will walk you through the process of installing a double din car stereo.
By following these steps, you can easily upgrade your car’s audio system and enjoy all the benefits that come with it.
Required Tools And Materials
Before you start installing a double din car stereo, it is important to make sure you have all the necessary tools and materials. Having everything ready beforehand can save you time and hassle during the installation process. In this section, we will discuss the list of tools needed as well as the materials required for a successful installation.
List of tools needed for installation
Installing a double din car stereo requires a few specific tools to ensure a smooth and efficient process. Here is a list of the essential tools you will need:
- Socket wrench set: A socket wrench set is necessary for removing and tightening bolts, which will be required during the installation.
- Screwdriver set: A set of screwdrivers, including both flathead and Phillips-head screwdrivers, will be needed to remove and secure screws.
- Wire stripper and cutter: A wire stripper and cutter will be necessary to strip and cut the wires during the installation process.
- Electrical tape: Electrical tape is required to insulate and secure the wires.
- Pry tool: A pry tool is used to remove panels and trim without causing damage.
- Trim removal tool: A trim removal tool is essential for popping out panels and trim without scratching or breaking them.
- Panel removal tool: A panel removal tool will help in easily removing panels from the dashboard.
- Torque wrench: A torque wrench is necessary for tightening bolts to the correct torque specifications.
Materials required for a successful installation
In addition to the tools mentioned earlier, there are some materials you will need to have on hand to ensure a successful installation:
- Double din car stereo: Of course, a double din car stereo is the main component required for this installation.
- Wiring harness: A wiring harness is necessary to connect the car stereo to your vehicle’s electrical system.
- Mounting kit: A mounting kit is needed to securely install the double din car stereo into the dashboard.
- Antenna adapter: An antenna adapter may be required to ensure proper radio reception after installing the new stereo.
- Dash kit: A dash kit is necessary if your vehicle’s dashboard has an irregular shape or size.
- Heat shrink tubing: Heat shrink tubing is used to provide a protective covering for the wire connections.
- Electrical connectors: These connectors are needed to join the wires securely and maintain good electrical connections.
- Mounting screws: Mounting screws are required to secure the mounting kit and the new stereo into the dashboard.
In conclusion,
Having all the required tools and materials for installing a double din car stereo is crucial for a successful installation process. Make sure you have everything on the list before you begin, and you’ll be well-prepared to tackle the installation with confidence. So, gather all the tools and materials, and let’s get started!
Preparing For Installation
Before diving into the installation process of a double din car stereo, there are a few crucial steps you need to take to ensure a smooth and successful installation. In this guide, we will walk you through these key steps, which include checking compatibility, disconnecting the battery, and gathering necessary information and instructions.
Checking compatibility of the stereo with the car model
First and foremost, it’s crucial to check the compatibility of the double din car stereo with your specific car model. Each car manufacturer and model may have different specifications and wiring configurations, so it’s essential to ensure that the stereo you choose is compatible. This prevents any potential issues or complications during the installation process. Consult the user manual of your car or contact the manufacturer to get information about the specific stereo models that are compatible with your vehicle.
Disconnecting the battery to ensure safety
Your safety should always be a top priority when working with electronics in your car. Before starting the installation process, it’s vital to disconnect the battery. This step prevents any electrical mishaps or short circuits that can occur while handling the wiring. Locate the battery in your car, loosen the negative terminal, and disconnect it from the battery. Remember to cover the exposed terminal with a cloth or tape to prevent accidental contact.
Gathering necessary information and instructions
Proper preparation is key to a successful installation. Before you start, gather all the necessary information and instructions related to your specific car model and the double din car stereo you’ve chosen. Refer to the user manuals of both your car and the stereo for any specific instructions that may be unique to your setup. Additionally, you can find helpful installation guides and videos online that provide step-by-step instructions tailored to your particular car model and stereo brand. This research phase will equip you with the knowledge needed to tackle the installation with confidence.
By following these crucial steps of checking compatibility, disconnecting the battery, and gathering necessary information and instructions, you set yourself up for a hassle-free installation process. With all the groundwork completed, you can now move on to the exciting part of actually installing your double din car stereo and enjoy an upgraded audio experience while cruising down the road.
Removing The Old Stereo
In order to install a new double din car stereo, it’s necessary to remove the old stereo first. This may seem like a daunting task, but with a few simple steps, you’ll have the old stereo out in no time. In this section, we’ll walk you through the process of removing the trim and panel to access the old stereo, disconnecting the wiring harness and antenna, and finally, taking out the old stereo from the dashboard.
Removing the trim and panel to access the old stereo
The first step in removing the old stereo is to remove the trim and panel that are covering it. Here’s how you can do it:
- Start by finding the screws or clips that are holding the trim and panel in place. These can usually be found around the edges of the panel or inside any compartments that may be present.
- Using a screwdriver or trim removal tool, carefully remove the screws or pry off the clips. Be cautious not to damage the surrounding trim or panel.
- Once the screws or clips are removed, gently pull the trim and panel away from the dashboard. It may be necessary to use a little force, but be careful not to pull too hard as there may still be wires connected.
- Set the trim and panel aside in a safe place, ensuring it doesn’t get scratched or damaged.
Disconnecting the wiring harness and antenna from the stereo
With the trim and panel removed, you now have access to the old stereo. The next step is to disconnect the wiring harness and antenna. Follow these steps:
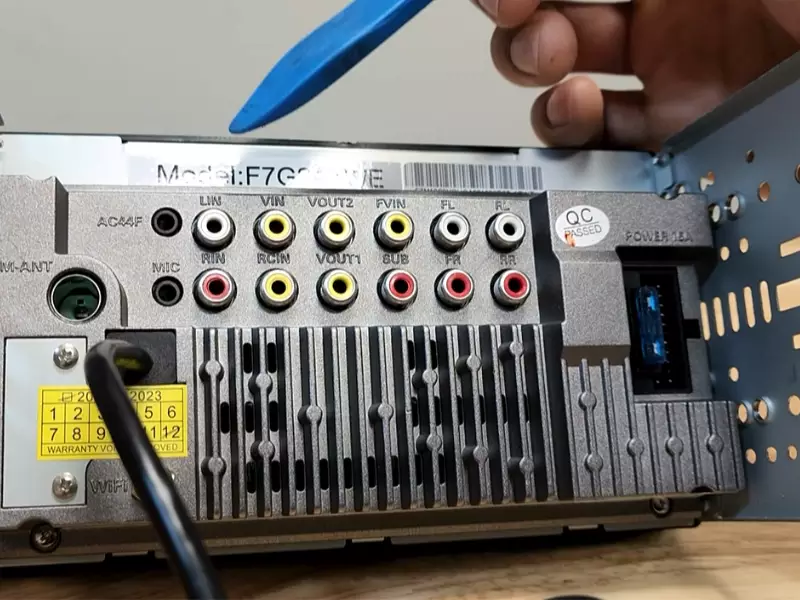
- Locate the wiring harness and antenna connections at the back of the stereo. These are typically a bundle of wires and a larger plug.
- Using your fingers or a small screwdriver, gently press the release tab or pull back the locking mechanism on the wiring harness and antenna connections.
- Once the connections are unlocked, carefully remove the wiring harness and antenna by gently pulling them away from the stereo.
- Ensure that you remember which wires and plugs were connected to which sockets. Taking a photo or making a diagram can be helpful for reference during the installation of the new stereo.
Taking out the old stereo from the dashboard
With the wiring harness and antenna disconnected, it’s time to remove the old stereo from the dashboard. Follow these steps:
- Locate the screws or clips that are holding the old stereo in place. These are usually found on the sides or top and bottom of the stereo.
- Using a screwdriver or trim removal tool, carefully remove the screws or pry off the clips, taking care not to scratch or damage the surrounding dashboard.
- Once the screws or clips are removed, gently pull the old stereo out of the dashboard. It may be necessary to wiggle it slightly to loosen it from any remaining connectors.
- Set the old stereo aside in a safe place, as you may need it for reference or as a backup.
With the old stereo removed, you are now ready to install your new double din car stereo. The process may seem intimidating at first, but by following these steps, you can easily remove the old stereo and prepare for the installation of the new one.
Wiring The Double Din Stereo
One of the most important steps in installing a double din car stereo is wiring. This process involves connecting the wiring harness of the new stereo to your car’s existing harness. It may seem complex at first, but with a basic understanding of the wiring diagram and careful attention to detail, you can ensure a successful installation.
Understanding the wiring diagram of the new stereo
Before you begin the wiring process, it’s crucial to study the wiring diagram of your new double din stereo. This diagram will show you the color-coded wires and their corresponding functions. It’s important to correctly identify each wire to avoid any mishaps during installation. Ensure that you have a clear understanding of which wires are for power, ground, speakers, and other essential functions.
Connecting the wiring harness of the new stereo to the car’s existing harness
Once you have a good grasp of the wiring diagram, you can start connecting the wiring harness of the new stereo to your car’s existing harness. The wiring harness acts as an intermediary between the stereo and the car’s electrical system. It allows for a seamless connection and ensures that the stereo functions properly.
To connect the wiring harnesses, match the color-coded wires from the stereo’s harness to the corresponding wires on the car’s harness. Strip a small portion of the insulation from each wire end, then twist and solder them together. Secure the connections using electrical tape or heat shrink tubing.
If your car’s harness does not match the color coding of the stereo’s harness, refer to the wiring diagram provided with the stereo. Many aftermarket stereos come with universal wiring instructions that outline the standard wire functions.
Ensuring proper connections and making necessary adjustments
Once all the wires are properly connected, it’s crucial to double-check each connection to ensure they are secure and snug. Loose connections can result in poor audio quality or even damage to the stereo or your car’s electrical system.
If needed, make any necessary adjustments to the wiring, such as trimming excessive wire lengths or repositioning wires to ensure they don’t interfere with other components of your car. Take your time and pay attention to detail to achieve a clean and organized wiring setup.
In conclusion, wiring a double din stereo may seem daunting, but with a clear understanding of the wiring diagram and careful attention to detail, it becomes a manageable task. By properly connecting the wiring harnesses and ensuring all connections are secure, you can enjoy your new stereo with confidence.
Mounting The Double Din Stereo
One of the most important steps in installing a double din car stereo is properly mounting it into the dashboard. This not only ensures a secure fit but also enhances the overall appearance of your car’s interior. In this section, we will guide you through the process of fitting the new stereo into the double din slot, securing it with brackets or screws, and checking for proper alignment and fitment.
Fitting the new stereo into the double din slot in the dashboard
To begin with, make sure you have a double din slot available in your car’s dashboard. Most modern cars come with this standard size slot, but if your car has a single din slot, you will need to find a suitable adapter kit to convert it to a double din size. Once you have confirmed the compatibility, follow these steps:
- Start by removing the existing stereo from the dashboard. This is usually done by gently prying off the trim panel surrounding the stereo using a trim removal tool or a flathead screwdriver. Take your time to avoid damaging the panel or any other components.
- Once the trim panel is removed, you will typically find the screws or bolts that secure the factory stereo in place. Use the appropriate tools to remove these and carefully pull out the stereo from the dashboard.
- Before inserting the new double din stereo, it’s crucial to connect all the required cables and wiring harnesses. This includes the power harness, speaker wires, antenna cable, and any other necessary connections. Refer to the stereo’s instructions or the wiring diagram specific to your car for proper guidance.
- Once all the connections are in place, carefully slide the new stereo into the double din slot. Make sure it fits snugly and aligns properly with the trim panel and other components in the dashboard. Apply gentle pressure but avoid forcing it in, as this can cause damage.
Securing the stereo with any necessary brackets or screws
In some cases, additional brackets or screws may be required to secure the double din stereo in place. These brackets or screws are usually included with the stereo or can be purchased separately. Follow these steps to ensure a secure installation:
- Check the instructions provided with the new stereo to determine if any brackets are required. These brackets are designed to hold the stereo securely in the dashboard.
- If necessary, attach the brackets to the sides of the stereo using the provided screws. Make sure the brackets are properly aligned and tightened to prevent any movement or vibrations while driving.
- Once the brackets are attached, carefully slide the stereo back into the double din slot, ensuring that it sits flush with the dashboard. You may need to apply slight pressure to fit it snugly.
- If your car’s dashboard has any screw holes or mounting points specifically designed for the stereo, make sure to use the appropriate screws to secure it. Tighten the screws firmly but avoid overtightening, as this can damage the stereo or the dashboard.
Checking for proper alignment and fitment
After completing the installation process, it’s crucial to check for proper alignment and fitment of the double din stereo. This step helps ensure that everything is properly installed and functioning correctly. Follow these simple steps:
- Inspect the stereo from various angles to ensure it is aligned symmetrically with the dashboard and fits seamlessly with the trim panel. Any noticeable gaps or misalignment should be corrected by adjusting the brackets or stereo position.
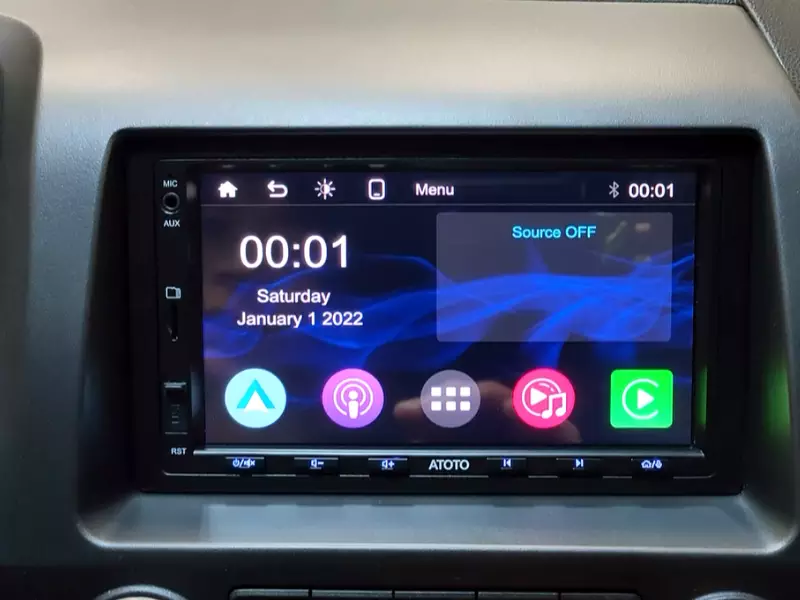
- Test all the functions of the stereo, including the audio output, touchscreen display, and any other features it offers. Make sure everything is working correctly and that the stereo is securely fixed in place.
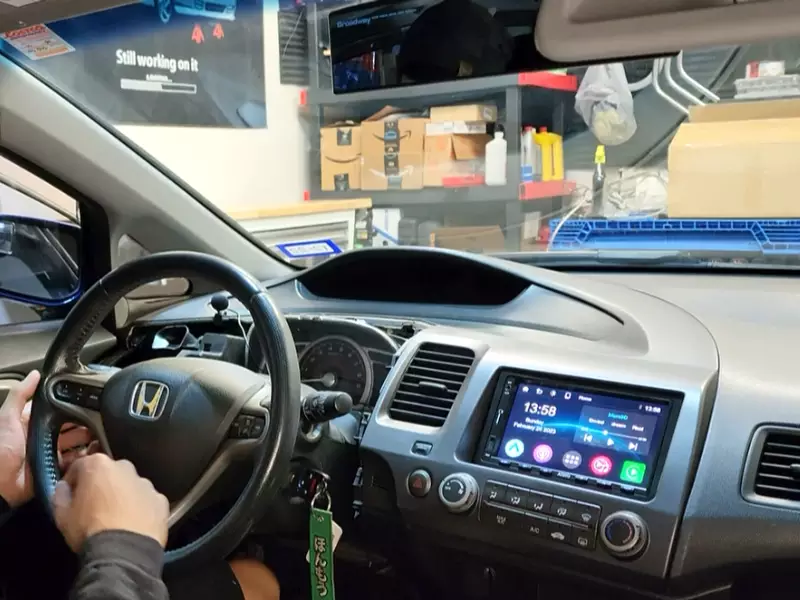
- Take your car for a short test drive to further evaluate the stability of the stereo. Listen for any strange noises or rattling sounds that may indicate loose brackets or improper fitment. If necessary, recheck the installation and make adjustments as needed.
By following these steps and paying attention to detail, you can confidently mount your double din car stereo and enjoy a seamless and enhanced driving experience.
Making The Final Connections
Once you have successfully removed the old car stereo and connected the new mounting bracket, it’s time to make the final connections. This step ensures that all the necessary wiring and components are properly connected, allowing you to enjoy your new double din car stereo without any issues. In this section, we will focus on reconnecting the wiring harness and antenna to the new stereo, double-checking all connections for accuracy, and testing the functionality of the stereo before final installation.
Reconnecting the wiring harness and antenna to the new stereo
First, you will need to locate the wiring harness that corresponds to your car’s make and model. The wiring harness serves as the interface between the car’s electrical system and the car stereo. It is typically a rectangular plastic connector with multiple color-coded wires. Once you have identified the correct wiring harness, follow these steps:
- Take the wiring harness that came with your new double din car stereo and plug it into the corresponding connector in your car’s wiring harness. Ensure it fits snugly and securely.
- Match the color-coded wires from both harnesses, ensuring that the positive (usually red) and negative (usually black) wires are correctly aligned.
- Securely connect each wire by twisting them together and covering them with electrical tape or using wire connectors.
- Next, you will need to connect the car’s antenna to the new stereo. Locate the antenna connector on the back of the stereo and plug in the antenna cable. Ensure it is firmly connected, as a loose connection can result in poor radio reception.
Double-checking all connections for accuracy
Once you have completed reconnecting the wiring harness and antenna, it is crucial to double-check all connections to ensure they are accurate. Taking the time to verify each connection will help prevent any technical issues later on. Follow these steps to double-check your connections:
- Inspect each wire connection to make sure they are securely fastened and there are no loose or exposed wires.
- Check that the wiring harness is properly seated in the connector and there are no bent or damaged pins.
- Ensure the antenna cable is firmly connected to the stereo and there are no signs of damage.
Testing the functionality of the stereo before final installation
Before completing the installation process, it is essential to test the functionality of the stereo to ensure everything is working correctly. Here’s how:
- Insert the car key into the ignition and turn it to the accessory or on position, without starting the engine.
- Power on the new stereo and test each feature, including radio, CD player, Bluetooth connectivity, and any additional functions.
- Adjust the volume, change the radio station, and play a CD to ensure the sound quality is satisfactory.
- Confirm that all buttons and controls on the stereo are responsive and functioning properly.
Once you have tested the functionality of the new car stereo, and everything is working as expected, you can proceed with the final installation. Following these steps ensures a smooth and successful installation of your double din car stereo, allowing you to enjoy your favorite music and features while driving.
Securing The New Stereo
When it comes to installing a double din car stereo, securing the new stereo is an essential step that ensures it remains in place and functions properly. In this section, we will discuss how to reattach the trim and panel to the dashboard, making sure everything is properly secured and aligned. We will also cover cleaning up any excess wiring or clutter, a crucial step for a tidy and professional installation.
Reattaching the trim and panel to the dashboard
Now that the new double din car stereo is securely mounted in the dashboard, it’s time to reattach the trim and panel. This step not only provides a finished look to the installation but also ensures that the stereo remains in place over time.
Here’s a simple step-by-step guide on how to reattach the trim and panel:
- Begin by carefully aligning the trim and panel with the dashboard. Make sure they fit snugly and align with any existing screw holes or clips.
- Once aligned, gently press the trim and panel against the dashboard, starting from one side and working your way to the other. Apply even pressure to ensure a secure fit.
- If the trim or panel has screws or clips, use the appropriate tools to reattach them. Make sure to tighten the screws firmly but not excessively to avoid damaging the trim or panel.
- Double-check the alignment and fitment of the trim and panel. Ensure that they are flush with the dashboard and there are no gaps or loose areas.
Making sure everything is properly secured and aligned
Now that the trim and panel are reattached, it’s crucial to ensure that everything is properly secured and aligned to prevent rattling or movement while driving. Here are a few tips to help you achieve a secure and aligned installation:
- Double-check all screws, clips, or brackets that hold the trim, panel, and stereo in place. Ensure they are tight and secure.
- Inspect the alignment of the trim and panel once again. Make any necessary adjustments to eliminate any gaps or misalignment.
- If you find any loose areas or parts that seem insecure, consider using foam tape or adhesive pads to provide additional support and prevent rattling.
Cleaning up any excess wiring or clutter
Now that the double din car stereo is securely installed and everything is properly aligned, it’s time to clean up any excess wiring or clutter. This not only improves the overall appearance of the installation but also ensures a safe and efficient operation of the stereo.
Follow these steps to clean up any excess wiring or clutter:
- Identify any loose or hanging wires that are not connected to the stereo or other components. Carefully bundle them together using zip ties or wire loom.
- Tuck the bundled wires neatly behind the dashboard or secure them to existing wire harnesses using zip ties or adhesive clips.
- Trim any excess length from the zip ties to maintain a tidy appearance.
- Ensure that all wires are properly connected to their respective terminals on the stereo, and there are no exposed or bare wires.
By following these steps, you can secure your new double din car stereo, reattach the trim and panel, and ensure everything is aligned and tidy. A well-installed stereo not only enhances your driving experience but also adds a touch of sophistication to your vehicle’s interior.
Testing And Troubleshooting
Turning on the car and testing the stereo’s functionality
After successfully installing your new double DIN car stereo, it’s time to test its functionality to ensure everything is working as it should. Testing the stereo is an important step to verify that your installation was done correctly and that all the components are properly connected. Here are some steps to follow when testing your car stereo:
- Powering on the car: Insert the car key into the ignition and turn it to the accessory or on position, allowing the car’s electrical system to power up. This will provide the necessary power to turn on the stereo and begin the testing process.
- Turning on the stereo: Once the car is powered on, locate the power button on your new double DIN stereo unit. Press the power button to turn on the stereo and wait for it to boot up.
- Testing the basic functions: Once the stereo is powered on, test the basic functions such as the volume control, radio tuner, and CD/DVD player (if applicable). Ensure that the buttons and knobs are responsive and that you can easily navigate through menus and change settings.
- Checking the display: Pay attention to the display screen of the stereo. Ensure that it lights up properly and that all the information is clearly visible. Check for any flickering or distorted display that may indicate a wiring or connection issue.
- Verifying connectivity: Test the connectivity features of your stereo, such as Bluetooth, USB, and auxiliary inputs. Pair your phone or any other Bluetooth device with the stereo and try playing audio through it.
Troubleshooting any issues that may arise
During the testing process, it’s possible that you may encounter certain issues with your double DIN car stereo. Troubleshooting these issues is essential to ensure optimal performance. Here are some common problems you may encounter and their possible solutions:
- No power: If the stereo doesn’t power on, check the wiring connections to ensure they are secure and properly connected. Also, make sure the fuse on the stereo’s wiring harness is intact. If these steps don’t resolve the issue, consult the manufacturer’s manual or seek professional assistance.
- No sound: If the stereo powers on but there’s no sound, check the speaker connections for any loose or disconnected wires. Ensure that the speaker wires are properly connected to the stereo’s speaker output. If the issue persists, verify that the stereo is not on mute or that the volume is not turned down too low.
- Poor reception: If you’re experiencing poor radio reception, make sure the antenna is properly connected to the stereo. Check for any damages to the antenna cable or try repositioning the antenna for better reception.
Checking for sound quality and overall performance
Once you have verified the basic functions and troubleshooting any issues, it’s time to assess the sound quality and overall performance of your new double DIN car stereo. Here are some steps to help you evaluate the stereo’s performance:
- Sound quality: Play different types of music to assess the stereo’s sound quality. Pay attention to clarity, balance, and bass response. Adjust the equalizer settings to suit your preferences and listen for any distortions or unusual noises.
- Sound adjustments: Test the stereo’s various sound settings, such as equalizer presets, sound staging, and time alignment. Experiment with different settings to find the optimal sound profile for your listening pleasure.
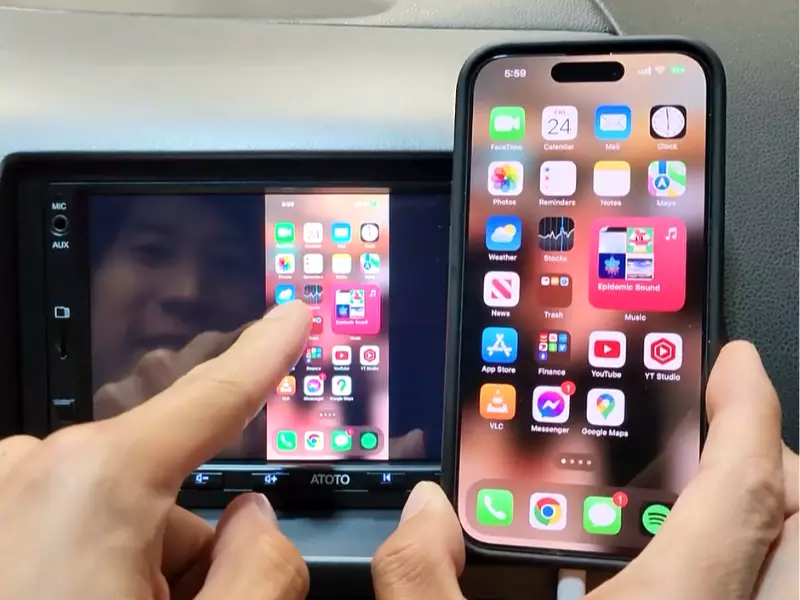
- Bluetooth performance: If your stereo has Bluetooth connectivity, test its performance by connecting your phone and playing audio through it. Check for any lag, audio dropouts, or connectivity issues that may affect your listening experience.
- Overall usability: Evaluate the overall usability of the stereo by testing its user interface and menu navigation. Ensure that it’s intuitive and easy to use while driving, with large, readable buttons and clear menu layouts.
By following these steps, you can confidently test and troubleshoot your newly installed double DIN car stereo, ensuring optimal functionality, sound quality, and performance. Enjoy your new audio experience on the road!
Final Steps And Tips
Reconnecting the car battery and ensuring proper electrical connections
Once you have successfully installed the double din car stereo in your vehicle, it is crucial to reconnect the car battery and check all the electrical connections. This step ensures that the stereo functions properly and avoids any potential issues.
To reconnect the car battery, follow these simple steps:
- Securely attach the positive terminal to the positive battery post.
- Tighten the nut or screw to ensure a stable connection.
- Repeat the above steps for the negative terminal, ensuring a secure connection.
Once the battery is reconnected, it is essential to check all the electrical connections on the stereo itself. Ensure that all the wiring harnesses are tightly connected and properly seated. In case you find any loose connections, gently push them in until they click into place. This step guarantees that there is no interference or malfunction due to loose connections.
Double-checking all settings and customizations on the stereo
After reconnecting the battery and ensuring the electrical connections are secure, it’s time to double-check all the settings and customizations on your brand-new double din car stereo. This step allows you to fine-tune the stereo’s functionality and tailor it to your preferences.
Here are a few key settings and customizations you should consider:
- Audio settings: Adjust the bass, treble, balance, and fade settings to optimize the sound quality according to your personal taste.
- Display settings: Customize the brightness, contrast, and color settings of the stereo’s display to ensure maximum visibility and readability, especially during different lighting conditions.
- Radio presets: Set up your favorite radio stations and save them as presets for easy access.
- Bluetooth pairing: If your stereo supports Bluetooth connectivity, pair it with your smartphone for hands-free calling and audio streaming.
Take your time to explore all the menus and options available on the stereo, making sure to adjust them according to your preferences. This step guarantees an optimized and personalized audio experience during your drives.
Providing additional tips and suggestions for maximizing the stereo’s features
To make the most out of your newly installed double din car stereo, here are some additional tips and suggestions:
- Consider investing in a high-quality sound system upgrade to complement your new stereo. Upgrading speakers or adding an amplifier can greatly enhance the overall audio experience.
- Regularly update the firmware of your stereo. Manufacturers often release firmware updates to improve performance, fix bugs, and introduce new features.
- Protect your stereo from theft by installing a security system or using a removable faceplate if available.
- Keep the stereo and its display clean using a microfiber cloth and mild cleaning solutions. This helps maintain visibility and prevents any long-term damage.
By following these additional tips, you can maximize the features of your double din car stereo and enjoy a premium audio experience on every journey.
Frequently Asked Questions For How To Install Double Din Car Stereo
Can You Install A Double Din Radio In Any Car?
Yes, a double DIN radio can be installed in any car, as long as the car’s dashboard has enough space to accommodate it. Make sure to check your car’s specifications and consult a professional for proper installation.
Can I Install A Car Stereo Myself?
Yes, you can install a car stereo yourself. Just follow the instructions carefully and take your time. Make sure to gather the necessary tools beforehand. Installing a car stereo can be a DIY project if you have basic knowledge of electrical connections.
Do I Need A Wiring Harness To Install A Car Stereo?
Yes, a wiring harness is necessary to install a car stereo. It connects the stereo to the vehicle’s electrical system, making the installation process easier and more efficient.
Is Double Din Car Stereo Good?
Double DIN car stereo is a good choice for your vehicle. It offers an upgraded audio experience with more features and a larger display. It allows for seamless integration with your smartphone and provides enhanced control over your car’s audio system.
Conclusion
Installing a double din car stereo may seem daunting at first, but with the right tools and guidance, it can be a smooth process. By following these step-by-step instructions, you can transform your car’s audio system and enjoy a seamless experience.
Remember to always prioritize safety and consult the manual for your specific car stereo model. So, why wait? Upgrade your car’s audio system and elevate your driving experience today!