To install decals on a car, thoroughly clean the surface, peel the backing off the decal, and carefully press it onto the desired area. Decals can add a touch of personality and style to your vehicle, but proper installation is crucial to ensure they stick securely and look aesthetically pleasing.
Adding decals to your car can be a fun and creative way to customize your vehicle and make it stand out from the crowd. Whether you want to display your favorite sports team, promote your business, or simply add some decorative accents, decals offer endless possibilities.
However, it’s essential to follow the correct installation process to achieve the best results. We will guide you through the process of installing decals on your car, from surface preparation to application techniques. By following these steps, you can ensure that your decals stay put and maintain their appearance for as long as possible. So, let’s dive in and get started!

Understanding The Basics Of Car Decals
Car decals are a great way to personalize and enhance the appearance of your vehicle. Whether you want to show off your favorite sports team, promote your business, or simply add a touch of style, car decals offer a versatile option for customization. In this section, we will explore the concept of car decals, the different types available, the benefits they offer, and how to choose the right decal for your car.
What are car decals?
Car decals are adhesive stickers or graphics that are applied to the exterior or interior of a vehicle. They can be made from various materials such as vinyl, polyester, or even magnetic sheets. Car decals come in a wide range of designs, sizes, and colors, allowing you to express your personality and interests. Whether you prefer a subtle decal or a bold statement, the possibilities are endless.
Different types of car decals
There are several types of car decals to choose from, each catering to different preferences and purposes. Let’s take a look at some of the most popular options:
- Window decals: These decals are specifically designed to be applied to the windows of your car. They can be used to display your favorite quotes, promote a business, or even showcase your love for a particular hobby.
- Bumper stickers: Bumper stickers are a classic choice for car owners looking to make a statement. They can be easily applied to the bumper or other parts of the exterior and are a great way to share your opinions or support a cause.
- Full-body wraps: If you’re looking to completely transform the look of your car, a full-body wrap is the way to go. These large-scale decals cover the entire surface of your vehicle and can be customized to your liking. They are a popular choice among businesses for advertising purposes.
- Partial wraps: Partial wraps are similar to full-body wraps but cover only a portion of your car’s surface. They offer a more cost-effective option while still allowing for a unique and eye-catching design.
Benefits of using car decals
Car decals offer several benefits beyond just aesthetics. Here are some reasons why you should consider installing decals on your car:
- Personalization: Car decals allow you to showcase your individuality and make your vehicle stand out from the crowd. Whether you’re a sports enthusiast, an art lover, or a nature enthusiast, there’s a decal out there for you.
- Advertising: Car decals can be a powerful marketing tool for businesses. By displaying your logo, contact information, or promotional messages on your car, you can reach a wider audience and increase brand visibility.
- Protection: Vinyl car decals provide a protective layer that can shield your vehicle’s paint from scratches, UV rays, and other elements. This can help preserve your car’s resale value and keep it looking new for longer.
Choosing the right decal for your car
When it comes to choosing the right decal for your car, there are a few factors to consider. Here are some tips to help you make an informed decision:
- Purpose: Determine the purpose of your decal. Are you looking to advertise your business, express your personality, or support a cause? Knowing the purpose will guide you in selecting the appropriate design and type of decal.
- Size and placement: Consider the size of your car and where you want to place the decal. Larger decals may be more suitable for full-body or partial wraps, while smaller decals can be applied to specific areas such as windows or bumpers.
- Design and color: Choose a design and color scheme that aligns with your preferences and complements the overall look of your car. Keep in mind that bold and contrasting colors tend to grab attention, while more subtle designs can convey a sense of sophistication.
- Quality: Look for high-quality decals that are made to withstand outdoor conditions and last for a long time. This includes ensuring that the materials used are durable and resistant to fading, peeling, and cracking.
In conclusion, car decals are a fantastic way to add a personal touch and make a statement with your vehicle. Understanding the basics of car decals, exploring the different types available, and considering the benefits they offer can help you choose the perfect decal for your car. So go ahead and give your car a makeover with a stylish and eye-catching decal!
Preparing Your Car For Decal Installation
Before installing decals on your car, it is essential to properly prepare the surface to ensure a smooth and long-lasting application. By following the steps outlined below, you can ensure that your car is ready for decal installation.
Cleaning the car surface
The first step in preparing your car for decal installation is to thoroughly clean the surface. Any dirt, dust, or debris present on the car can interfere with the adhesive and prevent the decal from sticking properly. To clean the surface, you can use water and a mild detergent, or a specialized car cleaner. Pay special attention to areas prone to dirt buildup, such as the hood, fenders, and rear bumper.
Removing any existing decals or stickers
If your car already has existing decals or stickers, it is important to remove them before applying new ones. Use a heat gun or a hairdryer to warm up the adhesive, making it easier to peel off. Be careful not to scratch the car’s surface while removing the decals. If any residual adhesive remains, you can use a adhesive remover to clean it up.
Ensuring a smooth and dry surface
Before proceeding with the decal installation, ensure that the car surface is smooth. Use a microfiber cloth to dry the surface thoroughly after cleaning, removing any water droplets or moisture. A smooth and dry surface will provide the best adhesion for your decals.
Protecting delicate areas of the car
When installing decals, it is important to protect delicate areas of the car such as the paint, windows, and trim. You can use masking tape or painter’s tape to cover these areas and ensure that the decals do not come into contact with them. This precaution will prevent any damage or discoloration to the car’s surfaces.
By following these preparation steps, you can ensure that your car is ready for decal installation. Taking the time to clean the surface, remove any existing decals, ensure a smooth and dry surface, and protect delicate areas will result in a professional and long-lasting decal application.
Step-By-Step Guide To Installing Decals On Your Car
Installing decals on your car is a great way to upgrade its appearance and showcase your personal style. Whether you want to add a cool graphic design or promote your business, properly installing decals is key to getting a professional and long-lasting result. In this step-by-step guide, we will walk you through the process of installing decals on your car, from gathering the necessary tools and materials to adding the finishing touches and post-installation care. Let’s get started!
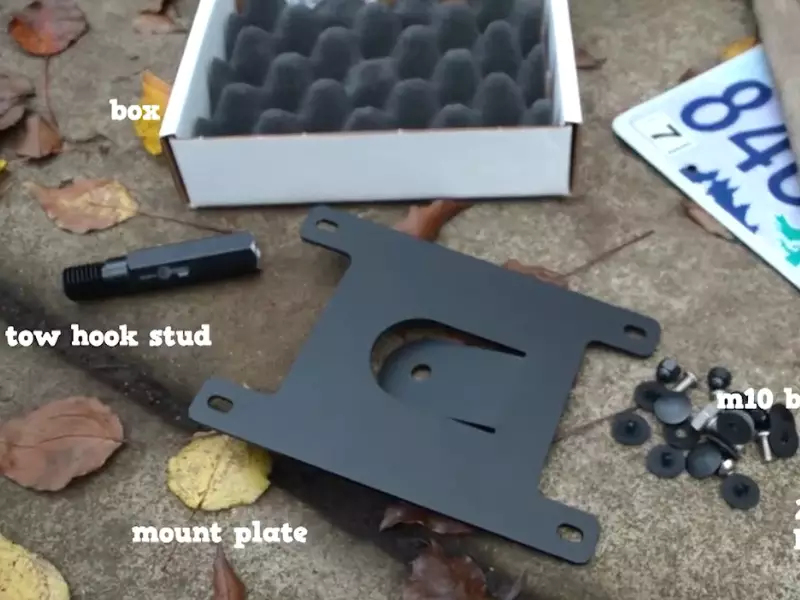
Gathering the necessary tools and materials
Before you begin the installation process, make sure you have all the necessary tools and materials handy. Here’s what you’ll need:
| Tools | Materials |
|---|---|
|
|
Measuring and planning the decal placement
Before you start sticking the decal onto your car, it’s important to measure and plan the placement to ensure a balanced and visually appealing result. Here’s how to do it:
- Clean the area where you plan to apply the decal using a microfiber cloth and isopropyl alcohol to remove any dirt, dust, or wax.
- Use masking tape to temporarily position the decal on the car. Step back and evaluate the placement from different angles to ensure it’s aligned and centered.
- Make small markings with a pencil or tape to indicate the exact position of the decal for reference.
Properly positioning and aligning the decal
Now that you have planned the placement, it’s time to position and align the decal accurately. Follow these steps to ensure a precise application:
- Apply masking tape horizontally across the top edge of the decal, creating a hinge that allows you to lift and fold the decal without losing its position.
- Gently lift the decal and peel off the backing paper, starting from one corner.
- Hold the exposed corner of the decal and carefully position it onto the car, aligning it with the markings you made earlier.
- Slowly lower the rest of the decal onto the car, keeping it taut and avoiding any wrinkles or creases.
Removing the backing paper and applying the decal
With the decal in the correct position, it’s time to remove the backing paper and securely apply it to the car’s surface. Follow these steps for a smooth application:
- Use your squeegee or credit card to gently smooth out the decal from the center towards the edges, pushing out any air bubbles or wrinkles.
- If using transfer tape, apply even pressure while peeling it off, ensuring the decal sticks to the car’s surface.
- Repeat the smoothing process to ensure the entire decal adheres well to the car.
Smoothly removing any air bubbles
Even with careful application, air bubbles may still occur. Here’s how to remove them smoothly:
- Use a pin or needle to poke a tiny hole in the center of the air bubble.
- Gently press down on the surrounding area to force the air out through the hole.
- Smooth out the area with your squeegee or credit card to ensure the decal is still securely applied.
Finishing touches and post-installation care for the decal
Now that your decal is properly installed, it’s important to add some finishing touches and take care of it for long-lasting results. Here’s what to do:
- Remove any excess residue or adhesive by gently wiping the decal and its surrounding area with a lint-free cloth and isopropyl alcohol.
- Inspect the edges of the decal and press them down firmly to ensure they are securely attached to the car.
- Avoid washing your car for at least 24 to 48 hours to allow the decal adhesive to fully set and bond.
Following these steps will help you install decals on your car like a pro. Enjoy the enhanced appearance and make heads turn wherever you go!
Troubleshooting Common Decal Installation Issues
Installing decals on a car can sometimes be tricky, especially for those who are new to the process. While it may seem straightforward, there are a few common issues that can arise during installation. It’s important to know how to troubleshoot these problems to ensure a smooth and professional-looking result. In this section, we will discuss how to deal with adhesive residue, fix decal alignment errors, address air bubbles and wrinkles, and repair damaged or peeling decals.
Dealing with adhesive residue
One of the most frustrating issues that can occur when installing decals on a car is leftover adhesive residue. This residue can be sticky and unsightly, detracting from the overall appearance of the decal. Fortunately, there are a few methods you can use to remove it effectively:
- Heat and peel: Apply heat to the residue using a hairdryer or heat gun. Once the adhesive becomes soft, gently peel it off using your fingers or a plastic scraper. Be careful not to damage the car’s paint in the process.
- Adhesive remover: If the heat and peel method doesn’t completely remove the residue, you can try using an adhesive remover. Apply a small amount of the remover to a clean cloth and gently rub it onto the affected area. Ensure the remover is safe to use on car surfaces and test it on a small, inconspicuous area first.
Fixing decal alignment errors
Decal alignment errors can occur when attempting to position a decal on a car. It’s essential to address these errors promptly to achieve a professional-looking installation. Here are a few steps you can take to fix decal alignment errors:
- Remove and reapply: If you notice that the decal is misaligned, carefully lift it off the car’s surface using a plastic scraper or your fingers. Gently peel it back and reposition it as needed. A helpful tip is to have a second person assist you in holding the decal while you adjust its placement.
- Measure and mark: Before applying the decal, take measurements and make marks using a washable marker or masking tape to indicate the correct placement. This can help ensure proper alignment and minimize the risk of errors.
Addressing air bubbles and wrinkles
Air bubbles and wrinkles are common issues that can mar the smooth appearance of a decal. Fortunately, there are a few techniques you can use to address them:
- Smoothing with a squeegee: Start from the center of the decal and use a squeegee to gently push any air bubbles or wrinkles toward the edges. Move in a diagonal motion for the best results. Be careful not to apply too much pressure, as this can damage the decal.
- Piercing and smoothing: If air bubbles persist, you can try puncturing them with a small pin or needle. Once pierced, use the squeegee or your fingers to smooth out the air bubbles. Take care not to puncture the decal itself.
Repairing damaged or peeling decals
In some cases, decals can become damaged or start peeling over time. When this happens, it’s crucial to address the issue promptly to prevent further damage. Here’s how you can repair damaged or peeling decals:
- Trimming and reapplying: If the decal has started to peel at the edges, use a sharp knife or scissors to trim off the damaged portion. Clean the area thoroughly and reapply the decal, making sure to smooth out any air bubbles or wrinkles.
- Using adhesive: If the decal has significant damage or is peeling extensively, you may need to apply adhesive to secure it back to the car’s surface. Choose an adhesive that is suitable for use on car decals, following the manufacturer’s instructions for application.
By following these troubleshooting techniques, you can overcome common decal installation issues and achieve a professional and sleek look for your car. Remember to take your time, be patient, and use these methods carefully to ensure a successful decal installation.
Tips For Maintaining And Removing Car Decals
Installing decals on your car can be a fantastic way to add a personal touch and make a statement. However, once they are on, it becomes equally important to maintain them and remove them safely when the time comes. In this section, we’ll provide you with valuable tips on how to clean and care for decals, how to avoid damage from car washes and extreme temperatures, and how to safely remove decals without damaging your car’s paint.
Cleaning and Caring for Decals
Cleaning and caring for your car decals is essential to keep them looking their best and ensuring their longevity. Here are some handy tips:
- Use a gentle, non-abrasive cleaner: When cleaning your car, avoid harsh chemicals or abrasive cleaners that can damage the decal. Instead, use a mild soap or specifically designed cleaner for decals.
- Hand wash your car: While automated car washes may seem convenient, they can potentially strip off or damage your decals. Opt for a gentle hand wash or use a touchless car wash if available in your area.
- Be cautious when using a pressure washer: If you choose to use a pressure washer, keep a safe distance from the decal and use a low-pressure setting. High-pressure water can cause the edges of the decals to lift or peel.
- Avoid scratching or scraping: When removing dirt or debris from your decals, be gentle and avoid using sharp objects. Instead, use a soft cloth or sponge to clean the surface.
- Regularly inspect your decals: Take the time to inspect your decals for any signs of damage, peeling, or fading. Catching any issues early on can help prevent further damage and allow for prompt repairs or replacements if needed.
Avoiding Damage from Car Washes and Extreme Temperatures
Car washes and extreme temperatures can pose significant risks to your decals. To avoid any damage, keep the following tips in mind:
- Choose a touchless car wash: Touchless car washes are generally gentler on decals as they use high-pressure water instead of brushes or abrasive materials.
- Avoid waxing directly over the decal: While waxing your car can provide protection and a polished look, avoid applying wax directly over the decal. Wax residue can build up and cause discoloration or damage to the decal.
- Protect your car from extreme temperatures: Excessive heat or cold can compromise the adhesive on your decals, leading to peeling or fading. Park your car in shaded areas when possible, and consider using a car cover during extreme weather conditions.
Safely Removing Decals without Damaging the Car Paint
When the time comes to remove your decals, following the correct techniques will help prevent damage to your car’s paint. Here’s how:
- Apply heat: Start by using a hairdryer or heat gun to warm up the decal. The heat softens the adhesive, making it easier to remove.
- Peel carefully: Once the decal is warmed up, start peeling it off slowly and gently. Avoid using excessive force or pulling at steep angles, as this can damage the paint. If the decal resists removal, use more heat or a plastic card to help lift the edges.
- Remove adhesive residue: After removing the decal, there may be some adhesive residue left behind. Use a decal remover product or a mixture of warm water and mild soap to gently clean off the residue. Avoid using harsh chemicals or abrasive materials that can damage the paint.
- Finish with a thorough wash: Once the decal and residue are removed, give your car a thorough wash to remove any remaining dirt or debris. This step will help restore the shine and ensure a clean surface.
Remember, following these tips will help you maintain your car decals effectively and safely remove them when necessary. By taking the time to care for your decals and keeping them in good condition, you can enjoy their eye-catching appeal for years to come.
Showcasing Your New Decal And Personalizing Your Car
Congratulations on successfully installing your new decal on your car! Now it’s time to step back and admire the finished product. Showcasing your new decal will not only enhance the visual appeal of your car but also make it stand out from the crowd.
In addition to showcasing your new decal, personalizing your car further with complementary decals or graphics can take its uniqueness to a whole new level. Let’s explore how you can achieve this and other car customization options to truly make your car an expression of your style and personality.
Stepping back and admiring the finished decal
After hours of careful placement and application, it’s finally time to take a step back and admire your newly installed decal. Seeing it in its full glory adds a sense of accomplishment, and you can’t help but marvel at how it transforms the look of your car. Take a moment to appreciate the fine details and the way the decal complements the overall aesthetics of your vehicle. It’s like adding a personal touch, turning it into a unique reflection of your style and taste.
Adding complementary decals or graphics
If you want to take your car customization to the next level, consider adding complementary decals or graphics alongside your existing decal. Complementing decals can emphasize certain aspects of your car, create a theme, or make a statement that resonates with your personality.
For example, if you have a decal of a roaring lion, you can add smaller decals of paw prints or other wildlife graphics to enhance the overall look. This combination will make your car truly one-of-a-kind, catching everyone’s attention wherever you go.
Exploring other car customization and personalization options
Personalizing your car doesn’t stop at decals and graphics alone. There are numerous other options to explore. From customized license plates and stylish window tints to aftermarket accessories such as spoilers, body kits, and alloy wheels, the possibilities are endless.
Remember, every choice you make contributes to the overall personality of your car. Choose wisely and have fun experimenting with different combinations to find the perfect balance of style and functionality. Your car is a blank canvas, waiting for you to unleash your creativity and turn it into a masterpiece.
So, go ahead and showcase your new decal, add complementary decals or graphics, and explore other car customization options. By doing so, you’ll not only have a car that turns heads but also a vehicle that reflects your unique personality and style. Happy customizing!
Frequently Asked Questions Of How To Install Decals On A Car
How Do You Put A Decal On A Car?
To put a decal on a car, follow these steps: Clean the surface, position the decal, secure it with masking tape, remove the backing paper, carefully apply the decal, and smooth out any air bubbles.
Is It Better To Apply Decals Wet Or Dry?
It is better to apply decals wet rather than dry for easier positioning and smoother application. Wet application allows you to slide and adjust the decal before it dries, resulting in a seamless finish.
Can You Use Soapy Water To Apply Vinyl Decals?
Yes, soapy water can be used to apply vinyl decals.
Where Do You Stick Car Decals?
Stick car decals on any smooth and clean surface like windows, bumpers, or doors. Just peel off the backing and carefully press the decal in place. Make sure to smooth out any air bubbles. Enjoy your personalized car style!
Conclusion
Installing decals on a car may seem daunting at first, but with the right steps and tools, it can be a smooth process. By preparing the surface properly, applying the decal carefully, and ensuring a good adhesion, you can achieve a professional-looking result.
Remember to follow the guidelines mentioned in this blog post to ensure a successful and long-lasting installation. With a little patience and attention to detail, you’ll have your car looking stylish and unique in no time. (47 words)