To install a cigarette lighter in your car, start by disconnecting the negative terminal of your car battery. Then, select a suitable location for the lighter and drill a hole using the appropriate size drill bit.
After that, connect the positive wire of the lighter to a power source and ground the negative wire. Finally, reattach the negative terminal of your car battery, and your cigarette lighter is ready to use. Installing a cigarette lighter in your car can be a convenient addition, allowing you to power various electronic devices on the go.
Whether you need to charge your phone or use other portable gadgets, having a cigarette lighter can be highly useful. However, it is important to follow proper installation steps to ensure safety and functionality. In this guide, we will provide clear instructions on how to install a cigarette lighter in your car, ensuring you can enjoy its benefits hassle-free. So, let’s dive right in and learn how to add this practical accessory to your vehicle.
Factors To Consider Before Installing A Cigarette Lighter In Your Car
When it comes to installing a cigarette lighter in your car, there are several factors that you should consider to ensure a successful installation process. These factors include checking the power source compatibility of your car, selecting the right type of cigarette lighter socket, and assessing the electrical wiring system of your car. By taking these factors into account, you can install a cigarette lighter in your car safely and efficiently.
Checking the Power Source Compatibility of Your Car
Before you begin installing a cigarette lighter in your car, it is important to check the power source compatibility of your vehicle. Not all cars have a compatible power source for a cigarette lighter, so it is crucial to determine if your car has the necessary connections. To do this, you can consult your car’s manual or check with the manufacturer. Additionally, you can visually inspect your car’s dashboard to see if there is a pre-existing space for a cigarette lighter. By ensuring compatibility, you can proceed with the installation process confidently.
Selecting the Right Type of Cigarette Lighter Socket
When it comes to selecting the right type of cigarette lighter socket for your car, it is essential to consider the power requirements of your devices. Different devices may have varying power needs, so it is important to choose a socket that can handle the output required. Additionally, you should also take into account the size and design of the socket, as it should fit seamlessly into your car’s interior. By selecting the appropriate socket, you can ensure efficient power delivery and a sleek installation.
Assessing the Electrical Wiring System of Your Car
The electrical wiring system of your car plays a crucial role in the installation process of a cigarette lighter. It is important to assess the existing wiring system to determine if any modifications or adjustments are required. This will ensure a secure and reliable connection for your cigarette lighter. If you are unsure about your car’s wiring system, it is recommended to seek professional assistance to avoid any potential damage or electrical issues. By assessing the electrical wiring system, you can have peace of mind and a well-functioning cigarette lighter in your car.
Gathering The Required Tools And Materials
Before you begin the process of installing a cigarette lighter in your car, it is important to gather all the necessary tools and materials. Having everything you need at hand will make the installation process smoother and quicker. In this section, we will provide you with a comprehensive list of tools and materials required for this task.
List of Tools Needed:
Here is a list of essential tools you will need to install a cigarette lighter in your car:
- Screwdriver (Phillips or flathead)
- Wire cutters/strippers
- Electrical tape
- Wire connectors/crimps
- Drill
- Drill bits
- Fuse tap
- Fuse puller

List of Materials Needed:
Aside from the tools mentioned above, you will also require the following materials to complete the installation:
- Cigarette lighter socket
- Wire (preferably 14-16 gauge)
- In-line fuse holder
- Ring terminals (for connecting wires to the battery)
- Heat shrink tubing
- Zip ties
- Electrical connectors
By ensuring you have all the necessary tools and materials before starting the installation process, you can avoid unnecessary delays and frustrations along the way. Take your time to gather and organize these items, creating a well-prepared workspace that will make the process even more efficient.
Identifying The Suitable Location For The Cigarette Lighter Socket
When installing a cigarette lighter socket in your car, one of the important steps is to determine the suitable location for it. This will ensure convenience and ease of use, as well as maintaining the aesthetics and functionality of your vehicle’s interior. In this section, we will discuss the factors to consider when choosing the location and provide some useful tips for proper placement.
Factors to Consider When Choosing the Location
Several factors play a role in identifying the best location for your car’s cigarette lighter socket. To ensure a successful installation, keep the following in mind:
- Accessibility: One of the primary considerations is access to the socket. It should be easily reachable for both the driver and passengers, allowing them to plug in their devices without any trouble. Installing it near the center console or dashboard is usually a good choice.
- Power Supply: The cigarette lighter socket requires power to function. Make sure you choose a location where you can easily tap into the car’s electrical system. This may involve finding a nearby circuit or fuse box that can provide the necessary power.
- Heat Dissipation: The cigarette lighter socket tends to heat up when in use, especially if you’re charging power-hungry devices. It’s crucial to choose a location that allows for adequate heat dissipation, as overheating can damage both the socket and the surrounding components. Opting for a spot with sufficient ventilation or a built-in heat shield is advisable.
- Visibility: While functionality is key, considering the visual impact is equally important. You may want to choose a location that keeps the socket discreet or blends well with the interior of your car. This ensures that it doesn’t become an eyesore or distract from the overall aesthetics.
- Wiring Length: Finally, think about the length of wiring you will require to connect the cigarette lighter socket to the power source. Choosing a location that minimizes the wiring distance can make the installation process easier and reduce the risk of tangling or exposure.
Tips for Proper Placement
Now that you are aware of the factors to consider, here are some helpful tips to ensure the proper placement of the cigarette lighter socket:
- Avoid High-Traffic Areas: Installing the socket in an area prone to spills or frequent bumps can increase the chances of damage or liquid entering the socket. Choose a location that is protected and less susceptible to accidents.
- Consider Extra Sockets: If you often have multiple devices to charge simultaneously, you might want to consider installing more than one cigarette lighter socket. This allows for more convenient charging options and can save you from needing additional adapters or extensions.
- Seek Professional Help: If you’re unsure about installing the cigarette lighter socket yourself, it’s always recommended to seek professional assistance. An experienced auto electrician can ensure a safe and secure installation that meets your specific needs.
By taking into account these factors and following these tips, you can choose the most suitable location for your car’s cigarette lighter socket. This will allow you to enjoy easy access to power whenever you need it, without compromising on the overall functionality and aesthetics of your vehicle.
Preparing The Car For Installation
Before installing a cigarette lighter in your car, it is important to prepare the car properly. This involves disconnecting the car battery and removing the interior panels or trims to gain access to the wiring. Follow these steps to ensure a successful installation:
Disconnecting the Car Battery
First and foremost, you need to disconnect the car battery to avoid any potential electrical hazards. This step is crucial as it ensures your safety while working on the installation. Here’s how to do it:
- Locate the car’s battery, usually found under the hood.
- Using the appropriate tools, loosen the nut on the negative terminal of the battery.
- Once the nut is loosened, carefully remove the negative cable from the battery terminal.
- Secure the cable away from the battery to prevent accidental reconnection.
Removing Interior Panels or Trims
After disconnecting the car battery, the next step is to remove the necessary interior panels or trims to access the wiring for the cigarette lighter. Here’s how you can do it:
- Identify the location of the panels or trims that need to be removed. This may vary depending on the make and model of your car, so consult the car’s manual if needed.
- Using a trim removal tool, gently pry off the panels or trims. Be cautious not to damage them during the process.
- Set aside the removed panels or trims in a safe place to avoid misplacement.
By following these steps to prepare your car for the installation of a cigarette lighter, you are ensuring a smooth and hassle-free process. Remember to always prioritize safety and take necessary precautions throughout the installation.
Wiring The Cigarette Lighter Socket
Installing a cigarette lighter socket in your car can provide a convenient way to charge your electronic devices on the go. However, it’s important to have a clear understanding of the wiring process to ensure a safe and secure installation. In this section, we will walk you through the steps of wiring the cigarette lighter socket in your car. From understanding the wiring diagram to connecting the power wire and grounding the socket, we will cover everything you need to know for a successful installation.
Understanding the Wiring Diagram
Before you begin the wiring process, it’s crucial to have a good understanding of the wiring diagram. This diagram shows the different components involved in the cigarette lighter installation and how they are interconnected. Take the time to carefully study the diagram and familiarize yourself with each component and wire color.
Connecting the Power Wire
When connecting the power wire of the cigarette lighter socket, it’s essential to ensure a secure and reliable connection. Most automotive power wires are color-coded, with red indicating the positive wire and black or brown indicating the negative wire. Locate a suitable power source, such as the fuse box or an existing power wire, and connect the positive wire to it using a soldering iron or crimping tool. Be sure to insulate the connection with electrical tape or heat shrink tubing to prevent any short circuits.

Grounding the Socket
Grounding the cigarette lighter socket is an important step in the installation process. The ground wire is typically black, and it needs to be connected to a solid metal surface in your car. Locate a nearby metal surface, such as the vehicle frame or dashboard panel, and securely attach the ground wire using a screw or bolt. Ensure that the connection is tight and free of any oxidation for a reliable ground connection.
Securing the Wiring in Place
Once all the necessary connections have been made, it’s crucial to secure the wiring in place to prevent any accidental damage or interference with other car components. Use zip ties or adhesive clips to secure the wires along existing wire harnesses or within the car’s interior. Make sure to avoid any areas that could pose a risk of heat or friction damage.
By following these steps and adhering to the wiring diagram, you can install a cigarette lighter socket in your car with confidence. Remember to prioritize safety and take the time to double-check all connections before using the socket. Enjoy the convenience of charging your devices on the go!
Mounting And Securing The Cigarette Lighter Socket
When it comes to installing a cigarette lighter in your car, mounting and securing the socket is an essential step. The correct installation ensures that the lighter will stay in place and function properly, providing a convenient power source for your electronic devices and accessories.
Mounting Options for Different Car Models
There are various mounting options available for different car models, ensuring a seamless integration of the cigarette lighter socket into your vehicle’s interior. The mounting options may vary depending on the make and model of your car.
If your car dashboard has a pre-cut hole or a dedicated space for a cigarette lighter, the installation process becomes relatively easier. You can simply insert the socket into the designated area and secure it using the retaining nut provided with the lighter.
However, if your car doesn’t have a pre-cut hole, you will need to create one in a suitable location on the dashboard or center console. This can be done using a hole saw or a drill paired with an appropriate-sized drill bit. Ensure that the location you choose is easily accessible and doesn’t interfere with any other vehicle functions.
Table: Mounting Options
| Car Model | Mounting Option |
|---|---|
| Honda Civic | Pre-cut hole on the dashboard |
| Toyota Camry | Center console |
| Ford Mustang | Custom hole on the dashboard |
Ensuring a Secure Fit
Once the cigarette lighter socket is mounted in the desired location, ensuring a secure fit is crucial for its longevity and reliability.
Before securing the socket, make sure to apply electrical tape or heat-shrink tubing over the wiring to protect it from any potential short circuits. This extra layer of insulation reduces the risk of electrical failures or damage to your car’s electrical system.
Next, insert the cigarette lighter socket into the mounting hole and use the retaining nut provided to secure it tightly. The nut should be screwed on firmly but not overly tight, as it could damage the socket or cause it to become misaligned.
Lastly, double-check the fitment by gently pulling on the lighter. It should remain firmly in place without any wobbling or movement.
By following these steps and ensuring a secure fit, you can enjoy a properly installed cigarette lighter socket in your car. From charging your phone to powering your GPS, this accessory will provide the convenience and functionality you need on the road.
Testing The Functionality Of The Cigarette Lighter
If you’ve recently installed a cigarette lighter in your car or if you suspect that the existing one isn’t functioning properly, it’s important to test its functionality. A properly functioning cigarette lighter can come in handy for a variety of purposes, such as charging your phone or powering your electronic devices on the go. In this section, we’ll guide you through the process of testing the functionality of the cigarette lighter, ensuring that it’s ready to use whenever you need it.
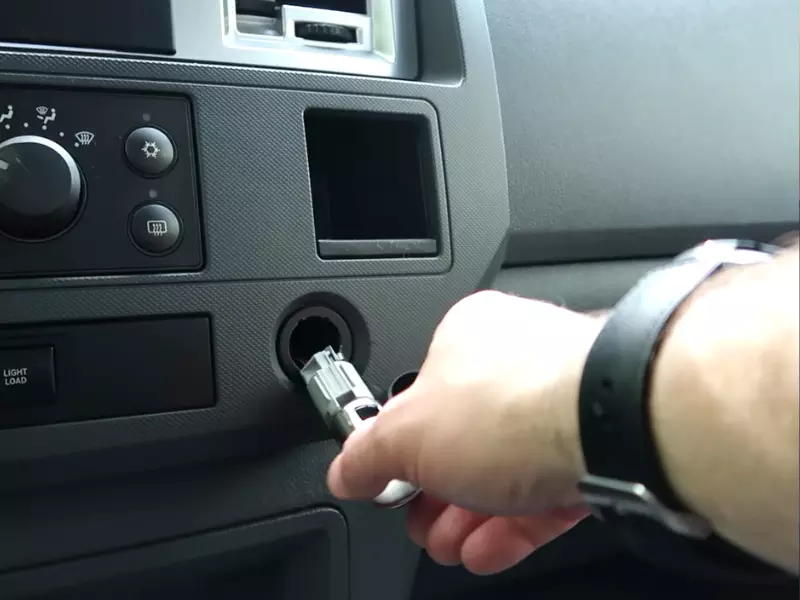
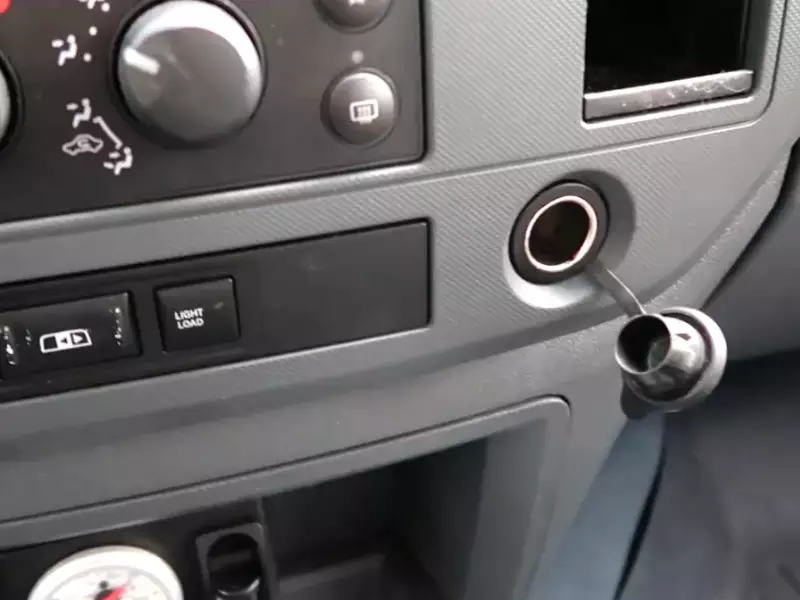
Operating the Lighter Socket
Before you start testing the cigarette lighter, it’s essential to understand how to operate the lighter socket. The lighter socket typically consists of a cylindrical receptacle and a removable heating element. To use the socket, follow these steps:
- Insert the heating element into the socket by pushing it firmly but gently.
- Press and hold the heating element down until it pops back out. This will activate the heating process.
- Wait for a few seconds until the heating element is glowing red or emits heat.
- Once the heating element is hot, release it by pulling it out of the socket.
Verifying Power Supply
Now that you know how to operate the lighter socket, it’s time to verify the power supply to the socket. Follow these steps to ensure that the lighter socket is receiving power:
- Start by checking the car’s fuse box. Locate the fuse corresponding to the cigarette lighter and inspect it for any signs of damage or breakage. If the fuse looks damaged, replace it with a new one of the same rating.
- With the car’s ignition off, insert a multimeter into the lighter socket. Set the multimeter to measure DC voltage.
- Turn the car’s ignition on and observe the multimeter reading. A properly functioning cigarette lighter should provide a reading between 12 and 14 volts. If the reading is significantly lower or zero, there might be an issue with the power supply.
- If you’re not getting any voltage reading, it’s recommended to consult a professional electrician or mechanic to diagnose and fix the issue.
Common Issues And Troubleshooting Tips
Installing a cigarette lighter in your car can be a useful addition, allowing you to power up electronic devices on the go. However, like any other vehicle component, the cigarette lighter socket may encounter certain issues that need troubleshooting. In this section, we will discuss the common problems you may face while installing a cigarette lighter in your car and provide helpful tips on how to resolve them.
No Power Supply to the Cigarette Lighter Socket
If your cigarette lighter socket is not providing power, there could be several reasons behind it. Here are a few troubleshooting tips to address this issue:
- Check the fuse: In most vehicles, the cigarette lighter socket is connected to a fuse that might have blown. Consult your car’s manual to locate the fuse and replace it if necessary.
- Inspect the wiring: Over time, the wiring connecting the socket to the car’s electrical system may become loose or damaged. Check for any visible signs of wear and tear and repair or replace the wiring if needed.
- Consider a faulty socket: If the fuse and wiring seem to be in working order, the socket itself could be faulty. Consider replacing the cigarette lighter socket with a new one to restore the power supply.
Socket Heating Issues
If the cigarette lighter socket gets excessively hot during use, it can be a cause for concern. Follow these troubleshooting tips to resolve socket heating issues:
- Check the load: Make sure that the devices you plug into the cigarette lighter socket do not exceed its maximum load capacity. Overloading the socket can cause it to heat up and may even lead to damage.
- Clean the socket: Over time, dirt and debris can accumulate inside the socket, obstructing proper electrical contact and causing it to heat up. Use a small brush or compressed air to clean the socket and remove any debris.
- Consider a faulty heating element: If the socket continues to heat up excessively even after cleaning and avoiding overloading, it might be a sign of a faulty heating element. In this case, replacing the cigarette lighter socket with a new one is recommended.
Socket Connection Problems
Socket connection problems can prevent proper electrical contact and cause devices to not work or charge properly. Below are some troubleshooting tips to address socket connection issues:
- Check the connection: Ensure that the cigarette lighter socket is properly connected to the car’s electrical system. Check for loose or disconnected wires and secure them if necessary.
- Inspect the device: Sometimes, the issue may lie with the device you are plugging into the socket rather than the socket itself. Check the device for any loose or damaged connectors, as they can affect the electrical connection.
- Consider a faulty socket: If the connection problem persists even after checking the wires and device, it might be due to a faulty socket. Consider replacing it with a new cigarette lighter socket to ensure a proper connection.
Frequently Asked Questions On How To Install Cigarette Lighter In Car
Can You Put A Cigarette Lighter In Any Car Outlet?
Yes, you can use a cigarette lighter in any car outlet as long as the outlet is designed to accommodate it.
How Do You Install A Cigarette Lighter Plug?
To install a cigarette lighter plug, follow these steps: 1. Locate the vehicle’s fuse box. 2. Identify a fuse slot that provides power when the car is on. 3. Remove the fuse, insert the cigarette lighter plug, and tighten the screws.
4. Connect the plug’s positive wire to the positive terminal and the negative wire to the negative terminal. 5. Test the lighter plug to ensure it works properly.
Can I Replace My Cigarette Lighter With A Usb Port?
Yes, you can replace your cigarette lighter with a USB port. This allows you to charge devices that use USB cables, making it convenient for charging phones or other electronics in your car.
Are Car Cigarette Lighters Universal?
No, car cigarette lighters are not universal. They can vary in size, shape, and voltage compatibility.
Conclusion
To sum up, the process of installing a cigarette lighter in your car, follow these simple steps: prepare the necessary tools, locate the fuse box, connect the wires to the fuse box, secure the connection with electrical tape, and finally, test the functionality of the cigarette lighter.
By carefully following these steps, you can enhance the convenience of your car and ensure a smooth installation process. Happy driving!