To install carpet in a car, first remove the old carpet and clean the floor thoroughly. Then, cut your new carpet to fit the car’s floor shape and apply adhesive before pressing the carpet into place.
Prepare The Car For Carpet Installation
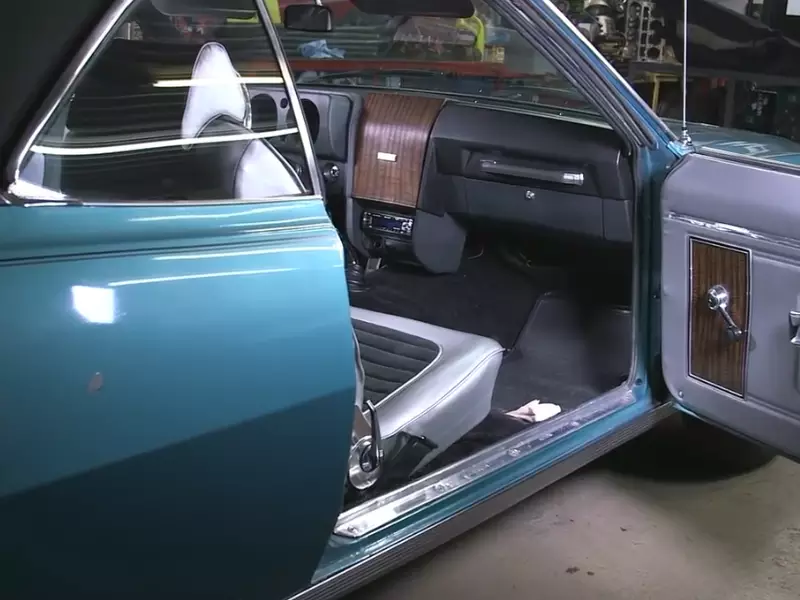
Before installing carpet in your car, it’s important to properly prepare the interior. This includes cleaning the interior, removing any existing carpet or flooring, and inspecting the car for any repairs or damage. Following these steps will help ensure a successful carpet installation and a finished look that you can be proud of.
Clean the interior of the car
Start by thoroughly cleaning the interior of your car. Remove any trash, debris, or personal belongings. Vacuum the carpet and upholstery to remove dirt, dust, and loose particles. Use an appropriate cleaner to remove any stains or spills. Pay special attention to areas that are prone to dirt buildup, such as the footwells and seating areas.
Remove existing carpet or flooring
If your car already has carpet or flooring in place, you’ll need to remove it before installing the new carpet. Begin by removing any trim pieces or molding that may be covering the edges of the carpet. This may involve using a pry tool or removing screws or fasteners. Once the trim is removed, carefully lift the edges of the carpet to expose the underlying flooring. Use a utility knife or carpet knife to cut the carpet into manageable sections and remove it from the car. Be cautious when cutting around any wiring or control mechanisms.
Inspect the car for any repairs or damage
Before installing the new carpet, it’s essential to inspect the car for any repairs or damage that may need to be addressed. Check the condition of the underlying flooring, making sure it is sturdy and free from rust or corrosion. Inspect the car for any signs of water damage, such as mold or mildew. Look for any loose or damaged wiring that may need to be repaired or replaced. Take note of any areas that may require additional attention or repair before proceeding with the carpet installation.
By following these steps and properly preparing the car for carpet installation, you’ll be well on your way to achieving a clean and professional-looking interior. Taking the time to clean, remove existing carpet, and inspect for any repairs or damage will ensure that your new carpet is installed correctly and provides a durable foundation for your car’s interior.
Acquire The Necessary Tools And Materials
Before undertaking the installation of carpet in your car, it is crucial to acquire the necessary tools and materials. This will ensure a smooth and efficient process, allowing you to achieve professional-looking results. Here are the steps you need to follow:
Measure the dimensions of the car’s interior
The first step in acquiring the right tools and materials is to measure the dimensions of your car’s interior. This will help you determine the amount of carpet you need to purchase. Measure the length and width of the floor area, taking into account any irregular or curved spaces. It is important to be precise in your measurements to avoid running short or having excess carpet.
Purchase the appropriate amount of carpet
Once you have the measurements, it’s time to purchase the appropriate amount of carpet. Consider factors such as the carpet’s durability, color, and texture to ensure it meets your preferences and needs. Keep in mind that some carpets may require additional materials such as padding for added comfort and insulation. Take note of the measurements you obtained earlier when selecting the carpet to ensure you acquire enough material for a perfect fit.
Gather tools such as a utility knife and adhesive
For a successful installation, you’ll need to gather the necessary tools. Some essential tools include a utility knife, adhesive or carpet tape, a measuring tape, a straight edge, and a staple gun. These tools will help you cut the carpet to size, secure it in place, and achieve a professional finish. Ensure that you have all the required tools and materials before starting the installation process to avoid any unnecessary delays.
To summarize, acquiring the necessary tools and materials is the first step towards installing carpet in your car. Measure the dimensions of your car’s interior, purchase the appropriate amount of carpet, and gather tools such as a utility knife and adhesive. Armed with these essential items, you’ll be well-prepared to begin the installation process and transform the interior of your car with a fresh and stylish carpet.
Remove Seats And Interior Trim
One of the essential steps in installing carpet in a car is removing the seats and interior trim. This process is necessary to ensure a smooth and even installation, as well as to avoid any damage to the existing components. In this section, we will guide you through the steps of unscrewing the seats and carefully removing them, as well as taking off any interior trim that may get in the way.
Unscrew the seats and carefully remove them
The first step in removing seats is to unscrew them from the floor of your car. To do this, locate the screws that hold the seats in place. Typically, these screws can be found at each corner of the seat or underneath plastic caps. Use a suitable tool, such as a wrench or socket set, to carefully unscrew these screws. Make sure to keep track of the screws as you remove them, as they will be needed for reassembly.
Once the screws are removed, carefully lift the seat straight up, ensuring that you do not damage any electrical or mechanical connections underneath. In some cases, there may be additional connections for power seats or airbag sensors, so it’s important to disconnect these before fully removing the seats. Refer to your car’s manual or consult a professional if you are unsure about any specific connections.
Take off any interior trim that may get in the way
After removing the seats, the next step is to take off any interior trim that may obstruct the carpet installation. This can include door panels, kick panels, and center console covers, among others. Start by identifying the screws or clips that secure the trim in place.
Using a suitable tool or your hands, carefully remove these screws or unclip the trim. Take note of the location and type of screws or clips used, as different trim pieces may require different tools or techniques for removal. As you remove the trim, be cautious not to damage any delicate parts or wiring behind it.
Keep track of screws and clips for reassembly
Throughout the process of removing seats and interior trim, it is crucial to keep track of all the screws and clips. These small components are vital for reassembling everything properly later on. Consider using a small container or bag to store the screws and clips, labeling them if necessary.
By organizing and keeping track of these essential parts, you can save time and ensure that everything fits back together seamlessly. Missing or mismatched screws and clips can lead to a loose or unstable installation, so attention to detail is key in this step.
Once you have completed the removal of seats and interior trim, you are ready to move on to the next steps in installing carpet in your car. Taking the time to carefully remove these components will lead to a successful and professional-looking installation.
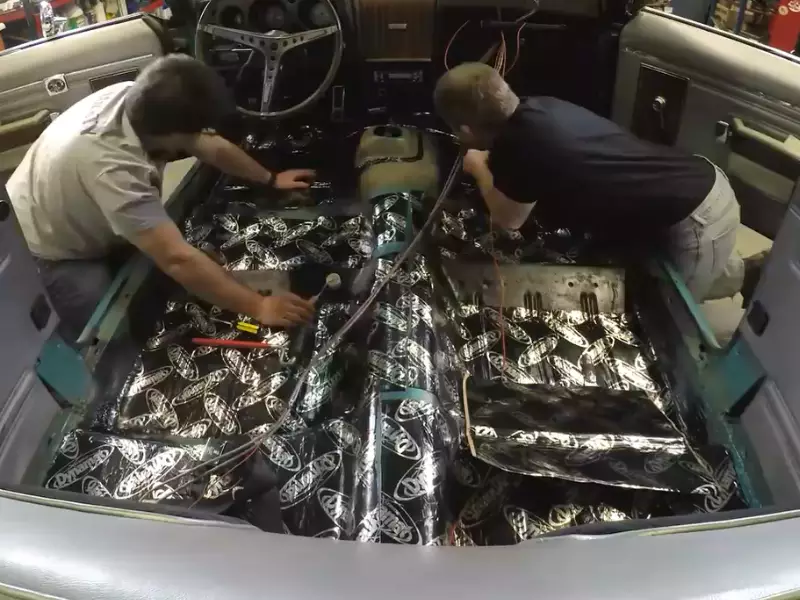
Install The Carpet Padding
Installing carpet in a car not only enhances the overall aesthetics of the interior but also improves comfort and reduces noise levels. One important step in this process is to install the carpet padding. The padding provides cushioning and insulation, ensuring a smooth and quiet ride. In this section, we will discuss how to install the carpet padding in your car, step by step.
Lay out the carpet padding on the car floor
The first step is to lay out the carpet padding on the car floor, ensuring it covers the entire area to be carpeted. Start from one end of the car floor and roll out the padding towards the other end. Make sure the padding is flat and centered.
Trim the padding to fit the dimensions of the car
Next, you need to trim the padding to fit the dimensions of your car. Use a utility knife or a pair of sharp scissors to carefully cut along the edges of the padding, following the contours of the car floor. Take your time to ensure accurate measurements and smooth edges.
Use adhesive or tape to secure the padding in place
Once the padding is trimmed, it’s time to secure it in place. There are two common methods you can use: adhesive or tape. If you prefer adhesive, apply it evenly on the backside of the padding, leaving no gaps or excess. Press the padding firmly onto the car floor, ensuring it adheres properly. Alternatively, you can use carpet tape, which is a quick and easy option. Apply the tape along the edges of the padding to hold it securely in place.
It is important to ensure that the padding is properly secured before moving on to the next step. This will prevent any shifting or movement of the padding once the carpet is installed, providing a durable and long-lasting result.
Taking the time to install the carpet padding correctly is essential for a professional and satisfactory outcome. It not only enhances the overall look of your car’s interior but also contributes to a more enjoyable and comfortable driving experience.
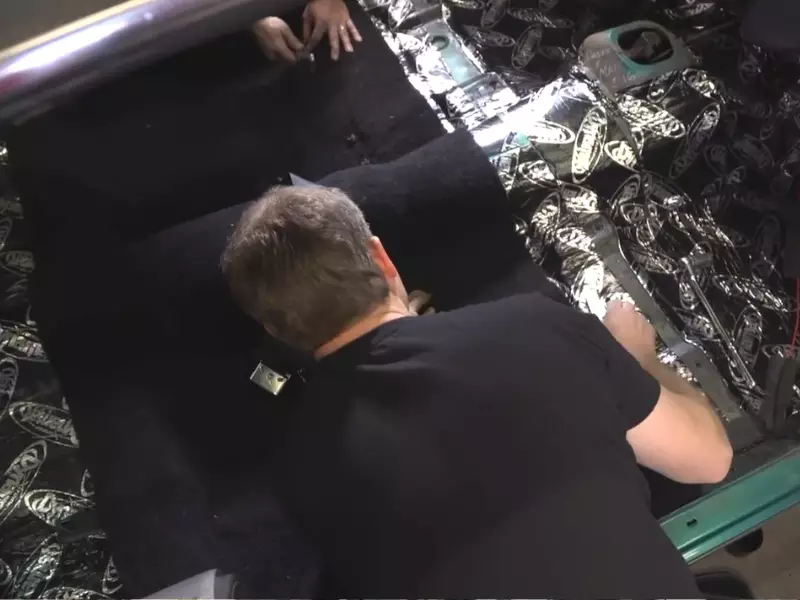
Cut And Fit The Carpet
Once you have prepared the car floor and laid down the padding, it’s time to cut and fit the carpet. This step is crucial in ensuring a professional and seamless carpet installation in your car. In this section, we will walk you through the process of laying the carpet over the padding, aligning it with the car’s contours, cutting it to match the shape of the car floor, and trimming any excess for a snug fit.
Lay the carpet over the padding, aligning it with the car’s contours
The first step in cutting and fitting the carpet is to lay it over the padding, making sure to align it with the contours of your car. Start by positioning one end of the carpet against the seat backs, ensuring that it covers the entire car floor area. Smooth out the carpet and make any necessary adjustments to ensure it fits snugly against the walls and around any obstructions, such as the seat mounts or center console.
To achieve a clean and professional look, take your time to smooth out any wrinkles or creases in the carpet’s surface. A properly aligned and smooth carpet will not only enhance the overall aesthetics but also provide a comfortable and enjoyable driving experience.
Cut the carpet to match the shape of the car floor
With the carpet secured in place, it’s time to cut it to match the shape of the car floor. Begin by using a utility knife or a carpet cutter to trim any excess carpet that extends beyond the edges of the car floor. Be careful not to cut too much at once, as this can result in an uneven and ill-fitting carpet.
Work your way around the car, cutting the carpet along the contours of the floor. Pay close attention to areas where the carpet needs to fit tightly, such as around the pedals or seat brackets. Take your time to ensure the cuts are precise and follow the natural lines of the car floor. If needed, make small adjustments until the carpet fits snugly against all the edges and obstacles.
Trim excess carpet and ensure a snug fit
Once you have cut the carpet to match the shape of the car floor, it’s time to trim any excess material and ensure a snug fit. Use a sharp pair of scissors or a carpet knife to trim the edges of the carpet neatly. Start around the perimeter, making small cuts and adjustments as needed for a clean and finished look.
Along with the perimeter, pay attention to any areas where the carpet may bunch up or overlap. Make additional cuts as necessary to keep the carpet flat and avoid any bulges or wrinkles. This step is vital in achieving a professional and well-fitted carpet.
Remember to check your work periodically as you trim excess carpet, ensuring that the carpet fits snugly against all edges and obstacles. Take your time, as a properly fitted carpet will not only enhance the appearance of your car interior but also provide long-lasting durability and comfort for your driving pleasure.
You are now one step closer to completing the carpet installation in your car. In the next section, we will cover the final steps to secure the carpet in place and add those finishing touches that will make your car’s interior look and feel brand new.
Apply Adhesive And Secure The Carpet
Once you have lifted sections of the carpet and properly aligned it with the car’s interior, it’s time to apply adhesive and secure the carpet in place. This step is crucial to ensure a seamless and long-lasting installation. Follow the steps below to effectively apply adhesive and secure the carpet to the padding.
Lift Sections of the Carpet and Apply Adhesive to the Padding
To begin, lift up sections of the carpet one at a time. This allows you to easily access the padding beneath and ensures a thorough adhesive application. Use a designated carpet adhesive or spray adhesive designed for automotive use. Apply the adhesive evenly across the exposed padding, making sure to cover the entirety of the section.
Focus on one section at a time to prevent the adhesive from drying out before you have a chance to secure the carpet. Start from one corner of the car and work your way towards the opposite corner, applying the adhesive as you go. This ensures a systematic and efficient installation process.
Press the Carpet Firmly Down to Ensure it Sticks Properly
Now that the adhesive has been applied, press the carpet firmly down onto the padding. This step is crucial to ensure a secure and long-lasting bond. Use your hands or a carpet roller to apply pressure evenly across the surface of the carpet. Pay close attention to any edges or corners to ensure they are properly secured.
Take your time during this step to ensure that the carpet adheres completely to the padding. Applying even pressure helps eliminate any air pockets and ensures a smooth and professional finish.
Smooth Out Any Wrinkles or Bubbles
Once the carpet is secured, thoroughly inspect the surface for any wrinkles or bubbles. These imperfections can not only affect the aesthetic appeal but also cause premature wear and tear on the carpet. Smooth out any wrinkles or bubbles by gently pulling the carpet towards the closest edge and pressing it down firmly.
If needed, remove the adhesive temporarily and readjust the carpet. Repeat the pressing process until the carpet is free from any wrinkles or bubbles. Ensuring a smooth and taut surface is essential for both the visual appeal and longevity of your car’s carpet.
By following these steps, you can effectively apply adhesive and secure the carpet in your car. Properly adhere to each section of the carpet by lifting and applying adhesive to the padding. Be sure to press the carpet firmly down to ensure a strong bond, and smooth out any wrinkles or bubbles for a seamless finish. With these tips, you’ll have a well-installed carpet that will enhance the interior of your car and provide a comfortable driving experience.
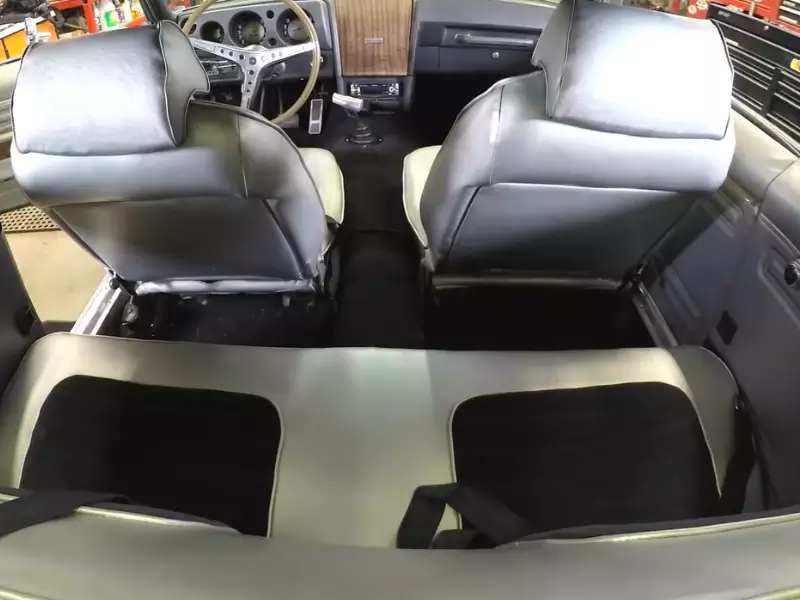
Reinstall Seats And Interior Trim
Now that you have successfully installed the carpet in your car, it is time to put the finishing touches by reinstalling the seats and interior trim. This step will not only give your car a polished look but also ensure that everything is secure and in its original position. Follow these easy steps to complete the process:
Place the seats back into the car and screw them in securely
Begin by carefully placing the seats back into their respective positions in the car. Ensure that the seat brackets align with the designated holes on the floor. Once in position, grab your trusty screwdriver and start tightening the screws. Make sure each screw is securely fastened to keep the seats firmly in place. You don’t want any unnecessary wobbling or movements while driving!
Put the interior trim back in place, aligning it properly
Next, it’s time to reattach the interior trim panels around the seats. Align each panel properly, making sure they fit flush against the car’s body. Take your time to ensure a precise fit, as any misaligned panels can be an eyesore. Once aligned, use a gentle amount of pressure to push the panels back into place. You might hear a satisfying click as they lock into position.
If you removed any other interior trim pieces during the carpet installation process, now is the time to put those back as well. Align them correctly and secure them with the appropriate fasteners.
Ensure everything is in its original position
Before calling it a day, take a few moments to double-check everything is in its original position. Make sure all the seatbelts are properly reattached, and any electrical connections are securely plugged in, if applicable. Give the seats a gentle wiggle to ensure they are stable, and ensure that no interior trim pieces are loose or rattling.
By following these simple steps, you have successfully reinstalled the seats and interior trim after installing carpet in your car. Now, take a moment to admire your handiwork and enjoy the fresh carpeted interior of your vehicle!
Clean And Maintain The Installed Carpet
Once you have successfully installed your new carpet in your car, it is important to maintain it properly to keep it looking fresh and in good condition. Regular cleaning and inspection can help extend the lifespan of your carpet and prevent any potential damage. In this section, we will discuss some important steps you can take to clean and maintain your installed carpet.
Vacuum the carpet to remove any debris or dirt
Regular vacuuming is essential to keep your car’s carpet free from dust, debris, and dirt particles. This simple but effective step helps to prevent the accumulation of dirt, which can cause staining and damage over time. To ensure optimal cleaning, follow these steps when vacuuming your car’s carpet:
- Start by removing any loose items and floor mats from the car.
- Use a handheld vacuum cleaner or the vacuum attachment specifically designed for car interiors.
- Work in a systematic pattern, starting from the top and gradually moving down towards the floor.
- Pay extra attention to high-traffic areas like the driver’s side, as these tend to accumulate more dirt.
- Be thorough in your approach, making sure to reach into crevices and corners where dirt might hide.
- In addition to regular vacuuming, consider using a carpet cleaner periodically for a more thorough deep cleaning.
Use appropriate cleaning products to keep the carpet looking fresh
To maintain the fresh appearance of your car’s carpet, it is important to use appropriate cleaning products. Avoid harsh chemicals or cleaners that may damage or discolor the carpet. Instead, opt for gentle and specifically formulated car carpet cleaners. Here are some tips when selecting and using cleaning products:
- Always read the label instructions to ensure compatibility with your carpet material.
- Test the cleaner on a small, inconspicuous area of the carpet before using it on the entire surface.
- Gently blot stains or spills with a clean cloth or sponge, using the cleaning product as directed.
- Avoid rubbing or scrubbing vigorously, as this can push the stain deeper into the carpet fibers.
- Allow the carpet to fully dry before placing any items back on it.
Regularly inspect and address any wear or damage
Over time, car carpets can experience wear and tear. It is important to regularly inspect your carpet and address any signs of damage or wear promptly to prevent further issues. Here are some steps to follow when inspecting your car’s carpet:
- Look for signs of fraying, unraveling threads, or loose carpeting.
- If you notice any loose carpeting, use a carpet adhesive to secure it back in place.
- For small tears or holes, you can use a carpet repair kit to patch them up.
- If the damage is extensive or beyond repair, consider seeking professional help for carpet replacement.
By following these simple steps to clean and maintain your car’s installed carpet, you can ensure its longevity and keep it looking fresh for years to come. Regular vacuuming, using appropriate cleaning products, and addressing any wear or damage will help preserve the overall appearance and quality of your car’s carpet. So, invest some time and effort in maintaining your carpet to enjoy a comfortable and stylish ride.
Frequently Asked Questions Of How To Install Carpet In A Car
How Do You Install Car Carpet?
To install car carpet, first, remove the old carpet and clean the surface. Then, cut the new carpet to fit the dimensions of your car’s floor. Use adhesive or carpet tape to secure the carpet in place. Smooth out any wrinkles or bubbles, and trim any excess carpet.
Enjoy your newly installed car carpet.
Can You Put New Carpet In A Car?
Yes, it is possible to install new carpet in a car to freshen the interior and improve its appearance.
How Much Would It Cost To Put New Carpet In A Car?
The cost of installing new carpet in a car varies depending on the material and quality. On average, it can range from $200 to $700. However, the final price may also depend on the size and complexity of the car’s interior.
Does Carpet Need To Be Glued?
No, carpet does not need to be glued. It can be installed using a variety of methods such as stretching and tacking it down, using adhesive strips, or using a double-sided carpet tape. Gluing is just one option among many.
Conclusion
To summarize, installing carpet in your car can greatly enhance its comfort and appearance. By following the step-by-step process outlined in this guide, you can easily transform the interiors of your vehicle. Remember to prepare the car, measure accurately, and secure the carpet properly.
With patience and attention to detail, you’ll have a professionally installed carpet that will make your car look and feel brand new. Happy carpeting!