To install a car wrap, thoroughly clean the vehicle surface and remove any dirt or wax. Then, use a squeegee to apply the wrap, starting from one edge and smoothing out any wrinkles or air bubbles as you go.
Car wraps are a stylish way to transform the appearance of your vehicle while also providing protection for the original paintwork. Whether you want to advertise your business or simply enhance the look of your car, installing a car wrap can be a cost-effective solution.
However, it is important to follow the correct steps to ensure a successful installation. We will guide you through the process of installing a car wrap, highlighting important points to help you achieve a smooth and professional finish. So, let’s dive in and learn how to install a car wrap effectively.
Why Choose Car Wraps For Your Vehicle
Car wraps have become increasingly popular among vehicle owners who are looking to give their cars a new and unique look. Instead of going for traditional paint jobs, car wraps offer a cost-effective and versatile solution. With car wraps, you can transform the appearance of your vehicle without the commitment of a permanent change.
Whether you want to promote your business, protect your car’s original paint job, or simply stand out from the crowd, car wraps provide a wide array of benefits that make them an excellent choice for vehicle customization.
Benefits of using car wraps
- Enhanced aesthetics: One of the primary reasons why car owners choose wraps is the opportunity to enhance the look of their vehicles. Car wraps come in a variety of colors, designs, and finishes, allowing you to choose a style that aligns with your personal taste. From matte finishes to vibrant colors, you can create a customized look that sets your car apart from the rest.
- Protection from scratches and UV rays: Car wraps not only enhance the appearance of your vehicle but also provide an additional layer of protection. The vinyl material used in car wraps acts as a shield, preventing scratches, dings, and other cosmetic damages. Moreover, it offers protection against harmful UV rays, which can cause fading and deterioration of the car’s original paint job.
- Easy maintenance: Unlike traditional paint jobs that require regular waxing and polishing, car wraps are relatively low maintenance. They can be easily cleaned with a mild detergent and water, helping you save time and effort on upkeep.
- Cost-effective option: Car wraps are usually more affordable than custom paint jobs. They offer a cost-effective way to change the appearance of your vehicle, especially if you consider alternative methods such as repainting.
Different types of car wraps are available
When it comes to car wraps, you have a wide range of options to choose from:
- Color change wraps: These wraps allow you to completely change the color of your vehicle. Whether you want a glossy black finish or a metallic blue, color change wraps can give your car a fresh look.
- Printed wraps: Printed wraps offer endless design possibilities. You can showcase your creativity by adding custom graphics, logos, or even full-scale images to your vehicle.
- Matte wraps: Matte wraps are an excellent choice for those who want a more sophisticated and subtle appearance. These wraps create a non-reflective finish that adds a touch of elegance to any car.
- Protective wraps: As the name suggests, protective wraps are designed to safeguard your car’s paint job from scratches, rock chips, and other physical damages. These wraps provide an extra layer of defense without compromising on the aesthetics.
Statistics on the popularity of car wraps
Car wraps have gained significant popularity in recent years, with businesses and individuals alike recognizing their countless benefits:
| Statistic | Percentage/Number |
|---|---|
| Percentage of businesses that find car wraps effective for local advertising | 75% |
| Number of impressions a wrapped vehicle can generate in a day | Between 30,000 to 70,000 |
| Percentage increase in brand recognition when using car wraps | Up to 107% |
These statistics highlight the immense value that car wraps bring both as a marketing tool for businesses and as a means of individual vehicle customization.
Importance Of Proper Installation
When it comes to installing a car wrap, proper installation plays a crucial role in not only achieving a visually appealing look but also ensuring its longevity. A properly installed car wrap can transform the appearance of your vehicle and protect its original paint from scratches, UV rays, and other elements. However, if the installation process is not carried out correctly, it can lead to a subpar finish, premature damage, and an overall unsatisfactory result.
Key factors for successful car wrap installation
A successful car wrap installation depends on several key factors that should not be overlooked. These factors include:
- Surface Preparation: Prior to installing the car wrap, it is essential to thoroughly clean the vehicle’s surface to remove any dirt, grime, wax, or other contaminants. This ensures a smooth and adhesive-friendly surface for the wrap.
- Quality Materials: Using high-quality vinyl wrap materials is crucial for achieving a professional finish. Inferior materials may not adhere properly or withstand the wear and tear associated with daily vehicle use.
- Proper Tools: A professional installer utilizes specialized tools such as squeegees, heat guns, and cutting devices to facilitate the installation process and ensure precise alignment and seamless edges.
- Experience and Skill: Car wrap installation is a technical process that requires skill and experience. A professional installer has the necessary expertise to handle complex curves, contours, and corners, resulting in a seamless and visually appealing finish.
Common mistakes to avoid during installation
While installing a car wrap, it is important to be aware of common mistakes that can hinder the overall outcome. By avoiding these mistakes, you can ensure a successful installation:
- Inadequate Surface Preparation: Skipping or insufficiently cleaning the vehicle’s surface can lead to poor adhesion and an uneven finish.
- Poor Alignment: Failing to accurately align the car wrap can result in visible gaps, overlaps, or crooked patterns, detracting from the desired aesthetic.
- Inadequate Stretching: Improper stretching of the vinyl wrap during installation can lead to bubbling, creasing, or premature lifting from the surface.
- Inadequate Post-Heating: Applying heat to the installed wrap is essential to activate adhesives and ensure optimal adhesion. Skipping or inadequate post-heating can cause the wrap to peel or lift over time.
The role of a professional installer
While it may be tempting to attempt a DIY car wrap installation, the role of a professional installer should not be underestimated. Hiring a professional installer offers several benefits:
- Expertise: Professional installers have the necessary expertise and training to handle the complexities of car wrap installation, ensuring a flawless finish.
- Time and Cost Efficiency: DIY installations often require extensive time, effort, and trial and error. A professional installer can efficiently complete the job, saving you both time and potential expenses caused by mistakes.
- Warranty and Quality Assurance: Reputable professional installers often provide warranties, ensuring that any issues or defects arising from the installation are promptly addressed.
In conclusion, the importance of proper installation for car wraps cannot be overstated. By considering the key factors, avoiding common mistakes, and relying on the expertise of a professional installer, you can ensure a visually appealing, durable, and long-lasting car wrap that protects and enhances the appearance of your vehicle.
Step-By-Step Guide To Installing Car Wraps
Installing a car wrap can transform the look of your vehicle, giving it a fresh and personalized touch. Whether you’re a car enthusiast or looking to advertise your business, knowing how to install a car wrap properly is crucial for a seamless and professional finish. In this step-by-step guide, we will walk you through the process, from preparing the vehicle to achieving long-lasting results.
Preparing the vehicle for wrap installation
Before you start installing the car wrap, it’s essential to prepare the vehicle properly. Begin by thoroughly cleaning and drying the surface to remove any dirt, debris, or wax residue that could affect the adhesion of the wrap. Cleaning the vehicle’s surface ensures that the wrap adheres smoothly and helps in achieving a seamless finish.

Removing any existing decals or paint imperfections
Next, inspect the vehicle’s surface for any existing decals or paint imperfections. Use a heat gun or torch to warm up the decals, making them easier to remove. Gently peel off the decals, taking care not to damage the underlying paint. If you encounter any paint imperfections, it’s important to fix them before proceeding with the wrap installation. Sanding and applying touch-up paint can help create a smooth surface.
Measuring and cutting the wrap material
Once the vehicle is prepped, it’s time to measure and cut the wrap material. Start by taking accurate measurements of the areas you want to wrap and add some extra inches for margin. Utilize templates or custom measurements to ensure a precise fit. Cutting the wrap material correctly is crucial for a professional-looking installation and a wrap that fits seamlessly on your vehicle’s surface.
Properly aligning the wrap panels
Before applying the wrap, aligning the panels is important to ensure a seamless appearance. Carefully lay out each panel onto the vehicle’s surface, making sure the design lines up correctly and any patterns or images flow smoothly without interruption. Taking your time during this step will ensure a more professional and visually appealing result.
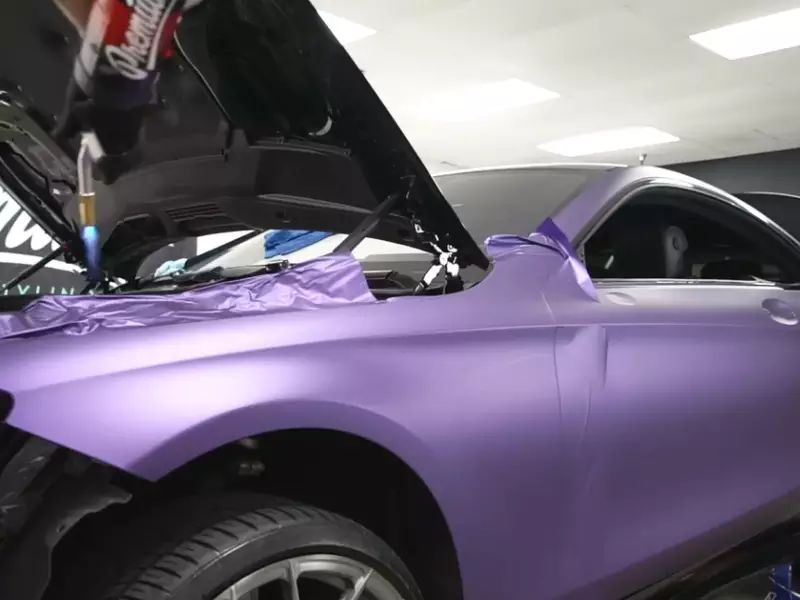
Applying the wrap to the vehicle
Now comes the exciting part – applying the wrap to the vehicle. Begin by peeling back a small portion of the backing paper, exposing the adhesive side of the wrap. Carefully position the exposed adhesive area onto the vehicle’s surface, starting from one end and working your way across. Use a squeegee or your hands to smooth out any air bubbles or creases, gradually removing the backing paper as you go along.
Using a heat gun or torch for better adhesion
To improve adhesion and create a tighter bond between the wrap and the vehicle’s surface, use a heat gun or torch. Apply heat evenly to the wrap, gently stretching it if needed, as this helps the wrap conform to any curves, contours, or recessed areas. Be cautious not to overheat or damage the wrap material during this process.
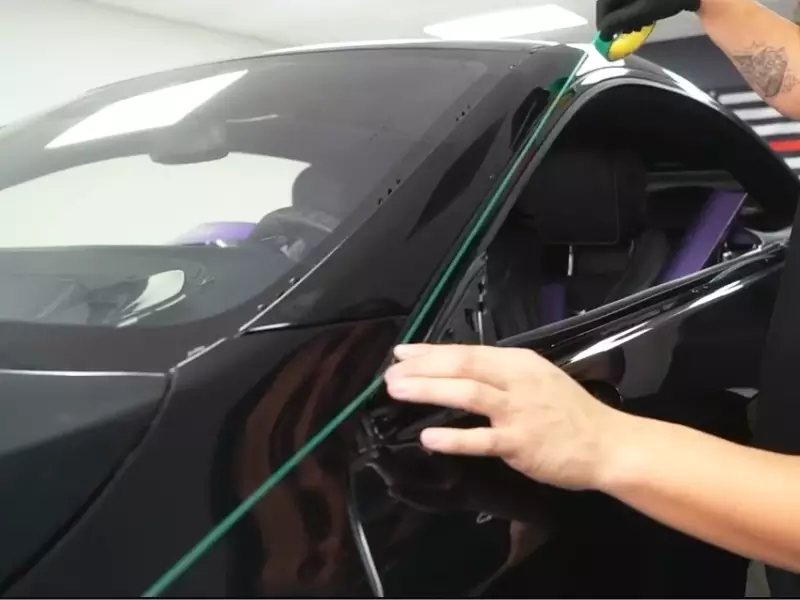
Trimming and finishing the edges
Once the wrap is applied, it’s time to trim and finish the edges for a clean and polished look. Use a sharp utility knife or trim line tape to carefully trim away any excess material. Taking your time during this step ensures precise cuts and a seamless transition from the wrap to the vehicle’s surface.
Securing loose edges for long-lasting results
To ensure the longevity of your car wrap, it’s vital to secure any loose edges properly. Use a heat gun or torch to warm up the wrap along the edges, then apply pressure with a squeegee or your fingers to ensure a tight bond. This step prevents the edges from peeling over time and ensures your wrap maintains its pristine appearance.
Techniques for a seamless and professional finish
Finally, to achieve a seamless and professional finish, pay attention to the details. Regularly inspect the wrap for any air bubbles, creases, or imperfections, and use a heat gun or torch to fix them. Smooth out any remaining bubbles or creases using a squeegee or microfiber cloth. Taking the time to perfect the small details will elevate your car wrap installation to the next level.
Maintenance And Care Tips For Car Wraps
In order to maintain the appearance and longevity of your car wrap, proper maintenance and care are essential. By following a few simple cleaning and protective measures, you can keep your wrap looking fresh and vibrant for years to come. In this section, we will discuss the cleaning instructions, recommended cleaning products, and protection methods to ensure the durability of your car wrap.
Cleaning Instructions for Maintaining the Wrap’s Appearance
Cleaning your car wrap regularly is crucial to prevent dirt and debris from causing damage. Follow these simple steps to keep your car wrap looking its best:
- Use a mild detergent and warm water mixture to clean the wrap surface.
- Gently wash the wrap using a soft sponge or microfiber cloth. Avoid using abrasive materials or brushes that could scratch the wrap.
- Rinse the wrap thoroughly with clean water to remove any soap residue.
- Allow the wrap to air dry or use a clean, soft cloth to dry it gently.
Recommended Products for Gentle and Effective Cleaning
Using the right cleaning products is essential to maintain the appearance and prolong the life of your car wrap. Here are some recommended cleaning products:
| Product | Description |
|---|---|
| Baby Shampoo | Gentle and effective for removing dirt and grime without damaging the wrap. |
| Isopropyl Alcohol | Useful for removing stubborn stains or adhesive residue. Dilute the alcohol with water to avoid damaging the wrap. |
| Microfiber Cloths | Soft and lint-free, these cloths are ideal for gentle cleaning and drying. |
Before using any cleaning product on your car wrap, make sure to test it on a small, inconspicuous area to ensure compatibility and prevent any potential damage.
How to Protect the Wrap from UV Rays, Scratches, and Other Damage
Protecting your car wrap from UV rays, scratches, and other damage ensures its longevity and vibrant appearance. Follow these tips to keep your wrap well-protected:
- Park your vehicle in shaded areas or use a car cover to shield it from direct sunlight and UV exposure.
- Avoid using automated car washes with brushes or harsh chemicals that may cause scratches or damage to the wrap.
- Regularly wax the wrap using a specially formulated vehicle wrap wax product. This helps to protect against UV rays and adds a layer of defense against minor scratches.
- If possible, avoid parking near trees or areas where the wrap may come into contact with sharp objects or tree sap.
By following these maintenance and care tips, you can ensure that your car wrap stays in pristine condition, providing a stylish and protective covering for your vehicle for many years to come.
Frequently Asked Questions About Car Wrap Installation
Are you considering installing a car wrap but have some questions on your mind? In this section, we will address the most commonly asked questions about car wrap installation. Read on to find the answers you’re looking for.
Can car wraps be installed on any vehicle?
Yes, car wraps can be installed on nearly any vehicle, regardless of its make, model, or size. Whether you have a car, truck, van, or even a motorcycle, you can transform its appearance with a professionally installed car wrap. Different types of vinyl wraps are available to accommodate various surfaces, including the curves and contours of your vehicle.
How long does a car wrap installation typically take?
Car wrap installation times can vary depending on several factors, such as the size of the vehicle and the complexity of the design. On average, a professional car wrap installation can take anywhere from one to three days. This timeframe includes the prep work, such as cleaning and priming the vehicle surface, as well as the actual application of the vinyl wrap.
Can car wraps be removed without damaging the paint?
Yes, car wraps can generally be removed without causing any damage to the underlying paint. This is especially true when the car wrap has been professionally installed and properly maintained. However, it’s essential to ensure that the removal process is carried out correctly to minimize the risk of any potential paint damage. It is often recommended to have the wrap removal performed by professionals who have experience in this procedure.
How durable are car wraps?
Car wraps are designed to be highly durable and long-lasting. They are constructed with high-quality vinyl materials that are resistant to fading, cracking, and peeling. When properly cared for, car wraps can maintain their appearance for several years. However, regular maintenance, such as hand washing and avoiding harsh chemicals, can help prolong the lifespan of the car wrap.
Can car wraps be customized with designs or logos?
Absolutely! One of the significant advantages of car wraps is their versatility in customization. You can choose from a wide range of colors, finishes, and textures to create a unique look for your vehicle. Additionally, car wraps can be customized with designs, logos, or even full-scale graphics to promote your business or personal brand. The possibilities for customization are virtually endless.
Conclusion
To wrap it all up, installing a car wrap may seem daunting at first, but with the right techniques and tools, it becomes an achievable task. Remember to thoroughly clean and prepare the surface, measure and cut the wrap accurately, and apply it smoothly to avoid air bubbles.
With a little patience and practice, you’ll be able to transform your car’s appearance and protect its paintwork in no time. So go ahead, give your vehicle a fresh new look with a professionally installed car wrap.