To install car vinyl wrap, thoroughly clean the surface, apply heat to conform the vinyl to the shape of the car, and use a squeegee to smooth out any bubbles or wrinkles. The process requires attention to detail and patience but can be completed by following these steps.
Car owners who want to give their vehicles a fresh new look often consider installing vinyl wrap. This versatile material not only protects the vehicle’s paint but also allows for limitless customization options. Whether you’re aiming for a sleek, glossy finish or a bold, eye-catching design, vinyl wrap can transform your car’s appearance.
We will guide you through the process of installing car vinyl wrap, ensuring a seamless and professional result. With careful preparation and mindful execution, you can achieve a flawless finish that will make your car stand out from the crowd.
Choosing The Right Vinyl Wrap For Your Car
When it comes to giving your car a fresh and unique look, vinyl wrapping is an excellent choice. Not only can it transform the appearance of your vehicle, but it also provides a layer of protection for the underlying paint. However, with so many options available in the market, it can be overwhelming to choose the right vinyl wrap for your car. In this section, we will explore the factors to consider when selecting a car vinyl wrap, the popular types of vinyl wraps for cars, and compare matte and glossy finishes.
Factors to consider when selecting a car vinyl wrap
Choosing the perfect vinyl wrap for your car involves considering several important factors. Let’s take a look at what you need to keep in mind when making your decision:
- Color and Design:
- Durability:
- Installation:
- Cost:
- Brand and Material:
By examining these key factors, you can ensure that the vinyl wrap you choose will not only enhance the appearance of your car but also meet your long-term expectations.
Popular types of vinyl wraps for cars
There is a wide range of vinyl wraps available in the market, each offering its own unique qualities and characteristics. Here are some of the most popular types:
- Cast Vinyl:
- Calendered Vinyl:
- Carbon Fiber Vinyl:
- Color Flip Vinyl:
- Chrome Vinyl:
Each type has its own advantages and disadvantages, so it’s important to consider your preferences and the overall look you want to achieve for your car.
Preparing Your Vehicle For Vinyl Wrap Installation
Installing vinyl wrap on your car is a fantastic way to give it a fresh new look. However, before you dive into the installation process, it’s important to properly prepare your vehicle. Taking the necessary steps to clean, prep, and remove any existing paint or decals will ensure a seamless and long-lasting vinyl wrap installation.
Essential steps to take before beginning the installation process
Before you start applying the vinyl wrap to your car, there are a few important steps that you should take:
- Clean and thoroughly wash your vehicle
- Remove any dirt, debris, and contaminants from the surface
- Inspect your car for any existing paint chips, scratches, or damages
- Repair any damages and ensure the surface is smooth
- Gather all the necessary tools and materials for the installation
Cleaning and prepping the surface of your car
Properly cleaning and prepping the surface of your car is crucial for a successful vinyl wrap installation. Follow these steps to ensure the surface is ready:
- Start by washing your car using a mild automotive detergent and a sponge or soft cloth.
- Rinse off any soap residue and dry the surface using a clean microfiber cloth.
- Inspect the surface for any leftover dirt, grease, or contaminants.
- Use a high-quality automotive surface cleaner to remove any stubborn residue.
- Make sure to pay extra attention to areas such as the door handles, mirrors, and trim where dirt tends to accumulate.
- After cleaning, wipe down the surface with a lint-free cloth to ensure it is completely dry.
Removing any existing paint or decals
If you have any existing paint or decals on your car, it’s essential to remove them before installing the vinyl wrap. Follow these steps to remove paint or decals:
- Start by using a heat gun or hairdryer to apply heat to the paint or decal. This will soften the adhesive and make it easier to peel off.
- Gently lift the edge of the paint or decal and slowly peel it off, using a plastic scraper or your fingers.
- If any adhesive residue remains, use a commercial adhesive remover or rubbing alcohol to dissolve it.
- Take your time and be patient to avoid damaging the car’s surface.
- After removing the paint or decals, clean the area again to ensure a smooth and clean surface for the vinyl wrap.
By following these essential steps to prepare your vehicle for vinyl wrap installation, you’ll set yourself up for success. Taking the time to clean, prep, and remove any existing paint or decals will ensure a professional and long-lasting finish. Now that you’ve prepared your vehicle, you’re ready to move on to the next exciting step in the process: installing the vinyl wrap!
Tools And Materials Needed For Vinyl Wrap Installation
Installing a vinyl wrap on your car can be a fun and rewarding DIY project. Not only does it allow you to change the look of your vehicle, but it also adds a layer of protection to the original paint. However, before you get started, it’s important to gather all the necessary tools and materials to ensure a smooth and successful installation. In this guide, we’ll walk you through the essential tools and materials required for a professional-looking vinyl wrap.
Gathering the necessary supplies for a successful installation
Before you dive into the installation process, you’ll need to gather a few supplies to make sure everything goes smoothly. Here’s a list of all the tools and materials you’ll need:
List of tools required for the job
Having the right tools at hand can make a world of difference when it comes to vinyl wrap installation. Here are the essential tools you’ll need:
- Heat gun or hairdryer: to heat and stretch the vinyl wrap for easy manipulation and application
- Application squeegee: to smooth out air bubbles and ensure proper adhesion
- Knife or blade: for trimming excess vinyl wrap
- Isopropyl alcohol: to clean the surface before application
- Plastic scraper: for removing any dirt or debris from the surface
- Microfiber cloth: for wiping down the surface and ensuring it’s clean and dry
- Masking tape: for temporarily securing the vinyl wrap in place before final application
- Felt-tip pen or marker: for marking any cuts or measurements on the vinyl wrap
- Measuring tape: for precise measurements and cuts
- Shop towels or lint-free cloth: for cleaning up any mess or excess adhesive
- Protective gloves: to protect your hands from any chemicals or sharp edges
Materials needed to ensure a smooth application process
In addition to the tools, you’ll also need a few materials to ensure a smooth and successful application of the vinyl wrap:
- Vinyl wrap: choose a high-quality vinyl wrap in the color and finish of your choice
- Primer: if necessary, use a primer to enhance the adhesion of the vinyl wrap
- Adhesive promoter: helps the vinyl wrap adhere better to the surface
- Transfer tape: used to transfer the vinyl wrap from the backing to the surface
- Surface cleaner: to thoroughly clean the surface before application
- Finishing solution: for smoothing out the vinyl wrap and removing any air bubbles
By gathering these tools and materials, you’ll be well-equipped to tackle the installation process with ease. Remember to follow the instructions provided by the manufacturer and take your time to achieve a professional-looking vinyl wrap. Happy wrapping!
Step-By-Step Guide To Installing Car Vinyl Wrap
Installing a car vinyl wrap is a great way to completely transform the look of your vehicle. Whether you’re aiming for a sleek matte finish or eye-catching graphics, vinyl wraps offer endless possibilities. In this step-by-step guide, we will walk you through the process of installing car vinyl wrap, from preparing the wrap to applying heat for a flawless finish.
Preparing the vinyl wrap for installation
Before you begin installing the vinyl wrap on your car, it’s essential to properly prepare the material. Follow these actions to ensure a smooth installation:
- Clean your car thoroughly: Start by washing your vehicle with a gentle car shampoo, removing all dirt, grime, and residue from the surface. Any debris left on the car will affect the adhesion of the vinyl wrap.
- Remove any fixtures and trim: Take off any parts of the car that may hinder the installation process, such as door handles, mirrors, or emblems. This will allow for precise wrapping and prevent any damage to these components.
- Measure and cut the vinyl wrap: Take accurate measurements of the different sections of your vehicle and cut the vinyl wrap accordingly. This will help you avoid wasting material and ensure a seamless fit.
- Prepare the vinyl wrap: Once the vinyl wrap is cut to size, use a squeegee or similar tool to remove any air bubbles or creases. This step is crucial in providing a smooth and professional-looking finish.
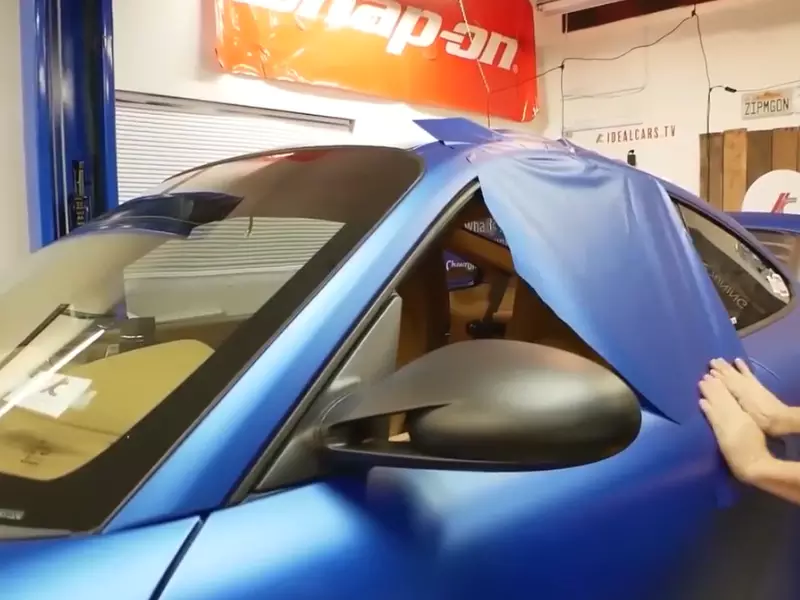
Techniques for properly aligning and positioning the wrap on your car
Aligning and positioning the vinyl wrap correctly is essential for an aesthetically pleasing result. Follow these techniques to ensure a precise fit:
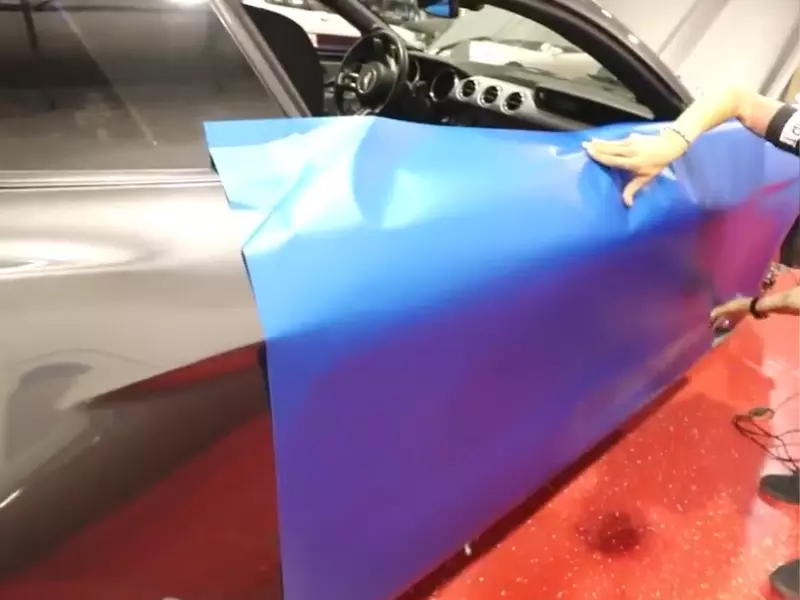
- Working in sections: Start wrapping one section of the car at a time, rather than attempting to apply the vinyl to the entire surface at once. This will help you maintain control and avoid mistakes.
- Using a hinge method: Begin by attaching a small section of the vinyl wrap to the car using masking tape as a hinge. This will allow you to reposition the wrap until you achieve the desired alignment.
- Taking your time: Patience is key when it comes to aligning and positioning the vinyl wrap. Take your time to make small adjustments, ensuring that the pattern or design matches perfectly across different sections of the vehicle.
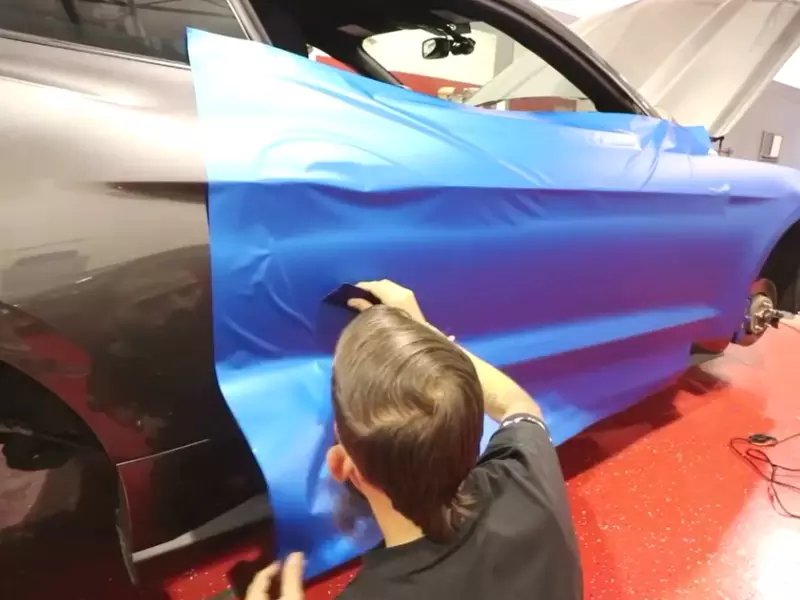
Applying heat to stretch and conform the vinyl to your vehicle’s curves
Applying heat is a crucial step in the installation process as it allows the vinyl wrap to stretch and conform to your vehicle’s curves. Here’s how you can do it:
- Use a heat gun: With a heat gun or similar device, warm up the vinyl wrap as you work it onto the car’s surface. The heat will make the material more malleable, allowing it to follow the contours of your vehicle smoothly.
- Stretching the vinyl wrap: Apply gentle tension to the vinyl wrap while using the heat gun. This will help you achieve a tight fit over curved areas, reducing the likelihood of wrinkles or bubbles.
- Avoid overstretching: While stretching the vinyl wrap is necessary, be cautious not to overstretch it, as this may cause it to thin out and become more susceptible to tearing or lifting.
By following this step-by-step guide, you can successfully install a car vinyl wrap and achieve a professional-looking finish. Remember to take your time, work in sections, and use heat to ensure a flawless and long-lasting result.
Tips And Tricks For A Professional-Looking Vinyl Wrap Installation
Installing a car vinyl wrap can give your vehicle a whole new look and protect its paint job at the same time. However, achieving a professional-looking installation requires some skill and knowledge. In this blog post, we will provide you with valuable tips and tricks that will make your vinyl wrap installation stand out. We will discuss how to avoid common mistakes, techniques for achieving smooth edges and corners, and the proper use of a squeegee for bubble-free application. Let’s dive in!
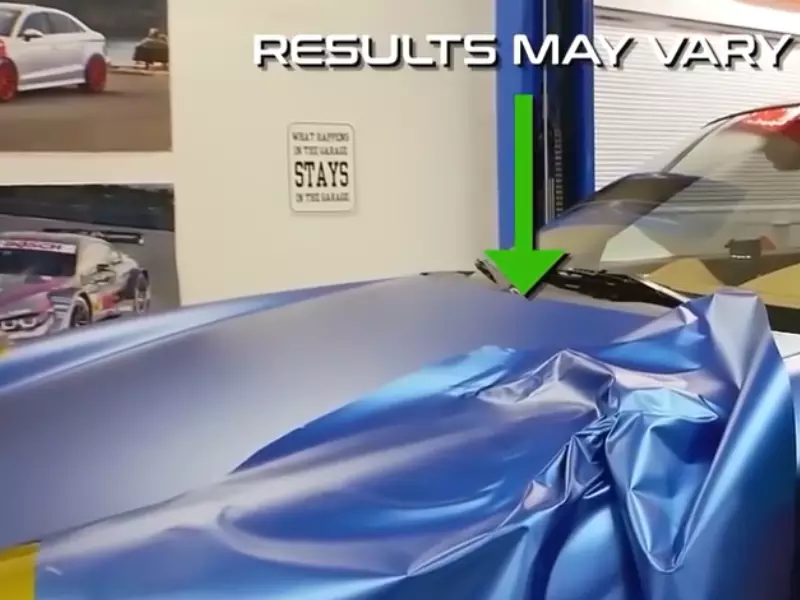
Avoiding Common Mistakes During Installation
Making common mistakes during vinyl wrap installation can lead to a less-than-desirable end result. It’s essential to be aware of these mistakes and how to avoid them. Here are some common mistakes to watch out for:
- Poor surface preparation: Before applying the vinyl wrap, ensure the surface is clean, dry, and free of dust and debris. Use a mild detergent and water solution to thoroughly clean the car’s body.
- Stretching the vinyl too tight: Stretching the vinyl excessively can cause it to snap back, leaving wrinkles and bubbles. Tug gently on the vinyl wrap as you go to ensure a smooth application without overstretching it.
- Rushing the process: Take your time during the installation process, especially when dealing with complex curves or corners. Rushing can result in misalignments, uneven edges, and air bubbles.
Techniques for Achieving Smooth Edges and Corners
Getting smooth edges and corners is essential for a professional-looking vinyl wrap installation. The following techniques will help you achieve seamless results:
- Heat and stretch: When working on corners or curves, use a heat gun to warm up the vinyl wrap. This will make it more pliable and easier to stretch around the contours of your car’s body.
- Overlapping technique: Instead of trying to wrap a corner or edge with a single piece of vinyl, use overlapping pieces. This technique allows for better adhesion and reduces the chances of the vinyl lifting or peeling over time.
- Trimming excess vinyl: After wrapping around an edge or corner, use a sharp knife or blade to carefully trim any excess vinyl. This will give your installation a clean and finished look.
How to Use a Squeegee for Bubble-Free Application
The proper use of a squeegee is crucial for achieving a bubble-free vinyl wrap installation. Follow these steps:
- Starting from the center: Begin by positioning the vinyl wrap in the desired location, leaving some excess around the edges. Place the squeegee in the center and firmly press the vinyl onto the surface.
- Working outwards: Gradually move the squeegee outwards, using overlapping strokes. Apply even pressure to push out any air bubbles trapped beneath the vinyl wrap.
- Repositioning if necessary: If you encounter any stubborn bubbles, lift the vinyl slightly and reposition it. Then, continue smoothing it out with the squeegee.
- Trimming and finishing: Once the vinyl wrap is fully applied, use a sharp knife to trim any excess material. Finish by going over the entire surface with the squeegee to ensure proper adhesion.
By following these tips and utilizing the techniques described above, you can achieve a professional-looking vinyl wrap installation. Remember to stay patient, take your time, and practice beforehand if needed. With careful attention to detail, your car will be the envy of the road with its flawless vinyl wrap!
Post-Installation Care And Maintenance
After successfully installing a vinyl wrap on your car, it’s essential to understand the importance of post-installation care and maintenance. Taking proper care of your car wrap will help it last longer, maintain its appearance, and prevent any unnecessary damage. In this section, we will explore various aspects of post-installation care and maintenance, including cleaning and maintaining your newly wrapped car, protecting the vinyl from harsh weather conditions, and removing and replacing damaged sections of the vinyl wrap.
Cleaning and maintaining your newly wrapped car
Keeping your newly wrapped car clean is crucial for preserving its vibrant appearance. Fortunately, cleaning a vinyl-wrapped car isn’t a complex task. Here are some simple yet effective tips to follow:
- Use a mild soap or vinyl-specific cleaner to wash the car. Avoid harsh chemicals or abrasive cleaning tools as they may damage the vinyl.
- Gently wash the car with a soft sponge or microfiber cloth. Ensure that you don’t scrub vigorously, as it can lead to scratches.
- Rinse off the soap and thoroughly dry the vehicle using a clean, lint-free cloth or chamois.
- Regularly inspect the wrap for any signs of damage or peeling.
Protecting the vinyl from harsh weather conditions
Your vinyl wrap is designed to withstand various weather conditions, but taking a few extra precautions can go a long way in extending its lifespan. Here are some tips on protecting the vinyl from harsh weather:
- During extreme hot or cold weather, avoid parking your car in direct sunlight or exposed to harsh elements for extended periods.
- If parking outside, consider using a car cover to shield the vehicle from UV rays, rain, and other weather elements.
- Applying a UV protectant specifically formulated for vinyl wraps can provide an additional layer of protection against sun damage.
Removing and replacing damaged sections of the vinyl wrap
In the unfortunate event that a section of your vinyl wrap gets damaged or starts to peel, it’s crucial to address the issue promptly. Here’s a step-by-step guide to removing and replacing damaged sections:
- Start by assessing the extent of the damage. If the damage is minimal, you may be able to repair it without removing the entire wrap.
- Use a heat gun or hairdryer to warm the damaged area. This will make the vinyl more pliable and easier to work with.
- Carefully peel back the damaged section, taking care not to damage the underlying paint.
- Once removed, clean the surface thoroughly to remove any adhesive residue.
- Align and apply a new piece of vinyl, ensuring it matches the surrounding areas seamlessly.
- Use a heat gun to activate the adhesive and carefully smooth out the new vinyl, removing any air bubbles.
By following these steps, you can effectively repair damaged sections of your vinyl wrap, keeping your car looking its best.
Proper post-installation care and maintenance are essential for preserving the longevity and appearance of your car vinyl wrap. By regularly cleaning and maintaining your wrap, protecting it from harsh weather conditions, and addressing any damages promptly, you can enjoy the benefits of a stunning and long-lasting vehicle transformation.
Frequently Asked Questions (Faqs)
Before you embark on the journey of installing a car vinyl wrap, you might have a few questions in mind. In this section, I’ll address some of the most common concerns that often arise when it comes to installing car vinyl wraps. Read on to clear any doubts you may have!
Can I install a vinyl wrap on my own or should I hire a professional?
Installing a car vinyl wrap can be done by both professionals and DIY enthusiasts. However, it’s important to note that vinyl wrap installation requires precision and skill to achieve a seamless and professional-looking result.
If you’re confident in your abilities and have experience working with vinyl wraps, you may choose to install it yourself. There are plenty of online tutorials and resources available to guide you through the process. However, keep in mind that any mistakes made during installation are difficult to correct, and may affect the overall appearance of the wrap.
On the other hand, if you want a flawless and perfect finish without any hassle, hiring a professional installer is a wise decision. These experts have the knowledge, experience, and necessary tools to ensure a smooth installation process, saving you time and effort.
How long does a car vinyl wrap typically last?
The longevity of a car vinyl wrap depends on various factors, including the quality of the vinyl, the way it is installed, and how well it is maintained. On average, a high-quality vinyl wrap can last up to 5-7 years if properly cared for.
However, it’s important to note that heavy sun exposure, extreme weather conditions, and improper maintenance can shorten the lifespan of the vinyl wrap. Regular care and maintenance, such as washing the car regularly and avoiding abrasive cleaning agents, can help prolong the lifespan of the vinyl wrap.
Can I wash my car after installing a vinyl wrap?
Yes, you can wash your car after installing a vinyl wrap. In fact, regular washing is important to keep the wrap looking its best. However, there are a few precautions you should take to ensure the longevity of the vinyl wrap.
- Use a gentle hand wash or touchless car wash to avoid damaging the wrap.
- Avoid strong chemicals and abrasive cleaning agents that can degrade the vinyl.
- Do not use a pressure washer directly on the vinyl as it can cause the edges to lift or the wrap to peel.
- When drying the car, use a soft microfiber cloth to prevent any scratches.
- Regularly inspect the wrap for any signs of damage or lifting and address them promptly.
By following these simple guidelines, you can enjoy a clean and well-maintained car vinyl wrap for years to come.
Frequently Asked Questions On How To Install Car Vinyl Wrap
Is It Easy To Vinyl Wrap Your Own Car?
Yes, it is relatively easy to vinyl wrap your own car. With proper tools, patience, and following instructions, you can achieve a professional-looking result. However, it requires attention to detail and proper technique to avoid air bubbles or creases in the vinyl.
Is Vinyl Wrap Hard To Install?
Vinyl wrap installation is not difficult. It is relatively easy to install, even for beginners.
Do You Apply Vinyl Wrap Wet Or Dry?
Vinyl wrap application is typically done wet, using a solution to allow better positioning and prevent bubbles.
What Is The Best Way To Apply Vinyl Wrap?
The best way to apply vinyl wrap is to follow these steps: 1. Clean the surface thoroughly. 2. Measure and cut the vinyl to fit. 3. Peel off the backing and apply the vinyl, starting from one edge. 4. Smooth out any air bubbles using a squeegee.
5. Trim any excess vinyl.
Conclusion
Installing a car vinyl wrap requires careful preparation, patience, and attention to detail. By following the step-by-step guide outlined in this blog post, you can ensure a successful installation that transforms the appearance of your vehicle. Remember to clean and prepare the surface properly, use a heat gun for stretching and molding, and take your time to avoid air bubbles.
With practice and the right techniques, you can achieve professional-looking results and enjoy a refreshed and stylish car.