To install a car starter, locate the starter motor, disconnect the battery, remove the starter, and install the new starter in place. Installing a car starter requires a few simple steps to ensure proper installation and functionality.
Whether you’re adding a new starter or replacing a faulty one, following this guide will help you complete the task safely and effectively. By being mindful of these steps, you can avoid any potential damage to your vehicle and confidently install a car starter on your own.
Before you begin, make sure you have the necessary tools and equipment. Let’s dive into the steps needed to install a car starter.
Understanding The Importance Of A Car Starter
The role of a car starter in the ignition process
A car starter is a critical component of any vehicle’s ignition system. Without a functioning starter, you won’t be able to start your car. The main role of a car starter is to engage the engine’s flywheel, allowing the combustion process to begin and the engine to come to life. In simple terms, the starter is responsible for cranking the engine until it starts running on its own.
Signs of a faulty car starter that needs replacement
If you’re experiencing any of the following issues, your car starter may be faulty and in need of replacement:
- Clicking sound: When you turn the key in the ignition and hear a clicking sound but the engine doesn’t start, it’s a clear indication that the starter is not engaging properly.
- Grinding noise: If you hear a grinding noise when starting your car, it can mean that the starter gear is not properly aligning with the flywheel, which can lead to permanent damage if not addressed promptly.
- Slow cranking: When you turn the key and the engine cranks slowly or takes longer than usual to start, it may indicate that the starter is not functioning at its optimal level.
- No response: If you turn the key and there is no response at all from the engine, the starter may be completely dead and will need to be replaced.
- Burning smell: A burning smell coming from the engine area can be a sign of a malfunctioning starter, as it may be overheating and causing the wiring to melt or burn.
- Dashboard warning lights: Pay attention to any dashboard warning lights related to the starter system, such as the battery or check engine light. These can be indicators of a faulty car starter.
It’s important to address any signs of a faulty car starter promptly to avoid being stranded with a non-starting vehicle. If you’re experiencing any of these issues, it is recommended to consult a professional mechanic who can diagnose the problem and replace the starter if necessary.
Gathering The Necessary Tools And Equipment
Gathering the necessary tools and equipment is an important step in installing a car starter. Having the right tools handy ensures a smooth and efficient installation process. Additionally, it is essential to take certain safety precautions before starting the installation to prevent any accidents or mishaps. In this section, we will discuss the essential tools needed for installing a car starter and the safety precautions that should be followed.
Essential tools needed for installing a car starter
Before you begin the installation process, it is crucial to gather all the necessary tools. Here is a list of essential tools you will need:
| Tools | Description |
|---|---|
| Socket set | A set of sockets in various sizes to loosen and tighten bolts and nuts. |
| Screwdrivers | A set of screwdrivers with different types and sizes to remove screws. |
| Pliers | Various types of pliers like needle-nose pliers, slip-joint pliers, and wire-cutting pliers to handle different tasks during the installation process. |
| Wire Stripper | A tool specifically designed to strip insulation from wires easily. |
| Electrical Tape | A type of adhesive tape used for insulating electrical connections. |
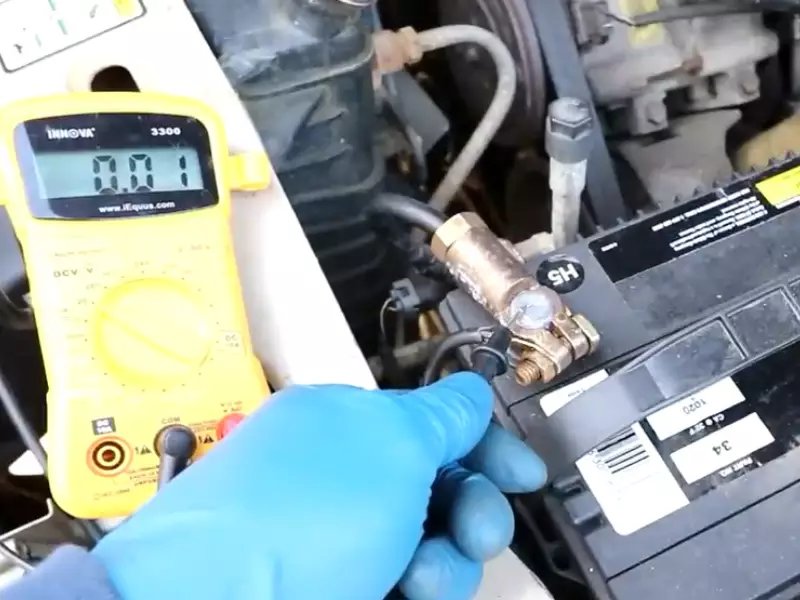
| Multimeter | A device used to measure different electrical parameters like voltage, current, and resistance. It is essential for testing the electrical connections of the car starter. |
| Torch/Flashlight | A portable light source to assist you in areas with low visibility. |
| Protective Gloves | High-quality gloves to protect your hands from potential injuries during the installation process. |
| Protective Eyewear | Safety goggles or glasses to shield your eyes from any debris or sparks. |
Safety precautions to take before starting the installation process
Prior to starting the installation process, it is crucial to take certain safety precautions to ensure your well-being and prevent any accidents. Here are some safety measures to adhere to:
- Make sure the car is turned off and the keys are removed from the ignition.
- Disconnect the negative terminal of the car battery to avoid any electrical hazards.
- Wear protective gloves and eyewear to safeguard yourself from potential injuries.
- Avoid wearing loose clothing or jewelry that could get caught in the installation process.
- Keep a fire extinguisher nearby in case of any fire emergencies.
- Work in a well-ventilated area to prevent the accumulation of harmful gases.
- Read the installation manual thoroughly and follow the manufacturer’s instructions carefully.
- If you are unsure about any step or face difficulties, seek professional assistance rather than attempting to complete the installation on your own.
By gathering the necessary tools and equipment and taking the necessary safety precautions, you are well-prepared to start the installation process of the car starter. This ensures a smooth and safe installation, allowing you to enjoy the benefits of a functioning car starter.
Locating And Accessing The Car Starter
Identifying the Car Starter’s Location in the Engine Compartment
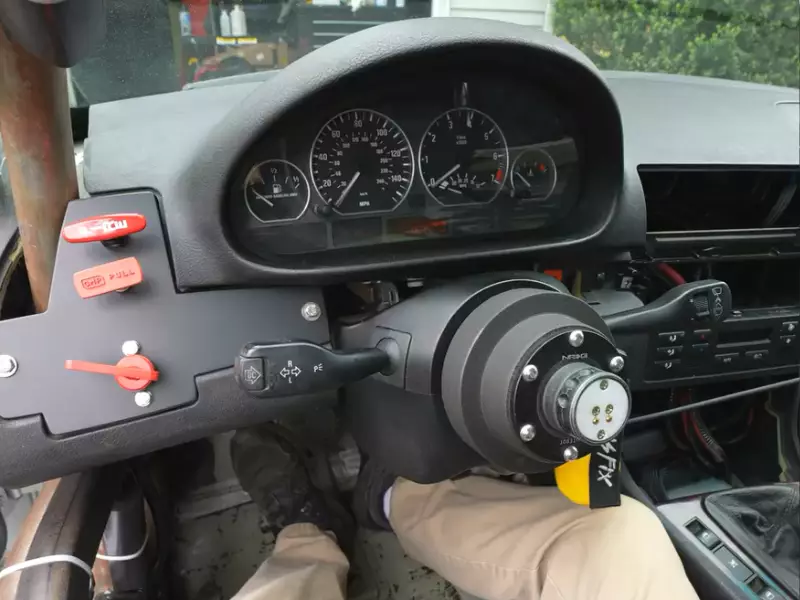
Locating and accessing the car starter is an essential step in the installation process. The car starter is typically found in the engine compartment, but its exact location may vary depending on the make and model of your vehicle. To identify the car starter’s location, follow these steps:
- Open the hood of your car and secure it properly.
- Take a moment to familiarize yourself with the engine compartment, paying close attention to the different components.
- Look for a cylindrical-shaped device with wires attached to it. This is the car starter.
- Inspect nearby components such as the battery, air intake system, and other electrical parts. This will give you a better understanding of the surrounding area before proceeding.
Removing Any Necessary Components to Access the Starter
After identifying the car starter’s location, you may need to remove certain components that are blocking easy access to the starter. Follow these steps to ensure you can reach the starter safely:
- Carefully examine the surrounding area to identify any components obstructing access to the car starter.
- Refer to your vehicle’s owner manual for specific instructions on removing these components. The manual will provide you with detailed steps and diagrams to guide you.
- Prepare the necessary tools to disconnect and remove the obstructing components. Depending on the situation, you may need tools like wrenches, pliers, or a socket set.
- Using the appropriate tools, carefully remove the necessary components that are blocking access to the car starter. Take your time to avoid damaging any wires or nearby parts.
- Once the obstructing components have been safely removed, you should have clear access to the car starter.
By following these steps and successfully locating and accessing the car starter, you are one step closer to installing your new starter. Remember to always consult your vehicle’s owner manual for specific instructions and take necessary safety precautions before working on your car’s engine compartment. With the car starter now accessible, you can move on to the next step of the installation process with confidence.
Removing The Old Car Starter
Removing the old car starter is an essential step in the installation process of a new car starter. This section will guide you through the necessary steps to safely and effectively remove the old car starter. Prioritize your safety by disconnecting the battery to prevent electric shock and then proceed to detach the electrical connections and mounting bolts. By following these steps, you’ll be one step closer to installing your new car starter and enjoying a smooth ride.
Disconnecting the Battery to Prevent Electric Shock
The first important step in removing the old car starter is to ensure your safety by disconnecting the battery. Electric shock can be dangerous and even life-threatening, so it’s crucial to follow this step carefully. Here’s how you should proceed:
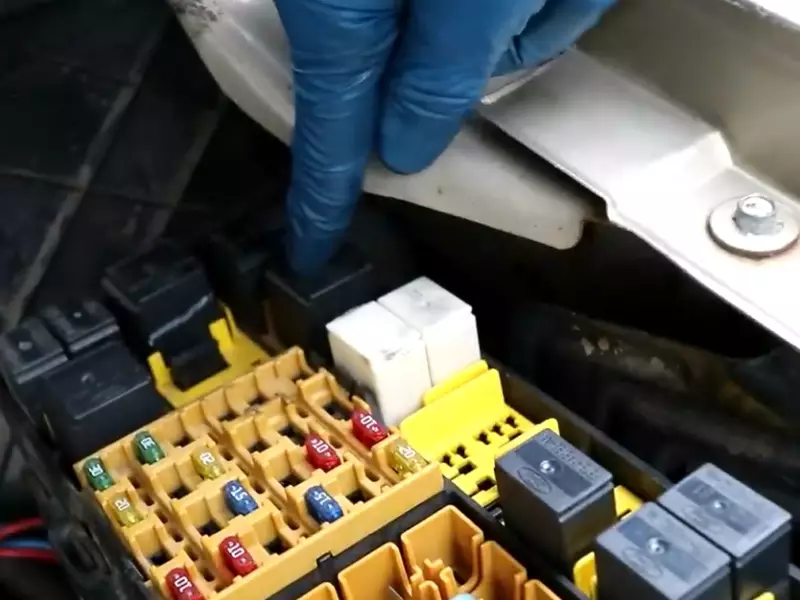
- Begin by locating the car’s battery, typically found under the hood or in the trunk. Refer to your car’s manual for specific instructions if necessary.
- Use a wrench or socket set to loosen and remove the negative (-) terminal’s cable from the battery. Make sure the cable is tucked away to prevent accidental contact with the battery.
- Next, repeat the previous step for the positive (+) terminal’s cable. This will ensure a complete disconnection of the battery and minimize the risk of electric shock during the removal process.
Detaching Electrical Connections and Mounting Bolts to Remove the Old Starter
Once you have disconnected the battery, it’s time to proceed with the removal of the old car starter. This step involves detaching the electrical connections and mounting bolts. Here’s how you should approach this process:
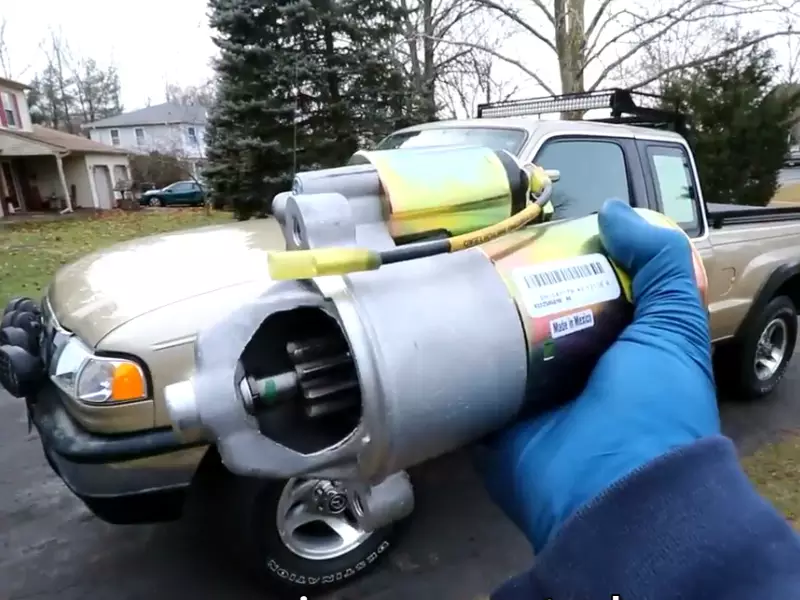
- Locate the old starter, which is typically connected to the engine block near the transmission.
- Identify the electrical connections attached to the starter. These connections include wires and cables, so it’s crucial to ensure you can distinguish between them. Take a photo or make a note of their locations to facilitate the reinstallation process later.
- Using a wrench or socket set, carefully loosen and remove the electrical connections from the old starter. Remember to handle the connectors and wires with care, as some might be fragile or sensitive to damage.
- After detaching the electrical connections, locate the mounting bolts that secure the starter to the engine block. These bolts might require a socket set or wrench to remove. Loosen and unscrew the bolts until the old starter is no longer attached to the engine block.
- Once you have removed the mounting bolts, gently pull and wiggle the old starter out of its position. Be cautious of any lingering electrical connections that may obstruct its removal.
By following these steps, you have successfully removed the old car starter. Make sure to set it aside properly for disposal or potential repairs if needed. Now, you’re ready to move on to the next step of installing your new car starter, bringing you one step closer to a reliable and efficient vehicle.
Installing The New Car Starter
Once you have successfully removed the old car starter, it’s time to move on to the next step: installing the new car starter. This crucial part of the process requires attention to detail and proper execution to ensure compatibility and functionality. In this section, we’ll walk you through the necessary steps to properly install the new car starter in your vehicle.
Matching the new starter with the old one to ensure compatibility
Before diving into the installation, it’s important to double-check that the new car starter matches the old one in terms of specifications and compatibility. This step ensures a seamless installation process and prevents any potential issues down the road.
To match the new starter with the old one, take note of the following factors:
1. Brand and Model: Ensure that the brand and model of the new car starter match the old one. Brands may have slight variations in their products, so it’s crucial to choose the right one for your vehicle.
2. Starter Type: Different vehicles may require different types of starters, such as gear-reduction starters or direct-drive starters. Make sure to determine the correct starter type for your specific vehicle.
3. Mounting Holes: Compare the number and position of the mounting holes on the new starter with the old one. These should align perfectly, as any misalignment can affect the installation process and the starter’s performance.
4. Electrical Connections: Check the electrical connections on the new starter and compare them to the old one. These connections should match perfectly in terms of size, shape, and configuration.
5. Voltage and Amperage: Verify that the voltage and amperage ratings of the new car starter match those of the old one. Using a starter with incorrect ratings can lead to electrical problems and potential damage to your vehicle.
By diligently comparing these factors, you can ensure that the new car starter is compatible with your vehicle, setting the stage for a successful installation.
Attaching electrical connections and securing the starter with mounting bolts
Once you have confirmed the compatibility, it’s time to move forward with attaching the electrical connections and securing the starter with mounting bolts. Follow these steps:
- Identify the electrical connections on the new starter, including the positive and negative terminals.
- Attach the positive and negative cables to their respective terminals on the new starter. Ensure that the connections are firm and secure.
- Double-check the tightness of the mounting bolts on the starter before attaching it to the vehicle.
- Position the new starter in place, aligning the mounting holes with the corresponding holes in the vehicle.
- Insert the mounting bolts and tighten them securely, but be careful not to overtighten as it may damage the starter or the mounting surface.
- Once all the bolts are tightened, give the new starter a gentle tug to ensure that it is securely fastened in place.
By following these steps, you will have successfully attached the electrical connections and secured the new car starter with mounting bolts. This ensures that the starter is properly installed and ready to provide reliable performance when you start your vehicle.
Testing The Car Starter
Testing the Car Starter
Once you have successfully installed a new car starter, it’s important to conduct a test to ensure it is functioning properly. This step is crucial to avoid any potential issues down the line and to guarantee a smooth start every time you turn the key. In this section, we will cover two essential steps: reconnecting the battery and double-checking the connections, as well as conducting a test start to confirm the proper functioning of the new starter.
Reconnecting the Battery and Double-Checking the Connections
The first step in testing your car starter is to reconnect the battery and double-check all the connections. This ensures that everything is securely in place before you move on to the next step. Follow these simple steps:
- Open the hood of your car and locate the battery.
- Remove any protective covering from the positive and negative terminals of the battery.
- Connect the positive (+) cable to the positive terminal and the negative (-) cable to the negative terminal.
- Tighten the connection using a wrench or pliers, ensuring a secure fit.
- Once the battery is reconnected, inspect the connections you made during the installation process.
- Ensure that all wires and cables are properly connected and tightened.
By double-checking the connections, you can prevent any loose or faulty connections that may affect the performance of your new car starter. This step is crucial for optimizing the efficiency and longevity of your starter.
Conducting a Test Start
Now that you have reconnected the battery and double-checked all the connections, it’s time to conduct a test start. This will allow you to confirm that the new car starter is functioning as it should. Follow these steps:
- Insert the car key into the ignition and turn it to the “on” position.
- Listen for any unusual sounds, such as clicking or grinding noises, which may indicate a faulty starter.
- If everything sounds normal, turn the key to the “start” position and observe how the car engine starts.
- The engine should start smoothly and without any hesitation.
- If the engine fails to start or there are any issues, turn off the ignition and recheck all the connections. Ensure they are properly secured.
- If you continue to experience difficulties after checking the connections, it may be necessary to consult a professional mechanic.
Conducting a test start is crucial to validate the functionality of your newly installed car starter. By following these steps, you can ensure a reliable and hassle-free start every time you get behind the wheel.
In conclusion, testing the car starter after installation is essential to confirm its proper functioning. By reconnecting the battery and double-checking the connections, as well as conducting a test start, you can identify any issues and resolve them proactively. Taking the time to perform these tests will not only save you from potential headaches but also ensure the longevity and efficiency of your car starter.
Troubleshooting Common Issues
Installing a car starter can be a rewarding DIY project that can save you time and money. However, even with careful planning and proper execution, you may still encounter some common issues along the way. In this section, we will address potential problems such as starter motor failure or misalignment and provide you with tips for troubleshooting and resolving these issues.
Addressing Starter Motor Failure
One of the most common issues you may face when installing a car starter is starter motor failure. This can be frustrating, especially if you have put in a considerable amount of time and effort into the installation. However, there are a few steps you can take to address this problem and get your car starter up and running smoothly.
- First, double-check all the connections to ensure they are secure and properly connected. Loose or faulty connections can prevent the starter motor from receiving the necessary power to function.
- If the connections are fine, test the starter motor by connecting it directly to a power source. This will help determine if the issue lies with the motor itself or with the wiring or connections in the car.
- If the starter motor is found to be faulty, it will need to be replaced. Consult your car’s manual or a trusted mechanic to find a compatible replacement.
Resolving Misalignment Issues
Another common issue that can arise during car starter installation is misalignment. When the starter motor and flywheel are not properly aligned, it can prevent the gears from engaging correctly, resulting in a failed start. Luckily, this problem can often be resolved with a few simple steps.
- Start by loosening the bolts that secure the starter motor to the engine block.
- Adjust the position of the starter motor slightly so that it aligns with the flywheel. This may require some trial and error, so be patient and take your time.
- Once you have achieved proper alignment, tighten the bolts securely to ensure the starter motor remains in place.
By addressing potential problems such as starter motor failure or misalignment, you can troubleshoot and resolve common car starter installation issues. Remember to always refer to your car’s manual for specific instructions and safety precautions. With the right approach and a little perseverance, you’ll have your car starter installed and ready to go in no time.
Final Thoughts On Car Starter Installation
Recap of the Installation Process
Now that you have successfully installed your new car starter, let’s recap the installation process. Going over the steps will help reinforce your understanding and ensure that you’ve followed each one correctly.
First and foremost, make sure to gather all the necessary tools and materials before you begin. This will save you time and prevent any unnecessary interruptions during the installation.
Next, disconnect the negative terminal of your car’s battery to ensure your safety and avoid any electrical mishaps. Once the battery is disconnected, locate the starter motor in your vehicle. It is typically found underneath the engine, near the transmission.
After locating the starter, carefully remove the electrical connections and mounting bolts that hold it in place. Keep track of these parts as you will need them when installing your new car starter.
Now that the old starter is removed, it’s time to install the new one. Place the new starter in the same position as the old one and tighten the mounting bolts securely.
Once the new starter is secure, reconnect the electrical connections, ensuring they are properly seated and tightened. Double-check to make sure everything is in place and secure.
With the new car starter installed, it’s time to reconnect the negative terminal of your car’s battery. Remember to tighten it securely to avoid any electrical issues in the future.
Now that the installation process is complete, you can confidently start your car and enjoy the benefits of your new car starter.
Key Takeaways
As you reflect on your car starter installation journey, keep these key takeaways in mind:
- Proper preparation is vital. Before starting the installation, gather all the necessary tools and materials.
- Ensure your safety by disconnecting the negative terminal of your car’s battery.
- Take note of the starter motor’s location in your vehicle.
- Be cautious when removing the electrical connections and mounting bolts of the old starter.
- When installing the new starter, make sure it is placed correctly and securely.
- Double-check all electrical connections to ensure they are properly seated.
- Reconnect the negative terminal of your car’s battery securely.
By following these steps and keeping these takeaways in mind, you’ve successfully installed your new car starter. Take pride in your accomplishment and enjoy the convenience and reliability it will bring to your vehicle.
Frequently Asked Questions On How To Install Car Starter
Can You Install A Car Starter Yourself?
Yes, it is possible to install a car starter yourself. However, it is recommended to have some knowledge and expertise in car mechanics before attempting it. Always refer to the car’s instruction manual and follow safety precautions carefully.
Is Installing A Remote Car Starter Hard?
Installing a remote car starter is not difficult. It requires some basic knowledge, tools, and following the instructions. It’s recommended to consult a professional if you’re unsure or want to ensure a seamless installation. Stay informed about local regulations and warranties when considering this upgrade.
How Much Does It Cost To Install A Car Starter?
Car starter installation costs vary depending on the make and model of your car, but on average, expect to pay between $150 to $300.
How To Install A Starter?
To install a starter, follow these steps:
- Disconnect the battery.
- Locate the starter motor.
- Remove the electrical connections.
- Take out the mounting bolts.
- tall the new starter and reconnect everything.
Conclusion
Installing a car starter can greatly enhance your driving experience by providing convenience and comfort. By following the step-by-step guide outlined in this blog post, you can successfully install a car starter on your own. Remember to gather the necessary tools, consult the manual, and take safety precautions throughout the installation process.
Enjoy the benefits of easily starting your car, especially during colder months, and say goodbye to the hassle of manually starting your vehicle.