To install a car sound system, connect the stereo receiver to the car’s electrical system and secure the speakers in the appropriate locations. Are you looking to upgrade your car’s audio experience?
Installing a car sound system can greatly enhance your driving enjoyment. Whether you prefer booming bass or crystal-clear highs, a properly installed sound system will deliver superior audio quality. We will guide you through the steps to install a car sound system, from connecting the stereo receiver to wiring the speakers and ensuring proper placement.
So let’s dive in and get your vehicle rocking with the ultimate sound experience.
Choosing The Right Car Sound System
When it comes to installing a car sound system, choosing the right one can make a significant difference in your overall audio experience. With so many options available in the market, it can be overwhelming to narrow down your choices. However, by considering a few key factors, you can ensure that you select a car sound system that suits both your budget and audio preferences.
Factors to consider when selecting a car sound system
Before diving into the world of car sound systems, it is essential to evaluate a few crucial factors. Keeping these factors in mind will help you make an informed decision and find a system that caters to your specific needs. Here are the key factors to consider:
- Evaluating your budget and sound preferences
- Researching reputable brands and reading customer reviews
Evaluating your budget and sound preferences
When it comes to selecting a car sound system, one of the first things to consider is your budget. Determine how much you are willing to spend on the system, keeping in mind that higher-quality systems generally come with a higher price tag. It is important to strike a balance between affordability and audio quality to ensure you get the best value for your money.
Additionally, defining your sound preferences is crucial. Do you prefer deep bass, crisp highs, or a balance between the two? Identifying your audio preferences will help you narrow down your options and choose a system that delivers the sound quality you desire.
Researching reputable brands and reading customer reviews
Once you have determined your budget and sound preferences, the next step is to research reputable brands in the market. Look for well-established manufacturers known for their high-quality car sound systems. These brands often have a wide range of products to choose from, allowing you to find a system that fits your requirements.
Customer reviews can provide valuable insights into the performance and reliability of different car sound systems. By reading reviews from verified customers, you can gain an understanding of the real-world experiences others have had with the systems you are considering. This will help you make an informed decision based on the experiences and feedback of actual users.
In conclusion, when selecting a car sound system, it is crucial to evaluate your budget, sound preferences, and research reputable brands while considering customer reviews. By taking these factors into account, you can find a car sound system that not only fits your budget but also delivers the audio experience you desire.
How To Install Car Sound Systems: The Ultimate Guide
Welcome to the ultimate guide on how to install car sound systems. Upgrading your car’s audio system can greatly enhance your driving experience, allowing you to enjoy your favorite music with enhanced clarity and power. In this comprehensive guide, we will walk you through the step-by-step process of installing a car sound system, from gathering the necessary tools to identifying the optimal locations for the components.
Gathering the necessary tools for installation
Before diving into the installation process, it’s important to gather all the tools you’ll need to complete the job effectively and efficiently. Here’s a list of essential tools to have on hand:
- Socket set
- Wire strippers
- Utility knife
- Electrical tape
- Screwdrivers (both flathead and Phillips)
- Wire crimpers
- Panel removal tools
- Drill with assorted bits
- Installation kit for your specific car
- Amplifier wiring kit
Preparing the car for installation (removing panels, disconnecting the battery)
Once you have all the necessary tools, it’s time to prepare your car for the installation process. This involves removing certain panels and disconnecting the battery to ensure safety and ease of access. Follow these steps:
- Park your car in a safe and well-lit location.
- Locate the panels that need to be removed to access the existing audio system. Refer to your car’s user manual or online resources for specific instructions.
- Using the appropriate tools, carefully remove the panels, taking care not to damage them.
- Locate the car battery and disconnect the negative terminal using a socket or wrench.
- Use electrical tape to cover the exposed end of the negative cable to prevent accidental reconnection.
Identifying the location for the sound system components
The next step is to identify the optimal locations for the sound system components in your car. Here are some considerations:
- Speaker placement: Determine where you want to install the speakers, keeping in mind factors such as sound quality, aesthetics, and available space.
- Amplifier placement: Find a suitable location for the amplifier, ensuring it has proper ventilation and is easily accessible for maintenance.
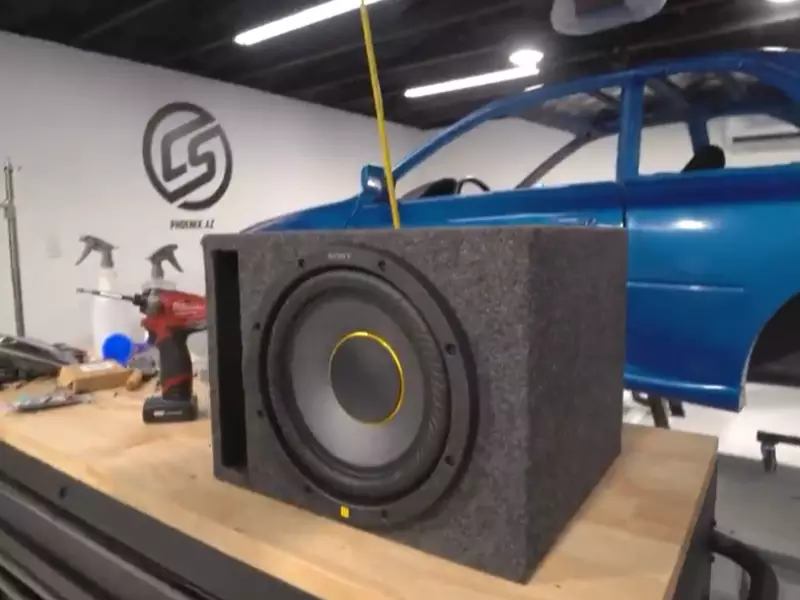
- Subwoofer placement: Decide where you want to place the subwoofer in your car to achieve optimal bass response while considering space limitations.
Take measurements and plan the routing of the wires before proceeding with the installation. It is crucial to ensure secure and neat wire connections throughout the system.
Installing The Amplifier And Speakers
Mounting the amplifier in a secure location
To ensure optimal performance and longevity of your car sound system, it’s essential to mount the amplifier in a secure location. This will not only protect it from damage but also prevent any rattling or interference with other components. The ideal spot for mounting the amplifier is usually in the trunk, on a flat surface away from any moisture or excessive heat sources.
One practical option is to use an amplifier mounting kit, which provides a secure base for your amplifier. This kit typically includes brackets, screws, and adhesive pads that allow you to mount the amplifier in a sturdy, vibration-free position. It’s important to follow the manufacturer’s instructions and ensure a tight fit to prevent any movement or unwanted noise.
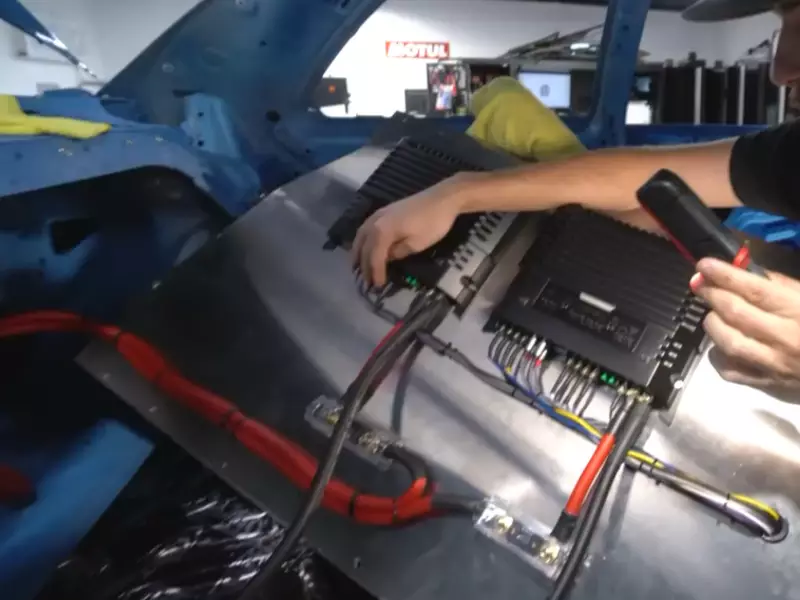
Connecting the amplifier to the car’s electrical system
Now that you have securely mounted the amplifier, the next step is to connect it to the car’s electrical system. Before beginning this process, ensure that the car’s battery is disconnected to avoid any electrical mishaps.
Start by locating the car’s fuse box, usually found under the dashboard or in the engine compartment. Use a voltage meter or a test light to identify a power source that turns on and off with the ignition. This will serve as the remote wire connection for your amplifier.
Next, connect the ground wire from the amplifier to a metal surface in the car, such as a bolt or a screw, ensuring a solid connection. This ground connection is crucial for eliminating any unwanted noise or interference.
Finally, connect the power wire from the amplifier to a fused power source. It’s crucial to use an appropriate fuse size to protect both your amplifier and the car’s electrical system. Remember to check the manufacturer’s guidelines for the recommended fuse size and secure all connections tightly.

Routing the wiring for the speakers
Routing the wiring for the speakers is a crucial step to ensure optimal sound quality and prevent any potential hazards. It’s best to route the wiring away from any moving parts or heat sources to avoid damage or interference.
Start by planning the wiring route, considering the distance between the amplifier and each speaker. Measure the required length of the speaker wire and add a few extra inches for flexibility. Use wire clips or adhesive mounts to secure the speaker wire along the car’s interior panels, making sure it doesn’t interfere with any moving parts.
When routing the wiring, maintain a safe distance from the car’s power cables to prevent any unwanted noise or interference. It’s also essential to avoid any sharp edges or areas prone to excessive heat, as these can damage the wires over time.
Installing and wiring the speakers
With the wiring route established, it’s time to install and wire the speakers into your car sound system. Begin by removing the factory speakers, which are typically held in place with screws or clips. Keep in mind that the process may vary depending on your car’s make and model, so consult the user manual if needed.
Once the factory speakers are removed, follow the manufacturer’s instructions to install the new speakers. Typically, this involves attaching the wires from the speakers to the corresponding terminals on the amplifier, ensuring a secure connection.
You can use crimp connectors or solder the wires together for a reliable and long-lasting connection. Make sure to double-check the polarity, with the positive wire connected to the positive terminal and the negative wire connected to the negative terminal.
Once all the connections are secure, gently place the speakers in their designated locations and secure them using screws or clips. Give each speaker a light push to ensure it’s properly mounted.
With the installation complete, reconnect the car’s battery and test your newly installed speakers. Adjust the sound settings as needed to achieve the best possible audio experience.
Wiring The Head Unit And Subwoofer
When it comes to installing a car sound system, one of the most crucial steps is wiring the head unit and subwoofer properly. This step ensures that both components are connected to the car’s electrical system and working together seamlessly. In this section, we will guide you through the process, step by step.
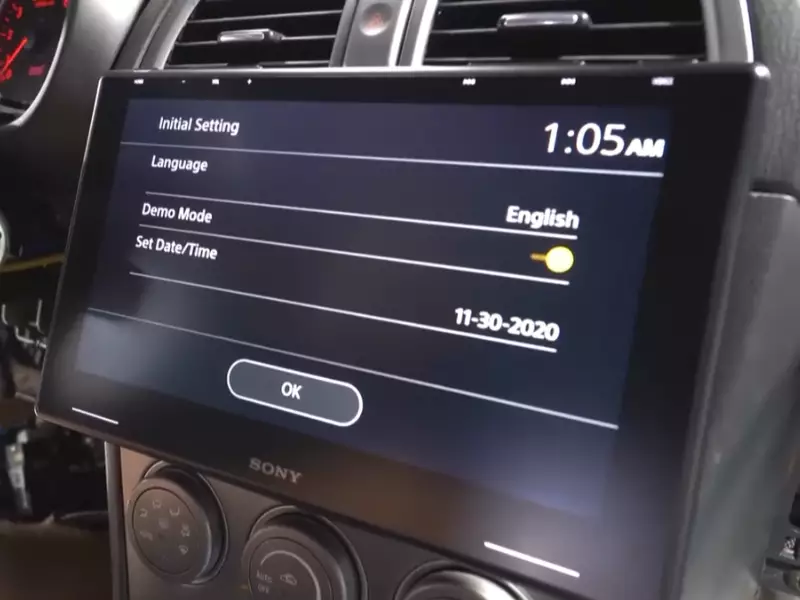
Connecting the head unit to the car’s electrical system
Connecting the head unit to the car’s electrical system requires careful consideration of the wiring. Here’s how you can do it:
- Locate the car’s wiring harness: Start by identifying the car’s wiring harness, usually found in the dash or near the stereo cavity. This harness houses all the necessary wires for connecting the head unit.
- Disconnect the negative battery terminal: As a safety measure, always disconnect the negative battery terminal before starting any electrical work on your car.
- Match the wires: Match the wires on the car’s wiring harness to the corresponding wires on the head unit’s harness. Use a wiring diagram or the manual to ensure proper connections.
- Connect the wires: Strip the ends of the wires and twist them together, ensuring a secure connection. Use wire connectors or electrical tape to secure the connection.
- Test the connections: Once all the wires are connected, turn on the head unit and test the functionality. Check if the radio, CD player, and other features are working correctly.
Mounting and wiring the subwoofer
The subwoofer is an essential component of a car sound system, providing deep bass and enhancing the overall audio experience. Here’s how you can mount and wire the subwoofer:
- Select the mounting location: Choose a suitable location in your car’s trunk or interior to mount the subwoofer. Ensure that it is securely fastened and positioned correctly.
- Connect the wiring: Connect the subwoofer to your head unit by running the necessary wiring. Use high-quality RCA cables to transmit the audio signals.
- Power connection: Connect the subwoofer amplifier to the car’s electrical system. This requires connecting the power wire, ground wire, and remote turn-on wire to their respective terminals.
- Tuning the subwoofer: After wiring the subwoofer, make sure to adjust the sound system settings to optimize the subwoofer’s performance. Experiment with the bass levels and crossover settings to achieve the desired sound quality.
By following these steps, you can effectively wire the head unit and subwoofer in your car sound system. Remember to double-check all the connections before completing the installation. Now, you are ready to enjoy your favorite tunes with a high-quality car sound system!
Troubleshooting Common Issues
Installing a car sound system can greatly enhance your driving experience, allowing you to enjoy your favorite music with premium sound quality. However, like any technology, car sound systems can encounter problems. In this section, we will discuss some common issues that may arise during the installation process and provide solutions to help you troubleshoot and resolve them.
Identifying and fixing wiring problems
One of the most common issues when installing a car sound system is wiring problems. Incorrectly connected or damaged wiring can lead to poor sound quality or no sound at all. Follow these steps to identify and fix wiring problems:
- Check the power connections: Inspect the power wires connected to the battery, amplifier, and head unit. Ensure they are secure and firmly connected. If you find loose or damaged power wires, replace them.
- Examine the speaker wires: Inspect the speaker wires running from the amplifier or head unit to the speakers. Look for any frayed or exposed wires. If you find any, trim them and reconnect the wires.
- Check the ground connection: A faulty ground connection can lead to sound issues. Ensure that the ground wire connected to the amplifier or head unit is securely fastened to a metal point on the vehicle’s chassis. Clean the metal surface if necessary to ensure a solid connection.
Addressing sound system distortion and poor sound quality
If you are experiencing distortion or poor sound quality from your car sound system, there are several potential causes to consider:
- Adjust the equalizer settings: Use the equalizer settings on your head unit to fine-tune the sound output. Experiment with different equalizer presets or customize the settings to achieve optimal sound quality.
- Check the speaker placement: Improperly positioned speakers can lead to distorted sound. Make sure your speakers are positioned correctly, away from any obstructions that could interfere with sound dispersion.
- Inspect the audio cables: Ensure that the audio cables connecting the amplifier or head unit to the speakers are undamaged and securely plugged in. Replace any faulty cables to eliminate potential signal interference.
Troubleshooting issues with the amplifier or head unit
If you encounter issues specifically related to your amplifier or head unit, consider the following troubleshooting steps:
- Check the settings: Ensure that the amplifier or head unit settings are properly configured. Make sure the balance and fade settings are centered, and any built-in enhancements or effects are disabled.
- Inspect the connections: Examine the connections between the amplifier or head unit and the speakers. Ensure they are firmly connected and free of any dirt or debris that could impede the signal.
- Test the amplifier or head unit: If you suspect a problem with the amplifier or head unit, try connecting a different set of speakers or headphones directly to the unit to see if the issue persists. This can help determine whether the problem lies with the amplifier or head unit itself.
By following these troubleshooting tips, you can address common issues that may arise during the installation of your car sound system. Remember to take your time, be thorough in your examination, and consult the user manuals for your specific equipment if needed. With proper troubleshooting and problem-solving, you’ll be able to enjoy high-quality sound in your car in no time!
Fine-Tuning Your Car Sound System
After successfully installing your car sound system, it’s time to fine-tune it to achieve the best audio quality possible. This process involves balancing the audio levels, adjusting the equalizer settings, and incorporating additional sound enhancers. By following these steps, you can optimize the performance of your car sound system and enjoy a truly immersive audio experience on the road.
Balancing the audio levels for optimal sound quality
One crucial aspect of fine-tuning your car sound system is ensuring that the audio levels are properly balanced. This means that all the speakers in your car should produce consistent sound levels to create a well-rounded audio experience. To achieve this:
- Start by playing a test track with a wide dynamic range.
- Listen carefully and adjust the sound levels of each speaker until they are balanced and harmonious.
- Pay special attention to the front speakers, as they are responsible for delivering stereo sound.
- While balancing the audio levels, make sure not to set the volume too high, as it can lead to distortion and potential damage to your speakers.
By taking the time to balance the audio levels, you can ensure that every component of your car sound system is contributing to a well-balanced and enjoyable listening experience.
Adjusting the equalizer settings
The equalizer settings allow you to fine-tune the audio frequencies to match your preferences and the characteristics of your car’s interior. By adjusting the equalizer, you can enhance specific frequency ranges and customize the sound output. Here’s how to do it:
- Start by playing a familiar track that represents the type of music you usually listen to in your car.
- Listen attentively and identify which frequency ranges need adjustment.
- Use the equalizer controls to boost or cut specific frequencies to achieve the desired sound quality.
- Experiment with different settings until you find the perfect balance for your preferences and car acoustics.
Through careful equalizer adjustments, you can optimize the audio output to match your personal taste and enhance the overall listening experience in your car.
Incorporating additional sound enhancers
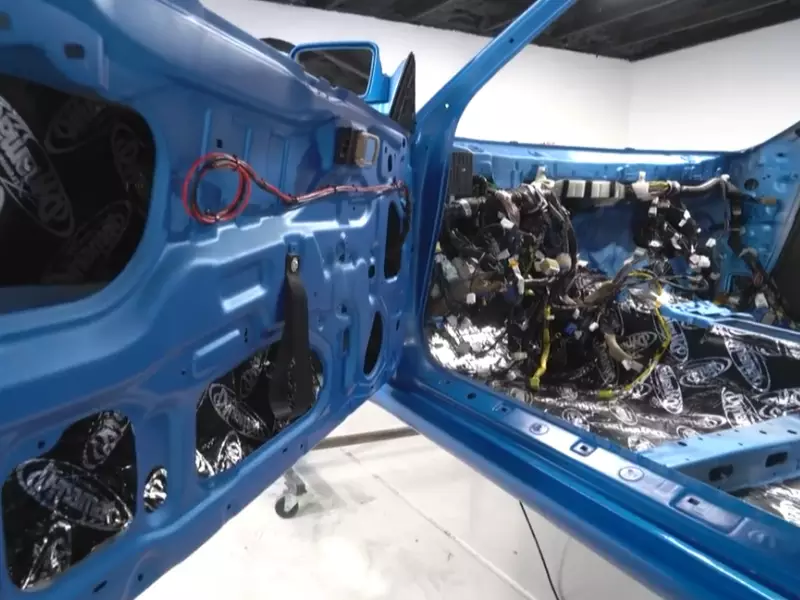
While balancing the audio levels and adjusting the equalizer settings are essential steps in fine-tuning your car sound system, incorporating additional sound enhancers can further enhance the audio quality. Two common sound enhancers are sound dampening materials and line output converters.
Sound dampening materials, such as foam or Mass Loaded Vinyl (MLV), can minimize vibrations and reduce external noise from entering the cabin. By applying these materials to the doors, floor, and trunk of your car, you can achieve a quieter and more controlled audio environment.
Line output converters, on the other hand, allow you to connect additional amplifiers to your car’s audio system, enabling more power and control over the sound output. These converters convert the speaker-level signal from your factory stereo into a line-level signal compatible with aftermarket amplifiers, providing a significant boost in audio quality and volume.
By incorporating these additional sound enhancers, you can take your car sound system to the next level and enjoy a premium audio experience on the go.
Overall, fine-tuning your car sound system is a crucial step in achieving optimal audio quality. By carefully balancing the audio levels, adjusting the equalizer settings, and incorporating additional sound enhancers, you can make the most out of your car sound system and enjoy immersive music playback during your drives.
Maintaining And Upgrading Your Car Sound System
One of the keys to ensuring optimal performance and longevity of your car sound system is regular maintenance and occasional upgrades. By following these simple tips and tricks, you’ll be able to keep your car audio system sounding crystal clear and explore new possibilities for enhancing your audio experience.
Cleaning and Protecting the Components
To maintain the quality of your car sound system, it’s crucial to clean and protect the various components from dirt, dust, and other contaminants. Regular cleaning not only improves the overall sound quality but also helps prevent any potential damage.
Here are a few tips for cleaning and protecting your car sound system components:
- Use a soft, lint-free cloth to wipe down the surfaces of your speakers, amplifier, and head unit. Avoid using harsh chemicals or abrasive materials that could damage the equipment.
- Consider using specialized cleaning products designed specifically for car audio equipment. These products help remove grime and provide a protective layer.
- Protect your speakers with grilles or covers to prevent any accidental damage. These accessories not only safeguard your speakers but also help maintain their aesthetic appeal.
- Regularly vacuum your car’s interior to remove any excess dust or debris that could potentially clog or affect the performance of your sound system.
Regularly Checking and Tightening Connections
A car sound system comprises various connections, including speaker wires, RCA cables, and power cables. Over time, these connections can become loose or corroded, leading to reduced sound quality or even complete failure of certain components.
Follow these steps to check and tighten the connections of your car sound system:
- Inspect all the connections between the amplifier and speakers, ensuring they are securely plugged in or screwed in.
- Examine the RCA cables that transmit audio signals between the head unit and amplifier. Replace any damaged or worn-out cables as necessary.
- Check the power cables connected to the amplifier, making sure they are tightly secured and free of any fraying or damage. Loose power cables can result in unstable power supply to your sound system.
- Don’t forget to check the grounding wire. It should be connected securely to a metal part of the car’s frame to ensure proper grounding.
Exploring Options for Upgrading Your Sound System
If you’re looking to take your car audio experience to the next level, consider exploring different options for upgrading your sound system. Whether you’re a bass enthusiast or seeking a more immersive audio experience, upgrading your components can make a significant difference in sound quality and overall enjoyment.
Here are a few options to consider:
- Upgrading the speakers: Invest in high-quality aftermarket speakers that provide better frequency response and power handling. This upgrade can significantly enhance the clarity and depth of your audio.
- Adding a subwoofer: If you’re a fan of deep bass, consider installing a dedicated subwoofer. This component reproduces low-frequency sounds with precision, giving your audio that extra punch.
- Installing an amplifier: Amplifiers provide more power and control to your speakers, resulting in improved sound reproduction and reduced distortion.
- Opting for sound processors: Sound processors allow you to fine-tune and customize the audio output to suit your personal preferences. They can help eliminate any road noise or adjust the audio balance.
By adopting a regular maintenance routine and considering occasional upgrades, you can ensure your car sound system delivers an exceptional audio experience every time you hit the road.
Importance of a well-installed car sound system
A well-installed car sound system is key to achieving the best audio experience in your vehicle. It ensures crystal-clear sound reproduction and optimal performance, allowing you to fully appreciate the nuances and details of your favorite music. Here are some reasons why a well-installed car sound system is important:
- Enhanced sound quality: A properly installed car sound system delivers superior sound quality, bringing your music to life. It allows you to hear the full range of frequencies, from deep bass to crisp highs, without any distortion or unwanted background noise. This clarity and balance in sound enhance the overall listening experience.
- Immersive experience: With a well-installed sound system, you can truly immerse yourself in your music while on the road. The right combination of speakers, amplifiers, and audio components creates a surround sound experience that engulfs you in the music. It adds depth, dimension, and realism to the audio, making you feel like you’re attending a live concert.
- Personalization: Installing a car sound system allows you to tailor the audio settings to your preferences. You can adjust the equalizer settings, balance, and fade to create a sound profile that suits your musical taste. Whether you prefer a bass-heavy sound or a more balanced mix, a well-installed sound system lets you customize the audio to your liking.
- Entertainment value: A car sound system isn’t just about music. It also enhances the overall entertainment value of your vehicle. Whether you want to listen to podcasts, audiobooks, or streaming services, a well-installed sound system ensures that every audio source sounds exceptional. It makes your drives more enjoyable and keeps you entertained on the road.
- Resale value: Investing in a quality car sound system and having it professionally installed can also increase the resale value of your vehicle. Many car buyers appreciate the presence of a premium sound system and are willing to pay a premium for it. So, not only do you get to enjoy better sound quality, but it can also be a worthwhile investment in the long run.
In conclusion, a well-installed car sound system is essential for an optimal audio experience while driving. From enhanced sound quality and immersion to personalization and increased entertainment value, it truly enhances the joy of listening to music on the road. So, don’t compromise on your car’s sound system, and enjoy your favorite tunes with exceptional audio quality.
Frequently Asked Questions For How To Install Car Sound Systems
Is It Hard To Install A Car Sound System?
Installing a car sound system is not particularly difficult. With the right tools and instructions, it can be a straightforward process. Just make sure to follow the steps carefully to achieve the best results.
Can I Install Car Stereo Myself?
Yes, you can install a car stereo yourself. Just make sure to follow the instructions carefully and have the necessary tools. However, if you are not confident or experienced with car electronics, it’s recommended to seek professional help.
How Much Would It Cost To Put A New Sound System In My Car?
The cost of a new sound system for your car will vary depending on factors such as the brand, quality, and installation requirements. It can range from $100 to $1000 or more.
How Long Does It Take To Install A Sound System In A Car?
It typically takes about 2-4 hours to install a sound system in a car.
Conclusion
Installing a car sound system can greatly enhance your driving experience and allow you to enjoy your favorite tunes in high-quality sound. By following the step-by-step guide provided in this blog post, you can successfully install a car sound system on your own.
Remember to gather all the necessary tools and materials, carefully read the instructions, and take your time during the installation process. With a little patience and effort, you’ll be cruising down the road with an impressive audio system in no time.