To install a car seat in an RV, secure it using the vehicle’s seat belt and follow the manufacturer’s instructions. Are you planning a road trip with your family and need to install a car seat in your RV?
It’s crucial to prioritize safety and ensure that your child is securely fastened. We will provide you with a step-by-step guide on how to properly install a car seat in an RV. By following these instructions and considering the specific requirements of your car seat, you can enjoy peace of mind knowing that your child is safe and secure during your travel adventures.
Whether you’re a first-time RV traveler or a seasoned road tripper, this guide will help you ensure the safety of your little one on the road.
Tips For A Safe And Secure Installation
Proper car seat installation is paramount when it comes to ensuring the safety of your child while traveling in an RV. Understanding the importance of a secure car seat installation and the potential risks associated with incorrect installation is crucial for every parent or caregiver. In this section, we will discuss the significance of proper car seat installation, the importance of keeping children safe while traveling, and how incorrect installation can result in severe injuries.
Understand the Importance of Proper Car Seat Installation
Installing a car seat in your RV may seem like a straightforward task, but it is essential to comprehend the significance of doing it right. A properly installed car seat provides a secure restraint system that can protect your child, minimizing the risk of injuries in the event of an accident or sudden stop. On the contrary, an improperly installed car seat may not provide adequate protection, putting your child’s safety at risk.
Importance of Keeping Children Safe While Traveling
As a parent or caregiver, your child’s safety should always be a top priority. Whether you are embarking on a short road trip or a long journey, keeping your child safe while traveling in an RV is crucial. Accidents can happen unexpectedly, and ensuring that your child is securely buckled up in a car seat greatly reduces the likelihood of injuries.
How Incorrect Installation Can Result in Severe Injuries
Incorrect car seat installation can have severe consequences. A car seat that is not properly installed may not provide sufficient protection in the event of a collision or sudden stop. The car seat may shift or become loose, increasing the risk of your child being thrown around inside the vehicle or even ejected from the seat in severe cases. This can lead to severe injuries or even fatalities.
When installing a car seat in your RV, it is crucial to follow the manufacturer’s instructions carefully. Each car seat model may have specific installation requirements that need to be adhered to for optimal safety. Additionally, consider seeking help from a certified Child Passenger Safety Technician who can assist you in ensuring that the car seat is correctly installed.
Remember, the installation of a car seat in your RV is not something to be taken lightly. By understanding the importance of proper car seat installation, the significance of keeping children safe while traveling, and the potential risks of incorrect installation, you can provide your child with the highest level of protection during your RV adventures.
Gather The Necessary Tools And Materials
Before you start installing a car seat in your RV, it’s essential to gather all the necessary tools and materials. This will ensure a smooth and hassle-free installation process. By having everything in place, you won’t have to halt your progress to search for missing items or make last-minute trips to the store.
Check the Car Seat Manual for RV Compatibility
First and foremost, it is crucial to consult the car seat manual to ensure that it is compatible with RV use. Not all car seats are suitable for installation in an RV, so it’s essential to double-check this information. The manual will provide valuable insights into any specific requirements or guidelines to follow during the installation process.
Ensuring the car seat is suitable for RV use
Next, it’s important to verify that the car seat you plan to use is specifically designed for RV use. Different car seat models have varying features and functionality. Some car seats may not be able to withstand the unique conditions of an RV or provide adequate protection when driving on the road. Checking the car seat’s suitability will give you peace of mind and ensure the safety of your loved ones.
Understanding any specific requirements for installation in an RV
Each car seat may have specific requirements for installation in an RV. These requirements might include using additional accessories or following certain steps that differ from regular car seat installation. Familiarize yourself with these requirements beforehand to save time and effort during the installation process. Ignoring these guidelines may compromise the efficacy of the car seat or even violate safety standards.
Choose the Right Location in Your RV
Once you have gathered the necessary tools and materials and verified the car seat’s compatibility, it’s time to select the right location for installation in your RV. Choosing the right location is crucial for both safety and comfort.
Factors to consider when selecting a location for the car seat:
- The car seat should be positioned in an area where it can be properly secured and provide optimal protection to the child.
- The location should offer easy access to the child from the RV’s doorway.
- Ensure the car seat does not obstruct driver visibility or hinder the operation of vehicle controls.
- Avoid placing the car seat near any potential hazards, such as doors, windows, or sharp edges.
- Check that the seat belts or anchor points in the chosen location meet safety standards and can provide a secure installation.
By carefully considering these factors, you can choose a location that not only adheres to safety standards but also enhances the overall travel experience for you and your little one.
Preparation And Adjustment Of The Car Seat
Installing a car seat in an RV is an essential step to ensure the safety of your child while on the road. However, it can be a daunting task if you are unfamiliar with the process. In this section, we will guide you through the necessary preparation and adjustments needed to install a car seat in your RV properly. By understanding the car seat components and making the necessary adjustments, you can ensure a secure fit for your child, giving you peace of mind during your travels.
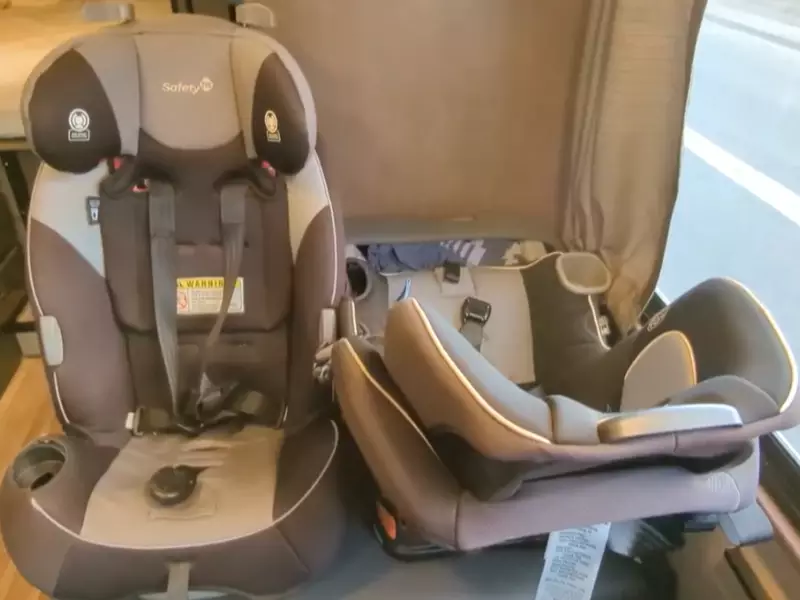
Familiarize Yourself with the Car Seat Components
Before installing a car seat in your RV, it’s crucial to familiarize yourself with the various components and their functions. By doing so, you will have a better understanding of how to properly install and adjust the car seat. Here are the key components to pay attention to:
- Base: The base is the foundation of the car seat and provides stability during a car ride. It is typically installed using either the vehicle’s seat belt or the LATCH system.
- Harness: The harness is the primary restraint system that keeps your child securely in place. It consists of straps and a buckle that hold your child’s body snugly.
- Chest Clip: The chest clip is an essential component that keeps the shoulder straps properly positioned on your child’s shoulders. It prevents them from sliding off during a sudden stop or impact.
- Shoulder Straps: The shoulder straps are responsible for distributing the force of a crash across your child’s shoulders and chest. Proper adjustment is crucial to ensure a secure fit.
Understanding the different parts and functions of the car seat
Now that you are familiar with the car seat components, it’s important to understand their functions. This knowledge will help you navigate the installation process with confidence. Here’s a brief overview:
| Component | Function |
|---|---|
| Base | Provides stability and installation support |
| Harness | Restraint system to keep your child secure |
| Chest Clip | Prevents shoulder straps from sliding off |
| Shoulder Straps | Distributes force during a crash |
Identifying essential adjustments to ensure a proper fit for your child
Every child is unique, which means adjustments are necessary to ensure a proper fit for your child. Here are the essential adjustments you need to make:
- Headrest position: Adjust the headrest to support your child’s head and neck in a neutral position.
- Seat angle: Find the appropriate angle of recline that provides comfort and safety for your child.
- Crotch strap position: Ensure that the crotch strap is properly positioned between your child’s legs, snug but not too tight.
- Height adjustment: Adjust the shoulder straps’ height to match your child’s shoulder level.
Adjusting the Harness and Straps for a Secure Fit
The harness and straps play a critical role in keeping your child secure during a car ride. Here are our top tips to ensure a secure fit:
- Properly tightening the harness straps: With your child seated in the car seat, pull the harness straps tight to remove any slack. You should not be able to pinch any excess webbing between your fingers.
- Tips for adjusting the chest clip and shoulder straps: Position the chest clip at armpit level and make sure it is secure. Adjust the shoulder straps to ensure they are snug but not restrictive. The straps should form a straight line without any twists.
By following these adjustment guidelines, you can create a secure and comfortable environment for your child in the car seat. Remember to review the car seat manufacturer’s instructions for specific guidelines related to your car seat model.
Rv-Specific Considerations For Car Seat Installation
Anchoring Methods for Car Seats in an RV
When it comes to installing a car seat in an RV, there are several RV-specific considerations to keep in mind. One of the most important considerations is understanding the anchoring methods available for car seats. Anchoring systems play a vital role in ensuring the safety and security of the car seat, providing a stable installation during travel.
Understanding the different anchoring systems available
RVs typically offer two main anchoring systems for car seats: the Lower Anchors and Tethers for Children (LATCH) system and the seat belt installation method. It’s important to understand the differences between these systems to determine which one is most suitable for your RV and car seat combination.
Comparing LATCH and seat belt installation methods
The LATCH system is a common choice for modern car seats and provides an easy and convenient method for installation. It involves using special anchors and hooks located in the RV’s seat crevices to secure the car seat. On the other hand, the seat belt installation method utilizes the RV’s seat belt to secure the car seat in place. Both methods have their own advantages and it’s essential to consider factors such as the weight limit of the LATCH system and the correct installation angle when deciding which method to use.
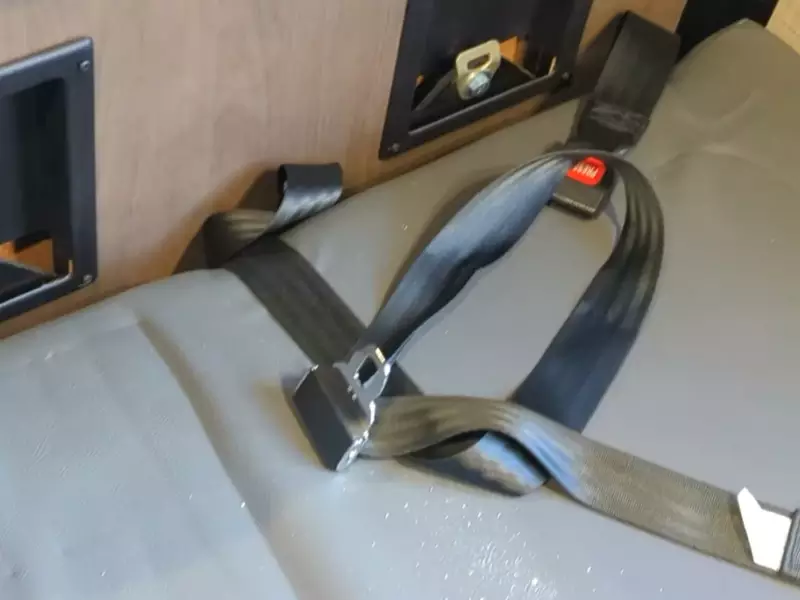
Utilizing RV Seat Belts Properly with Car Seats
RVs often have seat belts that are different from those found in passenger vehicles. It’s crucial to ensure that the seat belt in your RV is compatible with your car seat before proceeding with the installation. Check if the seat belt has a locking feature or if a locking clip is required to secure the car seat. Proper usage of the RV seat belt will contribute to a secure installation that keeps your child safe during travel.
Ensuring the seat belt is compatible with your car seat
Before installing a car seat using the RV seat belt, ensure that the seat belt is compatible with your specific car seat model. Manufacturers usually provide information on compatible seat belts in the car seat manual or on their websites. It’s advisable to follow these guidelines to prevent a mismatch between the car seat and seat belt, which could compromise the safety of your child.
Proper use of seat belts for a secure installation
Once you have confirmed compatibility, it’s vital to understand the proper use of seat belts for a secure car seat installation in your RV. This involves following the specific instructions provided by the car seat manufacturer and properly threading the seat belt through the designated belt path. Ensure the seat belt is snugly tightened to minimize any movement or slack that could jeopardize the effectiveness of the installation. Regularly check and adjust the seat belt throughout your journey to maintain a secure and safe setup.

Step-By-Step Installation Guide
Installing a car seat in your RV is an important step in ensuring the safety of your child during travels. By following a step-by-step installation guide, you can make sure that the car seat is properly secured and ready for the journey ahead. In this article, we will take you through the process of installing a car seat in your RV, covering everything from preparing the car seat to securing it using the chosen anchoring method. Let’s get started!
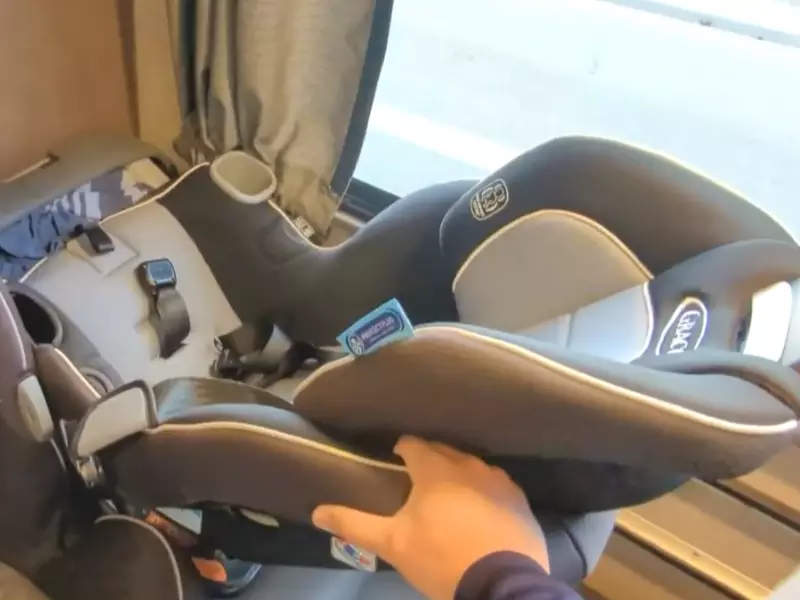
Preparing the Car Seat for Installation
Before installing the car seat in your RV, it is essential to prepare it properly. Start by cleaning the car seat thoroughly to remove any dirt or debris. Check for any damages, such as loose straps or broken parts, and make sure that the car seat is in good condition before proceeding with the installation. Additionally, remove any unnecessary accessories or attachments from the car seat to ensure a secure fit.
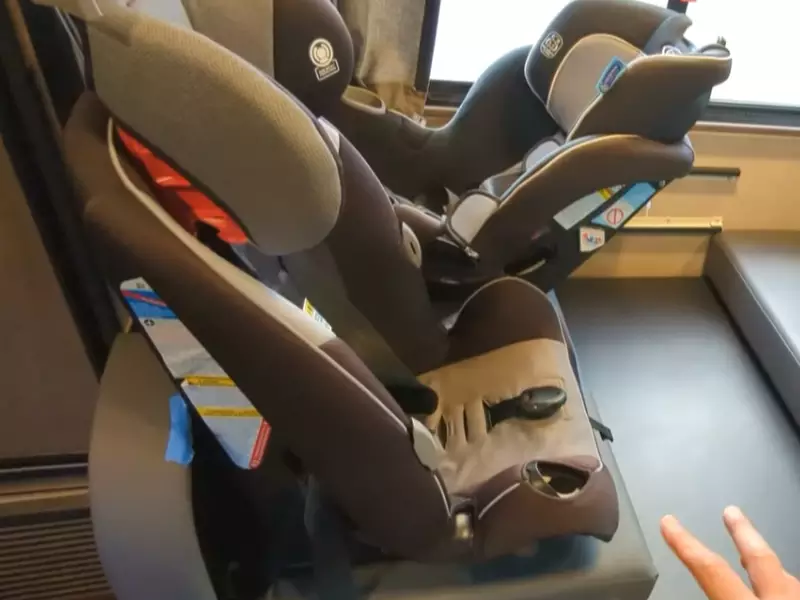
Positioning the Car Seat in the Chosen Location
Once the car seat is prepared, it’s time to position it in the designated spot in your RV. Consider the best location for the car seat, keeping in mind factors such as accessibility and safety. Place the car seat in the designated spot and make sure it is properly aligned and oriented. This will ensure that the car seat provides optimum protection for your child during travel.
Securing the Car Seat Using the Chosen Anchoring Method
Now it’s time to secure the car seat using the chosen anchoring method. There are two common methods for anchoring car seats in RVs: LATCH installation and seat belt installation. Let’s go through the step-by-step instructions for each method:
LATCH Installation:
- Locate the lower anchors in your RV’s seating area. These are typically found between the seat cushions.
- Attach the lower anchors of the car seat to the corresponding anchor points in the RV. Make sure to hear a click sound, indicating that the anchors are securely attached.
- Thread the car seat’s straps through the rear-facing belt path or the forward-facing belt path, depending on the orientation of the car seat.
- Tighten the straps to ensure a snug fit. Check the car seat’s manual for specific instructions on tightening the straps.
- Verify that the car seat is securely installed by giving it a firm tug. It should not move more than an inch in any direction.
Seat Belt Installation:
- Position the car seat in the designated spot and ensure that it is properly aligned and oriented.
- Thread the seat belt through the rear-facing belt path or the forward-facing belt path, depending on the orientation of the car seat.
- Buckle the seat belt and pull it tight to remove any slack.
- Check for proper tension by pressing down on the car seat and pulling the seat belt. The car seat should not move more than an inch in any direction.
By following these step-by-step instructions, you can confidently install a car seat in your RV and ensure the safety of your child during travels. Remember to always refer to the car seat’s manual for specific installation instructions and guidelines. Safe travels!
Final Checks And Safety Measures
Once you’ve successfully installed your car seat in your RV, it’s important to conduct final checks and implement safety measures to ensure the utmost protection for your child. These final steps will help verify the secure installation of the car seat and ensure its stability during travel.
Verifying a Secure Installation
Verifying a secure installation is crucial to ensure the car seat remains in place and provides optimal protection in the event of a collision. To do this, follow these steps:
- Check that the car seat is tightly secured to the RV seat using the appropriate seat belt or lower anchors and tethers for children (LATCH) system.
- Make sure the car seat doesn’t move more than one inch in any direction when you attempt to wiggle it. Excessive movement indicates an insecure installation.
- Confirm that all straps and harnesses are correctly tightened and properly positioned on the child. Ensure the harness straps are snug and secure, passing the “pinch test” where you cannot pinch any excess webbing.
Conducting a Thorough Check of the Car Seat’s Stability
In addition to verifying the overall secure installation, it’s vital to conduct a thorough check of the car seat’s stability to ensure it remains stable throughout your journey. Follow these steps:
- Check the recline angle of the car seat to ensure it is appropriate for your child’s age and weight. Consult the car seat’s manual for specific guidance on the correct recline angle.
- Inspect the car seat’s base to ensure it is level and not tilting to one side or the other.
- Ensure that the car seat does not have any cracks or structural damages that may compromise its stability.
Ensuring the Car Seat is Properly Fastened and Doesn’t Move Excessively
Properly fastening the car seat and preventing excessive movement is essential for the safety of your child during travel. Follow these guidelines:
- Verify that the car seat’s harness straps are properly buckled and tightened to secure your child in the seat.
- Ensure that the car seat’s chest clip is positioned at armpit level for proper protection.
- Check that there is no excessive slack in the car seat’s straps. If necessary, adjust the straps to ensure a snug fit.
Regular Maintenance and Safety Inspections
Regular maintenance and safety inspections are crucial to keep your car seat in top condition. Here’s what you should do:
- Inspect the car seat regularly for any signs of wear and tear, including frayed straps, worn padding, or broken parts. Replace any damaged components immediately.
- Clean the car seat regularly according to the manufacturer’s instructions to remove dirt, debris, and spills that may compromise its safety.
- Check for recalls or safety updates related to your specific car seat model. Stay informed and address any necessary modifications or replacements.
By following these final checks and safety measures, you can ensure that your car seat is securely installed, stable, and properly maintained, providing optimum protection for your child throughout your RV travels.
Frequently Asked Questions For How To Install Car Seat In RV
How Do You Secure A Carseat In An RV?
To secure a car seat in an RV, follow these steps:
1. Position the car seat in the back seat of the RV facing the rear.
2. Attach the car seat using the seat belt and ensure it is tightly secured.
3. Use the car seat’s built-in anchors or tether to secure it further if available.
4. Double-check the car seat’s installation for a snug fit and minimal movement.
5. Always refer to the manufacturer’s instructions for proper installation.
How Do You Put A Baby In A Motorhome?
To put a baby in a motorhome, ensure their safety with a car seat that meets regulations. Install the car seat facing backward in the vehicle, and fasten it securely. Verify the car seat’s compatibility with the motorhome’s seating arrangement.
Keep the baby within your sight and attend to their needs while traveling.
Can You Add Seat Belts To An RV?
Yes, it is possible to add seat belts to an RV for improved safety.
How Do You Install A Car Seat Insert?
To install a car seat insert, follow these steps:
1. Place the insert flat in the car seat.
2. Thread the straps through the slots on the sides.
3. Pull the straps tight and secure the buckles.
4. Adjust the insert to ensure a snug fit for your baby’s comfort and safety.
5. Double-check that the insert is securely in place before using the car seat.
Conclusion
Installing a car seat in an RV is crucial for ensuring the safety of your child during travel. By following the step-by-step guidelines mentioned in this blog post, you can easily install a car seat in your RV without any hassle.
Remember to always refer to your RV and car seat manufacturer’s instructions for specific guidance. Prioritize safety and provide your little one with a secure and comfortable travel experience. Happy road-tripping!