To install a car seat base, first, ensure the base is suitable for your car model, then locate the vehicle’s anchoring points and attach the base tightly using the latch system or seat belt. Next, adjust the base’s recline angle, place the car seat onto the base, and secure it using the harness straps.
Finally, check for a secure installation by applying pressure to the base and ensuring it does not move more than an inch in any direction. Introducing a car seat base to your vehicle is an essential step in ensuring your child’s safety while traveling.
Proper installation of the car seat base is crucial to provide a secure and stable platform for attaching the car seat. This article will guide you through the step-by-step process of installing a car seat base, from selecting a compatible base to properly securing the harness straps. By following these instructions, you can ensure a safe and reliable installation every time you place your child in the car seat.
Understanding The Importance Of Proper Car Seat Base Installation
Why proper installation is crucial for child safety
Properly installing a car seat base is essential for ensuring the safety of your child while traveling. The car seat base serves as the foundation upon which the car seat is securely attached. While many parents focus on selecting the right car seat for their little ones, it is equally important to understand the significance of correct installation.
Common mistakes to avoid during installation
When it comes to installing a car seat base, there are some common mistakes that parents often make. Avoiding these mistakes is crucial to maximizing the safety benefits provided by the car seat base. Let’s take a look at the most frequent errors parents make during installation:
- Loose installation: One of the most common mistakes is failing to properly tighten the car seat base. Remember, a loose installation can compromise your child’s safety in the event of a sudden stop or collision. Take the time to ensure a snug fit by following the manufacturer’s instructions carefully.
- Incorrect recline angle: Achieving the correct recline angle is vital for the comfort and safety of your child. Improper recline angles can result in your child’s head flopping forward, causing discomfort or even restricted breathing. Refer to the car seat’s manual to determine the appropriate recline angle for your child’s weight and age.
- Using the wrong installation method: Car seat bases typically offer different installation methods, such as LATCH or vehicle seatbelt. Using the wrong method can compromise the stability of the base, increasing the risk of injury. Always consult the car seat’s manual to determine the correct installation method for your specific car seat base.
The benefits of using a car seat base
Using a car seat base offers several benefits for parents and caregivers. Let’s explore the advantages of using a car seat base to further understand its importance:
1. Convenience: Installing a car seat base in your vehicle allows you to easily and securely attach and remove the car seat as needed. This flexibility is particularly beneficial for parents who frequently switch vehicles or need to transfer the car seat between different caregivers.
2. Increased stability: A car seat base provides a stable and secure attachment for the car seat, minimizing the risk of it shifting or moving during travel. This stability ensures that your child remains safe and protected, even during unexpected maneuvers or abrupt stops.
3. Easy installation: Most car seat bases are designed for straightforward installation, making it easier for parents to ensure a proper fit. Additionally, some car seat bases feature features such as level indicators or built-in lock-offs, simplifying the installation process and giving parents peace of mind.
Remember, proper installation of a car seat base is crucial for keeping your child safe during car journeys. By understanding the importance of installation and avoiding common mistakes, you can provide the best protection for your precious cargo. Always consult the car seat’s manual for specific instructions and reach out to a certified car seat technician if you need assistance.
Preparing For Car Seat Base Installation
Setting up a car seat base for your little one is an essential step in ensuring their safety during travel. As a responsible parent, taking the time to prepare for the installation process will give you peace of mind knowing that your child is secure in the car. In this blog post, we will walk you through the necessary steps to prepare for car seat base installation. Let’s get started!
Choosing the right car seat base for your car and car seat
Before diving into the installation process, it’s crucial to select the correct car seat base that fits both your car and car seat. Different car models and car seat brands have varying compatibility, and it’s essential to ensure that they are a perfect match to guarantee a secure installation. Take note of the following factors when choosing a car seat base:
- The make and model of your car
- The age and weight range indicated on the car seat
- The brand and compatibility suggestions provided by the car seat manufacturer
Considering these factors will help you select the ideal car seat base, preventing any potential issues during installation.
Gathering the necessary tools and equipment
Now that you have chosen the perfect car seat base, it’s time to gather all the tools and equipment you will need for installation. Having everything on hand before you start will save you time and frustration. Here’s a list of essential items you will need:
- A screwdriver or wrench, depending on the type of fasteners used
- A level to ensure accurate positioning
- The car seat base itself, complete with all its components
- The car seat, including any additional padding or inserts
- The car’s owner manual to guide you regarding the car’s LATCH system
Gathering these tools and equipment beforehand will make the installation process smoother and more efficient.
Reading the car seat and car seat base manuals
Once you have everything in place, it’s crucial to read the car seat and car seat base manuals thoroughly. Understanding the instructions provided by the manufacturer is key to ensuring a secure and proper installation. Pay attention to the following:
- The specific installation procedure for your car seat base model
- The weight and height restrictions for the car seat
- The necessary adjustments or modifications required for a perfect fit
- The recommended angle for proper positioning
By familiarizing yourself with the manuals, you will be equipped with the knowledge needed to install the car seat base correctly.
Now that you are equipped with the necessary knowledge to prepare for car seat base installation, it’s time to move on to the next steps to secure your child’s safety. Stay tuned for our next blog post on the actual installation process, where we will guide you step-by-step. Your journey to enhanced car seat safety starts here!
Step 1: Installing The Car Seat Base In Your Vehicle
When it comes to installing a car seat base in your vehicle, it’s essential to follow the proper steps to ensure the safety and security of your baby. In this step-by-step guide, we’ll walk you through the process of installing a car seat base correctly, starting with positioning the base in your vehicle.
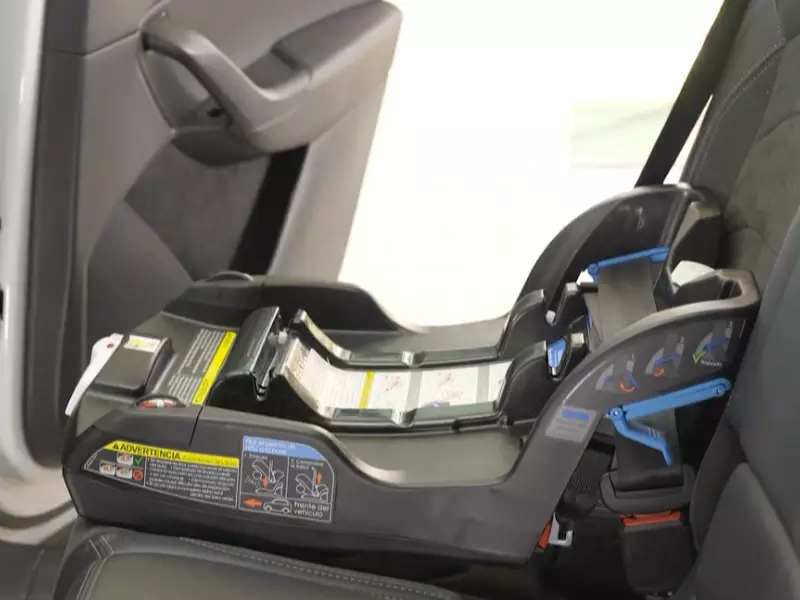
Positioning the car seat base in the vehicle
Positioning the car seat base correctly is the first crucial step in installing it securely. You want to ensure that the base is placed in a spot that allows for a stable fit and maximum protection for your little one. Here’s what you need to do:
- Consult your vehicle’s owner’s manual to determine where the car seat base can be installed. Most vehicles provide specific guidelines for car seat placement, so be sure to follow these recommendations.
- Place the car seat base in the selected seating position, whether it’s in the rear or the front of your vehicle. Make sure the base is sitting flat on the seat, avoiding any tilting or angles.
- Check for any obstructions or objects that may interfere with the base’s installation. Remove any loose items or debris to create a clear and secure environment.
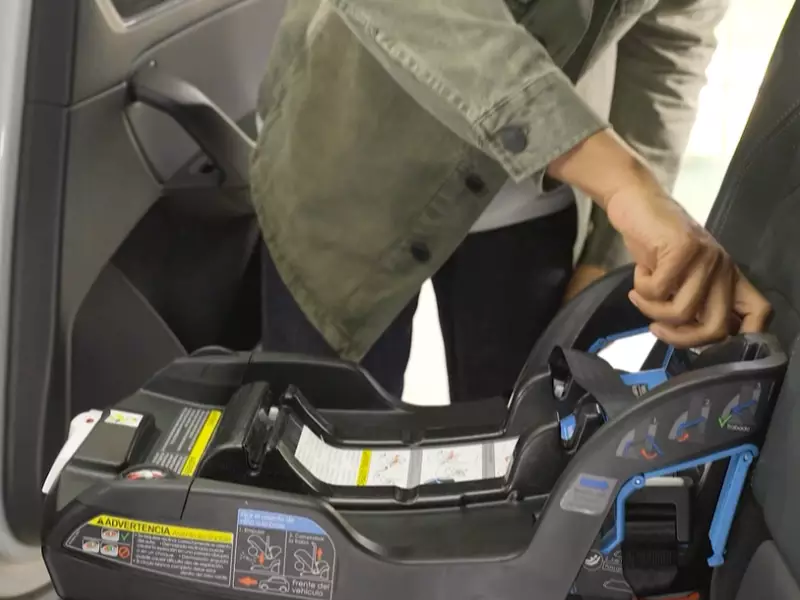
Ensuring a secure and stable fit
A secure and stable fit is essential for the car seat base to effectively protect your baby in the event of a collision. Follow the steps below to ensure a secure fit:
- Verify that the car seat base is level and properly aligned with the vehicle’s seat. It’s crucial to use a bubble level or the built-in leveling features present in some car seat bases to achieve the correct angle.
- Secure the car seat base tightly to the vehicle’s seat, minimizing any movement or wobbling. This can be achieved by using the designated installation method provided by the manufacturer, either using the vehicle’s seat belt or the LATCH system.
- Double-check that the car seat base is not experiencing excessive side-to-side or front-to-back movement. A firm and stable fit are critical, as any looseness can compromise your baby’s safety.
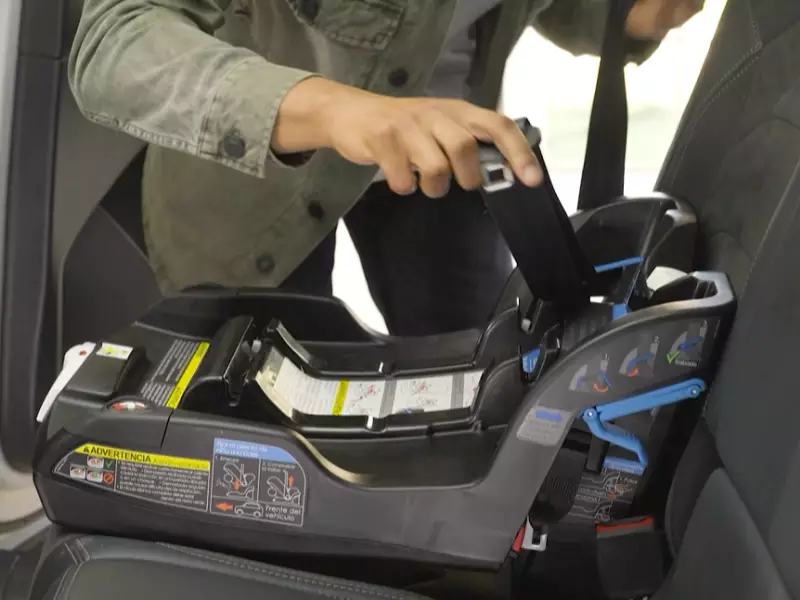
Using the vehicle’s seat belt or LATCH system for installation
Now that the car seat base is correctly positioned and secure, it’s time to choose the appropriate installation method. There are two primary methods: using the vehicle’s seat belt or the LATCH (Lower Anchors and Tethers for Children) system. Here’s what you need to know:
| Vehicle’s seat belt installation method: | LATCH system installation method: |
|---|---|
|
|
Both installation methods have their advantages, so choose the one that works best for your specific car seat and vehicle combination. Regardless of the method, always follow the manufacturer’s instructions and perform a final inspection to confirm the installation’s security.
By positioning the car seat base correctly, ensuring a secure fit, and using the appropriate installation method, you are taking essential steps to safeguard your baby during every car ride. In the upcoming steps, we’ll cover the remaining installation process, so stay tuned!
Step 2: Adjusting And Securing The Car Seat Base
Once you have successfully installed the car seat base in your vehicle, it’s time to focus on adjusting and securing it properly. This step is crucial to ensure your baby’s safety and comfort during car rides. In this section, we will guide you through the process of adjusting the recline angle of the car seat base, securing it with the appropriate locking mechanisms, and double-checking for tightness and stability.
Adjusting the recline angle of the car seat base
Before securing the car seat base, it’s important to adjust the recline angle to ensure your child is in the correct position. Follow these steps to ensure proper recline adjustment:
- Locate the recline adjuster on the car seat base.
- Refer to the car seat manufacturer’s instructions to determine the recommended recline angle for your child’s age and weight.
- Use the recline adjuster to position the car seat base at the appropriate angle, ensuring that it is neither too upright nor too reclined.
Proper recline adjustment is vital as it helps keep your baby’s head from flopping forward and ensures their airway remains open.
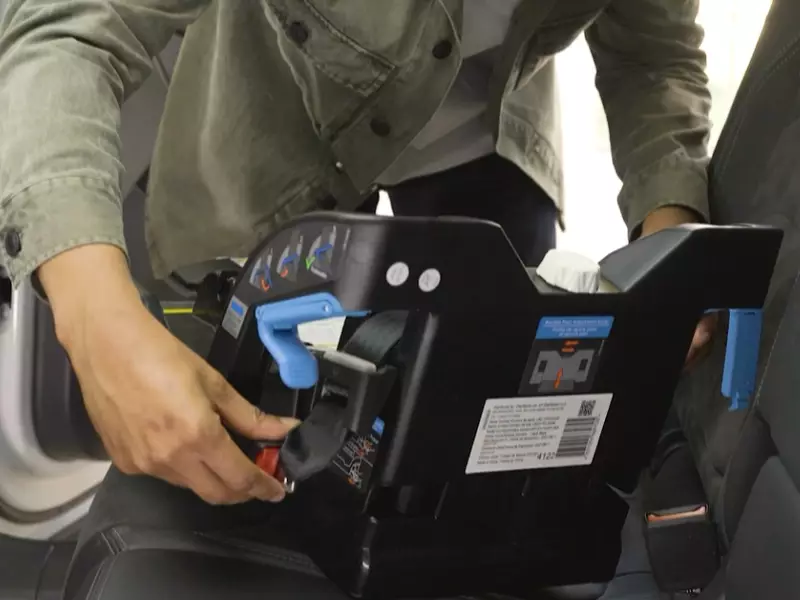
Securing the base with the appropriate locking mechanisms
After adjusting the recline angle, it’s time to secure the car seat base using the appropriate locking mechanisms:
- Locate the car seat base’s attachment points or lower anchor connectors.
- Connect the base to the vehicle’s lower anchor points, following the specific instructions provided by the car seat manufacturer.
- If your vehicle doesn’t have lower anchors, secure the base using the vehicle’s seat belt.
- Thread the vehicle’s seat belt through the designated belt path on the car seat base and ensure it is securely fastened.
- Tighten the seat belt, removing any slack, to firmly secure the car seat base.
By properly using the available locking mechanisms, you can ensure that the car seat base is securely attached to your vehicle, minimizing the risk of it shifting or becoming loose during travel.
Double-checking for tightness and stability
Once the car seat base is adjusted and secured, it is essential to double-check for tightness and stability:
- Gently grasp the car seat base and try to move it side to side and front to back. It should not move more than one inch in any direction.
- If the car seat base is not adequately tight or stable, repeat the steps to secure it properly.
- Ensure that the car seat base is tightly secured, providing a stable foundation for the car seat.
Regularly inspect the car seat base for any signs of looseness or instability and make necessary adjustments when needed. Remember, a properly installed and secured car seat base is crucial for your baby’s safety while traveling.
Step 3: Installing The Car Seat Onto The Base
Attaching the car seat to the installed base
Once you have successfully installed the car seat base in your vehicle, the next step is to attach the car seat onto the base. This is a crucial step to ensure the safety of your child while traveling. Follow these simple instructions to securely attach the car seat to the base:
- Position the car seat in the correct direction, according to the manufacturer’s guidelines. Make sure the seat is facing the rear of the vehicle for infants and young toddlers.
- Align the connectors at the bottom of the car seat with the corresponding anchors on the base. You may need to push down firmly to ensure a tight connection.
- Listen for a click or visual indicator that confirms the car seat is securely attached to the base. Check the manufacturer’s instructions for any specific indicators to look out for.
- Double-check the attachment to make sure there is no movement or looseness. A properly attached car seat should be stable and secure.
Verifying the correct connections and alignment
After attaching the car seat to the base, it is important to verify that all connections and alignment are correct. Take the following steps to ensure everything is in order:
- Inspect the connectors and anchors to ensure they are properly engaged and there are no visible defects or damage.
- Check that the car seat is level and reclined correctly. Most car seats have built-in level indicators to help you determine the correct angle.
- Make sure the harness straps are positioned correctly and securely fastened around your child. Adjust as necessary for a snug fit.
Performing a pull and tug test to ensure a secure fit
Now that you have attached the car seat to the base and verified the correct connections and alignment, it’s time to perform a pull and tug test to ensure a secure fit. This test will help ensure that the car seat will remain in place during sudden stops or impacts:
- Gently pull and tug on the car seat from different angles to check for any excessive movement or looseness.
- If the car seat moves more than an inch in any direction, recheck the connections and alignment, and make any necessary adjustments.
- Repeat the pull and tug test until there is no excessive movement and the car seat feels securely attached to the base.
By following these steps and performing the necessary checks, you can ensure that your car seat is correctly installed onto the base and provide optimal safety for your child during car journeys.

Expert Tips For Hassle-Free Car Seat Base Installation
Installing a car seat base can be a daunting task for new parents. But fear not! With expert tips and guidance, you can ensure a hassle-free and secure installation of your car seat base. In this article, we will discuss some essential steps and precautions to follow when installing a car seat base. By following these tips, you can provide your little one with the utmost safety and peace of mind while traveling.
Seeking Professional Assistance if Needed
While installing a car seat base might seem straightforward, it is always a good idea to seek professional assistance if you are unsure or uncomfortable with the process. Certified car seat technicians have the expertise and experience to install car seat bases correctly. They can also help you choose the right base for your specific car and provide personalized advice. Many local fire departments, police stations, and hospitals offer free car seat installation services. Don’t hesitate to reach out to them if you need assistance.
Regularly Checking and Maintaining the Installation
Once you have installed the car seat base, it is crucial to regularly check and maintain its installation to ensure maximum safety. Car seat bases may gradually become loose due to regular usage and vehicle vibrations. To prevent this, periodically check the tightness of the base by giving it a firm tug from various angles. If you notice any movement or looseness, readjust and tighten the base immediately.
In addition to checking the base’s tightness, it is essential to inspect the condition of the seat belt or LATCH system used to secure the base. Make sure the seat belt is not twisted and the LATCH connectors are properly inserted and secured. Regularly inspect the base and straps for any signs of wear, tear, or damage. Replace any worn-out components immediately to maintain optimal safety.
Keeping Up-to-Date with the Latest Safety Guidelines and Regulations
Safety guidelines and regulations for car seat installation are updated periodically, so it is vital to stay informed and keep up-to-date with the latest recommendations. Always refer to the car seat and vehicle manufacturer’s instructions for specific installation details. Familiarize yourself with the local and federal laws regarding child restraint systems in your area.
Additionally, subscribing to reputable child safety organizations’ newsletters or following them on social media can provide you with valuable updates on safety guidelines and regulations. By staying informed, you can ensure that your car seat base installation meets the latest safety standards and regulations, offering the best protection for your child.
Frequently Asked Questions On How To Install Car Seat Base
How Do You Install The Base Of A Car Seat?
To install the base of a car seat, follow these steps:
- Position the base in your car’s backseat.
- Ensure the base is level and aligned with the seat belt path.
- Thread the seat belt or attach the LATCH connectors through the designated slots.
- Tighten the seat belt or LATCH straps securely.
- Verify that the base is properly installed by giving it a firm shake.
How Do I Know If My Car Seat Base Is Installed Correctly?
To ensure your car seat base is installed correctly, follow these steps:
- Check that the base is tightly and securely attached to your car’s seat.
- Ensure the base is level and not tilted.
- Verify that the seat belt or LATCH system is properly threaded and snugly fastened.
- Confirm that the car seat clicks securely into the base and does not move.
- Finally, give the base a firm shake to check for any excessive movement.
How Do You Put A Graco Base On A Car?
To put a Graco base on a car, follow these steps:
- Place the base on the car seat, ensuring it’s level.
- Thread the vehicle seat belt through the base’s slots.
- Buckle the seat belt, making sure it’s snug.
- Lock the seat belt to secure the base.
- Confirm proper base installation with the built-in level indicator. Remember to consult the car seat and vehicle manuals for specific instructions.
How Do You Install A Front Facing Car Seat Base?
To install a front facing car seat base, follow these steps:
- Position the base on the backseat, ensuring it is tight against the cushion.
- Thread the seatbelt through the base and buckle it securely.
- Tighten the seatbelt until the base is snug against the seat.
- Secure the seatbelt in place, making sure it is locked for added safety.
- Double-check that the base is securely installed before placing the car seat on top.
Conclusion
Installing a car seat base is an essential step in ensuring your child’s safety during car journeys. By following the right procedures and guidelines, you can ensure a secure and proper installation. Remember to read the manufacturer’s instructions carefully and utilize the vehicle’s seat belts or LATCH system correctly.
Regularly check and adjust the car seat base to maintain its stability. Keeping your child safe on the road starts with a correctly installed car seat base.