To install a car lift, first, ensure you have the necessary tools and equipment. Then, follow the manufacturer’s instructions step by step.
Installing a car lift can greatly enhance your garage’s functionality and make vehicle maintenance easier. Whether you are a DIY enthusiast or a professional mechanic, having a car lift can provide you with more space and better access to the undercarriage of your vehicle.
However, proper installation is crucial to ensure safety and efficiency. We will guide you through the process of installing a car lift, ensuring that you have all the necessary tools and follow the manufacturer’s instructions precisely. By the end, you will have the knowledge and confidence to set up your car lift correctly and enjoy its benefits.
Factors To Consider When Selecting A Car Lift
Choosing the right car lift for your garage or workshop is a crucial decision that requires careful consideration. Various factors must be taken into account to ensure that the lift you install is suitable for your specific needs. From weight capacity and height specifications to the different types of car lifts available, understanding these factors will help you make an informed choice. Additionally, paying attention to safety features is crucial to protect yourself and your vehicles. Let’s dive into each of these important factors in more detail.
Weight Capacity
The weight capacity of a car lift is one of the most critical factors to consider. Each type of lift is designed to handle a specific maximum weight, and exceeding this capacity can be dangerous. Therefore, it is essential to know the weight of the vehicles you plan on lifting and choose a car lift that has an adequate weight capacity to handle them. Be sure to consider any potential future purchases or changes in the types of vehicles you may work on.
Height Specifications
Another crucial factor to consider is the height specifications of the car lift. This includes both the overall height of the lift and the maximum height it can raise a vehicle to. Measure the available space in your garage or workshop to ensure that the lift will fit comfortably without any height restrictions. Additionally, consider the types of vehicles you plan on working with and their respective heights. It is essential to select a car lift that provides sufficient clearance for the vehicles you will be lifting.
Types of Car Lifts
There are several types of car lifts available, each with its own advantages and applications. Understanding the different types will help you determine which one is best suited for your needs. The three most common types of car lifts are two-post lifts, four-post lifts, and scissor lifts.
Two-Post Lifts
Two-post lifts are excellent space-saving options and allow for easy access to the vehicle’s underside. They typically have a higher weight capacity compared to other types of lifts, making them ideal for larger vehicles or heavy-duty applications.
Four-Post Lifts
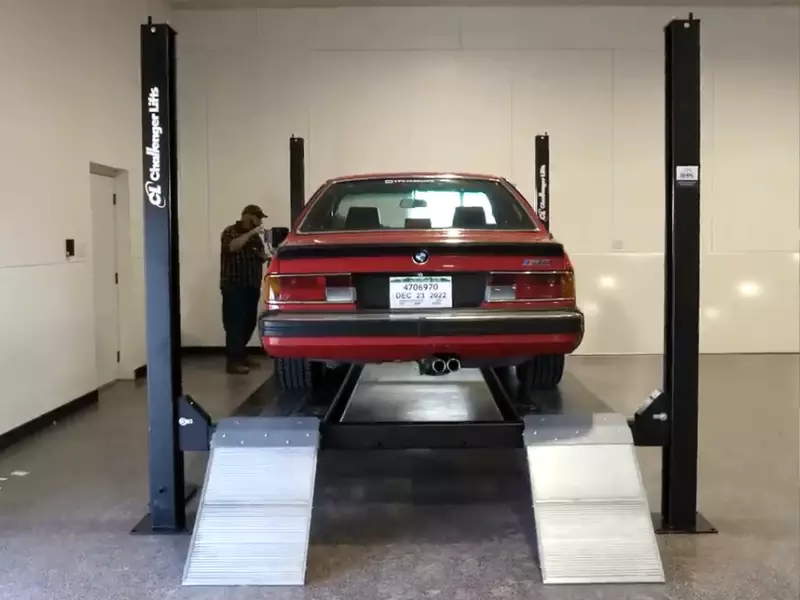
Four-post lifts provide excellent stability and are ideal for long-term storage or when you need to work on a vehicle for extended periods. They offer easy drive-on and drive-off capabilities, making them convenient for regular use or storing multiple vehicles.
Scissor Lifts
Scissor lifts are compact and versatile, making them an ideal choice for garages or workshops with limited space. They offer excellent lifting capabilities and are commonly used for routine maintenance and repairs.
Safety Features to Look for
Lastly, but most importantly, when selecting a car lift, it is crucial to prioritize safety features. Look for lifts that come equipped with mechanisms such as safety locks, automatic arm restraints, or hydraulic flow control systems. These features are designed to enhance operator safety and prevent accidents or damage to vehicles during operation. Additionally, consider lifts that meet recognized safety standards such as the ANSI/ALI ALCTV standard to ensure their reliability and durability.
By considering factors such as weight capacity, height specifications, the type of lift that suits your needs, and the safety features it offers, you can confidently choose a car lift that will meet your requirements and provide you with a safe and efficient lifting solution for your vehicles.

Measuring The Garage Space
Determining the Height and Width Requirements
Before you can install a car lift in your garage, it’s important to measure the available space to ensure it will fit properly. Start by determining the height and width requirements of the car lift. This will help you choose a lift that matches the dimensions of your garage and provides enough clearance for your vehicle.
To measure the height requirement, measure the distance from the floor to the highest point of the vehicle you plan to lift. Make sure to include any accessories or modifications to the vehicle that may increase its height. Once you have this measurement, add a few extra inches to account for the lift’s height when fully extended.
Next, measure the width of your garage and select a lift that matches this measurement. Keep in mind that you’ll need enough space on either side of the lift for maneuvering your vehicle into position. It’s also important to consider any obstructions such as walls, shelves, or other equipment that may limit the available width in your garage.
Floor Strength and Load-Bearing Capacity
Another crucial factor to consider when installing a car lift is the floor strength and load-bearing capacity of your garage. Not all garage floors are created equal, and it’s essential to ensure that your floor can handle the weight and pressure exerted by the car lift.
Check the specifications provided by the car lift manufacturer to determine the minimum required floor strength for installation. A common measurement used is the PSI (pounds per square inch). You may need to consult a professional or an engineer to assess the strength of your garage floor if you’re unsure.
In addition to floor strength, it’s important to determine the load-bearing capacity of your garage. This refers to the maximum weight that your floor can support without causing damage or instability. Exceeding this weight limit can lead to structural issues and potential accidents.
To assess the load-bearing capacity, you can consult the construction plans or blueprints of your home. If this information is not available, consider consulting a structural engineer or a garage lifting specialist to evaluate the suitability of your garage for a car lift.
Remember, ensuring that your garage has adequate floor strength and load-bearing capacity is crucial to the safety and functionality of your car lift. Don’t skip this step in the installation process, as it can prevent potentially costly and dangerous problems down the line.
Clearing The Area
Before installing a car lift, it is crucial to clear the area around where the lift will be installed. This not only ensures the safety of the overall installation process but also makes it easier to maneuver the lift and work on your vehicle. In this section, we will discuss the steps to remove obstacles and how to ensure sufficient lighting.
Removing Obstacles
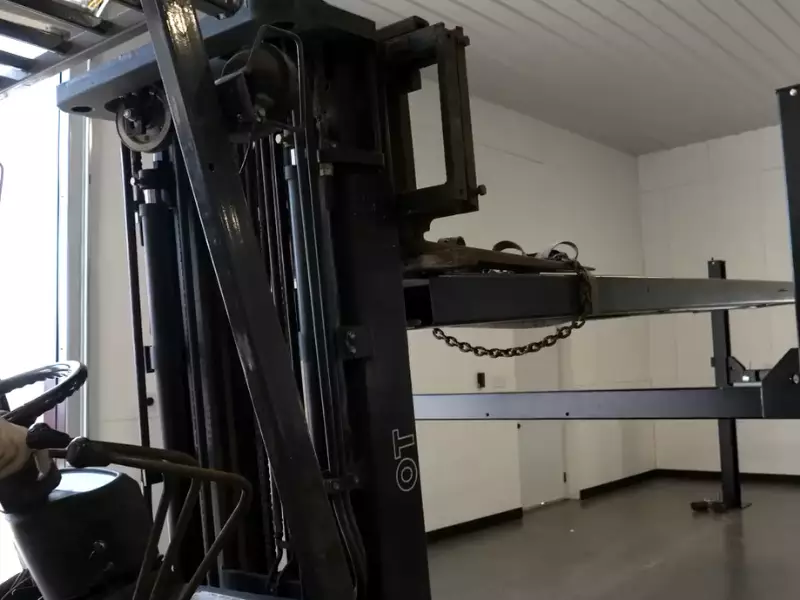
To start, take a good look at the area and identify any obstacles that may hinder the installation or operation of the car lift. Obstacles can include items such as tools, equipment, or even vehicles parked nearby. It is essential to remove these obstacles to create a clear, open space for your car lift.
Avoiding any potential tripping hazards is crucial to maintain a safe working environment. Make sure to clear the area of any loose cables, cords, or debris that could cause accidents or get in the way as you operate the lift.
If you have shelving units or storage racks within the vicinity, consider relocating or rearranging them to maximize the available space. By doing so, you are minimizing the risk of potential collisions or obstructions while operating the car lift, ensuring a smoother installation process.
Ensuring Sufficient Lighting
Proper lighting is essential when working on any automotive project, and installing a car lift is no exception. Inadequate lighting can make it difficult to inspect and perform tasks on your vehicle, possibly leading to mistakes or accidents. Therefore, it is crucial to ensure sufficient lighting in the area where the car lift is to be installed.
Start by examining the existing lighting fixtures in the space. If the lighting is insufficient or unevenly distributed, consider installing additional lights or replacing outdated fixtures. Bright LED lights are recommended for their energy efficiency and superior illumination.
In addition to overhead lighting, it is also helpful to have task lighting focused directly on the area where the lift will be installed. This can be achieved with the use of portable work lights or adjustable wall-mounted fixtures. Make sure these lights are positioned in a way that effectively minimizes shadows and provides clear visibility of the entire work area.
By removing obstacles and ensuring sufficient lighting in the installation area, you are setting the foundation for a successful car lift installation. These preparatory steps will help create a safer and more efficient environment for working on your vehicle, allowing you to make the most out of your car lift installation.
Safety Precautions
When it comes to installing a car lift, it’s essential to prioritize safety. This not only protects you and others but also ensures a successful installation. By taking the necessary safety precautions, you can prevent accidents and injuries. In this section, we will discuss the key safety measures to keep in mind during the car lift installation process.
Using Protective Gear
Before starting the installation, make sure to equip yourself with proper protective gear. This includes wearing safety goggles, gloves, and sturdy footwear. Safety goggles protect your eyes from any debris that may be released during the installation process. Gloves help provide a better grip on tools and prevent any cuts or injuries to your hands. Sturdy footwear, preferably steel-toed boots, protect your feet from heavy objects and falling equipment. By wearing these protective gears, you minimize the risk of injuries and enhance your overall safety.
Identifying Potential Hazards
Prior to installing the car lift, it’s crucial to identify and remove any potential hazards in the work area. Start by clearing the space of any clutter, tools, or materials that may obstruct your movement or cause accidents. Inspect the floor for any uneven surfaces, cracks, or oil spills that may lead to slips or trips. Additionally, evaluate the overall stability of the area to ensure that there is no risk of the car lift tipping over or collapsing. Identifying and eliminating these potential hazards will significantly reduce the likelihood of accidents or damage during the installation process.
Ensuring Proper Ventilation
Installing a car lift often involves working with heavy equipment and using various chemicals and solvents. Therefore, it is paramount to ensure proper ventilation in the work area. Good ventilation helps to disperse fumes and reduce the risk of inhalation, which can be harmful to your health. If the installation is taking place in a closed or poorly ventilated space, consider using fans or opening windows and doors to enhance air circulation. By providing adequate ventilation, you create a safer working environment and protect yourself from potential health risks.
Gathering The Necessary Tools And Equipment
If you are a car enthusiast or a professional mechanic, installing a car lift can be a game-changer in terms of convenience and efficiency. However, before you can dive into the installation process, it is crucial to gather the necessary tools and equipment to ensure a smooth and successful installation. Here, we will discuss the specific tools you will need, including a socket set, power drill, torque wrench, hydraulic jack, and safety stands.
Socket Set
A socket set is an essential tool for installing a car lift. It consists of a handle or ratchet and a range of interchangeable sockets of different sizes. These sockets are designed to fit various nuts and bolts used in the installation process. Ensure you have a socket set that includes a variety of socket sizes to accommodate different fasteners. This will ensure that you have the right tool for the job, saving you time and effort.

Power Drill
A power drill is another indispensable tool for installing a car lift. It enables you to create holes in the suitable locations for mounting the lift components securely. When using a power drill, ensure you have the appropriate drill bits needed for the specific installation process. This will prevent any complications and ensure the holes are the correct size and depth.
Torque Wrench
A torque wrench is a precision tool that allows you to tighten nuts and bolts to the specified torque value. This ensures that the fasteners are secured properly without the risk of over-tightening or under-tightening. It is crucial to follow the manufacturer’s instructions regarding the torque values for the car lift components. Having a torque wrench will help you achieve the required tightening torque accurately and ensure the overall safety and stability of the installed lift.
Hydraulic Jack
A hydraulic jack is an essential component for lifting your car off the ground during the installation process. It provides the necessary lifting power to raise the vehicle and allow for proper positioning of the car lift components. Make sure you have a hydraulic jack that has a suitable weight capacity to handle the weight of your vehicle safely. Additionally, ensure that the hydraulic jack is in good working condition before using it for the installation.
Safety Stands
Safety stands, also known as jack stands, are crucial for supporting the vehicle after it has been lifted. They provide extra stability and safety during the installation process by preventing the car from accidentally falling or shifting. When choosing safety stands, make sure they have a weight capacity that exceeds the weight of your vehicle. Place the safety stands in the appropriate locations under the raised vehicle to ensure maximum stability and security.
Preparing The Car Lift
When it comes to installing a car lift, proper preparation is key to ensuring a smooth and successful installation process. Some steps you need to take before actually installing the lift include reading the installation manual and assembling the components. In this section, we’ll explore these steps in detail to ensure that you are fully prepared for the installation process. Let’s dive in!
Reading the Installation Manual
The installation manual is your guide to understanding the specific requirements and instructions for installing your car lift. It provides step-by-step instructions, safety precautions, and important details you need to know. Make sure to carefully read the manual, highlighting important sections, and taking note of any special tools or additional materials required for the installation.
Assembling the Components
Once you have familiarized yourself with the installation manual, it’s time to start assembling the components of your car lift. Check that all the parts are present and accounted for, and ensure that you have the necessary tools to complete the assembly. Lay out the components in an organized manner, following the instructions provided in the manual. This will help you avoid any confusion or mistakes during the installation process.
As you assemble the components, be sure to refer back to the manual regularly to ensure that you are following the correct steps. Take your time and double-check each connection to ensure that everything is securely fastened. If you encounter any difficulties or have questions, don’t hesitate to consult the installation manual or reach out to the manufacturer for assistance.
Installing The Lift
Installing the lift is an essential step in setting up a car lift in your garage. With the right tools and proper instructions, you can easily complete this task. In this section, we will take you through the three crucial steps to install a car lift: anchoring the lift to the floor, connecting hydraulic lines, and securing the lift’s arms.
Anchoring the Lift to the Floor
To ensure stability and safety, anchoring the car lift to the floor is vital. Here is a step-by-step guide to help you through the process:
- Begin by marking the location where the lift will be installed. Make sure the area is free from any debris.
- Drill holes into the concrete floor at the marked locations using a masonry drill bit. The size and number of holes will depend on the type and size of your lift.
- Insert anchor bolts into the drilled holes and tighten them securely. This will provide a solid foundation for the lift.
Connecting Hydraulic Lines
Connecting the hydraulic lines correctly is crucial for the proper functioning of the car lift. Follow these steps to ensure a successful connection:
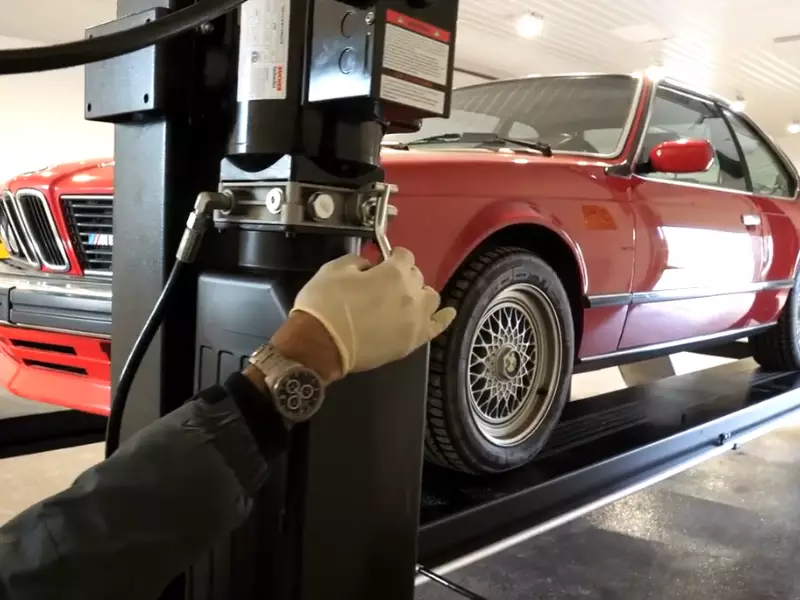
- Locate the hydraulic pump on the lift. It is usually positioned at the base.
- Identify the hydraulic line connections on the pump. There will be a supply line and a return line.
- Using the appropriate wrench, connect the supply line to the hydraulic pump’s “in” port and the return line to the “out” port. Ensure they are tightened securely.
Securing the Lift’s Arms
The final step is securing the lift’s arms, which will hold the vehicle securely in place. Here’s how to do it:
- Position the lift’s arms in the desired height and width configuration to accommodate the vehicle you intend to lift.
- Make sure the arm locks are engaged correctly, preventing any accidental dropping of the arms during operation.
- Ensure all locking pins are securely inserted, double-checking each one for tightness.
Testing And Adjusting
Once you have successfully installed your car lift, it is essential to test its operation and make necessary adjustments. Proper testing ensures that the lift is functioning correctly, guaranteeing the safety of both you and your vehicle. Adjustments may be required to ensure optimal performance and prevent any potential issues down the line. In this section, we will walk you through the steps of testing the lift’s operation and making adjustments if necessary.
Testing the Lift’s Operation
Before you start using the car lift for regular maintenance or repairs, it is crucial to test its operation to ensure it is in proper working condition. Following these steps will help you evaluate the lift’s functionality:
- Begin by inspecting the lift visually. Check for any loose bolts, leaks, or other signs of damage.
- Ensure that the lift is properly lubricated. Apply lubricant to moving parts if necessary.
- Verify that the lift is securely anchored to the floor or suitable surface. Safety should be a top priority.
- Test the lift by raising it to maximum height. Check for any unusual noises or vibrations.
- Lower the lift and observe its smoothness of operation. It should descend evenly without any jerking or sudden movements.
- Operate the lift multiple times to confirm consistent performance.
Making Adjustments if Necessary
If you encounter any issues or inconsistencies during the testing process, adjustments may be required. It is essential to address any problems promptly to ensure proper functioning and safety. Here are some potential adjustments you may need to make:
- If you notice excessive squeaking or resistance when raising or lowering the lift, apply lubricant to the affected areas.
- If the lift does not descend evenly or exhibits jerking movements, inspect the hydraulic fluid level and refill or replace it as necessary.
- Check the lift’s cables or chains for signs of wear or damage. Replace them if needed.
- Inspect the lift’s safety mechanisms, such as safety locks and automatic stop features. Make sure they are functioning correctly and engage properly.
By addressing any issues and making appropriate adjustments, you can ensure that your car lift operates smoothly and safely. Regular testing and maintenance are crucial for prolonging the lifespan of your lift and preventing any potential accidents or injuries. Following these guidelines will help you get the most out of your car lift and enjoy the convenience it brings to your automotive maintenance routine.
Frequently Asked Questions On How To Install Car Lift
How Thick Does Concrete Need To Be For A Car Lift?
Concrete needs to be at least 4 inches thick for a car lift. It is important to have a strong and stable foundation to support the weight and movement of the vehicle. Make sure the concrete mix is of good quality and properly cured for optimum performance.
What Are The Electrical Requirements For A 2 Post Car Lift?
A 2 post car lift typically requires a 220V, 20A electrical supply. It’s important to ensure that the power source is compatible with the lift’s specifications to ensure safe and effective operation.
Does A 4 Post Car Lift Need To Be Anchored?
Yes, a 4 post car lift needs to be anchored. Anchoring the lift ensures stability and safety during use. Make sure to follow the manufacturer’s instructions for proper installation and anchoring to ensure the lift is secure.
How Thick Does A Floor Need To Be For A 2 Post Lift?
The recommended thickness for a floor to accommodate a 2 post lift is typically 4 inches. Ensure the floor is structurally sound and capable of supporting the weight and pressure of the lift. Always consult the manufacturer’s guidelines for specific requirements.
Conclusion
Installing a car lift can be a daunting task, but with the right guidance, it becomes a manageable project. By following the steps outlined in this blog post and ensuring you have the necessary tools and safety precautions in place, you’ll be well on your way to a successful installation.
Remember, proper installation is crucial for the safe and efficient use of your car lift. So, take your time, double-check your work, and enjoy the convenience and functionality that a car lift brings to your garage. Happy lifting!
