To install car decals, clean the surface thoroughly and remove any air bubbles or wrinkles. Then, peel off the backing and apply the decal slowly.
Importance Of Car Decals
Enhancing the aesthetics of your vehicle
When it comes to personalizing your car and making it stand out from the crowd, car decals are the perfect choice. These eye-catching stickers add a touch of personality and style to your vehicle, instantly transforming its appearance. With a wide range of designs, colors, and sizes available, you can easily choose a car decal that complements your vehicle’s color and overall aesthetic.
Car decals are an affordable way to give your vehicle a unique look without breaking the bank. Whether you prefer a subtle design or a bold statement, there is a car decal out there to suit your taste. From sleek and minimalist designs to intricate and vibrant patterns, you can find decals that reflect your personality and make a statement on the road.
Promoting personal expression and creativity
Car decals go beyond just adding a touch of style to your vehicle. They provide a platform for you to showcase your personal expression and creativity. Whether you’re a fan of a particular sports team, passionate about a cause, or want to display your sense of humor, car decals allow you to do just that.
By choosing a car decal that reflects your interests and values, you can spark conversations, connect with like-minded individuals, and even inspire others. The decals you choose can tell a story about who you are and what you stand for, making your vehicle a reflection of your unique identity.
Moreover, car decals offer the flexibility to change and update your vehicle’s look whenever you desire. You can easily remove and replace decals, allowing you to keep up with your evolving interests and maintain a fresh and vibrant appearance on the road.
Ordering and installing car decals
If you’re ready to enhance your vehicle’s aesthetics and promote personal expression, ordering and installing car decals is a straightforward process. Here’s a step-by-step guide to help you get started:
- Choose a design: Consider your personal style, interests, and the look you want to achieve for your vehicle. There are countless designs available online, or you can even create a custom decal.
- Measure your vehicle: Before placing an order, measure the area where you want to install the decal to ensure it fits perfectly.
- Order your decal: Once you’ve found the perfect design, place an order online or visit a local decal shop.
- Clean and prepare the surface: Before installing the decal, clean the area thoroughly and make sure it is free of any dirt or debris.
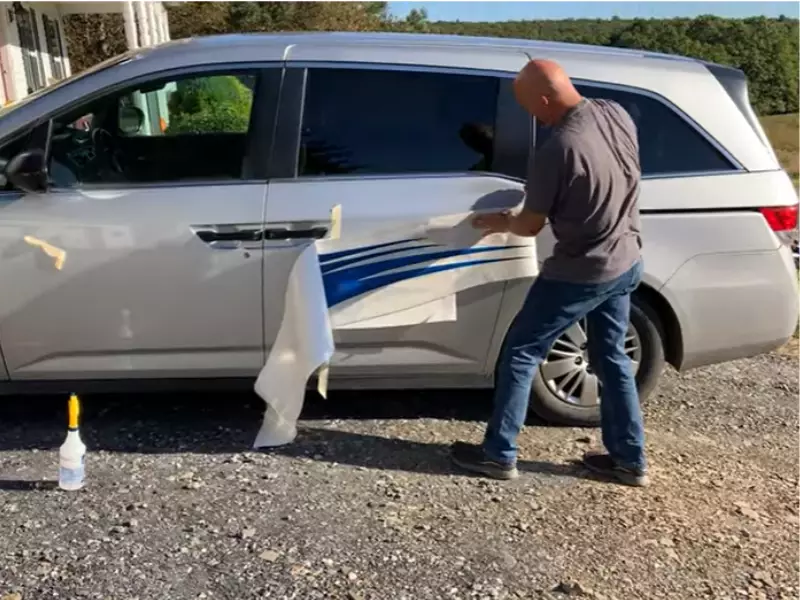
- Peel and apply: Carefully peel off the backing of the decal and apply it to the desired location on your vehicle. Smooth out any air bubbles or wrinkles using a credit card or squeegee. Be patient and take your time to ensure a precise installation.
- Secure and finish: Once the decal is applied, press it firmly to ensure it is securely attached to the surface. Give it a final inspection to make sure it looks perfect.
With these simple steps, you can install car decals and enjoy the benefits of enhanced aesthetics and personal expression on your vehicle. So, let your creativity roam free and give your car the attention it deserves with a captivating car decal!
Understanding The Different Types Of Car Decals
Car decals are a great way to express your personality, promote a business, or simply add a touch of style to your vehicle. However, with so many options available, it can be overwhelming to know which type of car decal is right for you. In this section, we will explore the different types of car decals, including vinyl car decals, window decals, and magnetic car decals, so you can make an informed decision about which one suits your needs.
Exploring Vinyl Car Decals
One of the most popular types of car decals is vinyl car decals. Made from a durable vinyl material, these decals are long-lasting and resistant to fading, cracking, and peeling. They come in a wide variety of designs, colors, and sizes, making them a versatile option for customizing your vehicle. Vinyl car decals can be applied to the exterior or interior of your car, allowing you to showcase your personal style on every surface. Whether you want a small logo on your bumper or a full-car wrap, vinyl car decals offer endless possibilities.

Introducing Window Decals
If you’re looking to add a touch of flair to your car’s windows, window decals are the way to go. These decals are specifically designed to be applied to the glass surfaces of your vehicle, making them a great option for displaying logos, designs, or messages. Window decals are typically made from a perforated vinyl material that allows for visibility from the inside, while still maintaining privacy and reducing glare. Whether you want to promote your business or simply add some personality to your car’s windows, window decals are a versatile and eye-catching choice.
Discussing Magnetic Car Decals
When it comes to temporary car decals, magnetic car decals are a popular choice. Unlike vinyl or window decals that adhere directly to the surface of your car, magnetic car decals are made from a flexible magnetic material that can be easily applied and removed. This makes them an ideal option for those who want the flexibility to change their decals frequently or remove them when not in use. Magnetic car decals can be customized with your own design or logo, allowing you to promote your business or showcase your personal style without the commitment of a permanent decal.
Preparing Your Vehicle For Decal Installation
Step-By-Step Guide To Installing Car Decals
Choosing the appropriate tools for installation
Before diving into the installation process, it’s crucial to gather the necessary tools to ensure a smooth and successful application. You don’t want to be caught off guard midway through the process, so here’s a list of tools you’ll need:
- A clean microfiber cloth
- Squeegee or credit card
- Measuring tape
- Masking tape
- Scissors
Removing the backing paper smoothly
Once you have all the tools ready, it’s time to start the installation process. Here’s a step-by-step breakdown of how to remove the backing paper smoothly:
- Clean the surface of your car thoroughly to remove any dirt or debris.
- Place the decal on the desired location and secure it with masking tape.
- Gently peel off a small portion of the backing paper, making sure not to touch the adhesive.
- Using the squeegee or credit card, slowly press down on the exposed section while simultaneously peeling off the backing paper.
- Continue this process until the entire decal is free from the backing paper.
Applying the decal accurately
Now that the backing paper is removed, it’s time to apply the decal accurately. Follow these steps for a precise application:
- Align the decal to the desired position on your car, using the measuring tape to ensure proper placement.
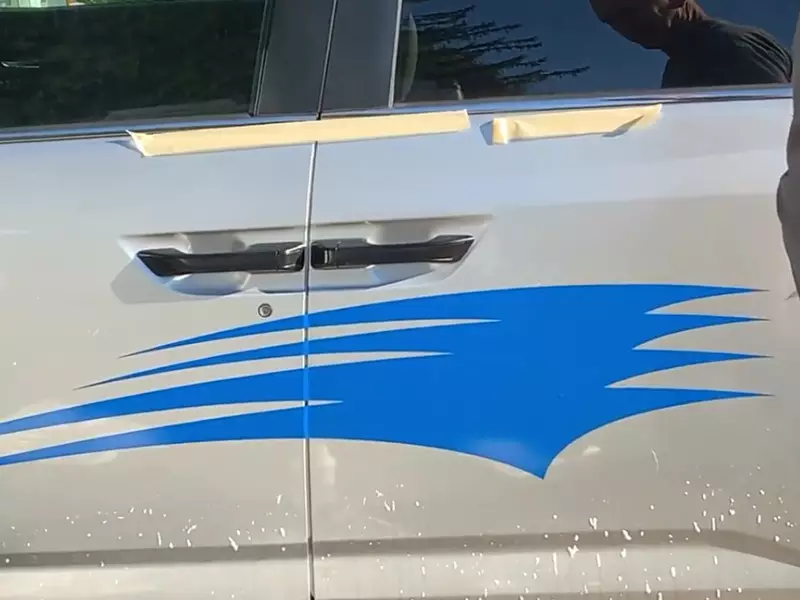
- Once aligned, press down the decal firmly using your hand to stick it to the surface.
- Gradually work from one side to the other, using the squeegee or credit card to eliminate any air bubbles and secure the decal in place.
- Take your time and make sure the decal adheres evenly without any creases or wrinkles.
Ensuring proper adhesion and eliminating air bubbles
After applying the decal, it’s essential to ensure proper adhesion and eliminate any pesky air bubbles. Here’s how you can achieve this:
- Run the squeegee or credit card firmly over the decal, pushing out any trapped air bubbles towards the edges.
- If you encounter stubborn air bubbles, use a pin to puncture them and then press the decal down to smoothen the area.
- Repeat this process until the decal is bubble-free and properly adhered to the surface.
Protective measures for long-lasting durability
To ensure your car decal stays in excellent condition for years to come, it’s important to take protective measures. Here are some tips:
- Avoid washing your car within the first 48 hours after installation to allow the decal to fully adhere.
- Avoid using harsh cleaning chemicals or abrasive materials when cleaning your car, as they may damage the decal.
- Regularly wax your car to provide an additional layer of protection for the decal.
- If you park your car outside for long periods, consider using a car cover to shield the decal from prolonged exposure to the elements.
Following this step-by-step guide will help you install car decals with ease, ensuring a professional-looking and durable result. Remember to always take your time and pay attention to detail throughout the process for the best outcome.
Tips For Maintaining And Caring For Car Decals
Installing car decals adds a personalized touch to your vehicle, but proper maintenance is essential to ensure their longevity and quality. By following a few simple tips, you can keep your car decals looking vibrant and attractive for years to come. Here are some useful tips for cleaning and caring for your car decals:
Cleaning Techniques to Preserve the Decal’s Quality
To maintain the quality of your car decals, it is crucial to adopt the correct cleaning techniques. Follow these steps to effectively clean your decals without damaging them:
- Use a Soft Cloth: When cleaning your car decals, opt for a soft, non-abrasive cloth. Avoid rough scrub brushes or sponges as they can cause scratches or peeling.
- Mild Detergent and Water: Create a gentle cleaning solution by mixing a few drops of mild detergent with warm water. Ensure the detergent is free from harsh chemicals, as they can potentially fade or deteriorate the decal.
- Gently Wipe the Decal: Dip the cloth into the soapy water mixture and carefully wipe the decal. Use light pressure and avoid rubbing vigorously to prevent any damage to the design or adhesive.
- Rinse Thoroughly: After cleaning, rinse the decal thoroughly with clean water to remove any soap residue. Drying with a soft cloth can help to prevent water spots or streaks.
- Avoid Direct Sunlight: When cleaning car decals, it is important to avoid cleaning them in direct sunlight. This can cause the cleaning solution to dry too quickly, potentially leaving residue behind.
Avoiding Abrasive Substances and Harsh Weather Conditions
Avoiding abrasive substances and harsh weather conditions is crucial to prolong the lifespan of your car decals. Here are some important points to keep in mind:
- Avoid Abrasive Cleaners: Harsh chemicals, such as bleach or ammonia, should never be used to clean car decals. They can damage the design, fade the colors, or even dissolve the adhesive.
- Protect from Extreme Weather: While car decals are generally durable, constant exposure to extreme weather conditions can cause them to deteriorate over time. Whenever possible, park your vehicle in a covered area or use a car cover to shield the decals from direct sunlight, heavy rain, snow, or hail.
- Regular Inspection: It’s recommended to periodically inspect your car decals for any signs of wear or damage. If you notice any peeling edges, fading colors, or bubbles, consider replacing or repairing the decal promptly to prevent further deterioration.
Frequently Asked Questions For How To Install Car Decals
Is It Better To Apply Decals Wet Or Dry?
It is better to apply decals wet for a smoother and bubble-free application process. The wet application allows for easier repositioning and ensures better adhesion to surfaces.
Can You Put Car Decals On Yourself?
Yes, you can apply car decals yourself. Simply follow the instructions carefully for a successful application.
Do You Need Transfer Tape For Car Decals?
Yes, transfer tape is necessary for car decals. It helps to transfer the decal onto the car’s surface smoothly and accurately. Using transfer tape ensures easy application and prevents any wrinkling or air bubbles in the decal.
How Do You Prep Car Paint For Decals?
To prep car paint for decals, follow these steps:
- Clean the surface with soap and water to remove dirt and debris.
- Use rubbing alcohol to remove any wax or grease.
- Smooth out any imperfections with sandpaper or a microfiber cloth.
- Apply a degreaser to further clean the surface. 5. Allow the paint to fully dry before applying the decals.
Conclusion
Installing car decals can be a fun and creative way to personalize your vehicle. By following the simple steps outlined in this guide, you can achieve a professional-looking installation. Remember to thoroughly clean the surface, take your time during application, and use a squeegee to smooth out any bubbles.
With a little patience and careful attention to detail, you’ll have eye-catching car decals that showcase your unique style. So, go ahead and give it a try – you’ll be amazed at the transformation!