To install a car bike rack, first, position the rack on the rear of your vehicle. Then, secure it using the provided straps and fasteners.
When it comes to transporting bikes, having a reliable car bike rack is essential. Installing a bike rack on your vehicle allows you to easily and safely transport your bicycles wherever you go. Whether you’re heading to the trails for a mountain biking adventure or going on a leisurely ride through the countryside, a bike rack makes it convenient to take your bikes along with you.
We will guide you on how to install a car bike rack, ensuring that your bikes are securely attached to your vehicle for a worry-free journey.
Choosing The Right Car Bike Rack
Installing a car bike rack is an excellent way to transport your bicycles conveniently and safely. However, with numerous options available in the market, choosing the right car bike rack for your needs can be a daunting task. To help you make an informed decision, it’s important to consider various factors and compare different types of car bike racks. In this section, we will discuss the factors to consider when selecting a car bike rack and compare the different types available in the market.
Factors to consider when selecting a car bike rack
Before purchasing a car bike rack, take the following factors into account:
- Number of bikes: Determine how many bikes you need to transport. Some racks can accommodate only one bike, while others can hold multiple bikes simultaneously.
- Car compatibility: Check if the rack is compatible with your car model. Consider the available hitch or roof rack options for your vehicle.
- Bike type: Consider the type of bikes you own. Some racks are better suited for road bikes, while others are designed for mountain bikes or e-bikes.
- Security: Look for racks that provide secure locking mechanisms to prevent theft. Consider additional features like built-in cable locks or anti-theft systems.
- Ease of installation: Choose a rack that is easy to install and remove. Look for user-friendly features like tool-free installation and quick-release mechanisms.
- Accessibility: Consider whether you need access to the trunk or rear hatch of your car while the rack is in place. Some racks are designed to tilt or swing away to allow easy access.
- Budget: Determine your budget and find a car bike rack that offers the best value for money without compromising on quality and safety.
Comparing different types of car bike racks
There are several types of car bike racks available, each with its own advantages and considerations:
| Rack Type | Advantages | Considerations |
|---|---|---|
| Hitch-mounted racks |
|
|
| Roof-mounted racks |
|
|
| Trunk-mounted racks |
|
|
Consider these advantages and considerations when choosing the right car bike rack for your specific needs. Remember, safety and convenience should be top priorities to ensure a smooth and enjoyable biking experience while on the road.
How To Install A Car Bike Rack On A Hitch Receiver
Step-by-step guide for installing a hitch-mounted car bike rack
Installing a car bike rack on a hitch receiver is a convenient and secure way to transport your bicycles. Whether you’re going on a biking adventure or need to transport your bike to a race, having a hitch-mounted bike rack makes the process easy. Follow these step-by-step instructions to properly install your car bike rack on a hitch receiver:
- Start by assembling the bike rack according to the manufacturer’s instructions. Make sure all the components are securely tightened and locked in place.
- Locate the hitch receiver on your vehicle. It is usually located at the rear end and is a rectangular-shaped opening. Ensure that the hitch receiver is clean and free from any dirt or debris that may interfere with the installation process.
- Insert the shank of the bike rack into the hitch receiver. Align the holes on the shank with the holes on the hitch receiver to secure it in place.
- Next, insert the hitch pin through the aligned holes on the shank and the hitch receiver. This pin will prevent the bike rack from sliding out of the hitch receiver while driving. Ensure that the hitch pin is securely fastened with the accompanying clip or lock.
- Test the stability of the bike rack by gently shaking it. It should be firmly secured and not move or wobble excessively.
- If your bike rack has additional locking mechanisms, such as cables or straps, use them to secure the bicycles to the rack. This will provide extra stability and prevent any potential theft.
Following these steps will ensure that your hitch-mounted car bike rack is properly installed and ready for use.
Common mistakes to avoid during installation
While installing a car bike rack on a hitch receiver, it’s important to avoid common mistakes that can compromise the safety and stability of the rack. Here are some common mistakes to avoid:
- Failing to properly secure the hitch pin and clip. This can result in the bike rack coming loose during transportation, which is dangerous for both the rack and your bicycles.
- Not aligning the holes on the shank and the hitch receiver correctly. Misalignment can lead to instability and potentially cause damage to your bike rack or bicycles.
- Overloading the bike rack beyond its weight capacity. Make sure to check the manufacturer’s guidelines for the maximum weight limit of the rack and distribute the weight evenly.
- Not using the additional locking mechanisms provided with the bike rack. These mechanisms are designed to provide extra security and prevent theft.
- Forgetting to regularly check and tighten the bolts and screws on the bike rack. Over time, vibrations from driving can cause them to loosen, compromising the stability of the rack.
By avoiding these common mistakes, you can ensure a safe and secure installation of your car bike rack on a hitch receiver.
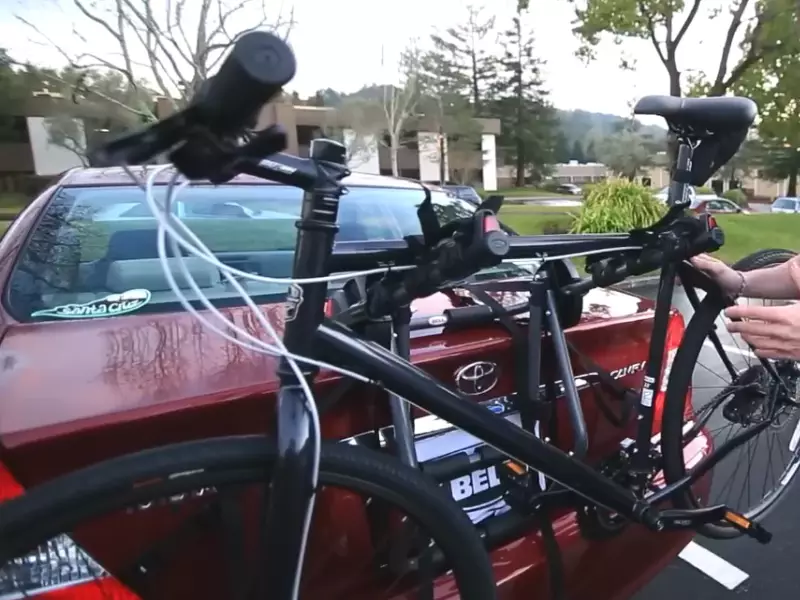
Installing A Car Bike Rack On A Trunk
If you’re an avid cyclist and enjoy exploring new trails, installing a car bike rack on your trunk can be a game-changer. Not only does it allow you to transport your bike conveniently, saving you from having to ride long distances or disassemble and reassemble your bike, but it also gives you the freedom to travel with your bike wherever you go.
Whether you’re planning a weekend getaway or simply going for a ride with friends, having a trunk-mounted car bike rack can make your adventures much more accessible. In this guide, we’ll take you through the step-by-step process of installing a trunk-mounted car bike rack and share some essential tips to ensure a secure installation.
Step-by-step process of installing a trunk-mounted car bike rack
- Start by determining the type of car bike rack you have. Trunk-mounted bike racks typically come in three main types: strap-on racks, hook racks, and platform racks. It’s essential to understand the specific features and installation process of your rack as it may vary depending on the manufacturer and model.
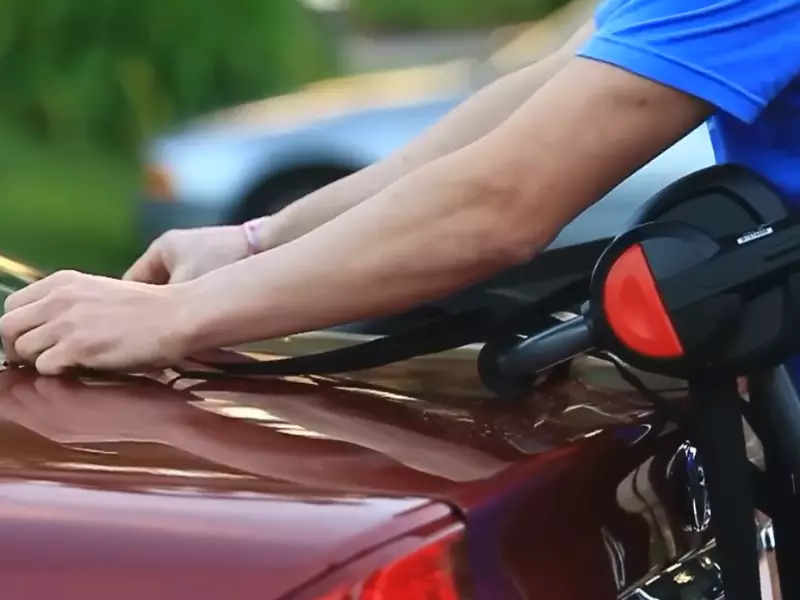
- Once you’ve identified your rack type, position it on your car’s trunk, ensuring it rests securely and evenly. Most trunk-mounted bike racks come with specific placement guidelines provided by the manufacturer. Following these guidelines is crucial to maintain stability and avoid damage to your vehicle.
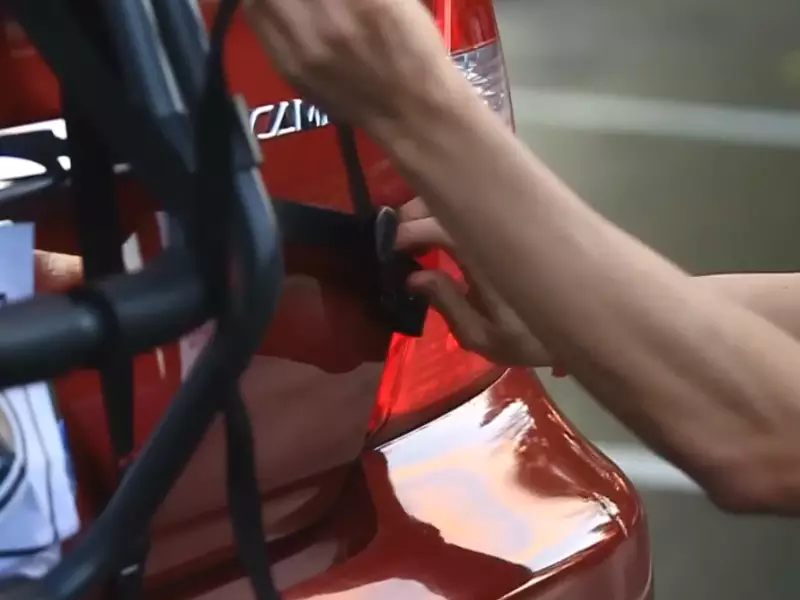
- Next, adjust the straps or hooks on your rack to fit securely around your car’s trunk. Ensure that all straps or hooks are tightened firmly to prevent any movement during transit. Double-check each attachment point to confirm they are secure before proceeding.
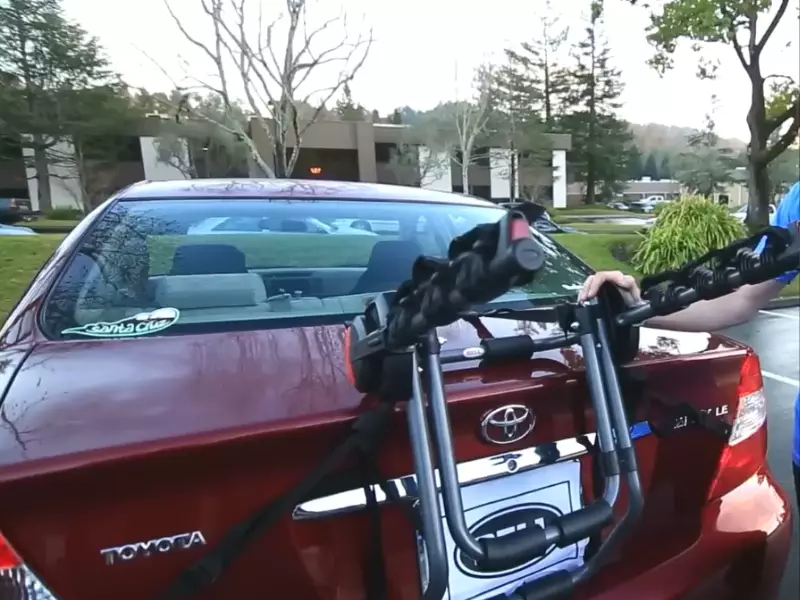
- Once the trunk-mounted bike rack is firmly attached, place your bike on the rack, following the manufacturer’s instructions. It’s essential to position your bike in a way that ensures it remains stable and secure during the journey. This may involve using additional straps or securing mechanisms provided with your rack.
- Finally, test your installation by gently rocking the loaded bike rack to confirm that it remains stable and secure. If you notice any wobbling or instability, double-check your attachments and adjustments and make necessary modifications.
Tips for ensuring a secure installation
While the step-by-step process above will guide you through the installation of a trunk-mounted car bike rack, here are a few additional tips to ensure a secure and worry-free journey:
- Before installation, thoroughly read the manufacturer’s instructions and guidelines specific to your car bike rack. It’s essential to understand any requirements or limitations to ensure a safe and secure installation.
- Inspect your car’s trunk before attaching the bike rack. Look for any signs of damage, loose parts, or other potential issues that may affect the stability and safety of the installation.
- Securely tighten all straps, hooks, and attachments. Regularly check them throughout your journey to ensure they remain tight and secure, especially after driving on rough terrains or long distances.
- Consider using additional security measures, such as cable locks or bike frame locks, to deter potential theft or unauthorized access to your bike. These extra precautions can provide peace of mind during stops or when parked.
- Maintain visibility and obey traffic laws. Ensure that the car bike rack and your bike do not obstruct your rear lights or license plate. Also, check local regulations regarding the use of car bike racks to avoid any legal issues while traveling.
By following these step-by-step instructions and essential tips, you’ll be able to install a trunk-mounted car bike rack securely and embark on your biking adventures without any worry. Remember, always prioritize safety and double-check your installation before hitting the road.
Installing A Car Bike Rack On A Roof
Installing a car bike rack on a roof is a great way to transport your bikes securely and conveniently. Not only does it free up space inside your vehicle, but it also ensures easy access to your bikes during your outdoor adventures.
However, it’s important to install the bike rack correctly to ensure the safety of your bike and the stability of your vehicle. In this guide, we will provide you with step-by-step instructions for installing a roof-mounted car bike rack and also highlight important precautions to take during the installation process.
Step-by-step instructions for installing a roof-mounted car bike rack
- Start by ensuring that your vehicle has a suitable roof rack system installed. The roof rack should be strong enough to support the weight of the car bike rack and the bikes you plan to transport.
- Place the car bike rack on top of the roof rack system, making sure it is properly aligned and centered.
- Secure the car bike rack to the roof rack system using the provided straps or clamps. Follow the manufacturer’s instructions for proper attachment, making sure that the straps or clamps are tightened securely.
- Double-check the stability of the car bike rack by gently shaking it. If there is any wobbling or movement, adjust the straps or clamps to eliminate any looseness.
- Once the car bike rack is securely attached, make sure the bikes are properly loaded. Use straps or bungee cords to secure the bikes to the bike rack, ensuring that they are stable and won’t move during transit.
Precautions to take when installing on a roof
Installing a car bike rack on a roof comes with some unique considerations and precautions to ensure safe and successful installation:
- Make sure to check your vehicle’s weight limit and ensure that the combined weight of the car bike rack and the bikes you plan to transport do not exceed this limit.
- It’s important to be mindful of the height clearance of your vehicle after installing the car bike rack. Be aware of low bridges, parking garages, and other obstructions that may limit the height of your vehicle.
- Regularly inspect the straps or clamps securing the car bike rack to the roof rack system. Over time, these can loosen or wear out, so it’s important to check and adjust them accordingly.
- Before hitting the road, test the stability of the car bike rack and the bikes by giving them a gentle shake. If you notice any movement or instability, recheck the attachment points and make any necessary adjustments.
- Always follow the manufacturer’s instructions for the car bike rack and consult your vehicle’s manual for any specific roof rack guidelines or restrictions.
By following these step-by-step instructions and taking the necessary precautions, you can confidently install a car bike rack on your roof and embark on your cycling adventures with peace of mind.
Maintenance And Safety Tips For Car Bike Rack
When it comes to using a car bike rack, it is important to prioritize both maintenance and safety. Regular maintenance practices will help keep your car bike rack in top condition, ensuring its durability and reliability.
Additionally, adhering to proper safety guidelines will not only protect your valuable bikes but also ensure a smooth and secure transportation experience. In this section, we will explore some essential maintenance practices and safety guidelines for using a car bike rack properly.
Essential Maintenance Practices for Keeping Your Car Bike Rack in Top Condition
By following these essential maintenance practices, you can ensure that your car bike rack operates at its best:
1. Regular Cleaning and Inspection
To keep your car bike rack in excellent condition, regularly clean it and inspect for any signs of wear and tear. Remove any dirt, road grime, or debris that may accumulate on the rack’s surfaces. Inspect all components, including straps, fasteners, and attachment points, for any signs of damage or loosening. Tighten or replace any worn-out parts to maintain the rack’s stability.
2. Lubrication
Applying lubrication to moving parts of your car bike rack will prevent rust and corrosion, ensuring smooth functionality. Use a suitable lubricant such as silicone spray or bike chain lubricant on hinges, pivots, and locking mechanisms. Regularly lubricate these areas to maintain the rack’s ease of use and prevent stiffness or jamming.
3. Storage
When not in use, store your car bike rack in a safe and dry place. Exposure to extreme temperatures, sunlight, and harsh weather conditions can lead to structural damage and disintegration of materials. Storing the rack properly will extend its lifespan and maintain its performance.
Safety Guidelines for Using a Car Bike Rack Properly
Ensure a safe and secure transportation experience by following these important safety guidelines:
1. Weight Distribution
Properly distribute the weight of your bikes on the car bike rack to maintain balance and stability. Follow manufacturer guidelines to determine the maximum weight capacity of your rack and avoid exceeding it. Place heavier bikes closer to the vehicle’s center and distribute the weight evenly to prevent swaying or tilting during transportation.
2. Secure Attachment
Before every journey, double-check that your bikes are securely attached to the car bike rack. Ensure that all straps, clamps, and attachments are tightly fastened and that there is no wobbling or movement of the bikes. Regularly inspect and re-tighten the connections during long trips to ensure the stability of the rack.
3. Regular Stops for Inspection
During extended journeys, make regular stops to inspect the car bike rack and the bike attachments. Check for any signs of loosening or damage and tighten or adjust accordingly. Pay attention to loose straps, bent components, or any unusual noises that may indicate a potential problem. Addressing these issues promptly will prevent accidents or additional damage.
By following these maintenance practices and safety guidelines, you can ensure that your car bike rack remains in top condition, providing a secure and reliable means of transporting your bikes. Incorporating these practices into your routine will enhance your overall biking experience and contribute to the longevity of your car bike rack.
Frequently Asked Questions On How To Install Car Bike Rack
Can You Put A Bike Rack On Any Car?
Yes, you can put a bike rack on most cars. Ensure the rack is compatible with your vehicle’s model and design.
How Much Does It Cost To Install A Bike Rack On a Car?
The cost of installing a bike rack on a car varies, with prices ranging from $50 to $200.
Are Bike Racks Easy To Install?
Bike racks are easy to install, making it simple and quick to add storage for your bikes.
How Do You Install A Bike Rack In Your Yard?
To install a bike rack in your yard: 1. Choose a suitable location. 2. Measure and mark the position. 3. Dig holes for posts. 4. Insert and secure posts. 5. Attach the bike rack to the posts. Enjoy your new bike storage solution!
Conclusion
Installing a car bike rack doesn’t have to be a headache. By following these simple steps, you can easily and securely attach your bike rack to your vehicle. Remember to choose the right type of rack for your needs, check for compatibility with your car, and ensure proper installation for a safe and enjoyable biking experience.