To install car audio systems, start by gathering all the necessary tools and equipment, then disconnect the negative battery cable, remove the existing stereo, and connect the wiring harness adapter. Finally, install the new stereo, reconnect the negative battery cable, and test the audio system.
Car audio system installation involves a series of steps that must be followed carefully to ensure a successful installation. This guide will provide you with the necessary steps and tips to install your car audio system effectively. From gathering the tools and equipment to testing the audio system, each step is crucial for a seamless installation process.
By following these steps, you can enjoy a high-quality audio experience in your vehicle.

Tools And Materials Needed
Installing a car audio system can be a rewarding DIY project that allows you to enjoy enhanced audio quality and a personalized driving experience. To ensure a successful installation, it’s important to have the right tools and materials at hand. In this section, we will discuss the necessary tools as well as the materials required for the installation.
Necessary tools for installation
Before you begin installing your car audio system, make sure you have the following tools:
- A set of screwdrivers (both flathead and Phillips) to remove paneling and secure the components.
- A wire stripper/cutter tool for properly preparing the wiring connections.
- A crimping tool to secure the wiring connections.
- A panel removal tool to safely remove the panels without damaging them.
- An electrical tape or heat shrink tubing for insulating the wiring connections.
- A multimeter to test the electrical connections and ensure proper voltage.
- A power drill with various drill bits for mounting components and running wires.
- A soldering iron for more secure and permanent wiring connections (optional).
Materials required for the installation
In addition to the necessary tools, you will also need the following materials for a successful car audio system installation:
- A car stereo system with all the required components, including the head unit, speakers, amplifier, and subwoofer.
- Wiring harnesses and connectors specific to your car make and model.
- Speaker wire to connect the speakers to the head unit or amplifier.
- RCA cables to connect the head unit to the amplifier.
- Fuse holder and fuse for the power wire of the amplifier.
- Power distribution block to properly distribute power to multiple amplifiers.
- Metal brackets and screws for securely mounting the components.
By ensuring that you have all the necessary tools and materials ready, you can proceed with confidence and tackle your car audio system installation project smoothly. Now that we have discussed the tools and materials needed, let’s move on to the next step in the installation process.
Preparing For Installation
Before you begin installing your car audio system, it’s important to properly prepare. This step will ensure a successful installation process and help you avoid any unnecessary issues. Here are some essential steps to take when preparing for the installation of your car audio system:
Choosing the right audio system for your car
Choosing the right audio system for your car is crucial to ensuring optimal sound quality and performance. Consider the following factors when selecting your car audio system:
- Budget: Determine how much you are willing to spend on your audio system. This will help you narrow down your options and choose the system that fits your budget.
- Audio preferences: Think about the type of music you enjoy and the level of sound quality you desire. This will help you choose the right speakers, subwoofers, and amplifiers to meet your audio preferences.
- Compatibility: Ensure that the audio system you choose is compatible with your car’s make, model, and year. Check the specifications and consult with a professional if needed.
- Brands and reviews: Research different brands and read reviews to determine which ones are known for their quality and reliability. This will help you make an informed decision.
Planning the layout and placement of the components
Once you have chosen the right audio system, the next step is to plan the layout and placement of the components. Here’s how to do it:
- Speaker placement: Determine where you want to install your speakers. Consider factors such as sound quality, visibility, and available space. Keep in mind that speakers should be positioned for optimal sound projection.
- Subwoofer placement: Decide on the placement of your subwoofer. This component requires more space and is usually installed in the trunk or a custom enclosure. Consider the size of your subwoofer and how it will fit into your car’s layout.
- Amplifier placement: Find a suitable location for your amplifier. It should be placed in an area with good ventilation to prevent overheating. Consider hiding the amplifier for a clean and organized look.
- Wiring considerations: Plan the routing of your wires to ensure a neat and tidy installation. Keep wires away from moving parts and hot surfaces. Use wire sheathing and clips to secure the wires in place and prevent any potential hazards.
By carefully planning the layout and placement of the components, you can ensure a seamless installation process and achieve the best possible audio experience in your car.
Removing The Existing Audio System
If you’re thinking about upgrading your car audio system, the first step is to remove the existing one. Whether you’re looking to replace a malfunctioning head unit or simply want to upgrade to a higher quality sound system, properly removing the old audio system is essential. In this article, we’ll guide you through the process of removing the existing audio system step by step. Let’s get started!
Removing the old head unit
The head unit, also known as the car stereo or receiver, is the control center of your car’s audio system. To remove the old head unit, you’ll need a few basic tools, including a screwdriver and a set of trim panel removal tools. Follow these simple steps to remove the old head unit:
- Start by disconnecting the negative terminal of the car battery to avoid any electrical short circuits. Safety first!
- Use the appropriate trim panel removal tools to gently pry off the plastic trim surrounding the head unit. Be careful not to scratch any surfaces.
- Once the trim panel is removed, you’ll see a series of screws or bolts securing the head unit in place. Use the screwdriver to carefully remove these screws.
- Once the screws are removed, gently pull the head unit out of the dashboard. Be mindful of any attached wiring harnesses.
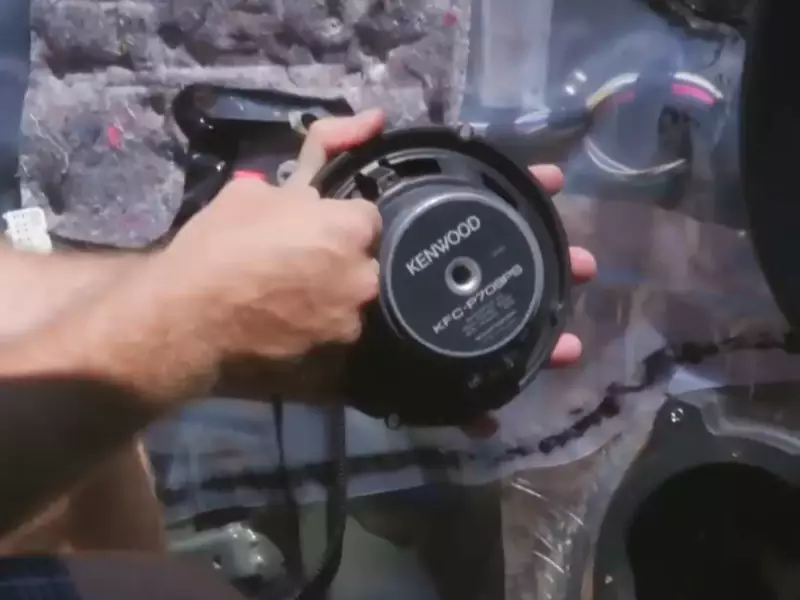
Detaching the speakers and wiring from the old system
Now that the old head unit is out, it’s time to detach the speakers and wiring from the old system. Follow these steps to ensure a clean and smooth removal:
- Start by identifying the wiring connections on the back of the head unit. Each wire should be labeled for easy identification.
- Using the appropriate wiring harness adapter, disconnect the wiring harness from the back of the head unit. Be sure to keep track of which wires go where.
- Next, detach the speaker wires from the old head unit. These wires are usually color-coded to match the corresponding speakers.
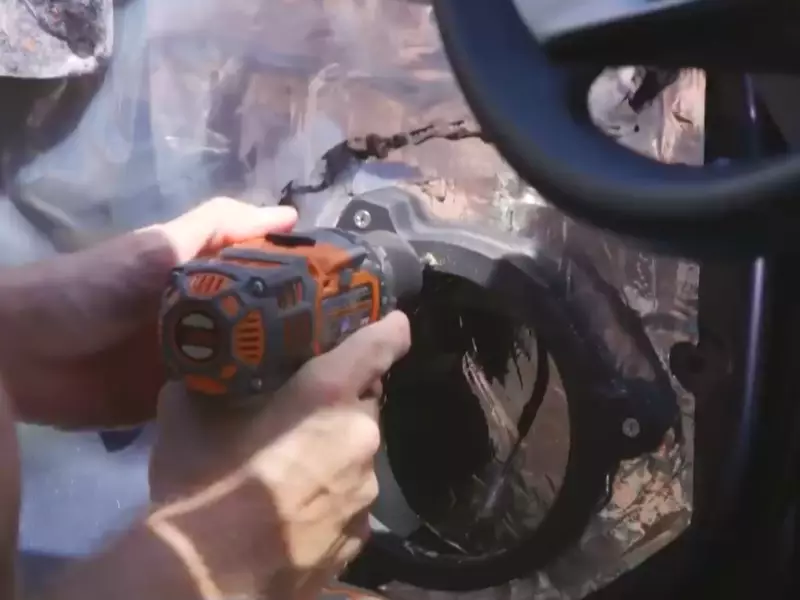
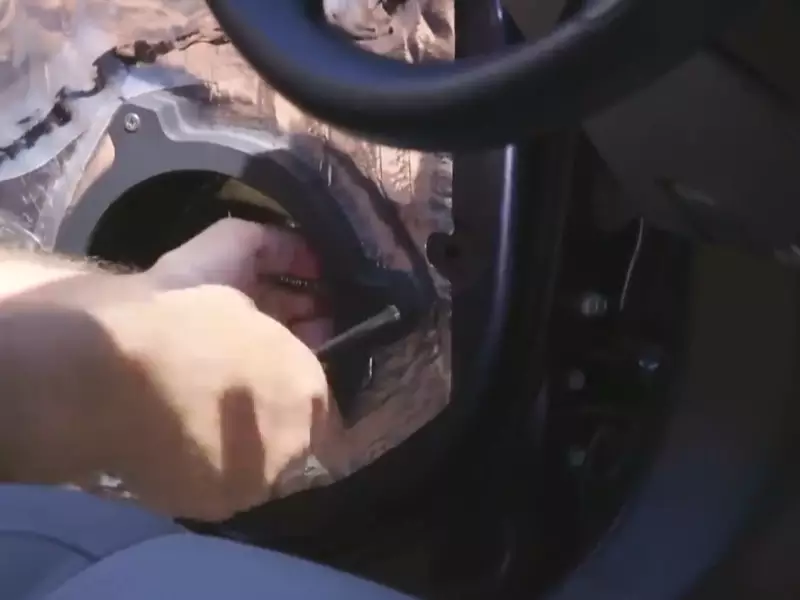
- Once all the wiring connections are detached, gently remove the old speakers from their mounting locations by unscrewing any screws or bolts holding them in place.
Now that you’ve successfully removed the existing audio system, you’re ready to move on to the exciting part of installing your brand new car audio system. Stay tuned for our next article where we’ll guide you through the installation process step by step. Happy upgrading!
Installing The Head Unit
Installing the head unit is an important step in upgrading your car audio system. The head unit, also known as the stereo or radio, is the control center of your car’s audio system. It allows you to listen to your favorite music, podcasts, and radio stations while on the road. In this guide, we will walk you through the process of installing the head unit, step by step.
Connecting the wiring harness to the new head unit
To begin the installation process, you will first need to connect the wiring harness to the new head unit. The wiring harness is a set of wires that connects the head unit to the car’s electrical system. This allows the head unit to receive power and audio signals from the car’s speakers.
To connect the wiring harness, follow these steps:
- Identify the wiring harness that came with your new head unit. It should be a set of wires with connectors at the end.
- Locate the wiring harness of your car. It is usually located behind the factory radio.
- Match the connectors of the wiring harnesses together. They should have the same shape and size.
- Plug the connectors of the wiring harnesses together until they click into place.
Once the wiring harnesses are connected, you can move on to mounting and securing the new head unit in the dashboard.
Mounting and securing the new head unit in the dashboard
Mounting and securing the new head unit in the dashboard is essential to ensure stability and prevent any vibrations or movement while driving. To ensure a secure installation, follow these steps:
- Remove the old head unit from the dashboard by unscrewing any mounting screws or clips holding it in place.
- Insert the new head unit into the empty slot in the dashboard. Make sure it fits securely and snugly.
- Use the mounting brackets or screws that came with your new head unit to attach it to the dashboard. Securely tighten the screws or brackets to ensure a stable installation. Be careful not to overtighten, as it could damage the dashboard.
- Double-check that the head unit is properly aligned and positioned in the dashboard. It should be centered and flush with the surrounding trim.
Once the new head unit is securely mounted and aligned, you can proceed with the final steps of the installation process, including connecting the remaining wires, testing the audio system, and reassembling the dashboard. With the head unit successfully installed, you can now enjoy an enhanced audio experience in your car!
Wiring The Audio Components
When installing a car audio system, wiring the audio components is a crucial step that ensures optimal sound quality and functionality. This involves connecting the speakers to the head unit and running and hiding the speaker wires. In this section, we will guide you through the process of wiring your car audio system components to help you achieve the best audio experience on the road.
Connecting the speakers to the head unit
To start, you will need to identify the positive and negative terminals on your speakers. Typically, the positive terminal is marked with a “+” sign, while the negative terminal is marked with a “-” sign. Once you have identified the terminals, follow these steps to connect the speakers to the head unit:
- First, strip off a small portion of insulation from the speaker wires, both positive and negative.
- Locate the corresponding positive and negative speaker wire outputs on the back of your head unit.
- Insert the positive wire into the positive output and the negative wire into the negative output.
- Tighten the connectors or screws to secure the wires in place, ensuring a snug fit.
- Repeat these steps for each speaker in your car audio system.
Running and hiding the speaker wires
Properly running and hiding the speaker wires not only ensures a neat and professional installation but also prevents them from being damaged or becoming a distraction while driving. Here are a few tips to help you run and hide your speaker wires effectively:
- Plan your wire routes beforehand to determine the best paths that avoid potential hazards, such as hot or moving parts.
- Use wire clips or adhesive-backed cable clamps to secure the wires along the path you’ve chosen.
- Consider using wire loom or conduit to protect the speaker wires from any sharp objects or excessive heat.
- Avoid running the speaker wires alongside power cables or other sources of potential interference.
- If necessary, remove interior panels or carpet to hide the wires and ensure they are not visible once the installation is complete.
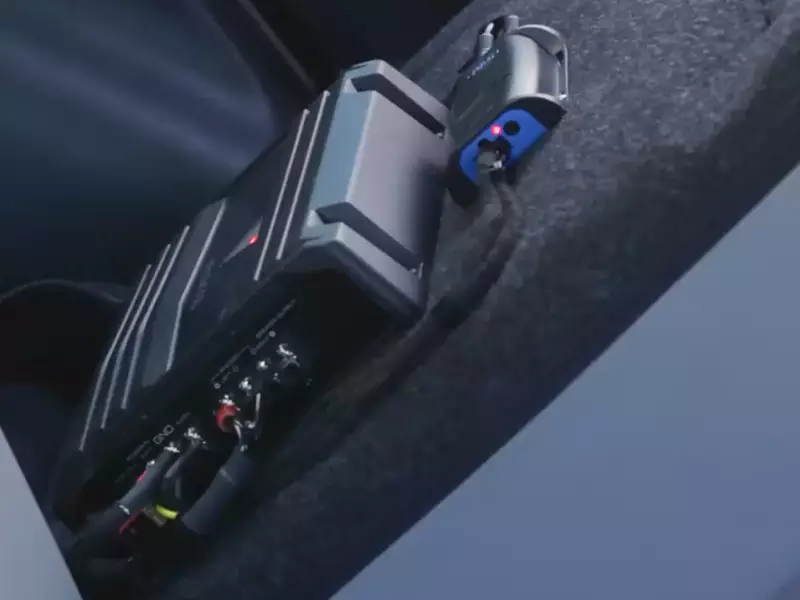
Installing An Amplifier
Installing an amplifier is a great way to improve the sound quality in your car audio system. Whether you’re a music enthusiast or just want to enhance your driving experience, adding an amplifier can make a significant difference in the way your music sounds. In this section, we will discuss how to select an appropriate location for the amplifier and how to wire it to the head unit and speakers for optimal performance.
Selecting an Appropriate Location for the Amplifier
Choosing the right location for your amplifier is crucial to ensure both safety and optimal performance. Here are some key factors to consider:
- Airflow: Amplifiers tend to generate heat, so it’s important to install them in a location that allows for proper airflow to prevent overheating. Avoid placing the amplifier in enclosed spaces or near heat sources like exhaust pipes.
- Accessibility: You’ll want to select a location that allows easy access for wiring and adjustments, in case you need to make any changes or repairs in the future.
- Security: To minimize the risk of theft, choose a spot that is not easily visible from outside the vehicle. Concealing the amplifier under the seats or in the trunk can be a good option.
Wiring the Amplifier to the Head Unit and Speakers
Properly wiring the amplifier is essential to ensure that the power from the amplifier is correctly distributed to the speakers. Here’s how to do it:
- Gather the necessary tools: Before you begin, make sure you have the required tools, including a wire stripper, crimping tool, and electrical tape. This will ensure a smooth installation process.
- Connect the amplifier to the head unit: Start by disconnecting the negative terminal of your car’s battery to prevent any electrical accidents. Next, locate the preamp outputs on your head unit and connect them to the corresponding inputs on the amplifier using RCA cables.
- Connect the amplifier to the speakers: Run speaker wires from the amplifier’s output terminals to each of the speakers. Ensure that the positive and negative terminals on the amplifier match those on the speaker, to maintain proper polarity.
- Secure and tidy up the wiring: Once all the connections are made, secure the wires to prevent them from coming loose during vehicle movement. Use zip ties or cable clamps to organize and bundle the wires neatly.
- Test the system: Before finalizing the installation, reconnect the battery and turn on the car audio system. Test the amplifier and speakers to ensure that everything is working correctly. Adjust the amplifier’s gain and crossover settings as needed to achieve the desired sound quality.
By following these steps, you can successfully install an amplifier in your car audio system, taking your music experience to the next level. Remember to always consult the amplifier’s manual and seek professional assistance if needed.
Connecting The Power Source
When installing a car audio system, one of the most crucial steps is connecting the power source. Without a proper power connection, your audio system won’t be able to function effectively. In this section, we will guide you through the process of running the power cable from the battery to the audio system and connecting it to the amplifier.
Running the power cable from the battery to the audio system
The first step in connecting the power source is to run the power cable from the car battery to the audio system. Follow these steps to ensure a secure and efficient power connection:
- Start by disconnecting the negative terminal of the car battery to avoid any electrical mishaps.
- Locate a suitable path for running the power cable. It’s essential to choose a route that minimizes interference with other car components.
- Measure the length of the route and ensure you have enough power cable to reach the audio system.
- Use zip ties or adhesive clips to secure the power cable along the chosen path, keeping it away from moving parts and hot surfaces.
- Once the cable is secured, connect one end of the power cable to the positive terminal of the car battery and tighten it securely.
- Route the power cable through the firewall to access the interior of the car. Look for existing holes or use a drill to create a small hole if necessary.
- Seal the hole with silicone to prevent any water or dust from entering the car cabin.
- Continue routing the power cable along the interior, making sure it is tucked away neatly and doesn’t interfere with the driver or passengers.
Connecting the power cable to the amplifier
Now that you have successfully run the power cable to the audio system, it’s time to connect it to the amplifier. Follow these steps to ensure a secure connection:
- Locate the power input terminals on the amplifier. They are usually labeled as “power” or marked with a (+) symbol.
- Strip the insulation off the end of the power cable, exposing the bare wire.
- Insert the stripped end of the power cable into the power input terminal of the amplifier and tighten the terminal securely.
- Ensure that there are no loose strands of wire and all connections are tight.
- Optional: To add extra protection and minimize the risk of short circuits, cover the power cable connection with heat shrink tubing and shrink it using a heat gun.
Once you have connected the power cable to the amplifier, you are one step closer to enjoying your enhanced car audio system. Make sure all connections are secure and double-check everything before reconnecting the car battery’s negative terminal. Now you’re ready to power up your audio system and experience an immersive and powerful sound while on the road!
Testing And Tuning The System
After installing your car audio system, the next crucial step is to test and tune it to ensure the best sound quality. This process involves checking all connections for proper functionality and adjusting the audio settings for optimal performance. By meticulously testing and tuning your system, you can create an immersive listening experience on the road.
Checking all connections for proper functionality
Before diving into the audio settings, it’s essential to examine the connections of your car audio system to ensure everything is in the right place and functioning correctly. Here’s a quick breakdown of the steps to accomplish this:
- Inspect the power connection: Ensure that the power cable is securely connected to the battery and that there are no loose or damaged wires.
- Check the ground connection: Verify that the ground wire is properly attached to a metal part of the vehicle’s chassis, free from rust, paint, or any other impediments. A solid ground connection is vital for minimizing unwanted noise.
- Examine the speaker connections: Make sure that all speaker wires are correctly connected to their respective terminals, with no loose or frayed ends. Confirm that each speaker is wired in phase, meaning the positive terminal connects to the positive wire and the negative terminal connects to the negative wire.
- Test the RCA cables: Ensure that the RCA cables are securely connected to the head unit and amplifier. Also, check for any signs of damage or interference.
Adjusting the audio settings for optimal sound quality
Once you’ve verified the functionality of all connections, it’s time to fine-tune the audio settings to achieve the best sound quality possible. Here are some essential adjustments to consider:
- Equalizer settings: Utilize the equalizer settings on your head unit or amplifier to adjust the frequency response. Experiment with boosting or cutting specific frequencies to refine the audio balance according to your preference.
- Crossover settings: Set the crossover frequency to control which frequencies are directed to each speaker. This helps prevent distortion and ensures each speaker produces the appropriate range of sound.
- Time alignment: Adjust the time alignment settings to sync the sound from different speakers to reach the listener’s ears simultaneously. This creates a more realistic and cohesive soundstage.
- Volume levels: Carefully adjust the volume levels of individual speakers to achieve a balanced sound. Pay attention to distortion and clipping, as excessive volume can result in distorted audio.
By taking the time to test and tune your car audio system, you can unleash its full potential and enjoy crisp, clear sound inside your vehicle. Don’t hesitate to experiment and make adjustments until you find the perfect audio settings that cater to your musical preferences and enhance your driving experience.
Troubleshooting Tips
Installing a car audio system can be an exciting project, but sometimes things don’t go as planned. Whether it’s a wiring issue or a sound problem, troubleshooting can help you identify and resolve the problem quickly. Here are some common issues that you may encounter during installation, along with their solutions.
Common issues and their solutions during installation
Even with proper planning and preparation, it’s not uncommon to face issues during the installation of a car audio system. Here are some common problems you may come across, along with their solutions:
1. Wiring problems:
One of the most common issues during installation is wiring problems. You may find that the system is not working at all or certain components are not functioning as expected. To troubleshoot this issue, start by checking all the connections and ensuring they are secure. Make sure the wires are properly connected to their respective terminals. If you find any loose or damaged wires, replace them immediately.
2. No sound:
If you’re not getting any sound from your car audio system, it can be frustrating. Start by checking the speaker connections and the amplifier settings. Make sure the speakers are connected to the correct terminals and that the amplifier is not set to mute mode. Additionally, check the audio source to ensure that it is set to the correct input.
3. Poor sound quality:
If the sound quality of your car’s audio system is not up to par, there could be several potential causes. Start by checking the speaker placement and ensuring that they are properly positioned for optimal sound. Additionally, check the equalizer settings and make adjustments as needed. If the problem persists, it may be a good idea to consider upgrading your speakers or amplifiers.
| Problem | Solution |
|---|---|
| Wiring problems | Check all connections and replace any loose or damaged wires |
| No sound | Ensure proper speaker connections, check amplifier settings, and verify the audio source |
| Poor sound quality | Check speaker placement, adjust equalizer settings, and consider upgrading speakers or amplifier |
Troubleshooting techniques for audio system problems
When you encounter issues with your car audio system, it’s important to have some troubleshooting techniques in your arsenal. Here are a few techniques that can help you diagnose and resolve audio system problems:
- Visual inspection: Start by visually inspecting all the connections, wires, and components. Look for any signs of damage or loose connections.
- Testing components: If you suspect a specific component is causing the problem, test it individually. Connect the component to a different system to check if it works properly.
- Resetting the system: Some audio systems have a reset function that can help resolve minor issues. Refer to the user manual to learn how to reset your specific system.
- Seek professional help: If you have exhausted all troubleshooting techniques and are still unable to resolve the problem, it may be time to seek professional help. A car audio specialist can diagnose and fix complex issues.
By following these troubleshooting tips and techniques, you’ll be able to overcome common installation issues and enjoy the superior sound quality of your car audio system. Don’t let technical difficulties hold you back from upgrading your driving experience!
Maintenance And Care
Proper maintenance and care are essential for ensuring that your car audio system performs optimally and has a long lifespan. By cleaning and maintaining the audio system components and following a few simple tips, you can keep your car audio system sounding great for years to come.
Cleaning and maintaining the audio system components
To maintain the performance and longevity of your car audio system, it’s important to regularly clean and maintain its various components. Here are some simple steps you can follow:
- Dust off the head unit: Start by dusting off the head unit using a soft, lint-free cloth. Avoid using harsh cleaning agents as they can damage delicate surfaces.
- Clean the buttons and knobs: Use a cotton swab dipped in alcohol or a specialized electronics cleaner to clean the buttons and knobs. Gently rub them to remove any dirt or grime.
- Check and clean the speakers: Inspect the speakers for any visible dirt or debris. Use a soft brush or a microfiber cloth to gently remove the dirt. Avoid applying excessive pressure to prevent damage to the speaker cones.
- Wipe down the car audio cables: Clean the audio cables by wiping them down with a damp cloth. Make sure to dry them thoroughly afterward to prevent any moisture-related issues.
Tips for extending the lifespan of your car audio system
Follow these tips to ensure that your car audio system lasts for years:
- Avoid extreme temperatures: Constant exposure to extreme heat or cold can damage the sensitive electronic components of your audio system. Park your car in shaded areas or use a sunshade to protect the interior from excessive heat.
- Use high-quality audio files: When playing music through your car audio system, use high-quality audio files to ensure clear and crisp sound. Low-quality files or heavily compressed formats can affect the audio quality.
- Avoid high volume levels: While it may be tempting to turn up the volume to the max, avoid doing so for extended periods. Excessive volume can strain the speakers and lead to distortion or even permanent damage.
- Maintain proper vehicle grounding: Ensure that your car’s electrical system is properly grounded, as poor grounding can cause electrical interference and affect the performance of your audio system.
- Regularly check and replace fuses: Fuses protect your audio system from electrical surges. Check them regularly and replace any blown fuses to prevent damage to your audio system.
By following these maintenance and care tips, you can ensure that your car audio system stays in top shape, providing you with a pleasurable listening experience every time you hit the road.
Frequently Asked Questions Of How To Install Car Audio Systems
Is It Hard To Install A Car Sound System?
Installing a car sound system is relatively easy. With some basic knowledge and tools, you can do it yourself. Just follow the provided instructions and take your time.
Can I Install the Car Stereo Myself?
Yes, you can install a car stereo yourself. It’s a straightforward process that doesn’t require professional help. Just follow the manufacturer’s instructions and use the necessary tools. Make sure to disconnect the battery before starting and double-check your connections for safety.
How Long Does It Take To Install A Sound System In A Car?
Installing a sound system in a car typically takes around 2 to 4 hours, depending on the complexity of the system and the experience of the installer.
How Do I Set Up My Car Music System?
To set up your car music system:
- Ensure you have the necessary components: a stereo unit, speakers, and wiring.
- Install the stereo unit by following the manufacturer’s instructions.
- Connect the speakers to the stereo unit using the appropriate wiring.
- Test the system to ensure it’s functioning properly.
- Adjust the settings and customize the sound to your preference. Enjoy your music on the go!
Conclusion
In a nutshell, installing a car audio system can seem daunting at first, but it doesn’t have to be. By following the step-by-step guide provided in this blog post, you’ll be able to successfully set up your own car audio system with ease.
Remember to gather all the necessary tools and materials beforehand, take your time during the installation process, and seek professional help if needed. With the right approach and a little patience, you’ll be enjoying your favorite tunes on the road in no time.
So go ahead, give it a try, and take your driving experience to the next level!