To install a car amplifier and subwoofer, follow a diagram for accurate and precise installation.
Preparing For The Installation
Preparing for the installation of a car amplifier and subwoofer is an important step to ensure a smooth and successful installation process. In this section, we will discuss the necessary steps you need to take in order to prepare yourself for this task. From gathering the necessary tools and materials to checking your car’s electrical system compatibility, we will cover all the essential aspects. Let’s get started!
Gathering the necessary tools and materials
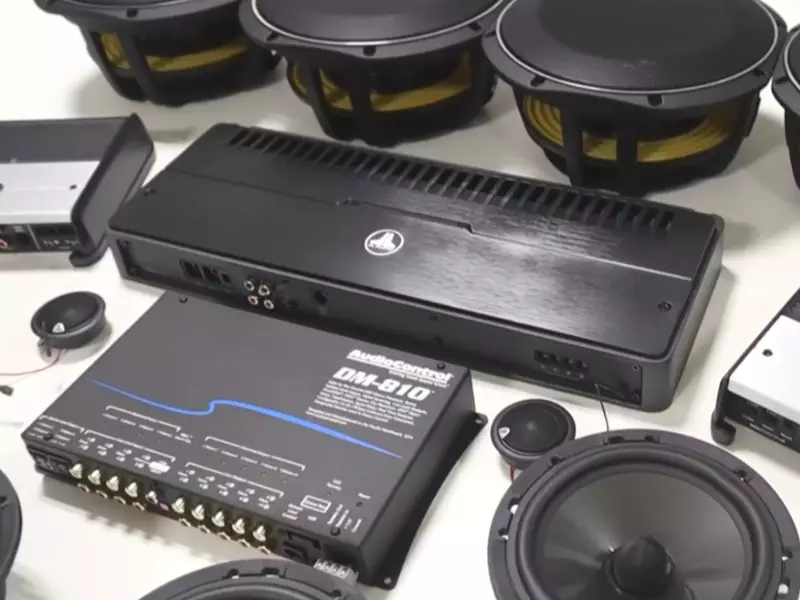
Before you begin installing the car amplifier and subwoofer, it’s crucial to gather all the necessary tools and materials. This will help you avoid any interruptions during the installation process. Here is a list of items you will need:
- Car amplifier and subwoofer
- Wiring kit
- Power drill
- Screwdriver set
- Wire cutter and stripper
- Tape measure
- Socket set
- Mounting screws
- Electrical tape
- Test light
Choosing the appropriate location for the amplifier and subwoofer
Once you have gathered all the necessary tools and materials, the next step is to choose the appropriate location for the amplifier and subwoofer. This decision will depend on various factors such as the size of your car and your personal preferences. Here are a few factors to consider:
- Available space: Ensure that you have enough space in your car to accommodate the amplifier and subwoofer.
- Accessibility: Choose a location that allows easy access for installation and maintenance.
- Aesthetics: Consider the visual appeal of the installation. You may want to hide the wiring and components for a clean and professional look.
Once you have considered these factors, you can proceed to find the best location for your amplifier and subwoofer.
Checking the car’s electrical system compatibility
Before you start the installation process, it’s important to ensure that your car’s electrical system can handle the additional power requirements of the amplifier and subwoofer. This step is crucial to avoid any damage to your car’s electrical system or even a potential fire hazard. Here’s what you need to do:
- Check the car’s manual: Refer to your car’s manual to understand its electrical system specifications and limitations.
- Measure the available power: Use a test light to check the voltage of your car’s electrical system. If the voltage is within the recommended range, then your car’s electrical system is compatible.
- Consult a professional: If you are unsure about your car’s electrical system compatibility, it’s always best to seek advice from a professional car audio installer.
Ensuring proper safety precautions
Finally, it’s crucial to ensure proper safety precautions before starting the installation process. This will help prevent accidents and damage to your vehicle. Here are a few safety tips to keep in mind:
- Disconnect the car’s battery: Before starting any electrical work, always disconnect the car’s battery to avoid any potential shocks or short circuits.
- Wear protective gear: Use safety glasses and gloves to protect yourself from any injuries during the installation process.
- Follow the manufacturer’s instructions: Always refer to the manufacturer’s instructions for the amplifier and subwoofer installation, as each product may have specific safety guidelines.
By following these safety precautions, you can ensure a secure and successful installation process.
With these steps completed, you are now ready to move on to the next phase of the installation process. In the next section, we will guide you through the step-by-step process of installing the car amplifier and subwoofer. Stay tuned!
Installing The Car Amplifier
Disconnecting the Car Battery
In order to ensure safety while installing the car amplifier, the first step is to disconnect the car battery. This will prevent any electrical accidents from occurring during the installation process. Start by locating the car battery, which is typically found under the hood in most vehicles. Using a wrench or socket set, carefully remove the negative terminal of the battery by loosening the nut. Once the negative terminal is disconnected, move the cable away from the battery to avoid accidental reconnection.
Mounting the Amplifier in the Chosen Location
After disconnecting the car battery, the next step is to determine the ideal location for mounting the amplifier. This location should be well-ventilated and away from any moisture or excessive heat sources. A popular choice is the trunk of the car, near the rear seats. Once the location is decided, use the appropriate mounting brackets or screws to securely attach the amplifier.
Ensure that the amplifier is positioned in a way that allows for easy access to the wiring terminals and controls.
Connecting the Amplifier to the Car’s Electrical System
Now it’s time to connect the amplifier to the car’s electrical system. Locate the main power wire that will run from the amplifier to the battery. This wire should be appropriately sized to handle the amplifier’s power requirements, typically indicated in the product’s manual or specifications.
Begin by connecting one end of the power wire to the positive terminal of the battery. Use a fuse holder to secure the wire, close to the battery terminal, to protect against any electrical faults.
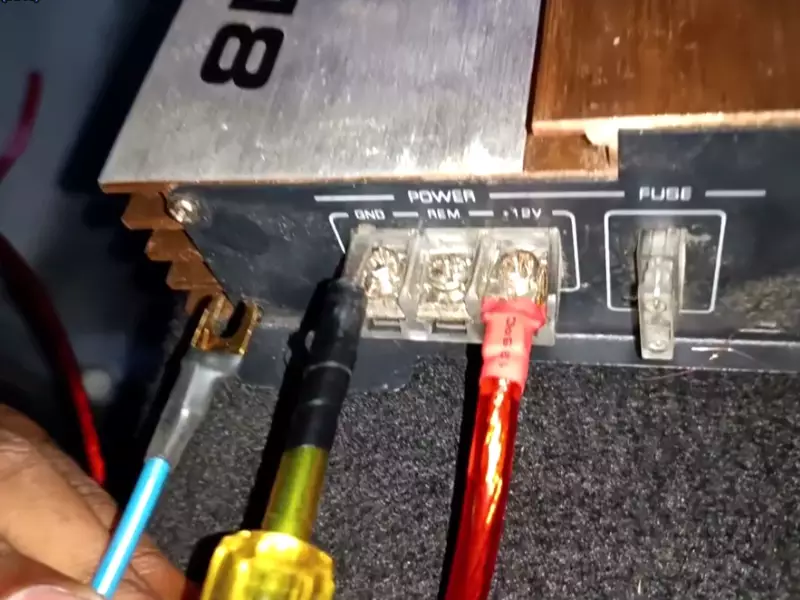
Running the Power and Ground Wires
With the main power wire connected, the next step is to run the power and ground wires from the amplifier to the car’s electrical system. Use a suitable gauge power wire to ensure efficient power transfer. Starting from the amplifier, route the wire through the vehicle’s interior, following the existing wiring harnesses or under-trim panels.
Make sure to avoid any sharp edges or potential hazards that may damage the wire. Finally, connect the other end of the power wire to the corresponding terminal on the amplifier, and connect the ground wire securely to a metal part of the vehicle’s chassis.
Connecting the RCA Cables and Speaker Wires
Now it’s time to connect the RCA cables and speaker wires to the amplifier. The RCA cables are responsible for carrying the audio signal from the car’s head unit or receiver to the amplifier. Connect one end of the RCA cables to the designated inputs on the amplifier, and the other end to the corresponding outputs on the head unit or receiver.
This will ensure proper audio transmission. As for the speaker wires, connect them to the appropriate terminals on the amplifier and route them to the respective speakers. Ensure that each wire is securely connected and well-insulated to prevent any signal loss or short circuits.
Testing the Amplifier’s Functionality
After connecting all the necessary wires, it’s crucial to test the functionality of the amplifier before finalizing the installation. Reconnect the car battery by attaching the negative terminal and tightening the nut. Power on the car’s audio system and check if the amplifier is receiving the audio signal and producing the desired sound.
Make adjustments to the amplifier’s controls as necessary to achieve the desired audio performance. Additionally, ensure that all cables are neatly organized and secured to prevent any interference or accidental disconnection.
Installing The Subwoofer
To get the best bass experience in your car audio system, installing a subwoofer is essential. A subwoofer enhances the low-frequency sounds, adding depth and impact to your music. In this section, we will guide you through the process of installing a subwoofer in your car step by step. By following these instructions, you’ll be able to enjoy powerful and immersive bass that will take your car audio to the next level.
Choosing the right subwoofer and enclosure
Before you start the installation, it’s important to choose the right subwoofer and enclosure for your car. The size and power output of the subwoofer should complement your car’s audio system. Consider factors such as available space, your music preferences, and the type of music you listen to.
Once you have chosen the right subwoofer, you need to select an enclosure that matches its specifications. There are various types of enclosures, including sealed, ported, and bandpass enclosures. Each type has its own advantages and characteristics, so make sure to research and select the one that suits your needs the best.
Preparing the subwoofer for installation
Before installing the subwoofer, you need to prepare it properly. Start by disconnecting the negative terminal of your car’s battery to avoid any electrical accidents. Then, determine the ideal location for the subwoofer. This can be in the trunk or under a seat, depending on your car’s layout and available space.
Next, you should ensure that the area where the subwoofer will be installed is clean and free from any debris or obstacles. Remove carpets or panels if necessary to create enough space and better access for installation.
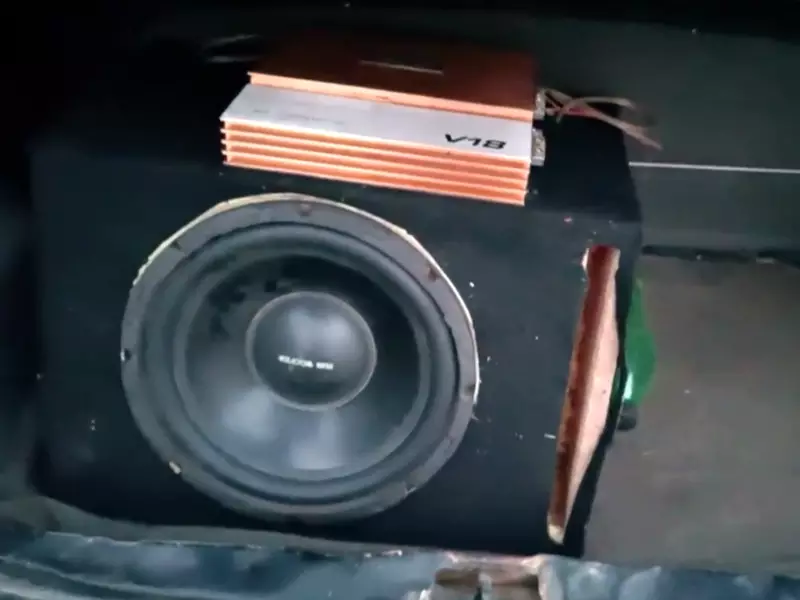
Mounting the subwoofer in the car
Mounting the subwoofer securely is crucial to prevent any vibrations or movement while driving. Use appropriate brackets, screws, or straps to secure the subwoofer in place. Make sure it is firmly attached to the car’s body or the enclosure to avoid any potential damage or unwanted noise.
If you are using a custom-built enclosure, follow the manufacturer’s instructions for mounting the subwoofer. If you are using a pre-built enclosure, it usually comes with pre-drilled holes or mounting points, simplifying the installation process.
Connecting the subwoofer to the amplifier
To power the subwoofer, you need to connect it to an amplifier. Locate the RCA preamp outputs on your car stereo head unit and connect them to the RCA inputs on the amplifier. Ensure that the connections are secure and tight to avoid any unwanted noise or signal interference.
Then, connect the speaker wire from the amplifier to the subwoofer. Ensure the polarity is correct: positive to positive and negative to negative. Secure the connections using terminal blocks or crimp connectors. Double-check all connections to make sure they are properly connected before proceeding.
Adjusting the subwoofer’s settings for optimal performance
Once the subwoofer is connected, it’s time to set the optimal sound levels for your car audio system. Start by adjusting the gain control on the amplifier. Gradually increase the gain until you achieve the desired bass level without distorting the sound. Be cautious not to turn it up too high as it may damage both the subwoofer and the amplifier.
Additionally, adjust the low-pass filter on the amplifier to limit the frequency range that the subwoofer reproduces. This will prevent any distortion caused by unwanted high-frequency signals being sent to the subwoofer. Fine-tune the crossover frequency to match the other speakers in your car audio system for smooth transitions between low and mid-range sounds.
Testing the subwoofer’s sound output
Before you finish the installation, it’s important to test the sound output of the subwoofer to ensure it is functioning optimally. Play various types of music that have distinct bass elements and listen for any distortion, rattling, or clipping. Adjust the settings on the amplifier if necessary to achieve a balanced and powerful bass response without compromising the overall sound quality.
Remember, each car’s interior and audio system are unique, so it might take some time and adjustments to get the perfect bass sound for your specific setup. Take your time to experiment and fine-tune the subwoofer’s settings until you are fully satisfied with the results.
Troubleshooting And Fine-Tuning
Identifying and troubleshooting common installation issues
When it comes to installing a car amplifier and subwoofer, it’s not uncommon to encounter a few hiccups along the way. However, by being aware of common installation issues and troubleshooting them, you can ensure a smooth and successful installation process.
One common issue is a lack of power or sound coming from the subwoofer. This could be due to a loose connection, so it’s important to check that all wiring connections are secure. Additionally, make sure that the amplifier is properly grounded to minimize any electrical interference.
Another issue that may arise is overheating. Car amplifiers can generate a lot of heat, especially when operating at high volumes for extended periods. To prevent overheating, make sure the amplifier is well-ventilated and not obstructed by any objects that could impede airflow.
Furthermore, if you’re experiencing distortion or a poor sound quality, it could be a result of incorrect gain settings. The gain controls on the amplifier determine the input sensitivity and should be adjusted accordingly. Start with a low setting and gradually increase it until you achieve the desired sound quality without distortion.
Checking for potential wiring or connectivity problems
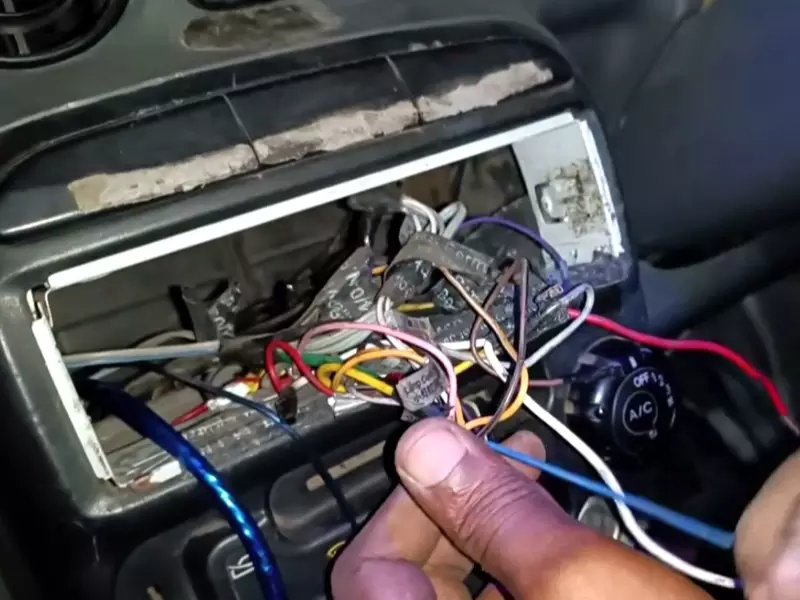
Incorrect wiring or connectivity issues can significantly impact the performance of your car amplifier and subwoofer. To ensure optimal functionality, it’s essential to double-check the wiring and connections.
Start by inspecting all the wiring connections to confirm they are properly connected. Verify that the power, ground, and remote wires are securely attached to their respective terminals. It’s also crucial to check the signal cables and ensure that they are firmly connected to the correct input and output ports.
If you’re still experiencing connectivity problems, it’s worth inspecting the cables themselves for any signs of damage or wear. Look for any frayed wires, loose connectors, or cuts that may be causing a weak or intermittent connection.
Adjusting the amplifier and subwoofer settings for desired sound quality
Once you have successfully installed your car amplifier and subwoofer, it’s time to fine-tune the settings to achieve the desired sound quality.
The first step is to adjust the bass boost, crossover, and phase settings on the amplifier. The bass boost control allows you to increase or decrease the bass frequencies according to your preference. The crossover settings determine the range of frequencies that the subwoofer will reproduce. Adjusting the phase control ensures proper synchronization between the subwoofer and the other speakers in your car.
Next, it’s important to adjust the gain and balance controls on your amplifier to achieve a balanced and well-defined sound. Experiment with different settings while playing various types of music to find the optimal balance and clarity.
Fine-tuning the system with an audio equalizer or crossover
To further refine the performance of your car audio system, you can consider using an audio equalizer or crossover.
An equalizer allows you to adjust the frequency response of different audio bands, enabling you to boost or cut specific frequencies according to your personal preference. By fine-tuning the equalizer settings, you can tailor your audio system to your specific music tastes and the characteristics of your car’s interior.
A crossover is especially useful if you have multiple speakers and subwoofers in your car audio setup. It helps to direct specific frequency bands to the appropriate speakers, ensuring a seamless transition between different audio components and preventing any overlap or distortion.
Following best practices for maintaining and protecting the amplifier and subwoofer
Proper maintenance and protection are crucial to ensure the longevity and optimal performance of your car amplifier and subwoofer.
It’s recommended to regularly inspect the amplifier and subwoofer for any signs of dust, debris, or moisture buildup. Clean them gently using a soft, lint-free cloth or compressed air, taking care not to damage any sensitive components.
Additionally, be cautious with the volume levels to prevent overloading and damaging the speakers. Avoid playing audio at excessively high volumes, especially for extended periods.
When parking your vehicle, it’s a good practice to turn off the audio system to prevent any unwanted drain on the battery. Also, ensure that the amplifier and subwoofer are securely mounted to reduce vibrations that could potentially harm the components.
By following these best practices, you can help prolong the lifespan of your car amplifier and subwoofer, enjoying crisp and powerful audio for many years to come.
Frequently Asked Questions On How To Install Car Amplifier And Subwoofer Diagram
How Do You Connect A Subwoofer To An Amplifier?
To connect a subwoofer to an amplifier, first, identify the subwoofer’s input and output ports. Use a suitable cable to connect the amplifier’s subwoofer output to the subwoofer’s input. Ensure a secure connection. Adjust the settings on both devices for optimal sound quality.
Can You Wire A Subwoofer To both The Right And Left Channels?
Yes, you can wire a subwoofer to both the right and left channels for better sound distribution. It allows the subwoofer to receive audio signals from both channels and produce a more immersive bass experience.
Is Rca To Amp Input Or Output?
RCA cables are generally used for connecting audio devices, such as CD players or turntables, to amplifiers or receivers. The RCA cables carry the audio signal from the output of the source device to the input of the amp or receiver.
How Do I Connect My Amp To My Sound System?
To connect your amp to your sound system, follow these steps:
1. Ensure both devices have compatible audio inputs and outputs.
2. Use appropriate cables, such as RCA or XLR, to connect the amp’s audio output to the sound system’s audio input.
3. Make sure all connections are secure.
4. Adjust the volume and sound settings on both devices.
5. Test the connection by playing audio through the system.
Conclusion
Installing a car amplifier and subwoofer can greatly enhance your car audio system and provide a richer, more immersive sound experience. By following the step-by-step diagram and tips provided in this blog post, you can successfully install the amplifier and subwoofer without any hassle.
Remember to carefully read and understand the instructions, double-check your connections for accuracy, and test the system before finishing up. Enjoy the ultimate audio experience in your car with the added power and depth of a quality amplifier and subwoofer setup.