To install a car amplifier, connect the power wire to the battery and the remote wire to the receiver. Then, run the RCA cables from the receiver to the amplifier and connect the speaker wires.
Installing a car amplifier is a simple and effective way to enhance your car’s audio system. By amplifying the sound signals, it provides more power and clarity to your speakers. Whether you’re a car audio enthusiast or just want to improve your driving experience, installing a car amplifier can make a significant difference.
We will guide you through the process of installing a car amplifier step-by-step. From connecting the power wire to wiring the speakers, we will cover all the necessary steps to ensure a successful installation. So, let’s get started and improve your car audio system by adding a powerful amplifier.
Getting Started With Car Amplifier Installation
Installing a car amplifier can greatly enhance your car audio system, giving you the power and clarity you’ve always desired. While it may seem like a daunting task, with the right tools and knowledge, you can easily install a car amplifier yourself. In this article, we will guide you through the process of getting started with car amplifier installation. Let’s get started!
Understanding the Basics of Car Amplifiers
Before diving into the installation process, it’s essential to understand the basics of car amplifiers. A car amplifier is a device that increases the power of the audio signal from your car stereo to the speakers. It improves the sound quality, loudness, and overall performance of your car audio system. Amplifiers come in various configurations, including mono, two-channel, four-channel, and multi-channel, depending on your specific needs and preferences.
Tools and Materials Needed for Installation
Now that you have a basic understanding of car amplifiers, let’s discuss the tools and materials you’ll need for a successful installation. Here’s a handy list:
| Tools | Materials |
|---|---|
| – Screwdriver set | – Car amplifier |
| – Wire strippers | – Amplifier wiring kit |
| – Wire crimpers | – Speaker wire |
| – Socket set | – RCA cables |
| – Drill | – Fuse holder and fuses |
| – Wire cutter | – Velcro strips |
| – Test light | – Electrical tape |
Make sure you have these tools and materials ready before you begin the installation process. Having everything on hand will save you time and ensure a smooth installation experience.
Preparing the Car for Amplifier Installation
Now that you have all the necessary tools and materials, let’s prepare your car for amplifier installation. Follow these steps:
- Disconnect the negative terminal of your car battery to avoid any electrical mishaps.
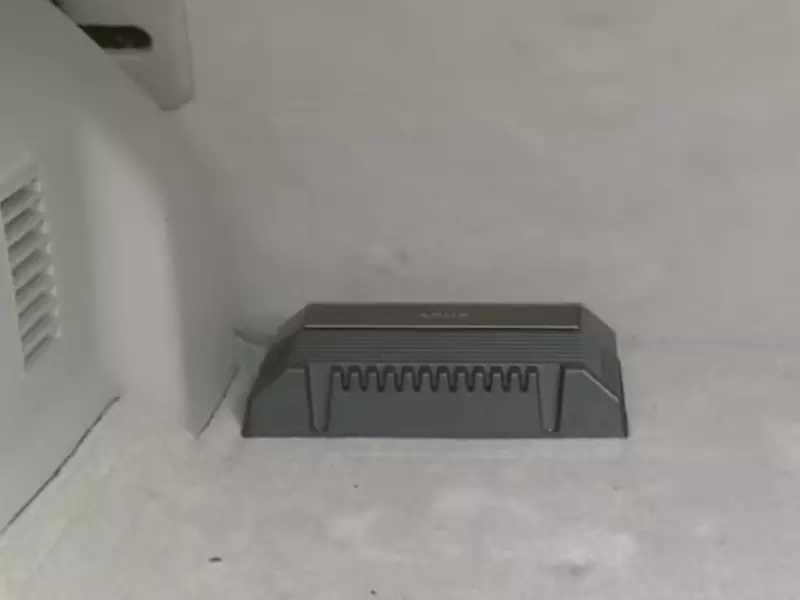
- Identify a suitable location to install the amplifier. It should be away from excessive heat and moisture.
- Mount the amplifier securely using screws or brackets.
- Remove the stereo head unit to access the wiring connections.
- Connect the RCA cables from the amplifier’s input to the stereo’s output RCA jacks.
- Connect the amplifier wiring kit to the positive and negative terminals of the car battery.
- Run the power cable from the battery to the amplifier, ensuring it is properly secured and away from any moving parts.
- Connect the speaker wire from the amplifier’s output to the speakers.
- Double-check all the connections, ensuring they are secure and free from any loose wires.
Once you have completed these steps, you can reconnect the negative terminal of your car battery and test your new amplifier. Enjoy the enhanced audio experience!
Installing a car amplifier may seem intimidating at first, but with the right guidance and preparations, it can be a rewarding and satisfying DIY project. By understanding the basics of car amplifiers, gathering the necessary tools and materials, and properly preparing your car for installation, you’ll be well on your way to enjoying an upgraded audio system in your car. Stay tuned for our next article, where we’ll delve further into the setup and fine-tuning of your car amplifier.
Understanding Car Amplifiers
When it comes to upgrading your car audio system, one component that can make a world of difference is a car amplifier. A car amplifier is an electronic device that increases the power of audio signals and delivers them to your speakers, resulting in clearer and more powerful sound.
What is a car amplifier and why do you need it?
A car amplifier, also known as an amp, is a device that takes the low-power audio signal coming from your car stereo and boosts it to a level that is suitable for your speakers. Without an amplifier, your car speakers may not be able to produce the volume and clarity you desire, especially when listening to music at high volumes.
Having a car amplifier is essential for several reasons:
- Better sound quality: Amplifiers provide the power needed to reproduce audio signals faithfully, resulting in clearer sound with improved dynamics and detail.
- Increased volume: Amplifiers allow you to achieve higher volume levels without distortion, ensuring that every note and beat can be heard and felt.
- Enhanced bass response: Amplifiers provide the necessary power to drive subwoofers, producing deep and impactful bass that adds depth and richness to your music.
- Flexibility: Amplifiers offer various configuration options, allowing you to customize your audio system to suit your preferences and match the specific requirements of your car.
Types of car amplifiers and their features
There are different types of car amplifiers available in the market today, each with its own unique features and capabilities. Here are a few common types:
| Type | Description | Features |
|---|---|---|
| Monoblock Amplifier | A single-channel amplifier designed to power subwoofers. |
|
| Full-Range Amplifier | A multi-channel amplifier capable of powering a complete audio system. |
|
| Class D Amplifier | An energy-efficient amplifier that uses switching technology. |
|
Choosing the right amplifier for your car
When choosing an amplifier for your car, it’s important to consider a few factors to ensure compatibility and optimal performance. Here are some key points to keep in mind:
- Power requirements: Determine the power needs of your speakers and subwoofers to select an amplifier that can provide adequate power.
- Number of channels: Decide how many speakers and subwoofers you plan to connect and choose an amplifier with enough channels to support your setup.
- Size and installation: Consider the available space in your car and choose an amplifier that fits seamlessly into your vehicle without causing any inconvenience.
- Features and controls: Look for amplifiers with features such as built-in crossovers, equalizers, and adjustable bass settings to fine-tune your audio system according to your preferences.
By understanding the purpose and types of car amplifiers, as well as considering your specific needs, you can choose the right amplifier to elevate your car audio experience to a whole new level.
Gathering The Tools And Materials
When it comes to installing a car amplifier, having the right tools and materials is essential. With the proper equipment on hand, you can ensure a smooth and successful installation process. In this guide, we will walk you through the tools and materials required for a hassle-free installation. Let’s dive in!
Essential tools for the installation process
Before you can begin installing your car amplifier, it’s important to gather the necessary tools. These tools will not only make the installation process easier but also help ensure a professional and polished result. Here are the essential tools you’ll need:
| Tool | Description |
|---|---|
| Multimeter | A multimeter is used to measure electrical current, voltage, and resistance. It’s crucial for testing and troubleshooting electrical connections. |
| Screwdriver Set | A set of screwdrivers, including both flathead and Phillips-head, will help you detach and fasten various components during the installation. |
| Wire Strippers | Wire strippers are necessary for removing the insulation from the power and speaker wires, allowing for proper connections. |
| Crimping Tool | A crimping tool is used to secure connectors onto the ends of wires, ensuring a secure and reliable connection. |
| Electrical Tape | Electrical tape is used to insulate and protect electrical connections from moisture and potential short circuits. |
| Drill and Bits | If you need to mount the amplifier or run wires through the firewall, a drill and appropriate bits will be necessary. |
Required wiring and cables for connecting the amplifier
Connecting your car amplifier requires the use of specific wiring and cables. These components ensure proper transmission of power and audio signals. Here are the required wiring and cables you’ll need:
- Power Wire: A thick gauge power wire that can handle the amplifier’s power requirements.
- Ground Wire: A dedicated ground wire to establish a reliable connection between the amplifier and the vehicle’s chassis.
- Signal Cables: RCA cables are needed to transmit audio signals from the head unit to the amplifier.
- Speaker Wire: High-quality speaker wire to connect the amplifier to the speakers for optimal sound quality.
- Fuse and Fuse Holder: A fuse and fuse holder are essential for protecting the amplifier and the vehicle’s electrical system from damage.
Additional materials for an optimal installation
While the essential tools and required wiring are crucial, there are a few additional materials you might consider for an optimal installation. These materials can help improve the longevity and performance of your car amplifier. Here are some suggestions:
- Wire Loom: Using a wire loom will protect the power and signal cables from wear and tear, preventing potential short circuits and maintaining a neat appearance.
- Heat Shrink Tubing: Heat shrink tubing can be used to provide additional protection and insulation for wire connections, safeguarding against moisture and vibrations.
- Grommets: Grommets help protect cables passing through sharp edges or holes, preventing damage to the wiring and ensuring a clean installation.
- Mounting Hardware: Depending on your installation setup, you may need additional mounting hardware to secure the amplifier in place.
By gathering all the necessary tools and materials, you’ll be well-prepared to install your car amplifier with confidence. In the next section, we’ll take you through the step-by-step process of connecting and installing the amplifier.
Preparing The Car For Installation
In this blog post, we will guide you through the process of installing a car amplifier. Before you start with the installation, it is important to prepare your car for the task at hand. This involves assessing the available space for the amplifier, ensuring proper grounding and electrical safety measures, and locating the appropriate power source. Let’s dive into each step in detail.
Assessing the available space for the amplifier
Before installing the amplifier, it is necessary to evaluate the space you have available in your car. This will help you determine the best location to install the amplifier for optimal performance. Consider the following points:
- Check if there is enough space in your car to accommodate the amplifier without causing any obstructions or interfering with other car components.
- Ensure that the location you choose provides proper airflow to prevent overheating of the amplifier.
- Check if there are any existing brackets or mounting points in your car that can be utilized for securing the amplifier.
By carefully assessing the available space, you can choose the most suitable location to install your amplifier, ensuring a clean and efficient setup.
Ensuring proper grounding and electrical safety measures
Proper grounding is crucial for the safe and effective operation of your car amplifier. Follow these steps to ensure proper grounding:
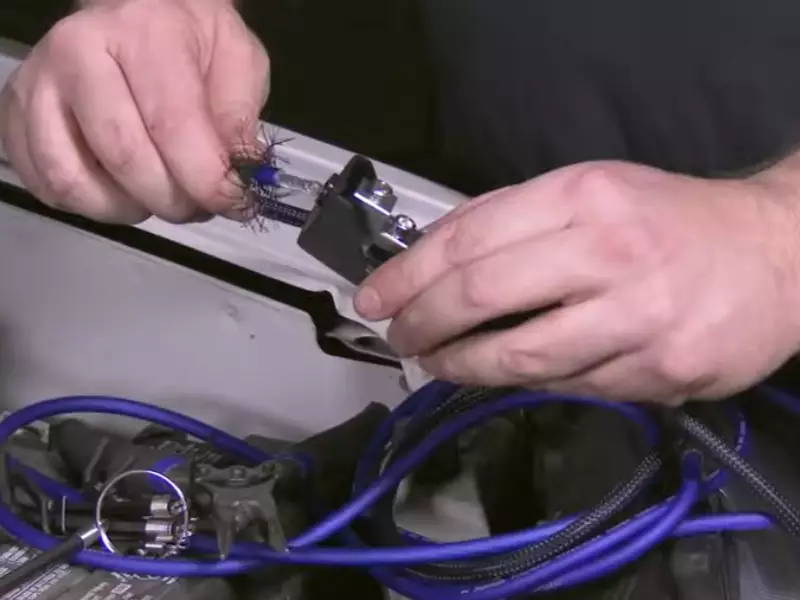
- Identify a solid metal surface near the amplifier installation location that can be used as the grounding point. This is typically a bolt or screw that connects to the car’s chassis.
- Clean the grounding point using sandpaper or a wire brush to ensure a good electrical connection.
- Connect the amplifier’s ground wire securely to the grounding point using a suitable connector.
Additionally, it is important to take electrical safety measures while working with car amplifiers. Ensure that the car’s battery is disconnected before starting the installation process to avoid any electrical mishaps.
Locating the appropriate power source for the amplifier
Identifying the right power source for your amplifier is essential for its proper functioning. Follow these steps to locate the appropriate power source:
- Identify a power source in your car that can handle the amplifier’s power requirements. This is usually the car’s fuse box or the positive terminal of the car’s battery.
- Check the power rating of the selected power source to ensure it matches the power requirements of your amplifier.
- Connect the amplifier’s power wire to the selected power source using an appropriate connector, ensuring a secure and reliable connection.
By locating the appropriate power source, you can ensure a stable and reliable power supply to your amplifier, resulting in optimal performance.
With these steps completed, your car will be prepared for the amplifier installation process. In the next section, we will guide you through the steps to physically install the amplifier in your car.
Installing The Car Amplifier
Installing a car amplifier can greatly enhance the audio quality in your vehicle, bringing your music to life with powerful and crisp sound. However, if you’re new to the process, it may seem a bit daunting. Don’t worry! In this guide, we’ll walk you through the steps of installing a car amplifier, ensuring that you can enjoy an immersive audio experience on the road.
Wiring the Power Connection
The first step in installing a car amplifier is to wire the power connection properly. Here’s how you can do it:
- Locate a suitable power source: Find the fuse box or battery in your car. This is where you will connect the power wire of the amplifier. It’s important to choose a power source that is able to handle the electrical load of the amplifier.
- Remove the negative terminal of the battery: To ensure safety, always disconnect the negative terminal of the battery before starting any electrical work in your car.
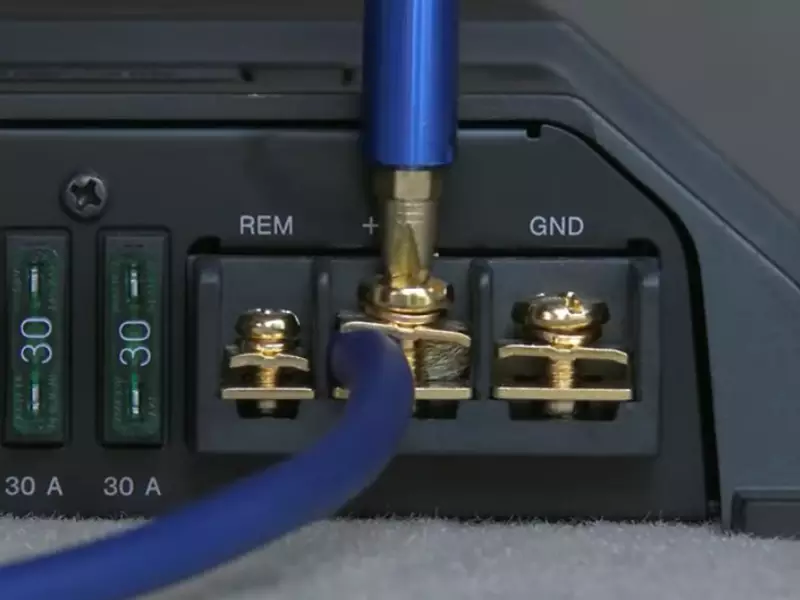
- Connect the power wire to the battery: Use a suitable gauge power wire, and attach it securely to the positive terminal of the battery. Make sure to use a fuse holder near the battery to protect the amplifier and the vehicle in case of a short circuit.
- Route the power wire: Carefully route the power wire from the battery to the location of the amplifier, making sure to avoid any sharp edges or moving parts that could damage the wire.
Connecting the Amplifier to the Audio System
Now that you have properly wired the power connection, it’s time to connect the amplifier to the audio system. Follow these steps:
- Find a suitable location for the amplifier: Choose a secure location in your car where you can mount the amplifier. Ensure that it is well-ventilated to prevent overheating.
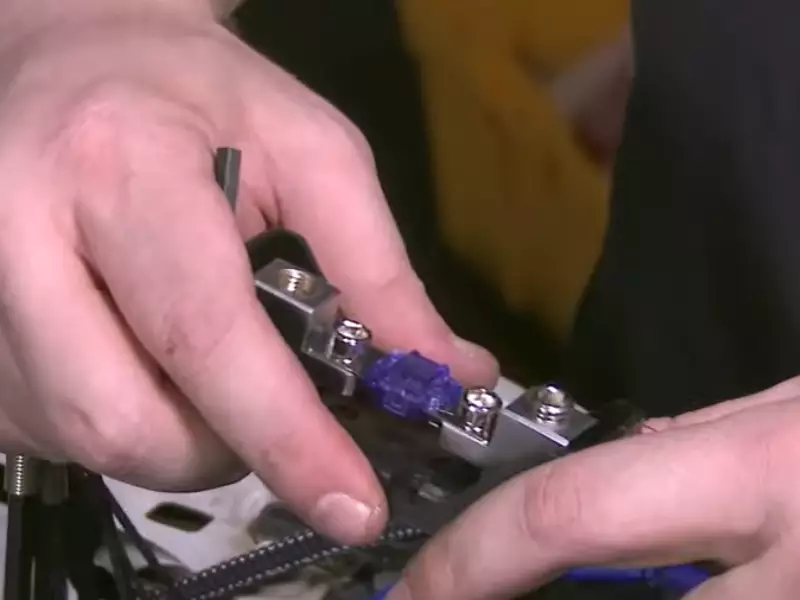
- Connect the RCA cables: Locate the RCA outputs on your head unit or amplifier, and connect them to the RCA inputs on your amplifier. These cables carry the audio signal from your head unit to the amplifier.
- Connect the speaker wires: Connect the speaker wires from your amplifier to the speakers. Make sure to match the positive and negative terminals correctly to avoid phase issues.
- Ground the amplifier: Attach a grounding wire from the amplifier to a clean, bare metal surface in your car. This will help eliminate any interference or humming noise.
Adjusting the Amplifier Settings
Once you have connected the amplifier to the audio system, it’s important to adjust the settings for optimal sound quality. Follow these steps:
- Set the gain control: Adjust the gain control on your amplifier to match the output voltage of your head unit. This will ensure that your amplifier receives a clean and undistorted signal.
- Adjust the crossover settings: If your amplifier has crossover settings, adjust them according to the type of speakers you have installed. This will help route the appropriate frequencies to the correct speakers, optimizing sound production.
- Fine-tune the equalizer settings: If your amplifier has an equalizer, adjust the settings to enhance specific frequency ranges. This can help compensate for any deficiencies in your audio system and tailor the sound to your preferences.
Installing a car amplifier may seem challenging at first, but by following these steps, you can achieve great sound quality in your vehicle. Remember to take your time, double-check your connections, and prioritize safety throughout the installation process. Happy listening!
Wiring The Power Connection
When it comes to installing a car amplifier, one of the most crucial steps is wiring the power connection. Understanding the power requirements and using the correct gauge of wiring is essential to ensure optimal performance and avoid any potential damage to your amplifier or vehicle’s electrical system. In this section, we will delve into the details of how to connect the amplifier to the car battery, install and secure the power wire, and ensure a proper power connection.
Understanding the power requirements and wiring gauge
The first step in wiring the power connection for your car amplifier is to understand the power requirements of your amplifier and select the appropriate wiring gauge. Each amplifier has a specific power requirement, typically measured in watts. To determine the correct wiring gauge, you need to consider the power output of your amplifier and the length of the power wire.
Here’s a handy table to help you select the suitable wiring gauge based on the power output:
| Power Output (Watts) | Wiring Gauge (AWG) |
|---|---|
| Less than 200 | 10 |
| 200 – 400 | 8 |
| 400 – 1,000 | 4 |
| 1,000 – 2,000 | 2 |
Once you have determined the appropriate wiring gauge, you can move on to connecting the amplifier to the car battery.
Connecting the amplifier to the car battery
To ensure a reliable power connection, you’ll need to connect the amplifier directly to the car battery. This direct connection minimizes the risk of interference and voltage drops. Here’s a step-by-step guide to connecting the amplifier:
- Locate the car battery and identify the positive and negative terminals.
- Disconnect the negative terminal of the battery to avoid any accidental short circuits.
- Connect the power wire from the amplifier’s positive terminal to the positive terminal of the car battery.
- Secure the connection tightly using an appropriate connector or terminal.
- Connect the ground wire from the amplifier’s negative terminal to a suitable grounding point on the vehicle’s chassis.
- Ensure a solid and clean connection by removing any paint or rust from the grounding point.
- Reconnect the negative terminal of the car battery.
Now that the amplifier is connected to the car battery, the next step is to install and secure the power wire to avoid any potential hazards.
Installing and securing the power wire
Proper installation and securing of the power wire are crucial for the safety of your amplifier and the vehicle. Follow these steps to install and secure the power wire:
- Route the power wire from the amplifier’s location to the car battery. Make sure to avoid any moving parts, sharp edges, or hot surfaces.
- Use wire loom or protective tubing to shield the power wire from potential damage.
- Secure the power wire using zip ties or clips at regular intervals along the route.
- Keep the power wire away from audio cables or other sensitive components to prevent interference.
By following these steps, you can ensure a proper power connection for your car amplifier, allowing it to operate at its full potential without any electrical issues. Taking the time to understand the power requirements, selecting the correct wiring gauge, and proper installation will result in a reliable and enjoyable car audio experience.
Connecting The Amplifier To The Audio System
Once you have installed your car amplifier and secured it in place, it’s time to connect it to your audio system. This step is crucial as it determines the quality of sound you will get from your speakers. In this section, we will discuss how to locate and connect the audio input source, connect the amplifier to the head unit or receiver, and how to route and organize the audio cables.
Locating and Connecting the Audio Input Source
Before connecting your amplifier to the audio system, you need to find the audio input source. Typically, this is the head unit or receiver of your car’s stereo. To locate it, follow these steps:
- Start by removing the trim panel surrounding the head unit or receiver.
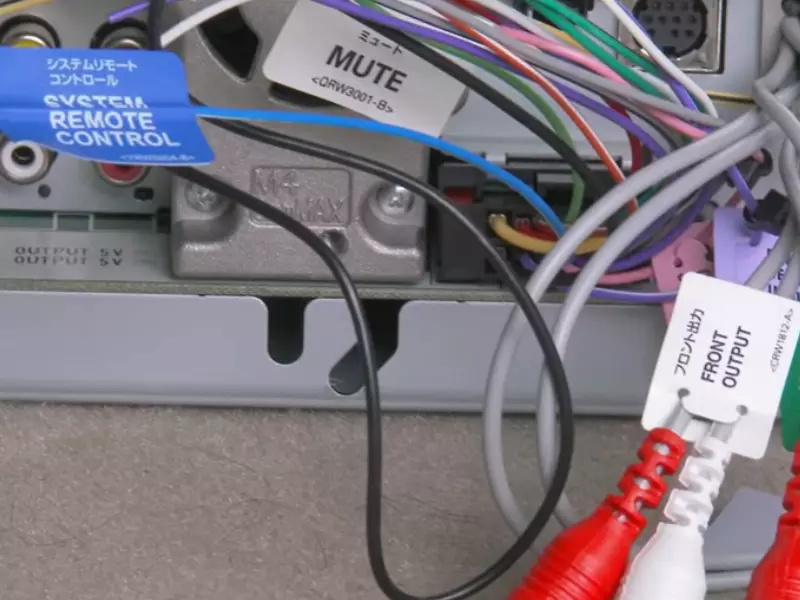
- Locate the RCA or speaker level outputs on the back of the head unit.
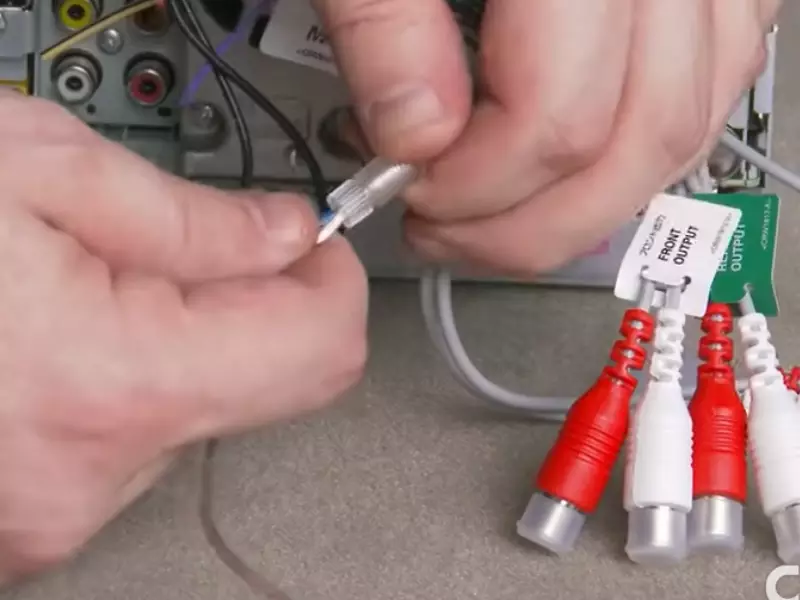
- If your head unit has RCA outputs, use RCA cables to connect the outputs to the amplifier’s RCA inputs. Make sure to match the right and left channels correctly.
- If your head unit only has speaker level outputs, you’ll need to use speaker wire to connect them to the amplifier’s speaker level inputs. Strip the ends of the wires and connect them securely.
Connecting the Amplifier to the Head Unit or Receiver
Once you have located the audio input source and connected it to the amplifier, it’s time to connect the amplifier to the head unit or receiver. Follow these steps:
- Find the RCA outputs on the amplifier and connect them to the RCA inputs on the head unit or receiver. Make sure to match the right and left channels correctly.
- Alternatively, if your head unit or receiver has a dedicated subwoofer output, you can connect it to the corresponding input on the amplifier.
- Secure all the connections by tightening the RCA connectors or using electrical tape to prevent any potential issues.
Routing and Organizing the Audio Cables
Properly routing and organizing the audio cables is essential to ensure optimum performance and minimize interference. Here are some tips:
- Choose the shortest route possible for the audio cables to minimize the chances of signal degradation.
- Avoid running the audio cables parallel to power cables, as this can introduce unwanted noise.
- Use insulated cable clamps or zip ties to secure the cables and keep them tidy.
- If necessary, use cable conduits to protect the cables and enhance the overall appearance.
By following these steps and tips, you can effectively connect your car amplifier to the audio system and enjoy enhanced sound quality in your vehicle.
Adjusting The Amplifier Settings
Setting the gain control for optimal audio performance
When installing a car amplifier, one of the crucial steps to achieving optimal audio performance is setting the gain control properly. The gain control determines how much signal is being sent to the amplifier, and if it’s set too low, you may not take advantage of the full power of the amp. On the other hand, if it’s set too high, it can lead to distorted, clipped sound.
To adjust the gain control, start by playing a song with a consistent volume level. Connect a digital multimeter to the speaker outputs of the amplifier, ensuring the meter is set to measure AC voltage. Gradually turn up the gain control until the multimeter shows the desired voltage level according to your amplifier’s specifications. It’s important to refer to the amplifier’s manual for the recommended voltage range.
Configuring crossover settings for different frequency ranges
Another important aspect of adjusting the amplifier settings is configuring the crossover settings. Crossover settings determine which frequencies are sent to which speakers in your car audio system. By properly configuring these settings, you can ensure that different frequency ranges are played through the appropriate speakers, resulting in a well-balanced sound.
There are typically two types of crossovers – high-pass and low-pass. High-pass crossovers allow frequencies above a certain point to pass through, while low-pass crossovers allow frequencies below a certain point to pass through. The crossover points for each speaker can be adjusted to match the speaker’s capabilities and the overall sound you desire.
To configure the crossover settings, consult the amplifier’s manual for the recommended crossover points and adjust the crossover controls accordingly. It may involve setting the frequency using dials or switches on the amplifier.
Fine-tuning other amplifier parameters as needed
In addition to gain control and crossover settings, there may be other amplifier parameters that you can fine-tune to further enhance the audio performance. These parameters can vary depending on the specific amplifier model you are using.
For example, some amplifiers offer the ability to adjust the bass boost, allowing you to achieve a stronger and punchier bass response. Other amplifiers may have additional controls for equalization, allowing you to adjust the audio frequencies to your personal preferences.
To fine-tune these parameters, refer to the amplifier’s manual and experiment with small adjustments. It’s essential to listen to the changes in sound and make adjustments gradually to ensure you achieve the desired audio quality.
Testing And Troubleshooting
Testing and Troubleshooting
Once you have successfully installed your car amplifier, it is important to test and troubleshoot the installation to ensure optimal performance. This will help you identify any issues and make necessary adjustments to ensure your amplifier is functioning properly.
After installing the car amplifier, it is crucial to test the installation to ensure everything is working as intended. Follow these steps to test the amplifier:
- Check the power connection: Ensure that the power wires are securely connected to the amplifier and the battery. Verify that the fuse is intact by visually inspecting it.
- Turn on the car audio system: Start the car’s engine and turn on the audio system. Slowly increase the volume to check if the amplifier produces sound.
- Check the speaker connections: Verify that the speaker wires are properly connected to the amplifier and the speakers themselves. Ensure that there are no loose connections or wires touching each other.
- Test different audio sources: Connect different audio sources, such as CDs or mobile devices, to the amplifier. Play various types of music to ensure the amplifier can handle different frequencies and volumes effectively.
- Inspect for distortion or overheating: Pay attention to any distortion or overheating issues. If you notice any distortion or the amplifier becomes excessively hot, it may require adjustments or additional cooling.
Even with careful installation, it is possible to encounter certain issues. Here are some common problems you may encounter and ways to troubleshoot them:
| Issue | Troubleshooting Steps |
|---|---|
| No sound from the speakers |
|
| Distorted sound |
|
| Amplifier overheating |
|
Once you have tested and troubleshoot the amplifier installation, it is important to ensure its proper functioning and performance. Here are some additional steps:
- Regularly inspect the amplifier and speaker connections for any signs of wear or damage.
- Keep the amplifier and other components clean and free from dust or debris.
- Monitor the amplifier’s temperature and avoid extended periods of high-volume usage to prevent overheating.
- Periodically check the power and ground connections to ensure they remain secure.
- Stay updated with the manufacturer’s guidelines and recommendations for maintenance and servicing.
By following these testing, troubleshooting, and maintenance steps, you can ensure that your car amplifier performs optimally, delivering the best audio experience while on the road.
Testing The Amplifier Installation
Verifying the audio output from the speakers
Once you have successfully installed an amplifier in your car, it is crucial to test the audio output from the speakers to ensure everything is working correctly. The verification process allows you to identify any potential issues and make any necessary adjustments for optimal sound quality.
To verify the audio output, follow these steps:
- Play a variety of music genres at different volume levels. This will help you assess how well the amplifier handles varying frequencies and power requirements.
- Listen carefully to each speaker. Are they producing clear sound with no distortion or static? If you notice any issues, you may need to check the wiring connections or troubleshoot the amplifier settings.
- Pay attention to the balance and fade settings. Adjust these features to ensure that the sound is evenly distributed across all speakers.
- Check for any unwanted noise, such as humming or buzzing. These noises could be an indication of a grounding issue or interference. Tackle these problems promptly for a more enjoyable audio experience.
Checking the amplifier’s power and functionality
Before finalizing your amplifier installation, it is essential to test its power and functionality to ensure maximum performance. Here’s what you need to do:
- Inspect the power connections. Ensure that there are no loose connections or frayed wires. A secure connection will guarantee a stable power supply to your amplifier.
- Use a multimeter to measure the voltage at the amplifier’s power terminal. This will indicate whether the amplifier is receiving the correct amount of power.
- Check the amplifier’s protection features. Ensure that the thermal protection, short circuit protection, and overload protection are functioning correctly.
- Test the amplifier’s remote turn-on function. This feature allows the amplifier to turn on and off automatically with your car’s ignition. If the amplifier is not powering on or off as expected, troubleshoot the remote turn-on wiring.
Conducting a sound quality assessment
Once you have verified the audio output and checked the amplifier’s power and functionality, it’s time to conduct a sound quality assessment. This step will help you fine-tune your audio system for the best possible listening experience.
Consider the following tips:
- Experiment with different equalizer settings. Adjust the bass, treble, and midrange frequencies to achieve your desired sound signature.
- Test the audio system’s performance at various listening positions in your car. Do certain locations produce better sound quality than others? Adjust the speaker angles and positions if necessary.
- Pay attention to the overall clarity and detail of the sound. Are the vocals clear and the instrumentals well-defined? If not, you may need to make further adjustments to the equalizer or consider upgrading your speakers.
- Invite a friend to listen to your audio system and provide feedback. A second opinion can help you identify any areas for improvement that you may have overlooked.
By thoroughly testing your amplifier installation and conducting a sound quality assessment, you can ensure that your car’s audio system performs at its best. Enjoy the enhanced audio experience on your drives and take pride in your successful amplifier installation!
Troubleshooting Common Issues
Installing a car amplifier can greatly enhance your audio system, but sometimes issues can arise that hinder its performance. In this section, we will address some common problems that you may encounter and provide step-by-step solutions to help you get your amplifier working smoothly.
Identifying and resolving wiring connection problems
One of the first things you should check if you’re experiencing issues with your car amplifier is the wiring connections. Loose or incorrect connections can result in poor sound quality, intermittent operation, or even complete failure. Here are some steps you can take to identify and resolve wiring connection problems:
- Inspect the power connections: Make sure that the power cable is securely connected to the amplifier’s power input terminal and properly grounded. Check for loose connections or signs of corrosion.
- Verify the speaker connections: Ensure that the speaker wires are connected to the appropriate terminals on the amplifier and speakers. Look for loose connections or damaged wires that may be causing the problem.
- Check the RCA connections: If you are using RCA cables to connect the amplifier to the head unit, make sure they are securely plugged into the correct inputs on both devices.
- Inspect the remote turn-on wire: Ensure that the remote turn-on wire is connected properly to the head unit’s remote turn-on output, as well as the corresponding input on the amplifier.
- Test the ground connection: A poor ground connection can introduce noise and other issues. Verify that the amplifier’s ground wire is securely connected to a clean, unpainted metal surface on the vehicle’s chassis.
Addressing audio distortion or clipping issues
If you notice distortion or clipping in your audio output, it could indicate an issue with your car amplifier. Here are some steps to help you address these problems:
- Check the gain settings: The gain control on the amplifier adjusts the input sensitivity, and incorrect settings can cause distortion. Ensure that the gain is set properly according to your system’s requirements.
- Inspect the speaker impedance: If your amplifier is not compatible with the impedance of your speakers, it can lead to distortion. Confirm that the amplifier and speakers have matching impedance ratings.
- Upgrade the power supply: In some cases, audio distortion can occur due to insufficient power supply. Consider upgrading your vehicle’s alternator or battery to provide adequate power to the amplifier.
Dealing with noise or ground loop problems
Noise or ground loop issues can be frustrating when trying to enjoy your music. Follow these steps to help eliminate these problems:
- Check for ground loop: Ground loops can cause a buzzing or humming noise. To troubleshoot, disconnect any additional audio accessories connected to the car’s electrical system, such as chargers or GPS devices.
- Install a ground loop isolator: If disconnecting accessories doesn’t solve the problem, consider installing a ground loop isolator between the head unit and the amplifier.
- Separate audio and power cables: Routing audio cables away from power cables can help minimize interference and reduce the chance of ground loop issues.
By following these troubleshooting steps, you can effectively address common issues that may arise when installing a car amplifier. Remember to double-check all connections and settings during the troubleshooting process to ensure a successful installation.
Ensuring Proper Functioning And Performance
In order to maximize the sound quality and performance of your car amplifier, it is crucial to take certain measures that ensure proper functioning and long-term reliability. By making necessary adjustments based on the audio performance, securing all wiring and connections, and regularly maintaining and caring for the car amplifier, you can enjoy a satisfying audio experience every time you hit the road.
Making necessary adjustments based on the audio performance
Once you have installed your car amplifier, it is important to properly adjust its settings to achieve the desired audio performance. Fine-tuning the amplifier can make a significant difference in sound quality. To do this, follow these steps:
- Start by adjusting the gain control, which determines the input level of the amplifier. Set it to a level that allows the amplifier to reach its maximum potential without distorting the sound.
- Next, adjust the low-pass and high-pass filters to ensure that the amplifier only reproduces the desired frequency range. This helps eliminate any unwanted noise or distortion.
- Lastly, adjust the bass boost, if available, to enhance the low-frequency response. Be cautious not to overdo it, as excessive boost can lead to distortion or damage to your speakers.
Securing all wiring and connections for long-term reliability
Properly securing all wiring and connections is crucial for the long-term reliability of your car amplifier. Loose or poorly connected wires can lead to electrical issues, sound quality problems, and even potential damage to your amplifier. Follow these steps to ensure secure connections:
- Start by double-checking all the connections between the amplifier and the car’s audio system. Make sure that all connections are tight and secure, and that there is no exposed wiring.
- Use zip ties or cable clamps to neatly organize and bundle the wires. This not only prevents them from getting tangled but also reduces the risk of accidental damage or disconnection.
- Consider using electrical tape or heat-shrink tubing to protect exposed wires and prevent any short circuits.
Regular maintenance and care for the car amplifier
To ensure the longevity and optimal performance of your car amplifier, it is important to perform regular maintenance and care. By following these simple tips, you can keep your amplifier in top shape:
- Clean the amplifier regularly using a soft cloth to remove any dirt or dust that may accumulate over time. Remember to turn off the amplifier and disconnect it from the power source before cleaning.
- Inspect the amplifier’s cooling fans to ensure they are clean and free from any obstruction. Blocked or malfunctioning fans can cause overheating, which can lead to amplifier failure.
- Check for any signs of damage or wear on the amplifier’s casing or connectors. If you notice any issues, address them promptly to prevent further damage.
By following these guidelines and regularly maintaining your car amplifier, you can ensure its proper functioning, optimal performance, and longevity. Take the time to make necessary adjustments based on audio performance, secure all wiring and connections, and provide regular care to enjoy the best audio experience on the road.
Frequently Asked Questions Of How To Install Car Amplifier
How Do You Hook Up A Car Amplifier?
To hook up a car amplifier, connect the power and ground wires to the battery and chassis, respectively. Then, run the RCA cables from the head unit to the amplifier’s input, and connect the speaker wires to the amplifier’s output.
Finally, adjust the settings and test the system.
Is It Easy To Install A Car Amplifier?
Yes, installing a car amplifier is easy. You just need to follow the instructions provided with the amplifier, connect it to the car’s electrical system, and then connect it to your speakers. It’s a straightforward process that can be done by most car owners.
How Do I Supply Power To My Car Amp?
To supply power to your car amp, connect it directly to your car battery using a power cable with an inline fuse. Make sure to use the appropriate gauge wire for your amp’s power requirements. It’s important to follow the manufacturer’s instructions and consult a professional if needed.
How Much Does It Cost To Install An Amplifier In A Car?
Installing an amplifier in a car usually costs around $100 to $400. Prices may vary depending on factors like the brand and quality of the amplifier, additional features, and the complexity of installation. It is recommended to consult a professional for an accurate quote.
Conclusion
To conclude, installing a car amplifier is a simple task that can greatly enhance your audio experience on the road. By following the step-by-step guide outlined in this blog post, you can ensure a seamless installation process. Remember to gather the necessary tools, carefully connect the wires, and secure everything properly.
With a bit of patience and attention to detail, you’ll be enjoying your upgraded sound system in no time. Happy amplifying!