To install a car amp, first, disconnect the negative terminal of the car battery. Then, connect the power, ground, and remote turn-on wires of the amp to their respective locations in the car.
Car amplifiers enhance the audio performance of your car’s sound system by increasing the power to your speakers. While it may seem daunting at first, installing a car amp can be done with a few simple steps. We will guide you through the process of installing a car amp, ensuring that your audio experience is taken to the next level.
So, let’s get started and learn how to install a car amp in a quick and hassle-free way.
Understanding Car Amplifiers
Installing a car amplifier is an excellent way to enhance your car audio system’s sound quality and overall performance. However, to make the right choice and get the most out of your investment, it is crucial to have a solid understanding of what car amplifiers are and why they are important. In this article, we will delve into the world of car amplifiers, covering topics such as what they are, the different types available, and the benefits they offer.
What is a car amplifier and why is it important?
A car amplifier, also known as an amp, is an electronic device designed to increase the power of audio signals before sending them to the speakers. It takes the low-power signals from the car stereo system and amplifies them to a higher power level, resulting in cleaner, louder, and more detailed sound reproduction.
The importance of a car amplifier cannot be overstated when it comes to maximizing the potential of your car’s audio system. While car stereos come with built-in amplifiers, they are often limited in power and can result in distorted sound at higher volumes. By adding a dedicated amplifier, you can enjoy increased power output, improved sound clarity, enhanced bass response, and a more immersive listening experience.
Different types of car amplifiers and their features
Car amplifiers come in various types, each catering to different audio needs and preferences. Here are three common types of car amplifiers:
- Monoblock Amplifiers: These amplifiers are specifically designed for powering subwoofers and are characterized by their ability to deliver high power in a compact size. With their mono channel configuration, monoblock amplifiers excel at producing deep, punchy bass tones.
- Multi-channel Amplifiers: As the name suggests, multi-channel amplifiers offer multiple channels or outputs, allowing you to power a combination of speakers. They are versatile and can be used to enhance both the low and high-frequency ranges, making them suitable for enthusiasts who desire a well-balanced audio system.
- Full-range Amplifiers: These amplifiers are designed to power all the speakers in your car audio system, including subwoofers, mid-range, and tweeters. They offer a comprehensive solution for those seeking to improve the overall sound quality across all frequency ranges.
Benefits of installing a car amplifier
There are various advantages to installing a car amplifier, including:
- Increased Power Output: Adding a dedicated car amplifier allows you to drive your speakers at higher volumes without sacrificing sound quality, resulting in a more immersive and enjoyable listening experience.
- Improved Sound Clarity: A car amplifier provides cleaner amplification of audio signals, reducing distortion and ensuring that every detail in the music is reproduced accurately.
- Enhanced Bass Response: By increasing the power to your subwoofers, a car amplifier can deliver deep, impactful bass that adds depth and richness to your audio.
- Customizable Sound: With a dedicated amplifier, you have more control over the sound output. You can fine-tune the settings to optimize the audio for your specific preferences, whether you prefer a bass-heavy or a more balanced sound.
- Flexibility: Car amplifiers come in various sizes and configurations, allowing you to choose the one that best fits your car audio system’s needs and available space.
In conclusion, understanding car amplifiers is essential before diving into the installation process. By knowing what car amplifiers are, the different types available, and the benefits they offer, you can make an informed decision and elevate your car audio experience to new heights.
Choosing The Right Car Amplifier
Determining the power requirements for your vehicle
Before selecting a car amplifier, it is crucial to determine the power requirements for your vehicle. One of the key factors to consider is the power output of the amplifier, which is typically measured in watts. It is important to match the amplifier’s power output with the power requirements of your car’s audio system to ensure optimal performance and avoid any potential damage.
To determine the power requirements, you can start by checking the specifications of your car’s speakers and head unit. Look for the RMS power ratings, which indicate the continuous power handling capability. It is advisable to choose an amplifier with an RMS power rating that matches or slightly exceeds the RMS power rating of your speakers and head unit. This will ensure that the amplifier delivers enough power to drive the speakers without causing distortion or clipping.
In addition to the power output, it is also important to consider the impedance (measured in ohms) of your speakers. Most car audio systems have speakers with an impedance of either 4 ohms or 2 ohms. Make sure to select an amplifier that is compatible with your speaker’s impedance to avoid any compatibility issues.

Matching the amplifier with your car’s audio system
Matching the amplifier with your car’s audio system involves considering factors such as the number of channels and the amplifier’s class. The number of channels refers to the number of speakers the amplifier can power simultaneously. For example, if you have a two-way speaker system (e.g., front door speakers and rear speakers), you would need a 4-channel amplifier to power all four speakers.
When it comes to choosing the amplifier class, you have different options such as Class A, Class B, Class AB, and Class D. Each class has its advantages and disadvantages in terms of power efficiency, heat generation, and audio quality. It’s recommended to do some research and consider your specific needs and preferences before making a decision.
Considering the amplifier’s size and installation options
Lastly, when choosing a car amplifier, it is essential to consider its size and installation options. Amplifiers come in a variety of shapes and sizes, so it’s important to ensure that it will fit comfortably in your vehicle. Measure the available space in your car and check the dimensions provided by the manufacturer to ensure compatibility.
In addition to size, consider the installation options available for the amplifier. Some amplifiers are designed for easy installation and may come with mounting brackets or kits. Others may require custom installation or professional help. Consider your technical skills and the level of complexity you are comfortable with before making a decision.
In conclusion, choosing the right car amplifier requires considering factors such as power requirements, matching with your car’s audio system, and size/installation options. By carefully evaluating these factors, you can ensure that your chosen amplifier delivers the desired audio quality and an enhanced driving experience.
Gathering The Necessary Tools And Equipment
Installing a car amp is a great way to enhance your vehicle’s audio system and enjoy a more immersive and powerful sound experience. Before you dive into the installation process, it’s crucial to gather all the necessary tools and equipment to ensure a successful installation. This section will walk you through the essential tools and additional equipment needed, as well as provide tips for preparing your car before starting the installation.
Essential tools for the installation process
To begin the installation of a car amp, there are a few essential tools that you’ll need to have on hand. These tools will help you with various steps of the installation process, ensuring a smooth and efficient installation. Here are the must-have tools:
- Screwdriver set – Having a set of screwdrivers with different sizes and types is essential for removing panels, securing the amp, and connecting wires.
- Wire crimpers – Wire crimpers are used to secure electrical connections by crimping the metal sleeves onto the wires.
- Wire cutters – Wire cutters will be necessary for trimming and cutting wires to the required lengths.
- Drill with bits – A drill will come in handy if you need to create holes for mounting brackets or running wires through the car’s body.
- Voltmeter – A voltmeter helps you test the voltage and ensure proper connections during the installation process.
By having these essential tools within your reach, you’ll be well-prepared to tackle each step of the car amp installation process without any hassle.
Additional equipment needed for a successful installation
In addition to the essential tools, there are a few additional equipment items that you’ll need to acquire for a successful car amp installation. These items will ensure that the installation is not only functional but also safe and professional-looking. Here’s what you’ll need:
| Additional Equipment | Purpose |
|---|---|
| Car amp wiring kit | Includes all the necessary wires, fuse holders, and connectors for proper power and signal distribution. |
| Speaker wire | Required to connect the amplifier to the speakers and ensure clear and reliable audio transmission. |
| Fuse and fuse holder | Protects the amplifier and the entire electrical system from potential damage caused by power surges or short circuits. |
| Mounting brackets | Secures the amplifier securely in place, preventing any unwanted movement or vibrations. |
Investing in these additional equipment items will not only make the installation process easier but also result in a professional-looking installation that meets safety standards.
Tips for preparing the car before starting the installation
Before you begin the car amp installation, taking some time to prepare your vehicle can significantly facilitate the process. Here are a few tips to help you get your car ready:
- Clean the interior – A clean and clutter-free interior will give you more space to work and make the installation process more convenient.
- Disconnect the battery – Safety should be your top priority. Disconnecting the car battery will protect both you and the electrical components from potential accidents.
- Plan the wiring route – Determine the best path for running the amp’s power and audio signal wires to ensure a clean and organized installation.
- Remove panels if necessary – If you need to access certain areas of your car for running wires or mounting the amp, remove the necessary panels carefully.
By following these tips and preparing your car beforehand, you’ll be setting the stage for a smooth and hassle-free car amp installation.
Preparing The Wiring For Installation
Installing a car amplifier is an excellent way to enhance your audio system’s sound quality and overall performance. However, before you can enjoy the benefits of a powerful amplifier, it’s important to properly prepare the wiring for installation. This involves various steps, including locating the ideal placement for the amplifier, running the power cable from the battery to the amplifier, and connecting the amplifier to the car’s audio system.
Locating the ideal placement for the amplifier
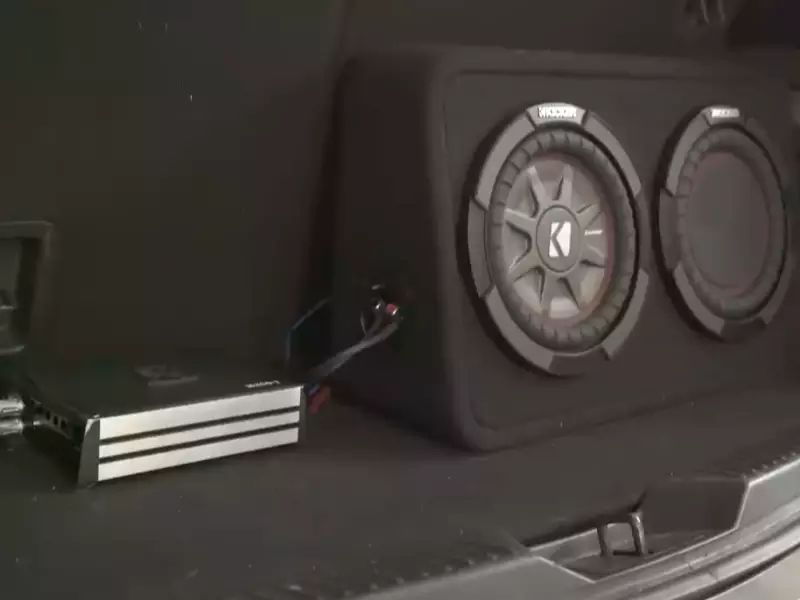
In order to achieve optimal performance and ensure the longevity of your car amplifier, it’s crucial to find the ideal placement within your vehicle. One of the most common locations to install an amplifier is in the trunk, as it provides sufficient space and reduces the risk of damage.
When selecting a spot in the trunk, choose an area that is away from potential moisture or direct sunlight exposure. You can also consider using shock-absorbing foam or brackets to secure the amplifier and minimize vibrations.
Running the power cable from the battery to the amplifier
Running the power cable is a fundamental step to ensure that your amplifier receives the necessary voltage to function effectively. Before starting this process, make sure to disconnect the negative terminal of your car’s battery to prevent any electrical mishaps.
- Identify a convenient pathway from the battery to the amplifier location. Ensure that the route avoids any moving parts or excessive heat sources.
- Using a power drill, create a small hole through the fire-resistant barrier between the engine bay and the cabin.
- Feed the power cable through the hole and route it to the trunk area, ensuring that it is securely fastened and away from any potential hazards.
- Before connecting the power cable to the amplifier, install an appropriate fuse near the battery terminal to protect the amplifier from power surges or short circuits.
Connecting the amplifier to the car’s audio system
After the power cable is properly installed, the next step is to connect the amplifier to your car’s audio system. This enables the amplifier to receive audio signals and amplify them to produce high-quality sound.
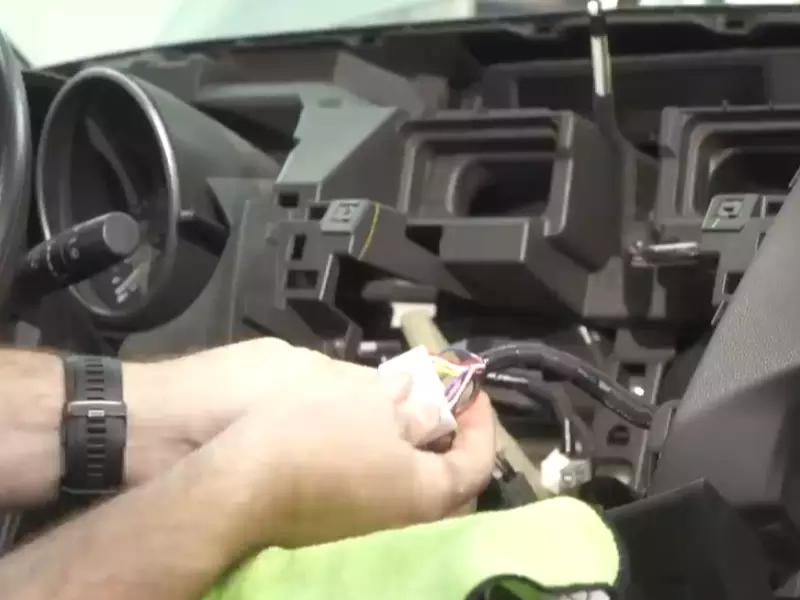
Start by locating the “head unit” of your car’s audio system. This is typically the dashboard component that controls the radio, CD player, or other audio sources. To connect the amplifier:
- Identify the RCA output jacks on the back of the head unit. These are usually labeled as “line out” or “pre-out.”
- Use RCA cables to connect the output jacks of the head unit to the corresponding RCA input jacks on the amplifier. Ensure a secure and tight connection.
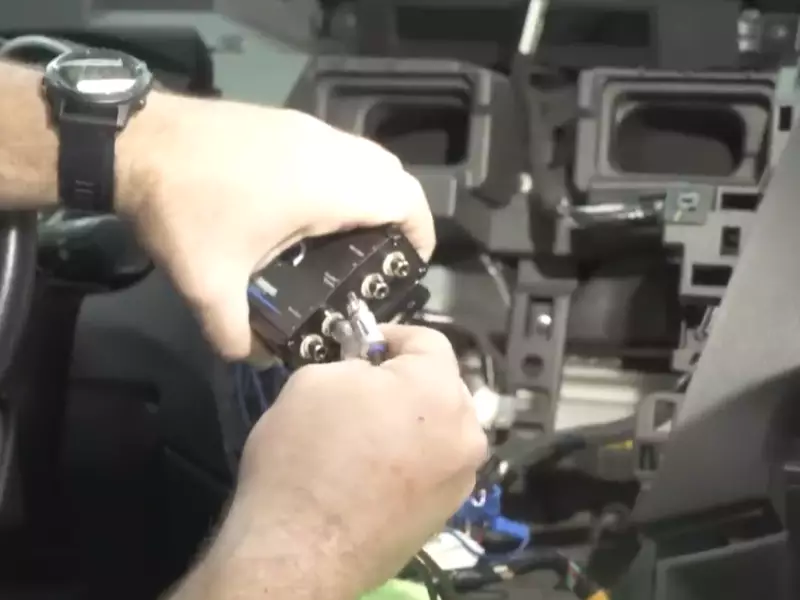
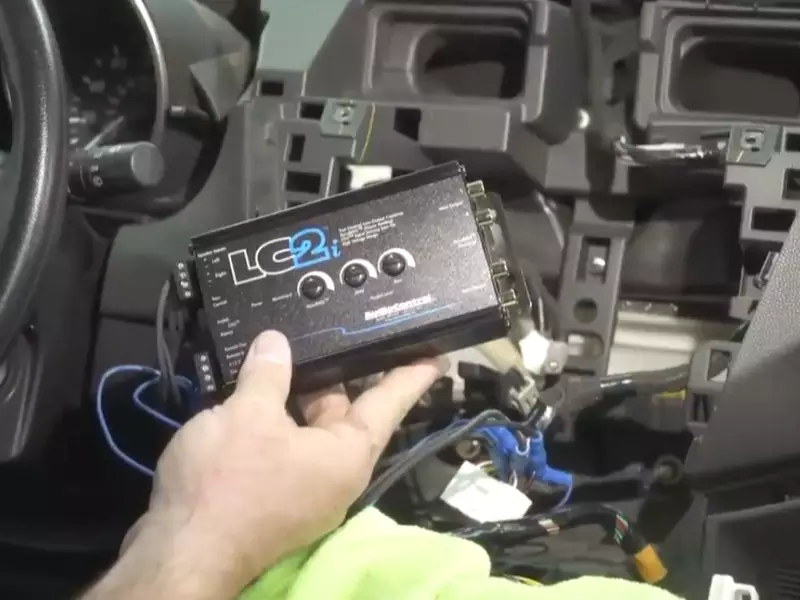
- If your head unit doesn’t have RCA output jacks, you can use a line output converter (LOC) to connect the amplifier to the speaker outputs.
- Lastly, connect the speaker wires from the amplifier to the corresponding speakers in your car. Ensure that the polarity is correct to achieve balanced sound reproduction.
Once all the connections are made, double-check the wiring to confirm everything is secure. Then, reconnect the negative terminal of your car’s battery and turn on your audio system to enjoy the boosted sound quality provided by your new amplifier.
Installing The Car Amplifier
Installing the car amplifier is an essential step in upgrading your car’s audio system and enhancing the overall sound quality. A properly installed amplifier can provide your speakers and subwoofers with the power they need to deliver clear, crisp audio. In this section, we will guide you through the process of installing a car amplifier, covering everything from mounting the amplifier in its designated location to wiring the speakers and subwoofers.
Mounting the amplifier in the designated location
To begin the installation process, you need to find a suitable location for mounting your car amplifier. Ensure that the location is well-ventilated to prevent overheating and within reach of the power and speaker wires. It is also important to consider any vibrations or potential damage from objects in your vehicle.
You can mount the amplifier using brackets or screws, depending on the design of your amplifier and your vehicle. Make sure to follow the manufacturer’s instructions for mounting to ensure a secure and sturdy installation.
Connecting the amplifier to the power source and ground
Once you have mounted the amplifier, it’s time to connect it to the power source and ground. This step is crucial for ensuring the amplifier receives the necessary power and functions properly.
You will need to connect the power wire from the amplifier’s positive terminal to the positive terminal of your car battery. Select an appropriate gauge wire, depending on the power requirements of your amplifier. Remember to use a fuse near the battery connection point for added protection.
The ground connection is just as important as the power connection. Locate a solid metal surface close to the amplifier for grounding. Remove any paint or coating from the surface to establish a solid metal-to-metal connection. Then, connect the ground wire from the amplifier’s negative terminal to the ground point. Make sure the ground wire is securely fastened to prevent any potential electrical issues.
Wiring the speakers and subwoofers to the amplifier
With the amplifier properly connected to power and ground, you can now focus on wiring your speakers and subwoofers.
Start by identifying the positive and negative terminals on your speakers and subwoofers. These are usually indicated by a plus (+) and minus (-) symbol. Match the positive terminal of each speaker or subwoofer with the corresponding positive output on the amplifier. Repeat this process for the negative terminals, ensuring a secure and proper connection.
If you have multiple speakers or subwoofers, you may need to use speaker wire with connectors or a distribution block to simplify the wiring process. This will help maintain a clean and organized installation.
Remember to double-check all your connections to ensure they are secure and free from any loose wires. This will help prevent any potential audio issues or damage to your amplifier or speakers.
Once you have successfully connected your speakers and subwoofers to the amplifier, it’s time to test the system and fine-tune the audio settings to your preference. Enjoy the improved audio experience and cruising with your favorite tunes!
Testing And Fine-Tuning The Installation
Once you have successfully installed your car amplifier, your job is not yet complete. Testing and fine-tuning the installation is an essential step to ensure optimal performance and a great listening experience. In this section, we will discuss two crucial tasks: checking the connections for any issues or loose wires, and adjusting the amplifier settings for optimal performance.
Checking the connections for any issues or loose wires
Before testing your car amp, it is essential to double-check all the connections to ensure they are secure and free from any issues. This step is important as loose or faulty connections can lead to poor sound quality or even damage your audio system. Follow these steps to check your connections:
- Inspect all the wires and terminals connected to the amplifier, ensuring they are firmly attached.
- Make sure there are no loose wires or exposed metal that could cause a short circuit.
- Check the power and ground connections, ensuring they are tightly connected and free from corrosion.
- Inspect the RCA cables, ensuring they are securely plugged into the amplifier and head unit.
- If you are using speaker wire connections, ensure they are properly connected to the amplifier’s speaker output terminals and the speakers themselves.
By thoroughly checking the connections, you can prevent any potential issues and ensure a smooth and uninterrupted listening experience.
Adjusting the amplifier settings for optimal performance
Once your connections are secure, it’s time to fine-tune the amplifier settings to achieve the best sound quality. Every amplifier has different settings, so refer to your amplifier’s manual for specific instructions. However, here are some general steps to adjust the settings:
- Start by setting the gain or input sensitivity control. This control determines how much signal the amplifier receives from the head unit. Set it to match your head unit’s output voltage.
- Adjust the high pass and low pass filters to ensure that only the desired frequency range is coming out of the speakers. This will prevent distortion and unwanted sound.
- Experiment with the equalizer settings to fine-tune the sound according to your preferences. Increase or decrease specific frequency ranges to enhance bass, treble, or mid-range.
- Consider using a bass boost feature if available, but use it sparingly to avoid overpowering the sound.
By adjusting these settings, you can optimize the performance of your car amplifier and tailor the sound to your liking.
Testing the audio system to ensure proper functionality
After double-checking the connections and fine-tuning the settings, it’s time to test the audio system to ensure everything is working correctly. Here’s what you need to do:
- Start with a low volume and gradually increase it, paying attention to any distortion or unusual noises.
- Check each speaker individually by playing sound through it and ensuring it produces clear and balanced sound.
- Test different audio sources, such as radio, CD, or Bluetooth, to make sure the amplifier works seamlessly with all of them.
If you notice any issues during the testing process, revisit the connections and settings to identify and solve the problem. This thorough testing will help you achieve the best sound quality and ensure your car amp installation is a success.
Troubleshooting Common Installation Problems
Setting up a car amplifier can sometimes be a challenging task, even for experienced car enthusiasts. Fortunately, most of the issues you may encounter during the installation process can be easily resolved with a little troubleshooting. In this section, we will explore some common installation problems and provide solutions to help you get your car amp up and running smoothly.
Identifying and resolving potential wiring errors
One of the most common issues that can arise during a car amplifier installation is wiring errors. These errors can lead to connectivity problems, inadequate power supply, or even damage to your car’s electrical system. It is crucial to identify and address them promptly to ensure a successful installation. Here are some steps you can take to resolve potential wiring errors:
- Check the power connections: Make sure that the power wire is securely connected to the positive terminal of your car battery. Check for any loose or damaged connections that may be causing a power failure.
- Verify the ground connection: Ensure that the ground wire is properly connected to a metal part of your car’s chassis. A loose or insufficient ground connection can result in poor audio quality or even damage to your amplifier.
- Inspect the signal cables: Examine the RCA cables running from your car stereo to the amplifier. Look for any visible damage or loose connections that could be causing signal distortion or loss.
- Test the speaker connections: Check the wiring connections between your amplifier and speakers. Make sure that the positive and negative wires are correctly connected to the corresponding terminals to avoid phase cancellation and poor sound quality.
Dealing with amplifier overheating or power issues
Amplifier overheating and power issues are common problems that can occur during the installation process. These issues can lead to system malfunctions, reduced performance, or even permanent damage to your amplifier. Here are some troubleshooting steps to address these problems:
- Ensure proper ventilation: Make sure that your amplifier is installed in a well-ventilated area to prevent overheating. Avoid placing it in areas with limited airflow, such as under the seats or in enclosed compartments.
- Check the power supply: Verify that your car’s electrical system can provide enough power to properly run your amplifier. Consider upgrading to a higher amperage alternator or installing a capacitor to provide a stable power supply.
- Inspect the speaker impedance: Check that your amplifier is compatible with the impedance of your speakers. Mismatched impedance can cause overheating and damage to both the amplifier and speakers.
- Reduce the gain settings: Lower the gain settings on your amplifier to prevent distortion and excessive power draw. Adjusting the gain levels can help optimize performance and minimize the chances of overheating.
Seeking professional help if needed
If you have followed the troubleshooting steps and are still experiencing issues with your car amplifier installation, it may be time to seek professional assistance. A certified car audio technician can diagnose the problem accurately and help you resolve it effectively. Attempting to fix complex issues without the necessary expertise can potentially lead to further damage or safety hazards.
Remember, troubleshooting common installation problems is an essential part of ensuring a successful car amplifier setup. By identifying and resolving any potential wiring errors, dealing with overheating or power issues, and seeking professional help if needed, you can enjoy optimal audio performance in your car. Now, let’s move on to the next section to explore some advanced tips and tricks for maximizing your car amp’s performance.

Safety Tips And Precautions
When it comes to installing a car amplifier, it’s essential to prioritize safety. Working with car electrical systems can be dangerous if not handled properly. To ensure a safe and successful installation, it’s important to take necessary precautions and avoid common mistakes that could potentially damage your car or amplifier.
Taking precautions while working with car electrical systems:
Working with car electrical systems requires caution and attention to detail. Here are some essential precautions to keep in mind during the installation process:
- Ensure that the car’s ignition is turned off before starting any work. This will help prevent any accidental damage to the car’s electrical system.
- Wear protective gear, such as gloves and safety glasses, to protect yourself from any potential hazards or injuries.
- Disconnect the car’s battery to avoid any electrical shock or short-circuiting. It’s crucial to disconnect the negative terminal first, followed by the positive terminal.
- Keep all wires, tools, and components away from any moving parts or hot surfaces in the engine bay. This will prevent potential damage and ensure your safety.
- Carefully read and follow the manufacturer’s instructions and specifications for both the car amplifier and the vehicle. This will help you understand the specific safety measures required for your installation.
Avoiding common mistakes that could damage the car or amplifier:
During the installation process, it’s important to avoid common mistakes that can lead to damage or malfunction. Here are a few mistakes to watch out for:
- Avoid using improper wiring techniques or poor-quality wires. Using subpar wiring can cause overheating, short circuits, or even damage your car’s electrical system.
- Make sure to select the appropriate fuse size for your amplifier. Using an incorrect fuse size can lead to electrical problems or even pose a fire hazard.
- Do not over-tighten screws or connectors when connecting wires. Over-tightening can damage the threads or cause terminals to strip, resulting in poor connections.
- Avoid installing the car amplifier in a location that is susceptible to moisture, excessive heat, or vibrations. These environmental factors can cause damage to the amplifier and affect its performance.
Ensuring a safe and reliable installation:
To ensure a safe and reliable installation of your car amplifier, consider the following tips:
- Securely fasten all connections using appropriate crimp connectors or soldering techniques. Loose connections can result in poor sound quality or even damage your amplifier.
- Use grommets or protective sheathing when routing wires through metal panels or tight areas. This helps prevent wire damage from sharp edges or rubbing against other components.
- Double-check all connections and make sure no wires are pinched or touching any metal surfaces. This will prevent potential shorts and electrical issues.
- Once the installation is complete, reconnect the car’s battery in the reverse order: the positive terminal first, followed by the negative terminal.
- Test the amplifier and audio system before finalizing the installation. This will help identify any potential issues and ensure everything is functioning correctly.
By following these safety tips and precautions, you can have peace of mind knowing that your car amplifier installation will not only be successful but also safe and reliable. Remember, prioritizing safety is crucial to protect both yourself and your vehicle.
Frequently Asked Questions For How To Install Car Amp
How Do I Hook Up An Amp To A Car?
To connect an amp to a car, follow these steps:
- Disconnect the car battery.
- Connect the power wire from the amp to the positive terminal of the battery.
- Ground the amp by connecting the ground wire to a solid metal part of the car’s chassis.
- Connect the remote turn-on wire from the amp to a switched power source.
- Finally, connect the amp to the car’s stereo using RCA cables.
Is It Easy To Install An Amp In A Car?
Yes, installing an amp in a car is relatively easy. By following instructions and using basic tools, you can do it.
How Do I Add An Amp To My Factory Radio?
To add an amp to your factory radio, you will need to connect it using a line output converter (LOC). Locate the speaker wires behind your radio, splice them with the LOC, and connect the LOC to your amp. Adjust the amp’s settings to ensure proper sound output.
Where Should I Put My Amp In My Car?
Place your car amp in a secure location that allows for proper ventilation, such as under a seat or in the trunk. Ensure it is easily accessible for adjustments and wiring. Avoid mounting it on bare metal surfaces to prevent electrical interference.
Conclusion
Installing a car amp can greatly enhance your audio system, providing a high-quality sound experience on the go. By following the step-by-step instructions outlined in this blog post, you can easily install the amp in your car without any hassle.
Remember to gather all necessary tools beforehand and ensure safety precautions are taken throughout the process. So why wait? Upgrade your car’s sound system today and enjoy the ultimate audio experience wherever you go.