To install a Baby Jogger car seat base, simply follow the manufacturer’s instructions carefully. Here is a step-by-step guide on how to correctly install the car seat base for your baby’s safety and comfort.
When it comes to taking your baby on car rides, ensuring their safety is of utmost importance. Installing a car seat base correctly is crucial to providing the necessary protection for your little one. We will guide you on how to install a Baby Jogger car seat base effectively.
By following these simple steps, you can ensure your baby’s safety and peace of mind while traveling. Let’s dive in and learn how to install a Baby Jogger car seat base easily and securely.
Preparing For Installation
When it comes to installing a baby jogger car seat base, prepping for the installation is an essential step that should not be overlooked. Proper preparation ensures a secure and safe installation, providing peace of mind for parents on the go. In this blog post, we’ll guide you through the necessary steps to prepare for installing your baby jogger car seat base.
Choosing the Right Location
Choosing the right location for installing your baby jogger car seat base is crucial for the safety and comfort of your little one. Here are a few factors to consider when selecting a suitable spot:
- Accessibility: Ensure easy access to the car seat base for convenient installation and removal.
- Car Geometry: Consider the shape and slope of the car’s rear seat to find the most level spot.
- Interference: Avoid locations with obstructions such as seat belt buckles, latches, or cup holders that may hinder the installment or usage of the car seat.
Checking Compatibility with Car Seat Model
Before installing the car seat base, it is crucial to check compatibility with your specific car seat model. Here’s how to ensure compatibility:
- Read the Manual: Carefully read the car seat and car seat base instruction manuals to determine compatibility with your car seat model.
- Check Labels and Identifiers: Look for labels or indicators on both the car seat and car seat base that highlight compatibility with each other.
- Verify Dimension Requirements: Ensure that the car seat base fits within the required dimensions provided by the car seat manufacturer.
- Consult Customer Service: If you are unsure or have any questions about compatibility, reach out to the customer service of the car seat manufacturer for further guidance.
By following these steps, you can confidently ensure that your baby jogger car seat base installation goes smoothly. The preparation process plays a vital role in guaranteeing your baby’s safety and comfort during travel. Make sure to keep these considerations in mind to provide a secure and convenient ride for your little one.
Gathering Materials And Tools
Before you begin the installation process, it is essential to gather all the necessary materials and tools. This not only ensures a smooth and hassle-free installation but also guarantees the safety of your little one. In this section, we will discuss the required tools for installation and how to assemble the car seat base components.
Required Tools for Installation
To install your Baby Jogger car seat base, you will need the following tools:
- Screwdriver: Having a screwdriver will make it easier to securely fasten the base to your vehicle’s seat.
- Tape Measure: A tape measure will help you ensure that the car seat base is positioned correctly and at the recommended angle.
- Level: A level is essential for checking the base’s levelness while installing it in your vehicle. This ensures optimal safety for your baby.
- Car Seat Manual: Always refer to the car seat manual for specific instructions and guidelines provided by the manufacturer.
Assembling the Car Seat Base Components
Now that you have all the necessary tools, it’s time to assemble the car seat base components. Follow these steps:
- Step 1: Carefully unpack all the components from the packaging. Ensure that everything is included and in good condition.
- Step 2: Take the car seat base and locate the latch connectors.
- Step 3: Attach the latch connectors to the appropriate anchors in your vehicle. Refer to the car seat manual for the specific anchors’ location.
- Step 4: Securely tighten the latch connectors to ensure stability.
- Step 5: After attaching the latch connectors, adjust the base’s angle to the recommended position. Use the tape measure and level to verify the correct angle.
- Step 6: Once the base is at the correct angle, lock it into place using the adjustable base and secure the base with the designated straps provided.
- Step 7: For additional stability, double-check all connections and ensure that the base is securely installed.
With the car seat base assembled and securely installed, you are one step closer to providing a safe and comfortable ride for your precious little one. In the next section, we will cover how to properly install the car seat onto the base. So, stay tuned!
Installing The Baby Jogger Car Seat Base
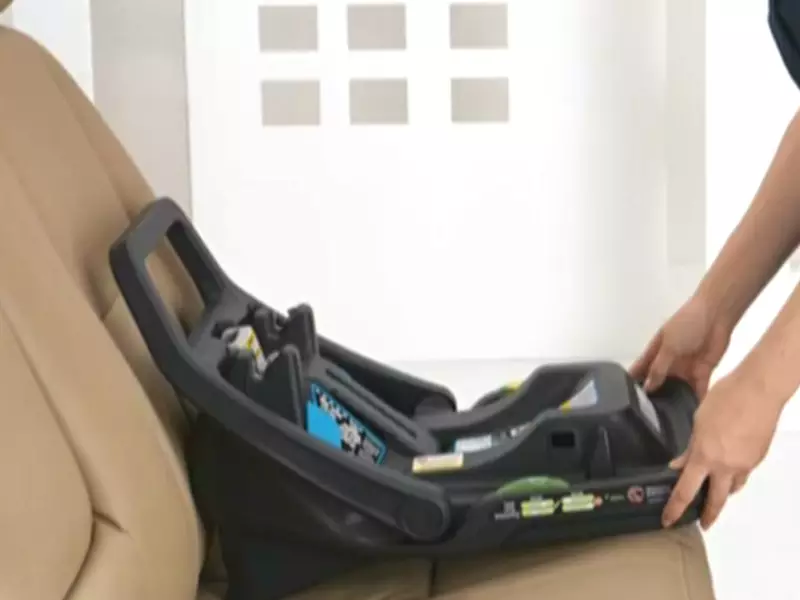
Positioning the Base in the Vehicle
Installing the Baby Jogger Car Seat Base is an important step to ensure your little one’s safety and comfort while traveling. To begin, position the base in your vehicle in a suitable spot. The safest location is typically in the center of the backseat, but if this is not possible, choose the rear passenger side seat as an alternative. Both options offer enhanced protection against side-impact collisions.
Make sure to refer to your vehicle’s manual for specific guidelines on positioning the base and to ensure a proper fit. Take note of any height restrictions or additional safety recommendations provided by the vehicle manufacturer. Remember, the base should be aligned in a way that prevents contact with the front seats, ensuring a secure and stable installation.
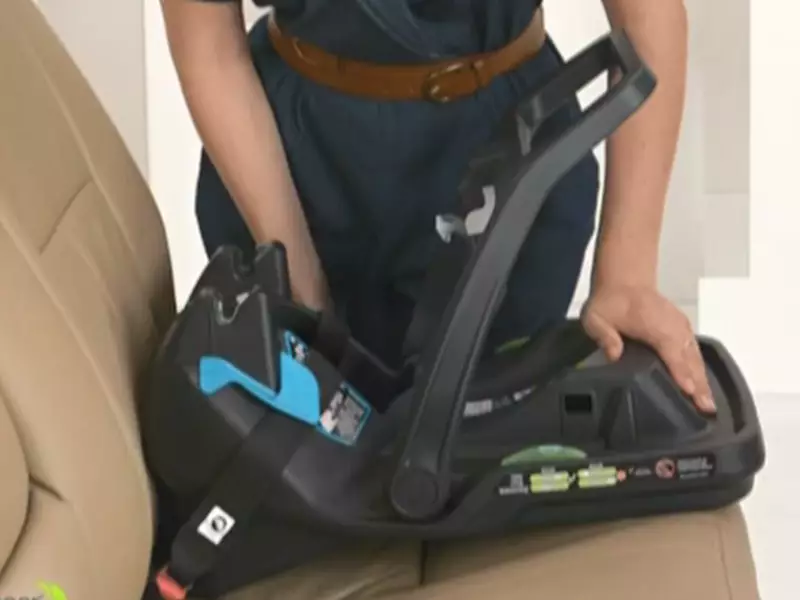
Securing the Base with LATCH System
The LATCH (Lower Anchors and Tethers for Children) system offers convenience and safety when installing your Baby Jogger Car Seat Base. Locate the LATCH anchors in your vehicle, usually indicated by small metal bars or fabric loops between the seat cushions. Attach the base’s LATCH connectors to these anchors, ensuring an audible “click” to confirm a secure connection. To achieve a proper fit, tighten the LATCH straps until the base is snug against the seat.
If your vehicle doesn’t have LATCH anchors, you can use the seat belt installation method instead. Refer to the manufacturer’s instructions for detailed guidance on proper seat belt installation.
Adjusting the Level Indicator
To ensure optimal protection and comfort for your child, it is crucial to adjust the level of the Baby Jogger Car Seat Base. Most bases are equipped with a level indicator, which helps you achieve the correct recline angle. When adjusting the level, ensure that the indicator falls within the designated range for your specific car seat model.
If needed, add a rolled-up towel or pool noodle under the base to achieve the proper angle. A level base is essential for preventing your baby’s head from flopping forward and maintaining their airway. Take the time to double-check the level before moving on to attaching the car seat.
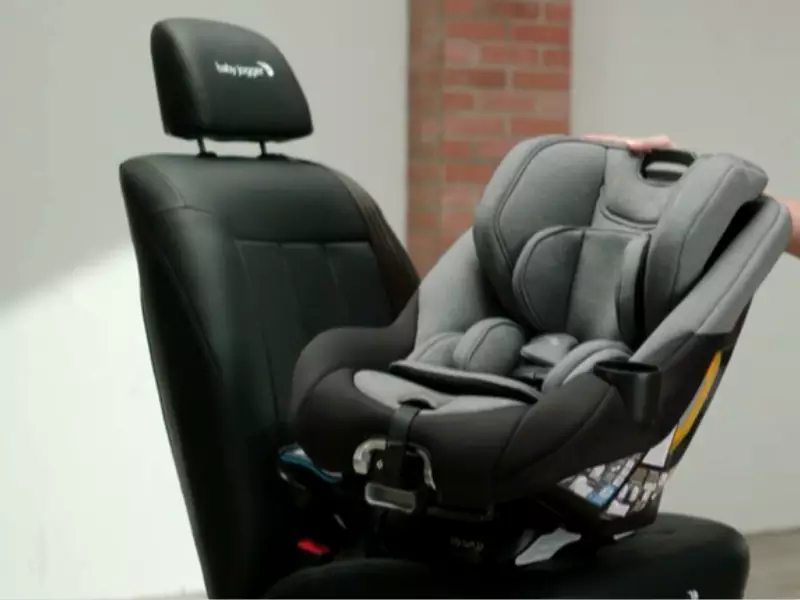
Attaching the Car Seat to the Base
With the base securely installed, it’s time to attach the Baby Jogger Car Seat. Gently place the car seat onto the base, making sure it aligns properly with the connectors. You should feel and hear a reassuring click, indicating that the car seat is securely attached to the base.
Perform a quick shake test to ensure the car seat doesn’t move excessively. If it feels loose or wobbly, double-check the connectors and consult the user manual for troubleshooting tips. Remember, a snug fit is essential to guarantee the utmost safety for your little one during car rides.
Securing the Car Seat with Seat Belt
If you prefer to secure the car seat with a seat belt rather than the LATCH system, follow these steps. Thread the seat belt through the designated pathway on the car seat, ensuring it is properly buckled. Next, pull the seat belt tight and lock it according to your vehicle’s instructions. Test the installation by attempting to move the car seat from side to side and front to back. If it remains secure, you have successfully installed the Baby Jogger Car Seat Base using the seat belt method.
Remember to periodically check and adjust the base and car seat installation as your child grows. Keeping their travel environment safe and secure is of utmost importance for their well-being.
Double-Checking Safety Measures
Installing a baby jogger car seat base is an important step to ensure the safety of your child during car rides. While the installation process might seem straightforward, it’s crucial to double-check a few safety measures to provide optimum protection for your little one. By testing the installation with a firm tug, verifying the base stability, and aligning the car seat harness correctly, you can have peace of mind knowing that your baby is secure and safe. Let’s dive into each of these safety measures in detail.
Testing the Installation with a Firm Tug
After you have securely installed the baby jogger car seat base, it’s essential to test its tightness and stability by giving it a firm tug. Grab the car seat at the base and try to move it side-to-side and forward-backward with moderate force. If the installation is done correctly, the car seat should not move more than an inch in any direction. This test ensures that the base is tightly secured and reduces the risk of accidental dislodgement during a car ride.
Verifying the Base Stability
While testing the installation with a firm tug is crucial, it’s also important to ensure the base’s stability. A stable base provides a solid foundation for the car seat and minimizes the risk of it shifting or rotating. To verify the stability, check that the base is firmly anchored to the vehicle seat.
Confirm that all the attachment points are tight and properly locked in place. Additionally, make sure that the vehicle seatbelt or LATCH strap is securely fastened, preventing any excessive movement of the base.
Aligning Car Seat Harness Correctly
Proper alignment of the car seat harness is essential for your baby’s safety. Take time to carefully position the car seat harness over your child’s shoulder and buckle them in securely. The harness straps should be snug, but not too tight, allowing for a comfortable fit.
Check that the harness straps lie flat and are not twisted. It’s crucial to regularly inspect the harness to ensure it remains properly aligned and tensioned throughout your baby’s car seat journey.

Tips For A Hassle-Free Installation
Installing a baby jogger car seat base can seem like a daunting task for new parents. However, with the right tips and guidance, you can ensure a hassle-free installation that prioritizes the safety and comfort of your little one. In this section, we will provide you with some key tips to make the installation process smooth and stress-free.
Seeking Professional Help if Needed
While installing a baby jogger car seat base is generally a straightforward process, there may be instances where you are unsure or encounter difficulties. In such cases, it is important to seek professional help to ensure that the base is installed correctly. Certified car seat technicians have the expertise and experience to handle any challenges that may arise.
They can assist you in understanding the intricacies of the installation process and make any necessary adjustments to ensure proper fit and installation. Don’t hesitate to reach out to a professional if you have doubts or concerns.
Periodic Inspection of Base
Once you have successfully installed the baby jogger car seat base, it is essential to regularly inspect it to maintain its effectiveness. Over time, the base may experience wear and tear, which can compromise its safety features. By conducting periodic inspections, you can identify any signs of damage or wear, such as cracks or frayed straps.
Inspect the base for loose or missing parts and ensure it is securely fastened. Additionally, check the expiration date of the base to ensure it is still valid and meets the required safety standards. By staying vigilant and conducting routine inspections, you can ensure that the car seat base remains in optimal condition for your child.
Installing a baby jogger car seat base is an important step in ensuring the safety of your child while traveling. By following these tips for a hassle-free installation, you can have peace of mind knowing that your little one is secure and comfortable during every car journey. Remember, if you ever encounter difficulties or have concerns, don’t hesitate to seek professional assistance.
Frequently Asked Questions For How To Install Baby Jogger Car Seat Base
How To Install A Baby Jogger City Go 2 Car Seat Without Base?
To install a Baby Jogger City Go 2 car seat without a base, secure it using the seat belt. Thread the seat belt through the designated belt path on the car seat, buckle it, and then pull the belt tight to ensure a secure fit.
How Do You Install A Baby Jogger Car Seat Adapter?
To install a baby jogger car seat adapter, follow these steps:
1. Attach the adapter to the stroller frame securely.
2. Align the car seat with the adapter and place it on top.
3. Ensure it clicks into place and is securely fastened.
4. Double-check that the adapter is locked in position.
5. Test the connection by gently pushing and pulling the car seat.
How Do You Install An Infant Car Seat Base?
To install an infant car seat base, first, position it in the back seat of your vehicle. Then, ensure the base is level and secure it using either the lower anchors or the seat belt. Confirm a tight fit by pushing and pulling the base.
Finally, attach the infant car seat to the base until it clicks into place.
How To Install Baby Jogger City Select Second Seat?
To install the second seat on the Baby Jogger City Select, follow these steps:
1. Make sure the stroller is unfolded and the brake is engaged.
2. Locate the mounting brackets on the sides of the stroller seat.
3. Insert the brackets of the second seat into the corresponding slots.
4. Push down until you hear a click.
5. Adjust the seat to your desired position.
Conclusion
Installing a baby jogger car seat base is an essential step to ensure the safety of your little one on the road. By following the step-by-step instructions mentioned above, you can easily install the car seat base without any hassle.
Remember to read the car seat manual thoroughly and practice correct installation techniques. Your baby’s safety should always be the first priority when it comes to traveling. So, go ahead, install the car seat base properly, and enjoy worry-free journeys with your baby.