To install an inverter in a car, connect it to the car battery using appropriate cables and ensure a secure mounting location.
Understanding The Basics Of Car Inverters
Installing an inverter in your car can be a great way to bring the convenience of everyday electronics on your journeys. Whether you need to power up your laptop, charge your camera batteries, or even use a small kitchen appliance, a car inverter can make it all possible. But before you jump into the installation process, it’s important to understand the basics of car inverters and how they work.
What is an Inverter and How Does it Work?
An inverter is an electrical device that converts the direct current (DC) power from your car’s battery into alternating current (AC) power. This AC power is similar to the power supplied by the electrical outlets in your home, allowing you to use various electronic devices in your car.
The process of converting DC power to AC power involves several steps. First, the inverter receives the DC power from your car’s battery, which is typically around 12 volts. Then, it uses a series of electronic components, such as transistors and capacitors, to convert this DC power into a high-frequency AC power. Finally, this high-frequency AC power is transformed into a standard voltage and frequency that your electronic devices can utilize.
Types of Inverters Available for Cars
When it comes to car inverters, there are mainly two types available: modified sine wave inverters and pure sine wave inverters.
A modified sine wave inverter is the more common and affordable option. It produces an AC power output that is suitable for most electronic devices, such as smartphones, laptops, and small appliances. However, some sensitive electronic equipment, such as medical devices or high-end audio systems, may not function optimally with a modified sine wave inverter.
A pure sine wave inverter, on the other hand, produces a cleaner and smoother AC power output, similar to the power supplied by the utility grid. This type of inverter is recommended for sensitive electronic devices that require a stable power source, like medical equipment, televisions, and microwaves. However, pure sine wave inverters are typically more expensive than their modified sine wave counterparts.
Importance of Inverter Installation in a Car
Installing an inverter in your car opens up a world of possibilities when it comes to using electronic devices on the go. Whether you’re traveling long distances or simply need to work on your laptop while parked, having a reliable power source can make all the difference.
An inverter installation ensures that you have the freedom to charge your devices, use small appliances, or even power essential equipment during emergencies. By utilizing the existing power from your car’s battery, you can avoid the hassle of finding electrical outlets or relying on external power sources.
However, it’s important to properly install the inverter to ensure efficient and safe operation. By following the manufacturer’s instructions and adhering to the necessary wiring guidelines, you can enjoy the benefits of an inverter without any risk of damaging your car’s electrical system or compromising your safety.
Preparing Your Car For Inverter Installation
Installing an inverter in your car can provide you with a convenient power source for various electronic devices while on the road. However, before you start the installation process, it’s crucial to ensure that your car is ready for the addition of an inverter. This involves assessing your power needs, choosing the right inverter, gathering the necessary tools and materials, and checking your car’s electrical system compatibility. Let’s delve deeper into each aspect to make sure you’re well-prepared.
Assessing your power needs
Understanding your power requirements is the first step in preparing your car for an inverter installation. Consider the electronic devices you plan to power and their wattage. Make a list of the devices and their power consumption to determine the total wattage you’ll need from your inverter. This information will help you select an inverter with the right wattage capacity to meet your needs.
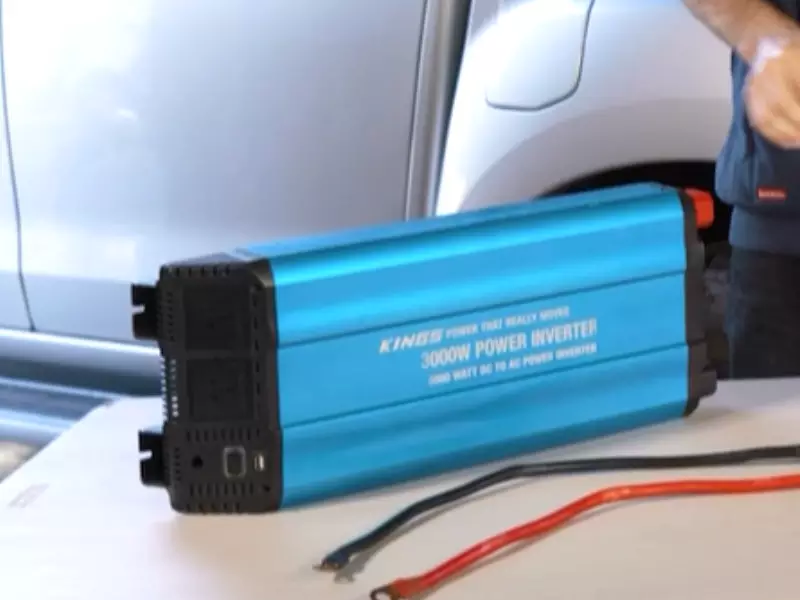
Choosing the right inverter for your car
With your power needs in mind, it’s time to choose the right inverter for your car. Inverters come in different sizes and voltage capacities, so it’s essential to select one that matches your car’s power capabilities. Look for an inverter that has a wattage capacity slightly higher than your power needs to allow for any potential power surges. Additionally, consider the type of wave output the inverter produces. Sine wave inverters are best for sensitive electronics, while modified sine wave inverters are suitable for most standard electronic devices.
Gathering the necessary tools and materials
Before you start the installation process, gather all the required tools and materials. This will save you time and prevent unnecessary trips to the store. Some common tools and materials you may need include:
- Socket set
- Wire cutters
- Wire strippers
- Soldering iron
- Electrical tape
- Crimp connectors
- Mounting brackets
- Fuse holder
- Fuse
Having these tools and materials readily available will ensure a smooth and efficient installation process.
Checking your car’s electrical system compatibility with an inverter
Before proceeding with the installation, it’s crucial to check your car’s electrical system compatibility with an inverter. Inverters draw power from your car’s battery, so it’s important to ensure that your battery can handle the additional load. Check the battery’s capacity and condition to confirm that it’s in good shape.
Furthermore, inspect your car’s electrical system for any signs of damage or issues that could impact the installation process. Look for frayed wires, loose connections, or corroded terminals. If you notice any problems, it’s advisable to address them before proceeding with the inverter installation.
By assessing your power needs, choosing the right inverter, gathering the necessary tools and materials, and checking your car’s electrical system compatibility, you’ll be well-prepared to install an inverter in your car. Taking these steps ensures a successful installation and provides you with a reliable power source for your electronic devices during your travels.
Step 1: Finding The Optimal Location For The Inverter
Installing an inverter in your car allows you to power electronic devices while on the road. However, finding the optimal location for the inverter is crucial to ensure proper functionality and safety. In this step, we will guide you through the process of identifying suitable locations in your car, considering factors such as ventilation and accessibility, and securing the inverter in a safe and stable manner.
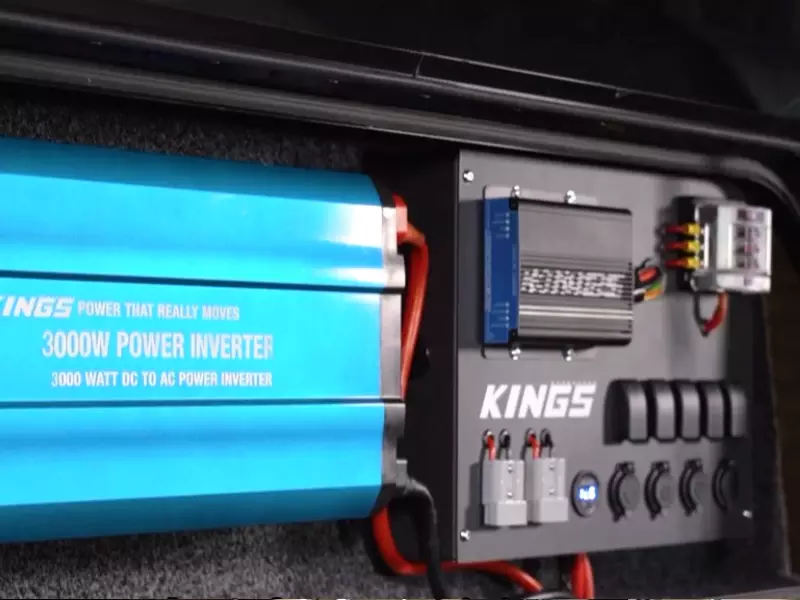
Identifying suitable locations in your car
When it comes to finding the perfect spot for your inverter, there are a few factors to keep in mind. Firstly, you need to consider the proximity to the battery. Mounting the inverter near the battery reduces the length of the cables required, minimizing power loss. Look for available space near the battery that is free from obstructions.
Secondly, you need to ensure that the location provides adequate ventilation. Inverters generate heat during operation, and proper airflow is necessary to prevent overheating. Avoid enclosed spaces or areas with restricted airflow, as this can lead to decreased performance and potential damage to the inverter.
Considering factors such as ventilation and accessibility
In addition to ventilation, accessibility is another crucial factor to consider when choosing a location for your inverter. You’ll want to install it in a place that allows for easy access in case you need to make adjustments or perform maintenance.
Keep in mind that you may need to connect additional devices to the inverter, such as USB chargers or power outlets. Selecting a location that allows for convenient access to these connections will make it easier to use and manage your devices while on the go.
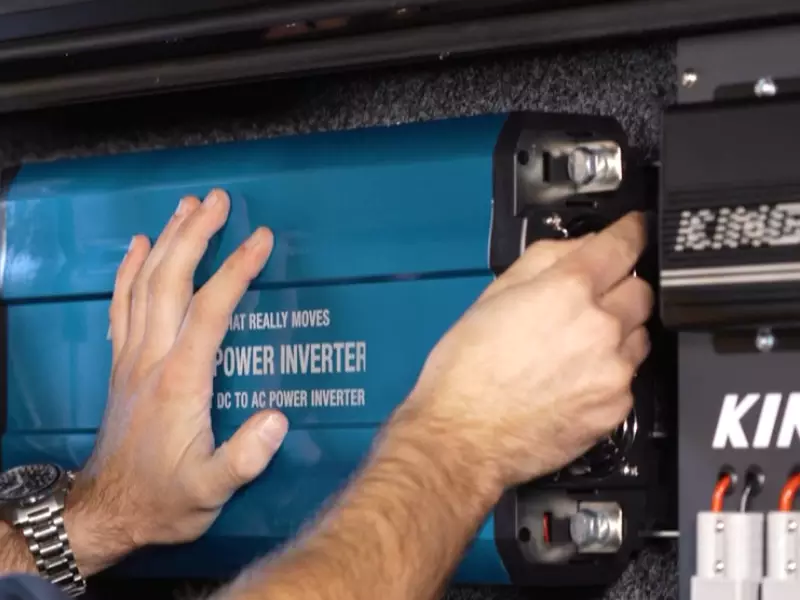
Securing the inverter in a safe and stable manner
Once you have identified a suitable location, it’s important to secure the inverter properly to ensure safety and stability. Many inverters come with mounting brackets or built-in mounting holes, making installation easier.
To secure the inverter, use solid and sturdy materials such as metal brackets or straps. These will prevent the inverter from moving or vibrating excessively while the car is in motion, reducing the risk of damage and potential hazards.
In addition to securing the inverter itself, make sure to secure any loose cables or wires to avoid interference or accidental damage.
By considering factors such as suitable locations, ventilation, accessibility, and secure mounting, you can ensure that your inverter is installed correctly in your car. In the next step, we will discuss the proper wiring and connection process for your inverter installation.
Step 2: Preparing The Car Battery For Connection
Park the car in a safe location and turn off the engine
Before preparing the car battery for connection, it is crucial to ensure the safety of yourself and the vehicle. To do this, park the car in a safe location, away from traffic or any potential hazards. Once the car is parked, make sure to turn off the engine to prevent any accidental power surges or interference during the installation process.
Locating the car battery and understanding its components
Now that the car is safely parked and the engine is turned off, the next step is to locate the car battery. In most cars, the battery is typically found under the hood, often covered by a plastic case. If you are unsure about the exact location of the battery, consult the car’s manual for guidance.
Once you have located the battery, it’s essential to have a basic understanding of its components. The battery will have two terminals, usually colored red for the positive terminal (+) and black for the negative terminal (-). Additionally, some batteries may have caps on the terminals for safety. Understanding these components will help you successfully connect the inverter to the car battery.
Disconnecting the car battery for safety
Before proceeding with the connection, it is important to disconnect the car battery for safety reasons. By doing this, you eliminate the risk of electrical shock or short-circuiting.
To disconnect the battery, follow these steps:
- Put on a pair of rubber gloves and safety glasses for added protection.
- Begin by removing the negative terminal first, indicated with the (-) symbol. This step is crucial to prevent any accidental arcing or sparks.
- Loosen the nut on the negative terminal using an appropriate wrench. Once loose, lift the terminal off the battery.
- Repeat the same process for the positive terminal, indicated with the (+) symbol.
Once both terminals are disconnected, it is important to take extra precautions to avoid any accidental reconnection. To do this, you can cover the disconnected terminals with insulating tape, preventing contact with any metal surfaces.
By carefully following these steps, you have successfully prepared the car battery for connection. The next step is to establish a secure connection between the inverter and the car battery, which we will explore in the upcoming section.
Step 3: Installing The Inverter
Now that you have prepared your car for the inverter installation, it’s time to move on to the actual installation process. Step 3 involves connecting the inverter to the car battery, securing the ground connection, and routing and managing the cables for a neat installation.
Connecting the Inverter to the Car Battery
To connect the inverter to the car battery, you will need a set of heavy-duty cables suitable for the power requirements of the inverter. Follow these steps:
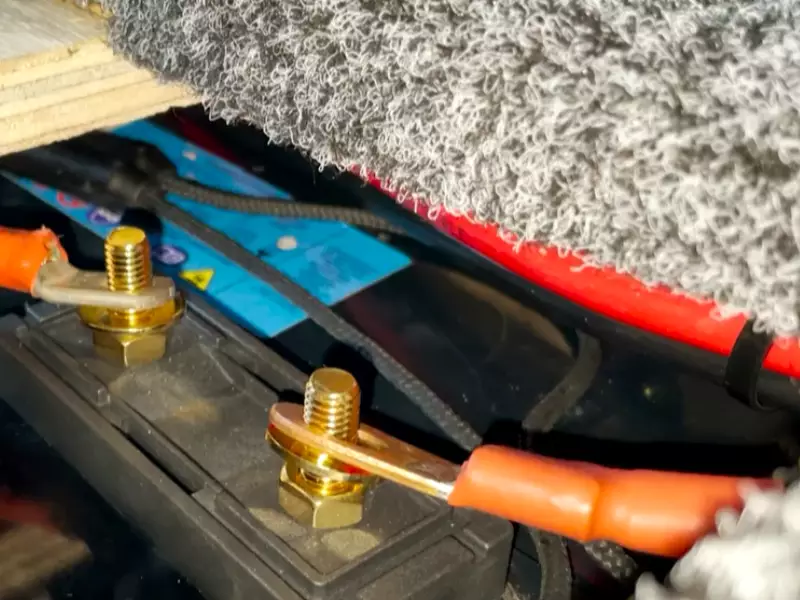
- Locate the positive and negative terminals of the car battery. They are usually marked with a plus (+) and minus (-) symbol.
- Attach the positive cable of the inverter to the positive terminal of the battery. Make sure it is tightly secured.
- Connect the negative cable of the inverter to the negative terminal of the battery. Again, ensure a secure connection.
By connecting the inverter directly to the car battery, you ensure a direct and reliable power source for your devices.
Securing the Ground Connection
The ground connection of the inverter is crucial for its proper functioning and safety. To secure the ground connection:
- Identify a suitable grounding point near the inverter installation location. Look for a metal surface that directly connects to the car chassis.
- Use a wire stripper to remove insulation from the end of the negative cable connected to the inverter.
- Securely attach the exposed end of the negative cable to the grounding point, ensuring a tight and reliable connection.
Remember, a properly grounded inverter reduces the risk of electrical faults and ensures maximum safety.
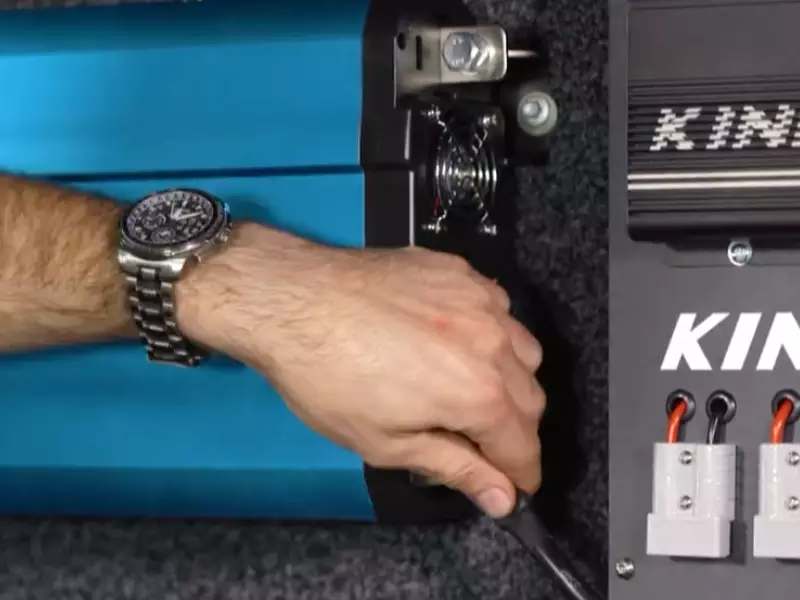
Routing and Managing the Cables for a Neat Installation
Once the inverter is connected and grounded, it’s important to route and manage the cables properly to maintain a clean and organized installation. Follow these tips:
- Secure the cables using cable clamps or zip ties to prevent them from moving around and potentially causing damage.
- Route the cables away from any moving parts or areas prone to excessive heat or moisture.
- If necessary, use cable conduits to protect the cables and give the installation a more professional look.
By organizing the cables and securing them in place, you not only ensure a tidy installation but also minimize the risk of any electrical mishaps.
With Step 3 completed, your inverter should be successfully installed in your car. However, before wrapping up the installation, make sure to check all connections, tighten any loose parts, and perform a final test to ensure everything is working as intended. Once you’re satisfied with the installation, you can start enjoying the convenience of having a reliable power source in your car.
Step 4: Testing The Inverter And Ensuring Safety
Once you have successfully installed the inverter in your car, it’s important to test its functionality and ensure safety measures are in place. Follow these steps to ensure a smooth operation and protect both your inverter and electronic devices.
Turning on the inverter and checking for proper functioning
The first step in testing your inverter is to turn it on and ensure it is working correctly. To do this, follow these simple steps:
- Locate the power switch on the inverter and make sure it is in the off position.
- Connect the positive (red) cable from your inverter to the positive terminal of your car’s battery.
- Connect the negative (black) cable from your inverter to the negative terminal of your car’s battery.
- Double-check all connections to ensure they are secure and tight.
- Once you’ve confirmed the connections, switch the power button on the inverter to the on position.
- Observe the inverter’s indicator lights or display to ensure it powers up correctly.
- If the inverter powers up without any issues, congratulations! It is functioning properly.
Testing the inverter’s power output
Now that you have confirmed the inverter powers up correctly, it’s time to test its power output. This ensures that it can provide the necessary electricity to run your electronic devices. Follow these steps:
- Plug in a low-power electronic device, such as a smartphone charger, into one of the inverter’s AC outlets.
- Turn on the device and verify that it is receiving power.
- If the device powers on and charges without any issues, this indicates that your inverter is delivering the necessary electrical output. However, if the device does not work or charges slowly, there may be a problem with the inverter’s power output.
- Consult the inverter’s user manual or contact the manufacturer to troubleshoot any power output issues you may encounter.
Verifying the inverter’s compatibility with various electronic devices
It is essential to verify the inverter’s compatibility with your specific electronic devices. This ensures that any device you connect to the inverter will function correctly and avoid potential damage. Consider the following points:
- Check the inverter’s user manual or specifications to identify the compatible power requirements (wattage, voltage, and frequency).
- Compare these power requirements with the devices you plan to use with the inverter.
- Ensure that the inverter’s power output matches or exceeds the power requirements of your electronic devices.
- If you are unsure about any compatibility issues, it’s always a good idea to consult the device manufacturer or the inverter manufacturer for clarification.
Ensuring safety precautions and addressing any potential issues
Safety should be a top priority when using an inverter in your car. Here are some important safety precautions to follow:
- Always double-check the inverter’s connections to ensure they are secure and properly insulated.
- Avoid overloading the inverter by connecting devices that exceed its power ratings.
- Regularly inspect the inverter for any signs of damage, including frayed cables or loose connections.
- If you encounter any issues with the inverter’s performance, such as tripping circuit breakers or emitting strange odors, immediately stop using it and consult a professional for assistance.
- Remember to turn off the inverter when not in use to conserve battery power.
By following these testing and safety precautions, you can ensure that your inverter operates efficiently and without any issues. Enjoy the convenience of powering your electronic devices on the go while keeping safety in mind.
Additional Tips For Inverter Installation In A Car
Proper installation of an inverter in your car is essential to ensure its optimal performance and longevity. However, there are a few additional tips you should keep in mind to maximize the effectiveness and durability of your inverter.
Proper maintenance and care of the inverter
Maintaining and caring for your inverter is crucial in extending its lifespan and preventing any potential issues down the line. Here are some maintenance tips to keep in mind:
- Clean the inverter regularly to remove any dust or debris that could hinder its performance. Use a soft cloth and non-abrasive cleaning solution to gently wipe away any dirt.
- Ensure all connections are secure and tight. Loose connections can cause electrical problems and reduce the efficiency of the inverter.
- Inspect the inverter for any signs of wear or damage. If you notice any frayed wires or physical damage, it is important to address these issues promptly to avoid further complications.
- Regularly check the inverter’s cooling system, such as fans or vents, to ensure proper airflow and prevent overheating.
Ensuring the inverter is protected from extreme temperatures and moisture
Extreme temperature and moisture can be detrimental to the performance and lifespan of your inverter. Here’s what you need to do to protect your inverter:
- Keep the inverter away from direct sunlight, as excessive heat can cause damage to its internal components. Consider installing the inverter in a shaded area of your car or using a protective cover.
- Avoid exposing the inverter to excessive moisture or water. Moisture can lead to corrosion and electrical shorts. Make sure the inverter is installed in a dry and well-ventilated area.
- If you plan to drive through areas with extreme temperatures or high humidity, consider using additional insulation or protective measures to shield the inverter from these harsh conditions.
Understanding the limitations of the inverter
While inverters can be incredibly useful, it is important to understand their limitations to avoid any potential problems or damages. Here are a few key points to keep in mind:
- Be aware of the maximum power capacity of your inverter and avoid exceeding it. Overloading the inverter can cause it to malfunction or even become a safety hazard.
- Understand the limitations of the inverter’s output waveform. Some electronics may not function properly with modified sine wave inverters, requiring a pure sine wave inverter instead.
- Consider the inverter’s efficiency and standby power consumption. Higher-quality inverters tend to have better efficiency ratings and consume less power when not in use.
Consulting a professional if needed
If you are unsure about any aspect of the inverter installation process or encounter any difficulties, it is always a good idea to consult a professional. A qualified technician or electrician can provide expert guidance and ensure that your inverter is installed correctly and safely.
By following these additional tips for inverter installation in a car and maintaining the inverter properly, you can enjoy a reliable and efficient power source for your electronic devices while on the road.
Frequently Asked Questions Of How To Install An Inverter In A Car
Can You Put An Inverter In A Car?
Yes, you can install an inverter in a car to convert DC power from the car battery to AC power for electronic devices. It allows you to use appliances like laptops, phones, and small appliances while on the go. Make sure to choose an inverter with the appropriate wattage for your needs.
Can I Wire an inverter Directly To a Car Battery?
Yes, you can wire an inverter directly to a car battery. However, it is important to follow proper installation guidelines to ensure safety and prevent damage to the battery or electrical system. Consider consulting a professional or referring to the manufacturer’s instructions for best results.
Can You Install An Inverter Yourself?
Yes, you can install an inverter yourself. It’s important to carefully follow the instructions provided and have some basic electrical knowledge. Ensure you have the proper tools and safety precautions in place. If you’re unsure, it’s recommended to consult a professional to avoid any potential risks or damages.
How Long Can You Run An Inverter Off A Car Battery?
You can run an inverter off a car battery for a specific time. The duration depends on factors like the battery’s capacity, the inverter’s power, and the load connected to it. It’s advisable to check the battery’s capacity and the inverter’s power requirements for an estimated running time.
Conclusion
To sum up, installing an inverter in your car can greatly enhance your driving experience. With the right tools and careful attention to detail, anyone can successfully complete this task. Now, you have the knowledge and confidence to power your devices on the go, whether it’s for road trips, camping, or emergencies.
So, grab your tools and get started on this exciting project today!