To install an amp, first, locate a suitable mounting location and secure the amp. Then, connect the power wire to the positive battery terminal and ground wire to a metal surface.
Finally, connect the head unit to the amp using RCA cables and adjust settings to optimize sound quality. Installing an amp in your car can significantly enhance your audio experience, allowing you to enjoy crisp and powerful sound while on the road.
Whether you’re a music enthusiast or simply want to upgrade your car’s sound system, this step-by-step guide will help you through the installation process. By following these instructions and ensuring proper connection and setup, you’ll be able to take your audio system to the next level. So let’s dive in and learn how to install an amp and enjoy a superior audio experience during your drives.
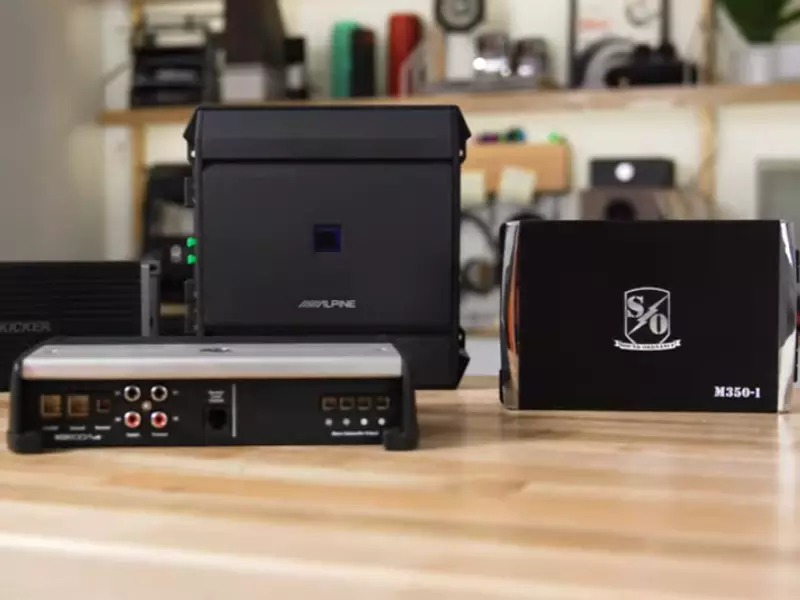
Selecting The Right Amp For Your Setup
When it comes to setting up a high-quality audio system, choosing the right amplifier is crucial. An amplifier, or amp, is responsible for boosting the audio signal and delivering it to your speakers in the purest form possible. However, with so many options available on the market, it can be overwhelming to determine which amp is the right fit for your setup. In this article, we will guide you through the process of selecting the right amp, ensuring optimal performance and compatibility with your speakers.
Choosing the appropriate power rating for your speakers
One of the most important considerations when selecting an amp is finding the appropriate power rating that matches your speakers. Power rating is measured in watts and represents the amount of electrical power the amplifier can deliver to your speakers. Using an amp with too low of a power rating may result in distortion, while an amp with too high of a power rating may overpower and potentially damage your speakers.
It is crucial to check the specifications of your speakers to determine their recommended power range. Once you have this information, you can select an amp that falls within that range for optimal performance. Remember to consider factors such as room size and listening preferences when determining the ideal power rating for your setup.
Understanding different amplifier types
Amplifiers come in various types, each with its unique characteristics and suitability for different audio setups. Understanding these types will help you make an informed decision when selecting an amp. Here are the most common amplifier types:
- Class A: These amps provide excellent audio quality but tend to be less efficient and produce more heat compared to other types.
- Class AB: Class AB amps are a popular choice, striking a balance between audio quality and efficiency. They are suitable for most audio setups.
- Class D: Class D amps are highly efficient and generate less heat. They are an excellent choice for those who prioritize energy efficiency.
- Tube amps: Known for their warm and rich sound, tube amps are favored by audiophiles seeking a more vintage sound experience.
Each amplifier type has its advantages and disadvantages, so it’s essential to consider your specific needs and preferences when selecting an amp.
Matching the impedance of the amp and speakers
To ensure optimal performance and prevent damage to your audio equipment, it is crucial to match the impedance of your amp and speakers. Impedance refers to the electrical resistance that the amp and speakers present to each other.
You can find the impedance ratings for both your amp and speakers in their respective specifications. It is important to match these values as closely as possible. Mismatched impedance can lead to distortion, low volume output, or even damage to your speakers or amp.
Before making a final decision, ensure that the amp you choose can handle the impedance of your speakers, and vice versa. This will help you achieve the best audio quality and performance from your setup.
In conclusion, selecting the right amp for your audio setup requires careful consideration of factors such as power rating, amplifier type, and impedance matching. By taking the time to research and understand your specific requirements, you can ensure that your amp delivers the best sound quality while protecting your speakers and equipment for years to come.
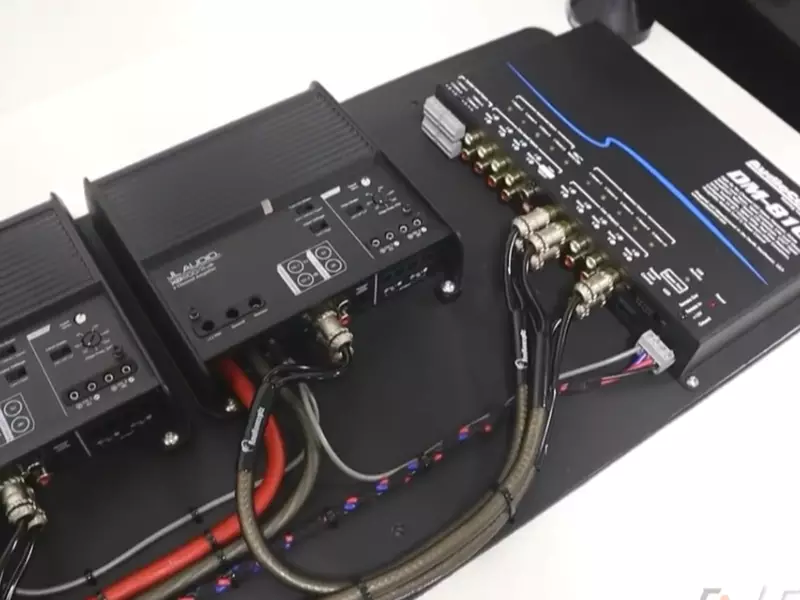
Gathering The Necessary Tools And Materials
Before you begin the amp installation process, it’s crucial to gather all the essential tools and materials you’ll need for a successful installation. Having everything prepared beforehand will save you time and make the process much smoother. In this section, we’ll cover the following:
Essential tools for amp installation
Having the right tools is the first step towards a hassle-free amp installation. Here are some of the essential tools you should have:
- Socket wrench set
- Wire strippers
- Screwdrivers (both flathead and Phillips)
- Multimeter
- Electrical tape
- Allen wrench set
- Wire crimpers
Required wiring and connectors
Proper wiring and connectors are crucial for a safe and reliable amp installation. Make sure you have the following wiring and connectors:
- Power wire: Select a wire with an appropriate gauge to handle the power requirements of your amp.
- Ground wire: Ensure you have a sufficient gauge ground wire to establish a solid connection with the vehicle chassis.
- Speaker wire: Use high-quality speaker wire to deliver optimal sound quality to your speakers.
- RCA cables: These cables connect your head unit to the amp, carrying the audio signals.
- Fuse holder and fuses: Install a fuse holder near the battery to protect your vehicle’s electrical system.
- Terminal connectors: Use proper terminal connectors for a secure and reliable connection.
Securing appropriate mounting hardware
Ensuring your amp is securely mounted is crucial for both safety and optimal performance. Here are the steps to secure appropriate mounting hardware:
- Choose a suitable location inside your vehicle for mounting the amp.
- Refer to the manufacturer’s instructions to determine the specific mounting hardware required for your amp.
- Ensure the mounting location is free from any obstructions and can accommodate the size and weight of the amp.
As you gather these tools and materials, double-check that everything is in good working condition. If you find any damaged or faulty items, replace them before starting the installation process. With all the necessary tools and materials at hand, you’ll be well-prepared to install your amp for an enhanced audio experience.
Preparing For Installation
Before you start the installation process of your amplifier, it is crucial to properly prepare for it. This involves selecting the ideal location, ensuring proper ventilation for heat dissipation, and planning and organizing the wiring layout. Taking these steps will help ensure a smooth installation process and optimal performance of your amp.
Selecting the ideal location for your amplifier
Choosing the right location for your amplifier is essential for its efficient operation. When selecting a spot, consider the following factors:
- Accessibility: Select a location that is easily accessible for adjustments and troubleshooting.
- Noise interference: Keep your amp away from sources of electromagnetic interference, such as power lines, transformers, or other electronic devices.
- Stability: Ensure that the chosen spot provides a stable and secure mounting surface for your amplifier.
It is also important to note that amplifiers generate heat when in use, so keep this in mind when selecting a location to prevent overheating.
Ensuring proper ventilation for heat dissipation
To prevent your amplifier from overheating during use, adequate heat dissipation is crucial. Make sure to:
- Leave enough space around the amp: Allow for at least a few inches of clearance on all sides to ensure proper airflow.
- Use a cooling fan: Consider installing a cooling fan near your amplifier to help dissipate heat effectively.
- Avoid enclosed spaces: Avoid placing your amp in a confined area or inside a cabinet, as this can restrict airflow and cause overheating.
- Mounting position: If possible, mount your amplifier in a position that allows natural convection, with the heat rising upwards and dissipating.
By ensuring proper ventilation, you can maximize the lifespan and performance of your amplifier.
Planning and organizing the wiring layout
Before you start connecting the cables to your amplifier, it is vital to plan and organize the wiring layout. This will help keep the installation neat and avoid any unnecessary interferences or complications. Follow these steps:
- Identify the components: Determine which components need to be connected to the amplifier and organize them accordingly.
- Route the cables: Plan the cable routing and ensure they are not tangled or crossed. Use zip ties or cable clamps to secure the cables in place.
- Consider cable length: Measure and cut the cable lengths to avoid excessive slack that may impede performance or cause clutter.
- Separate signal and power cables: Keep the signal and power cables separated to minimize the chance of interference.
- Label the cables: Label each cable to easily identify its purpose and destination when connecting them to the amplifier.
By investing time in planning and organizing the wiring layout, you can simplify the installation process and ensure a clean setup.
Installing The Amplifier
Installing the Amplifier
Mounting the amplifier securely in the chosen location:
Making sure your amplifier is securely mounted is essential for optimal performance and safety. Here are the steps to mount your amplifier:
- Choose a suitable location for your amplifier, preferably near the stereo head unit.
- Use screws and brackets to secure the amplifier to a sturdy surface, like the trunk or the back of your car’s seat.
- Ensure that the location you’ve chosen allows for proper ventilation to avoid overheating.
- Double-check the manufacturer’s instructions for any specific mounting requirements.
Connecting the power and ground wires:
Properly connecting the power and ground wires is crucial for your amplifier’s functionality. Follow these steps:
- Identify the power wire and the ground wire. The power wire is usually red, while the ground wire is black.
- Safely connect the power wire to the positive terminal of your car’s battery using an appropriate-sized fuse.
- Connect the ground wire to a clean, metal part of your car’s chassis. Make sure it is securely attached for a good electrical connection.
- Ensure there are no exposed wires that may cause a short circuit.
Wiring the RCA cables and speaker wires:
Wiring the RCA cables and speaker wires correctly will ensure optimal audio quality. Here’s how to do it:
- Connect the RCA cables from your stereo head unit’s RCA outputs to the RCA inputs of the amplifier. These cables transmit the audio signal.
- Securely connect the speaker wires from the amplifier to the speakers. Positive to positive and negative to negative.
- Make sure all connections are tight and secure to prevent any interference or loss of sound quality.
- Take extra care not to cross any wires or create any loose connections.
HTML Table representation:
| Heading | Content |
|---|---|
| Mounting the amplifier securely in the chosen location |
Making sure your amplifier is securely mounted is essential for optimal performance and safety.
|
| Connecting the power and ground wires |
Properly connecting the power and ground wires is crucial for your amplifier’s functionality.
|
| Wiring the RCA cables and speaker wires |
Wiring the RCA cables and speaker wires correctly will ensure optimal audio quality.
|
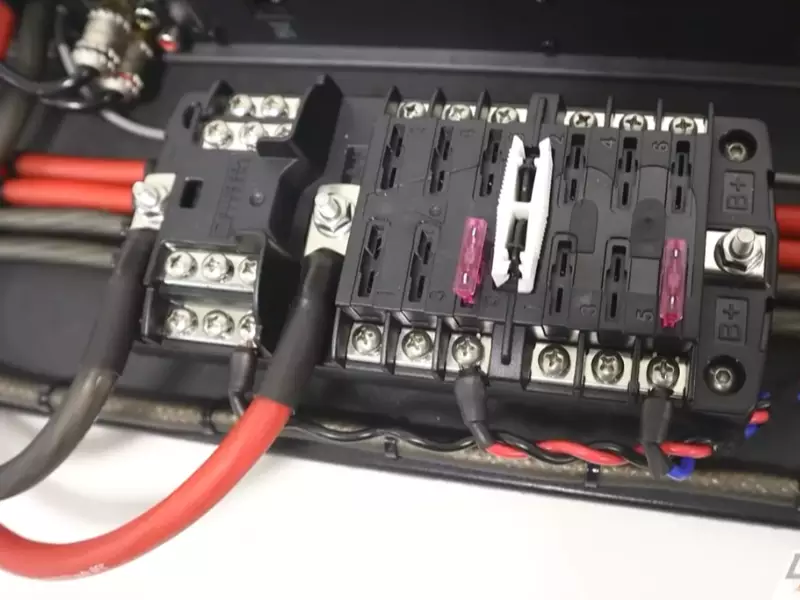
Testing And Troubleshooting
Once you have successfully installed your amp, it’s time to move on to the testing and troubleshooting phase to ensure everything is working as it should. This crucial step will help identify any potential issues and allow you to tackle them head-on. In this section, we will cover how to verify that all connections are secure, test the amplifier for functionality, and resolve common issues that may arise during installation.
Verifying that all connections are secure
Before proceeding with testing your amplifier, it is essential to make sure that all connections are secure and properly tightened. Loose connections can lead to poor sound quality or even damage to your audio system. Follow these steps to ensure that everything is correctly connected:
- Inspect all cables and wires: Check each cable and wire for signs of damage, such as fraying or exposed wires. Replace any damaged cables before proceeding.
- Tighten all connections: Ensure that all connections, including the power, ground, speaker, and RCA connections, are securely tightened. This will help prevent any unwanted noise or signal loss.
- Double-check polarity: Make sure that the positive and negative wires are correctly connected to their respective terminals. Incorrect polarity can result in a phase mismatch and affect sound quality.
- Securely mount the amp: If you have completed the physical installation of your amplifier, ensure that it is securely mounted to prevent vibrations or movement that could damage the connections.
Testing the amplifier for functionality
Now that all connections are secure, it’s time to test your amplifier for functionality. This will help you ensure that everything is working correctly and that you can expect optimal performance from your audio system. Follow these steps to test your amplifier:
- Power on the amplifier: Switch on the amplifier and verify that the power indicator light is illuminated. If not, check the power connection and fuse to ensure they are functioning correctly.
- Check the input signal: Play some audio through your audio source and verify that the input signal is reaching the amplifier. Adjust the gain and input sensitivity settings to achieve the desired volume level.
- Test each channel: Connect a speaker to each channel of the amplifier and play audio through each one separately. Ensure that sound is produced from all speakers and that the volume levels are consistent.
- Adjust equalizer and crossover settings: Fine-tune the sound by adjusting the equalizer and crossover settings according to your preferences. Test different frequencies and audio tracks to ensure that the amplifier is delivering the desired audio experience.
Solving common issues during installation
During the installation process, you might come across some common issues that can hinder the performance of your amplifier. Here are a few troubleshooting tips to help you resolve them:
| Issue | Possible Solution |
|---|---|
| No sound output | Check the speaker connections and ensure that the speaker wires are properly connected to the amplifier. Verify that the speakers are functional. Adjust the gain and input sensitivity settings to ensure they are not too low. |
| Distorted sound | Ensure that the gain is properly adjusted to avoid overpowering the speakers. Double-check the equalizer and crossover settings to ensure they are set appropriately for your audio system. |
| Ground loop noise | Investigate potential ground loop issues by isolating the audio system components and using ground loop isolators if necessary. Make sure the ground wire is properly connected to the amplifier’s chassis. |
| Overheating | Ensure that the amplifier is receiving proper ventilation and is not obstructed by other objects. Check for any dust accumulation and clean the amplifier if necessary. Consider installing additional cooling fans if required. |
By following these testing and troubleshooting procedures, you can ensure a successful installation and enjoy optimal performance from your amplifier. Resolving any issues promptly will help you achieve the best sound quality and avoid any potential damage to your audio system.
Fine-Tuning The Amp Settings
Adjusting gain and sensitivity settings
One of the most important steps in fine-tuning your amp is adjusting the gain and sensitivity settings. These settings determine how much power the amp receives from the head unit, and can greatly affect the overall sound quality and performance. It is essential to properly set the gain and sensitivity to prevent distortion and maximize the potential of your amplifier.
To adjust the gain settings, follow these steps:
- Begin by playing a song or audio track that represents the type of music you most frequently listen to.
- Slowly increase the volume on your head unit until you start to hear distortion.
- Once distortion is heard, slightly decrease the volume to eliminate the distortion.
- Now, turn the gain knob on your amplifier clockwise to gradually increase the gain level until you achieve the desired volume.
- Be sure to pay attention to any clipping or distortion during this process and make adjustments accordingly.
Once you have set the gain, it’s time to adjust the sensitivity settings:
- Refer to your amplifier’s manual to locate the sensitivity control.
- Start by setting the sensitivity to the lowest level.
- Gradually increase the sensitivity until you achieve the desired sound clarity and volume.
- Listen for any clipping or distortion and make slight adjustments to fine-tune the settings.

Balancing bass, midrange, and treble frequencies
Another crucial aspect of fine-tuning your amp involves balancing the bass, midrange, and treble frequencies. Achieving the right balance can greatly enhance the overall audio experience and ensure that no frequencies overpower the others. Here’s how to achieve this:
- Start by playing a song or audio track that has a good mix of bass, midrange, and treble elements.
- Listen carefully and make note of any areas where certain frequencies sound too dominant or weak.
- To adjust the bass, midrange, and treble frequencies, refer to your amplifier’s user manual to locate the corresponding controls.
- Gradually adjust each control, making small increments and listening for the desired balance.
- Take your time during this process, as small adjustments can have a significant impact on the overall sound quality.
Optimizing the amplifier for your audio preferences
Finally, optimizing your amplifier for your audio preferences ensures that you fully enjoy your listening experience. Different music genres and personal preferences may require unique settings, and it’s important to tailor the amp settings to match your specific tastes. Here are some tips for optimizing your amp:
- Experiment with different settings: Don’t be afraid to try different combinations of gain, sensitivity, and frequency adjustments to find the perfect balance for your audio preferences.
- Listen critically: Pay attention to how different settings affect the sound quality and make adjustments accordingly.
- Make notes: Keep track of the settings that you find most pleasing for each genre or audio source, making it easier to recreate those settings in the future.
- Consider expert advice: If you’re unsure about the optimal settings for your amp, consult with audio professionals or enthusiasts who can provide guidance based on their experience.
By fine-tuning the amp settings, adjusting the gain and sensitivity, balancing frequencies, and optimizing for your audio preferences, you can elevate your listening experience and make the most of your amplifier’s capabilities.
Ensuring Proper Amp Maintenance
Proper maintenance is vital for keeping your amplifier in peak condition and ensuring its long-term performance. Just like any other electronic device, amplifiers require regular cleaning, inspection, and occasional fuse replacement. By following these simple steps, you can keep your amp running smoothly and prolong its lifespan.
Cleaning the amplifier regularly
To maintain optimal sound quality, it is important to clean your amplifier regularly. Dust and debris can accumulate on the surface and vents, negatively affecting the cooling system. Clean the amplifier using a soft cloth or a brush to remove the dirt. Be sure to turn off the amp and unplug it from the power source before cleaning.
For hard-to-reach areas, such as the knobs and connectors, use a cotton swab or a small brush. Take caution not to apply excessive force or liquid directly onto the amp’s surface. Cleaning the amplifier regularly not only improves its appearance but also prevents internal damage caused by overheating.
Checking and replacing fuses as needed
Fuses are an essential part of the amplifier’s protection system. They help prevent electrical damage by interrupting the circuit in case of overcurrent or short circuit. Over time, fuses can blow out due to power surges or other issues. Therefore, it is important to regularly check their condition and replace them as needed.
To check the fuses, first, disconnect the power supply. Remove the fuse holder cover located at the back of the amplifier. Inspect each fuse visually, looking for any signs of damage such as a broken filament or discoloration. If a fuse appears faulty, replace it with a new one of the same amperage rating. Always ensure you have spare fuses readily available.
Performing routine inspections for potential issues
Routine inspections are crucial for identifying potential issues before they turn into major problems. Regularly inspect the amplifier for loose connections, frayed cables, or any other signs of wear and tear. Check the input and output jacks, power switches, and volume controls for proper functioning.
Additionally, pay attention to any unusual sounds or behavior from the amplifier during operation. Strange buzzing, crackling, or distortion can indicate an underlying problem. If you notice any such issues, it is recommended to consult a professional technician for further inspection and repair.
By incorporating these maintenance practices into your routine, you can ensure the longevity and optimal performance of your amplifier. Remember, a well-maintained amp not only produces high-quality sound but also provides peace of mind during your audio playback or performances. Take the time to care for your amplifier, and it will reward you with years of reliable service.
Advanced Amp Installation Techniques
When it comes to installing an amp in your car audio system, there are some advanced techniques that can take your setup to the next level. Whether you’re looking to increase power output, fine-tune your audio quality, or set up a more complex system, these techniques can help you achieve your desired results.
Bridging Amplifier Channels for Increased Power Output
If you want to amp up the power of your audio system, bridging amplifier channels is a technique worth exploring. By connecting the positive terminal of one channel to the negative terminal of another channel, you can effectively combine the power output of both channels. This process creates a more robust signal that can drive higher-powered speakers or subwoofers.
Keep in mind that not all amplifiers are bridgeable, so it’s important to check the manufacturer’s specifications before attempting this technique. Additionally, you’ll need to ensure that your speakers or subwoofers can handle the increased power output without getting damaged.
Adding an Equalizer or Crossover in the Audio System
If you’re looking to fine-tune the audio quality of your car audio system, adding an equalizer or crossover can make a significant difference. An equalizer allows you to adjust the sound frequencies to match your personal preferences. You can enhance the bass, fine-tune the midrange, and sharpen the treble to create a more balanced and dynamic audio experience.
On the other hand, a crossover helps in directing specific frequencies to the appropriate speaker or subwoofer. This ensures that each component reproduces the frequencies it’s designed for, resulting in cleaner and more accurate sound reproduction. By adding these components to your audio system, you can achieve a more customized and premium listening experience.
Installing Multiple Amplifiers for a More Complex Setup
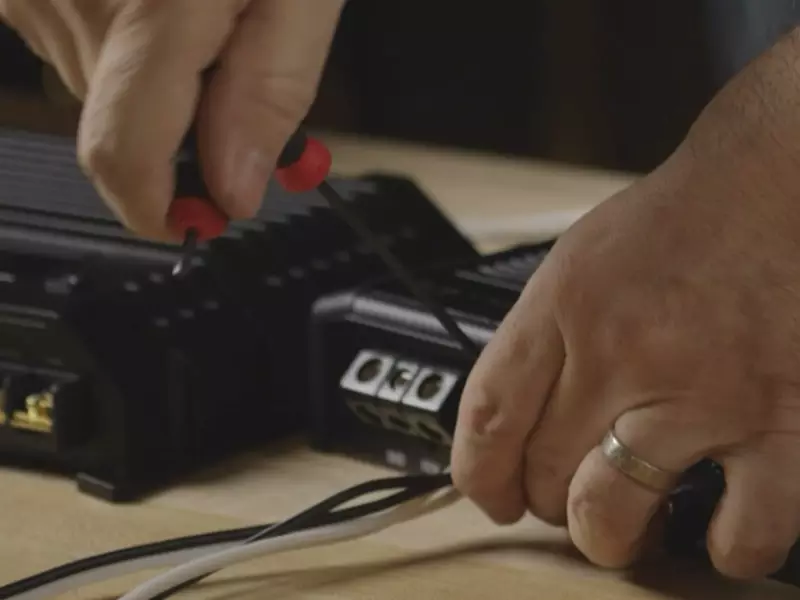
If you’re looking to take your car audio system to the next level with a more complex setup, installing multiple amplifiers is the way to go. This technique allows you to have dedicated amplifiers for different speaker or subwoofer groups, enabling more control and optimal power distribution throughout your system.
When installing multiple amplifiers, it’s crucial to ensure each amplifier is properly connected to the corresponding speakers or subwoofers. You’ll also need to consider the power requirements and make sure your electrical system can handle the load. Proper grounding and wiring techniques are essential for minimizing interference and achieving the best audio performance.
| Technique | Description |
|---|---|
| Bridging Amplifier Channels | Combine the power output of two channels to increase overall power and drive higher-powered speakers or subwoofers. |
| Adding an Equalizer or Crossover | Enhance audio quality by adjusting sound frequencies with an equalizer and directing specific frequencies to the appropriate speakers/subwoofers with a crossover. |
| Installing Multiple Amplifiers | Create a more complex system with dedicated amplifiers for different speaker/subwoofer groups, providing more control and optimal power distribution. |
By implementing these advanced amp installation techniques, you can elevate your car audio system to new heights, whether you’re seeking increased power, improved audio quality, or a more sophisticated setup. Remember to always follow proper installation guidelines and consult professionals if needed to ensure your system performs at its best.
Safety Tips And Considerations
When it comes to installing an amp, safety should always be your top priority. Proper precautions and considerations can help minimize the risk of accidents or damage to your equipment. In this section, we will discuss the important safety tips and considerations that you need to keep in mind before installing an amp.
Disconnecting the power source before working on the amplifier
Before you start working on the amplifier installation, it is crucial to disconnect the power source. This step ensures your safety and prevents any electrical accidents. Follow these simple steps to ensure a safe disconnection:
- Switch off the vehicle: Start by turning off the ignition and removing the key from the ignition switch. This step will cut off the power supply to the amplifier and prevent any electrical shock.
- Disconnect the negative battery cable: Locate the negative terminal of the battery and use a wrench or socket to loosen the nut. Once loose, carefully remove the negative cable from the battery terminal. This step ensures that there is no power flowing to the amplifier while you work on it.
Following proper electrical safety guidelines
Installing an amp involves working with electrical components and wiring. To ensure your safety and avoid any mishaps, it is essential to follow proper electrical safety guidelines:
- Avoid working on live wires: Always assume that any wire you encounter is live and treat it with caution. Avoid making contact with live wires and use electrical insulation tools whenever necessary.
- Use appropriate insulation techniques: Properly insulate all electrical connections using insulating tape or heat shrink tubing. This helps prevent short circuits and protects against electrical shocks.
- Avoid overloading the electrical system: Make sure to calculate the power requirements of your amp and ensure that your vehicle’s electrical system can handle the additional load. Overloading the electrical system can lead to damage and increased safety risks.
Ensuring compliance with local regulations and standards
It is important to check and adhere to the local regulations and standards when installing an amp. This ensures that your installation is not only safe but also legal. Here are a few points to consider:
- Consult the vehicle manufacturer guidelines: Some vehicles may have specific guidelines or restrictions for installing aftermarket amplifiers. Refer to the vehicle manufacturer guidelines to ensure compliance.
- Check local electrical standards: Different regions may have specific electrical standards that need to be followed. Familiarize yourself with these standards and ensure that your installation meets the requirements.
- Use proper installation techniques: When installing the amp, follow the correct wiring techniques to prevent electrical hazards. Securely fasten the wiring and avoid routing it in areas prone to heat or moisture.
By following these safety tips and considerations, you can install your amp with confidence and minimize the potential risks. Remember that safety should always be your top priority when working with electrical equipment.
Frequently Asked Questions On How To Install An Amp
Is It Hard To Install An Amp?
Installing an amp can be challenging, but not impossible. With proper instructions and basic technical knowledge, you can do it. Remember to connect the wires correctly, secure the amp, and tune the settings for optimal sound output. Seek professional help if you’re unsure or uncomfortable with the process.
How Do You Hook Up An Amp To A Car?
To hook up an amp to a car, first, find a suitable location and secure the amp. Then, connect the power wire to the car’s battery, ground the amp using a solid metal surface, and run RCA cables from the stereo to the amp.
Finally, connect the speaker wires and adjust the settings for optimal sound.
What Is Needed To Install Amp?
To install AMP, you need to follow these steps:
- Install and activate the AMP plugin on your website.
- Customize the design and appearance of your AMP pages according to your preferences.
- Test your AMP pages to ensure they meet the validation criteria.
- Submit your AMP pages to search engines and other platforms for indexing.
- Monitor the performance and analytics of your AMP pages for better optimization.
How Do I Connect Amp To Speakers?
To connect an amp to speakers, follow these steps:
- Ensure the amp is turned off and unplugged.
- Connect the speaker wire to the amp’s speaker output terminals.
- Identify the correct polarity (positive and negative) for the wires.
- Connect the other end of the speaker wire to the corresponding terminals on the speakers.
- Plug in the amp and turn it on. Verify that the connection is secure and test the sound.
Conclusion
Installing an amp can seem like a daunting task, but with the right guidance, it can be a smooth process. By following the step-by-step instructions in this blog post, you can confidently install an amp in your audio system. Remember to gather all the necessary tools, take your time with the wiring, and double-check your connections for a successful installation.
Now, you can enjoy enhanced sound quality and take your music experience to a whole new level. Happy amp installation!
