To install an amplifier wiring kit, first, gather all the necessary tools and materials. Then, connect the power wire to the positive terminal of the car battery, run the remote wire to the back of the stereo, and connect the ground wire to a metal part of the vehicle’s chassis.
Finally, connect the speaker wire to the amplifier and the car’s speakers, and secure all the connections using electrical tape or zip ties.
Gather The Necessary Tools And Equipment
To successfully install an amplifier in your vehicle, you’ll need to gather the necessary tools and equipment. This includes an amplifier wiring kit, amplifier, speaker wire, RCA cables, fuse holder and fuse, wire cutters, wire strippers, crimping tool, electrical tape, socket set, screwdriver, and possibly a drill. Having these tools on hand will make the installation process smoother and more efficient.
Let’s take a closer look at each of these items:
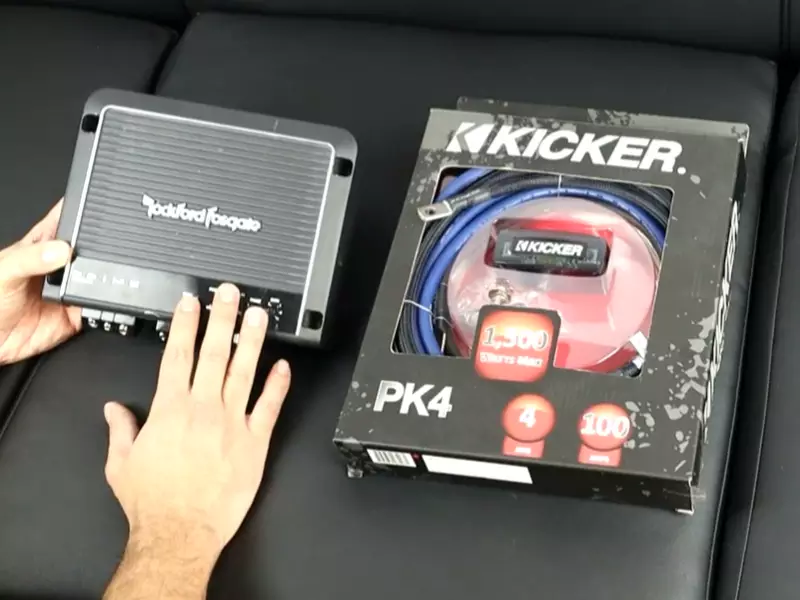
- Amplifier wiring kit: This kit provides all the necessary wiring components, such as power wire, ground wire, remote wire, and RCA cables, needed to connect your amplifier to your car’s audio system.
- Amplifier: The amplifier is the heart of your car’s audio system, responsible for boosting the audio signal to power the speakers. Choose an amplifier that matches your system’s power and compatibility requirements.
- Speaker wire: This wire connects the amplifier to the speakers, transmitting the amplified audio signal. Ensure you have enough speaker wire to reach all the speakers in your vehicle.
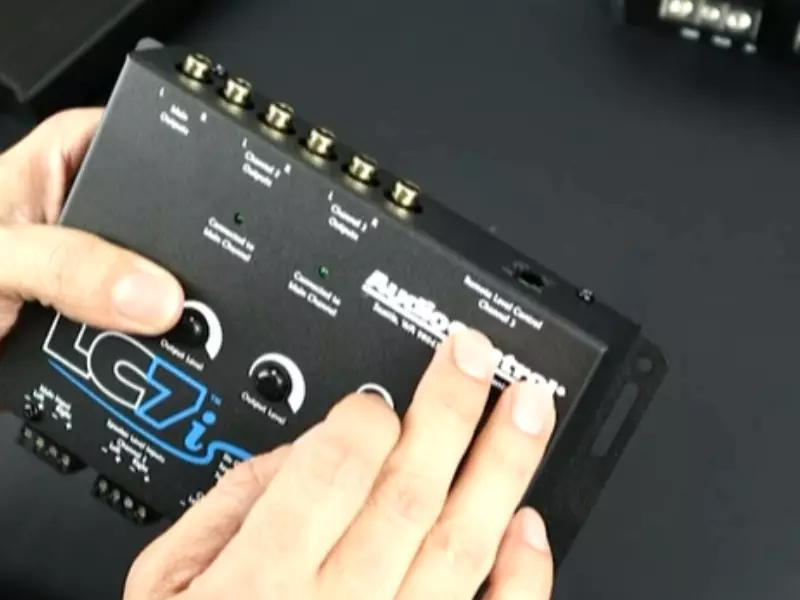
- RCA cables: These cables are used to transmit the audio signal from your car’s head unit to the amplifier. They come in pairs, usually red and white, and provide a clean and low-noise connection.
- Fuse holder and fuse: These safety components protect your car’s electrical system from potential short circuits and electrical damage. The fuse holder holds the fuse, which should be appropriately sized for your amplifier’s power requirements.
- Wire cutters: These tools are essential for cutting and trimming wires to the appropriate length during the installation process.
- Wire strippers: Wire strippers allow you to remove the insulation from the wires, exposing the bare metal for a secure connection.
- Crimping tool: A crimping tool is used to securely attach connectors to the ends of wires, ensuring a proper electrical connection.
- Electrical tape: This tape is used to insulate and protect exposed wires and connections, preventing shorts and maintaining the integrity of the electrical system.
- Socket set: A socket set will come in handy for removing any necessary panels or components during the installation, providing easy access to the wiring.
- Screwdriver: A screwdriver is used to secure the amplifier and other components in place, ensuring they are securely and properly mounted.
- Drill (if necessary): In some cases, you may need to drill holes for mounting brackets or running wires through your vehicle. If necessary, have a drill and appropriate drill bits on hand.
Gathering all the necessary tools and equipment before starting your amplifier installation will save you time and frustration. Ensure you have everything listed above to complete the installation smoothly. With all your tools organized and ready, you can move on to the next steps and enjoy the enhanced audio experience in your vehicle.
Plan The Installation
Installing an amplifier wiring kit is an essential step in upgrading your car’s audio system. Before diving straight into the installation process, it’s crucial to carefully plan each step to ensure a successful and efficient installation.
This includes determining the best location for the amplifier, measuring and planning the wiring route, considering the power source and grounding options, and checking the vehicle’s manual for any specific guidelines or restrictions. Let’s explore these steps in more detail.
Determine the Best Location for the Amplifier
Choosing the best location for your amplifier is vital for optimal performance and ease of installation. Look for a spot that is easily accessible, secure, and well-ventilated to prevent overheating. Some popular locations include the trunk, under the passenger or driver seat, or behind the dashboard. Consider factors such as available space, wiring length, and the need for future maintenance when selecting the location. Check that the chosen spot won’t interfere with any other car components or hinder passenger comfort.
Measure and Plan the Wiring Route
Once you have determined the amplifier’s location, the next step is to measure and plan the wiring route. Measure the distance from the amplifier location to the audio source, such as the car stereo or head unit. This measurement will help you determine the length of the power, ground, and signal cables needed for the installation.
Additionally, consider the shortest and safest path for running the wires while avoiding any potential hazards or obstructions within the vehicle. Keep in mind that tucking the wires away neatly can help maintain a clean and professional appearance.
Consider the Power Source and Grounding Options
For your amplifier to function optimally, it requires a reliable power source and a proper grounding connection. Identify a suitable power source, such as the car’s battery or fuse box, which can handle the amplifier’s power requirements. Ensure that the power wire is of the correct gauge and properly fuse-protected to avoid any electrical mishaps.
Similarly, locate a suitable grounding point near the amplifier to establish a solid connection between the amplifier and the car’s chassis. Clean any paint or rust from the grounding point to ensure a strong and stable ground connection.
Check the Vehicle’s Manual for Any Specific Guidelines or Restrictions
Before proceeding with the installation, it is essential to consult your vehicle’s manual for any specific guidelines or restrictions related to amplifier installations. The manual may provide valuable information on wiring diagrams, acceptable locations, or any manufacturer-specific recommendations to follow. Adhering to these guidelines will help ensure a safe and problem-free installation while protecting your vehicle’s electrical system.
Install The Amplifier Wiring Kit
Installing an amplifier wiring kit is an essential step in upgrading your car audio system. With the right tools and a little know-how, you can easily install an amplifier wiring kit and enjoy enhanced sound quality while on the road. In this guide, we will take you through each step of the installation process, ensuring a smooth and hassle-free experience. So let’s get started and install your amplifier wiring kit!
Disconnect the Negative Terminal of the Battery
The first step in the installation process is to disconnect the negative terminal of the battery. This ensures your safety while working with electrical components and prevents any accidental shorts or damage. Locate the negative terminal, use a wrench or socket to loosen the nut, and disconnect the negative cable.
Identify the Appropriate Power Source Connection Point
Next, you need to identify the appropriate power source connection point in your vehicle. This is usually the fuse box or the positive terminal of the battery. Make sure to choose a connection point that can handle the required amount of power for your amplifier.
Make a Hole for Routing the Power Wire into the Cabin
Now, it’s time to make a hole for routing the power wire into the cabin. Choose a suitable location, preferably near the amplifier location, and drill a hole of the appropriate size. This will allow you to pass the power wire from the engine bay into the cabin.
Route the Power Wire and Secure it Along the Vehicle’s Frame
After making the hole, route the power wire from the engine bay to the amplifier location inside the cabin. Make sure to secure the wire along the vehicle’s frame using zip ties or adhesive clips. This will prevent any loose wires and ensure a clean and tidy installation.
Connect the Power Wire to the Fuse Holder and Secure it
Now, it’s time to connect the power wire to the fuse holder. Strip the insulation from the end of the power wire and insert it into the appropriate terminal of the fuse holder. Use a crimping tool to secure the connection and ensure a solid electrical connection.
Connect the Fuse Holder to the Positive Terminal of the Battery
With the power wire properly connected to the fuse holder, it’s time to connect the fuse holder to the positive terminal of the battery. Again, strip the insulation from the end of the power wire and attach it securely to the positive terminal using a wrench or socket. Make sure the connection is tight and secure.
Connect the Amplifier to the Power Wire
Now it’s time to connect the amplifier to the power wire. Locate the power input terminal on the amplifier and strip the insulation from the end of the power wire. Insert the bare wire into the terminal and tighten the connection using a screwdriver or other suitable tool. Make sure the connection is secure to avoid any loose wires.
Install a Ground Wire and Connect it to the Amplifier and a Suitable Grounding Point
In order to ensure proper grounding of the amplifier, you need to install a ground wire. Choose a suitable grounding point near the amplifier location and strip the insulation from the end of the ground wire. Connect one end of the ground wire to the amplifier’s ground terminal and the other end to the chosen grounding point. Tighten the connections to ensure a solid ground connection.
Connect the Remote Turn-On Lead from the Head Unit to the Amplifier
Next, you need to connect the remote turn-on lead from the head unit (the main control unit of your car audio system) to the amplifier. Locate the remote turn-on wire on your head unit and strip the insulation from the end. Connect one end of the wire to the remote turn-on input on the amplifier and the other end to the appropriate wire on the head unit. Ensure the connections are secure and properly insulated.
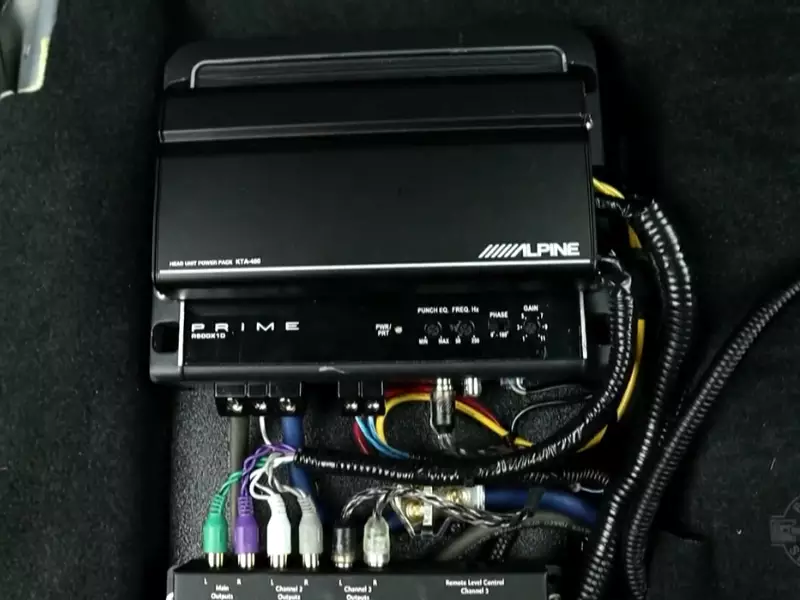
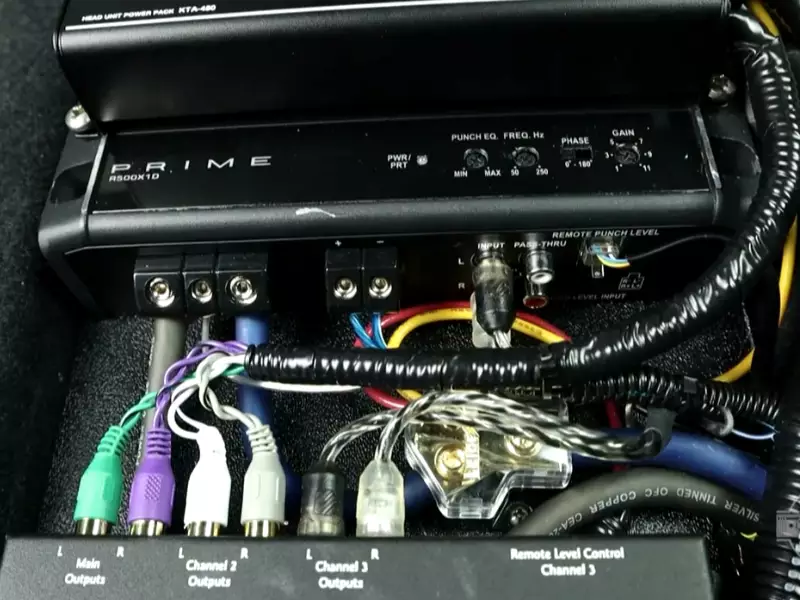
Connect the RCA Cables from the Head Unit to the Amplifier
Now it’s time to connect the RCA cables from the head unit to the amplifier. Locate the RCA outputs on your head unit and the corresponding RCA inputs on the amplifier. Connect one end of the RCA cables to the head unit and the other end to the amplifier, ensuring a secure and tight connection. This will enable the audio signal to be transmitted from the head unit to the amplifier.
Connect the Speaker Wires from the Amplifier to the Speakers
The final step in the installation process is to connect the speaker wires from the amplifier to the speakers. Strip the insulation from the ends of the speaker wires and connect them to the appropriate terminals on the amplifier and the speakers. Ensure the connections are secure and properly insulated to avoid any unwanted noise or interference.
Double-check all the Connections and Secure them Properly
Before wrapping up the installation process, it’s important to double-check all the connections and ensure they are secure and properly insulated. Take a few moments to inspect each connection, tighten any loose screws or connections, and secure all the wires properly to avoid any potential issues.
By following these step-by-step instructions, you can successfully install an amplifier wiring kit and enjoy a high-quality audio experience in your vehicle. Now sit back, turn up the volume, and enjoy the ride!
Test And Fine-Tune The System
When it comes to installing an amplifier wiring kit, it’s crucial to go that extra mile and test and fine-tune the system. This step ensures that your amplifier is properly connected and adjusted for optimal performance, delivering the best sound quality possible. In this section, we will cover the necessary steps to reconnect the negative terminal of the battery, test the amplifier, and fine-tune the sound settings.
Reconnect the negative terminal of the battery
Before testing the amplifier, it’s important to reconnect the negative terminal of the battery to ensure a safe and reliable connection. Follow these steps to reconnect the negative terminal:
- Locate the negative terminal of the battery.
- Using a wrench or socket, loosen and remove any bolts or clasps securing the negative cable.
- Place the negative cable back onto the negative terminal.
- Tighten the bolts or clasps to secure the negative cable in place.
Turn on the head unit and test the amplifier
After reconnecting the battery, it’s time to turn on the head unit and test the amplifier. Follow these steps:
- Ensure the head unit is turned off before proceeding.
- Turn on the head unit and wait for it to power up.
- Check if the amplifier’s power light indicator turns on. This indicates that it is receiving power.
- Play some audio through the system and check if the amplifier is producing sound.
Adjust the amplifier settings for optimal performance
Once you have verified that the amplifier is functioning properly, it’s time to fine-tune the settings for the best performance. Here’s how you can do it:
- Refer to your amplifier’s manual to locate the various controls and settings.
- Adjust the gain control to match your head unit’s output level. This ensures that the amplifier receives the right signal without distortion.
- Set the crossover controls to the desired frequency range. This helps in directing the appropriate frequencies to the speakers or subwoofers.
- Experiment with the tone controls, such as bass and treble, to achieve the desired sound signature.
Fine-tune the sound using an audio test track or an app
To further enhance the sound quality and balance, you can fine-tune the system using an audio test track or an app specifically designed for this purpose. Follow these steps:
- Download an audio test track or a sound calibration app from a reputable source.
- Play the test track or open the app on your head unit.
- Follow the instructions provided by the test track or app to adjust the settings on your amplifier and equalizer for optimal sound quality.
- Listen carefully to the changes and make minor adjustments until you are satisfied with the sound.
Once you have completed these steps, you can be confident that your amplifier and sound system are properly installed and optimized for the best audio experience. Take your time to test and fine-tune the system, as it will greatly enhance your enjoyment of music while driving.
Enjoy Your Upgraded Audio System
Sit back and enjoy the enhanced audio quality in your vehicle
Once you have successfully installed your amplifier wiring kit, it’s time to sit back and enjoy the incredible audio experience that awaits you. Whether you’re a music enthusiast or simply someone who loves listening to their favorite podcasts during commutes, having an upgraded audio system in your vehicle can truly elevate your driving experience.
Here are a few reasons why you should be excited about enjoying your upgraded audio system:
1. Crystal-clear sound
With the amplifier wiring kit properly installed, you can expect crystal-clear sound quality that brings every note and lyric to life. Say goodbye to muffled or distorted audio and hello to a truly immersive listening experience. Whether you’re pumping up the bass or fine-tuning the treble, your audio system will deliver exceptional clarity and depth.
2. Enhanced bass response
One of the most significant benefits of installing an amplifier wiring kit is the impact it has on the bass response in your vehicle. With the appropriate wiring and components, your subwoofers will unleash powerful low-end frequencies that bring a whole new level of depth to your music. Feel the thumping beats with every song you play and experience the music in a way you’ve never felt before.
3. Immersive surround sound experience
An upgraded audio system is not just about louder music; it’s about creating a surround sound experience that transports you into the heart of the music or audio. With the right wiring and setup, your speakers will deliver a spatial audio experience that makes you feel like you’re sitting in a live concert or a high-end recording studio. Each instrument and vocal will stand out and be precisely placed in the soundstage, enhancing your overall enjoyment.
4. Enjoyment for everyone in the vehicle
Whether you’re driving alone or with friends and family, an upgraded audio system ensures that everyone can enjoy their favorite music in the best possible quality. No matter where someone is seated in the vehicle, the sound will be evenly distributed, making every journey a memorable one. From road trips to daily commutes, your upgraded audio system will make every moment more enjoyable.
So, go ahead and enjoy your upgraded audio system to the fullest. Turn up the volume, sing along to your favorite tunes, and let the music take you to places beyond your imagination. With the right amplifier wiring kit installed, the possibilities are endless.
Frequently Asked Questions On How To Install Amplifier Wiring Kit
Does The Power Wire Go To Positive Or Negative On An Amp?
The power wire on an amp should be connected to the positive terminal.
How Do I Connect My Amp To My Sound System?
To connect your amp to your sound system, follow these steps:
- Ensure both your amp and sound system are turned off and unplugged.
- Connect the audio output of your amp to the audio input of your sound system using an audio cable.
- Make sure the connections are secure.
- Plug in and turn on both devices.
- Adjust the volume and settings to your preference.
What Wires Do I Need To Install An Amp?
To install an amp, you will need power and ground wires, a remote turn-on wire, and RCA cables for the audio signal. The power wire connects the amp to your car’s battery, while the ground wire connects it to a metal surface.
The remote turn-on wire activates the amp, and the RCA cables carry the audio signal from the head unit to the amp.
What Do I Connect The Amp Turn On Wire To?
The amp turn-on wire should be connected to the remote turn-on lead on your head unit or receiver. This wire signals the amplifier to turn on and off with your car’s stereo system.
Conclusion
Installing an amplifier wiring kit may seem daunting at first, but by following the steps outlined in this blog post, you can easily tackle the task. From gathering the necessary tools to connecting the wires correctly, this guide provides a comprehensive approach to ensure a successful installation.
Remember to maintain safety precautions throughout the process and seek professional help if needed. With this knowledge, you can enhance your audio experience and enjoy crisp, high-quality sound in your vehicle.