To install an amp with a factory radio, you need to connect the amp using a line output converter (LOC) and tap into the speaker wires for signal input, while also connecting the power and ground wires for the amp. This process allows you to amplify the audio output from your factory radio and improve the sound quality in your vehicle.
Simply follow the steps below to install an amp with a factory radio. Integrating an amplifier into a factory-installed radio system can significantly enhance the audio experience in your vehicle. Whether you want to add some bass to your music or achieve higher sound quality, installing an amp can be a great solution.
This article will guide you through the process of installing an amp with a factory radio. By following these steps, you can enjoy enhanced audio performance without having to replace your factory radio. So, let’s get started.
Understanding The Basics Of Amp Installation
When it comes to upgrading your factory audio system, adding an amplifier (amp) can significantly enhance your listening experience. An amp enables you to achieve higher power levels, clearer sound, and improved bass response. If you’re wondering how to install an amp with a factory radio, this guide will walk you through the process step by step. Before diving into the installation, it’s crucial to understand the basics of amp installation. This will empower you to make informed decisions throughout the project.
Why install an amp with a factory radio?
If you’re a music lover or someone who enjoys a powerful audio experience, installing an amp with a factory radio is a game-changer. Factory audio systems often lack the power and sound quality required to fully enjoy your favorite music tracks. Adding an amp can give you the power and clarity you desire, allowing you to hear details in the music that you might have missed before. This upgrade is particularly beneficial if you enjoy listening to genres like rock, hip-hop, or electronic music, where deep bass response is key.
Benefits of adding an amp to your factory audio system
Adding an amp to your factory audio system brings a multitude of benefits. Here are a few reasons why you might consider this upgrade:
- Improved sound quality: The extra power provided by the amp allows your speakers to perform at their full potential, resulting in clearer sound and better overall audio quality.
- Enhanced bass response: Amps provide the necessary power to drive subwoofers, delivering deep and impactful bass that can transform your listening experience.
- Increased volume: With an amp, you can achieve higher volume levels without distortion, ensuring that your music is heard clearly even at high volumes.
- Better dynamics: An amp allows for better control and response, enabling you to hear intricate details in your music and enhancing the dynamic range.
- Flexibility for future upgrades: By installing an amp, you create a foundation for future audio system upgrades, such as adding new speakers or a subwoofer. This way, you can continue to improve your audio system over time.
Planning your amp installation project
Before diving into the installation process, it’s essential to plan your project carefully. Consider the following factors when preparing for your amp installation:
- Research and gather information: Familiarize yourself with your factory radio and the specific requirements of your car’s audio system. This will help you understand the compatibility of the amp and ensure a successful installation.
- Determine power requirements: Calculate the power needs of your audio system and choose an amp that can handle the load. Consider factors such as the number and wattage of speakers you plan to connect.
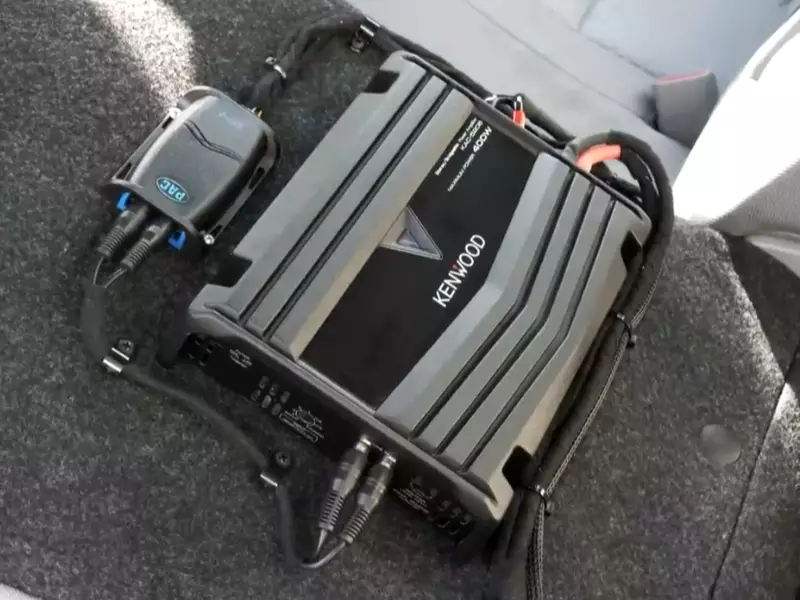
- Consider space and placement: Find a suitable location to mount the amp in your vehicle. Ensure that it is easily accessible, well-ventilated, and secure.
- Create a wiring plan: Plan the routing and placement of all the necessary cables and wires. Take into account the length of wires required, potential obstacles, and any additional accessories such as fuse holders or distribution blocks.
Necessary tools and materials for the installation process
To ensure a smooth and successful amp installation, gather the following tools and materials:
- Car audio wiring kit (which typically includes power wire, ground wire, RCA cables, fuse holder, and remote turn-on wire).
- Wire strippers and crimping tool.
- Screwdriver set.
- Panel removal tool.
- Electrical tape.
- Zip ties and adhesive mounts for cable management.
- Multimeter or test light for electrical testing and troubleshooting.
With these tools and materials in hand, you’ll be well-prepared for the amp installation process. In the next section, we’ll guide you through the step-by-step process of installing an amp with a factory radio. Stay tuned!
Remember, to ensure a successful amp installation, it’s best to follow the manufacturer’s instructions and seek professional assistance if needed.
Preparing Your Vehicle For Amp Installation
If you’re looking to enhance your car’s audio system with an amplifier, it’s important to properly prepare your vehicle for the installation process. By following a few simple steps, you can ensure a smooth and successful installation. Let’s take a look at what you need to do to prepare your vehicle for amp installation.
Disconnecting the battery for safety
Before you begin any electrical work on your vehicle, safety should always be your top priority. To avoid any potential accidents or damage, start by disconnecting the battery. This will cut off power to the entire system and eliminate the risk of electrical shocks.
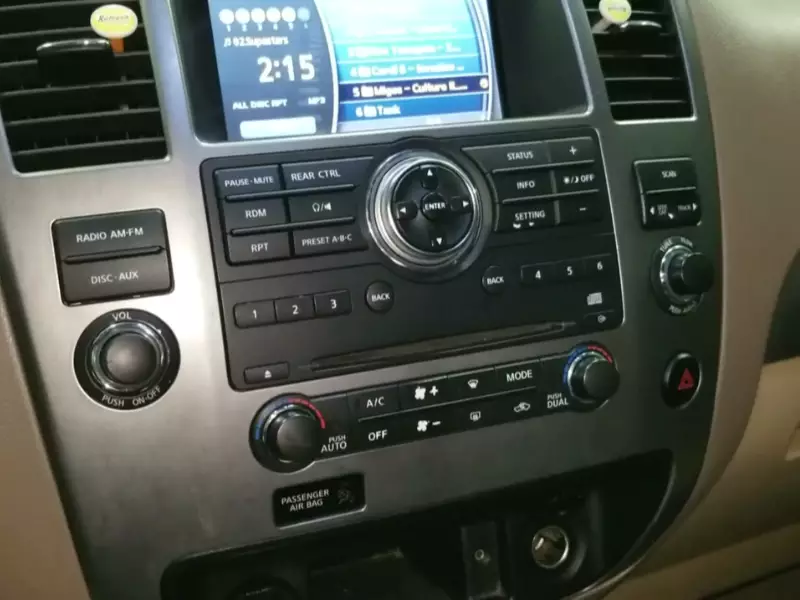
Locating the factory radio and necessary wiring connections
The next step in preparing your vehicle for amp installation is to locate the factory radio and the necessary wiring connections. The factory radio is typically located in the dashboard or center console area, and you may need to remove certain panels to access it. Consult your vehicle’s manual or do some online research to find the exact location.
Gathering the appropriate wiring harness and adapters
Once you have located the factory radio, it’s time to gather the appropriate wiring harness and adapters for your amp installation. These accessories will allow you to connect the amp to the factory radio without having to cut into any of the original wiring. It’s important to choose the correct harness and adapters that are compatible with your specific vehicle make and model.
Removing the necessary panels and accessing the wiring area
In order to properly connect the wiring harness and adapters, you’ll need to remove the necessary panels to access the wiring area. This may involve removing trim pieces or unscrewing certain components. Take your time and be gentle when removing the panels to avoid any damage to the vehicle’s interior.
Once you have gained access to the wiring area, make sure to carefully follow the instructions provided with the wiring harness and adapters. This will ensure a proper and secure connection between the factory radio and the amplifier.
By following these steps and preparing your vehicle for amp installation, you’ll be well on your way to enjoying a superior audio experience in your car. Stay tuned for our next blog post on how to correctly install the amp with the factory radio!
Connecting The Amp To The Factory Radio
When it comes to upgrading your car audio system, installing an amp with a factory radio can seem like a challenge. However, with the right knowledge and tools, it can be a relatively straightforward process. In this article, we will guide you through the steps of connecting an amp to your factory radio, ensuring optimal performance and audio quality.
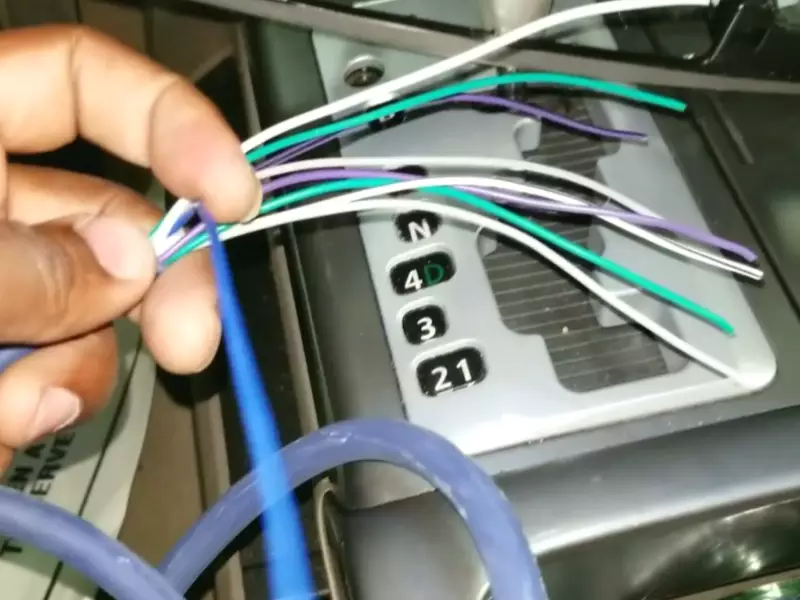
Understanding the wiring diagram and color codes
Before diving into the installation process, it is crucial to understand the wiring diagram and color codes of your factory radio. This information will help you properly identify and connect the necessary cables to your amp. The wiring diagram will depict the various connections and their corresponding color codes, ensuring seamless integration between your factory radio and amp.
Connecting signal cables from the factory radio to the amp
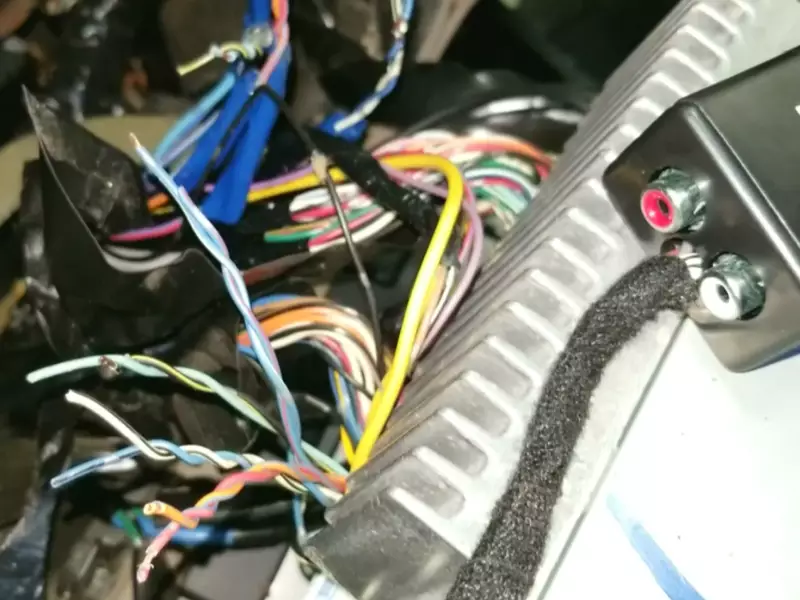
One of the key steps in connecting an amp to your factory radio is ensuring the proper connection of signal cables. These cables transmit audio signals from your factory radio to the amp, allowing it to amplify the sound and enhance your listening experience.
To connect the signal cables, locate the audio output of your factory radio and connect them to the corresponding inputs on your amp. Depending on your audio system, you may need RCA cables or speaker-level inputs for this connection.
Powering the amp with the appropriate wiring
Powering the amp is essential for its operation, and it requires the appropriate wiring to ensure optimal performance. Consult your amp’s manual to determine the power requirements and locate the suitable power source in your vehicle.
Generally, you will need to connect the amp’s power terminal to the positive terminal of your car battery, using an appropriately sized power cable. Additionally, don’t forget to connect the amp’s remote turn-on wire to the corresponding output on your factory radio, enabling the amp to turn on and off with your radio.
Grounding the amp for optimal performance
Grounding your amp properly is crucial for achieving optimal performance and reducing potential noise and interference. Locate a solid metal surface near the amp’s location, preferably the vehicle chassis, and ensure a clean metal-to-metal connection.
Strip off a small portion of the insulation from the ground wire and secure it tightly to the chosen grounding point. Remember to tighten the connection securely to ensure a good electrical connection.
Ensuring proper fuse usage for safety
Proper fuse usage is vital to protect your amplifier and your vehicle’s electrical system from potential damage caused by power surges or short circuits. Refer to your amp’s manual to determine the appropriate fuse size and install it in line with the main power cable. Additionally, double-check that any additional fused wiring connections are properly installed and secure.
In conclusion, connecting an amp to a factory radio is a manageable task, provided you have a clear understanding of the wiring diagram, follow the correct color codes, and make secure connections. Take your time to ensure all cables are properly connected, and follow safety measures such as fuse usage and grounding for optimal performance and longevity of your audio system.
Adjusting Amp Settings And Fine-Tuning The Audio
After successfully installing the amp with your factory radio, it’s time to focus on adjusting the amp settings and fine-tuning the audio for the best sound experience. By configuring the gain, crossover, and equalizer settings on the amp, testing the audio system, measuring voltage with a multimeter, and troubleshooting common issues, you can ensure optimal performance from your newly installed amp.
Configuring the gain, crossover, and equalizer settings on the amp
Properly configuring the gain, crossover, and equalizer settings on your amp is crucial to achieving the desired audio output. The gain control adjusts the input level of the amp, preventing distortion or clipping. Begin by setting the gain to the minimum and gradually increasing it until you reach your preferred listening volume without distortion. Use a test tone or music with a consistent level to fine-tune the gain settings for each channel.
The crossover settings on the amp allow you to define the frequency range for the various speakers in your audio system. You can set high-pass filters to direct higher frequencies to smaller speakers like tweeters, and low-pass filters to send lower frequencies to subwoofers. Consult your amp’s manual to adjust the crossover settings according to the frequency response of your speakers.
The equalizer settings on the amp enable you to adjust the sound according to your personal preferences. Most amps provide basic equalization options such as bass, treble, and mid-range adjustments. Experiment with these settings to find the perfect balance for your audio system.
Testing the audio system and making adjustments
Once you have configured the amp settings, it’s essential to test your audio system and make any necessary adjustments. Start by playing a variety of audio sources, including different music genres, to ensure that the sound is well-balanced across all frequencies. Pay attention to any distortion, clipping, or imbalances in the audio and adjust the gain, crossover, and equalizer settings accordingly.
Additionally, listen to various tracks that highlight specific frequencies, such as bass-heavy songs or tracks with intricate highs and mids. This will help you identify any areas where the audio may require further fine-tuning. Take your time during this process, as finding the perfect audio balance can significantly enhance your listening experience.
Using a multimeter to measure voltage and confirm proper installation
A multimeter is a valuable tool for measuring voltage and confirming the proper installation of your amp. Using the multimeter’s voltage setting, connect the positive probe to the amp’s positive terminal and the negative probe to the amp’s negative terminal. Ensure that the readings match the voltage requirements specified by your amp’s manufacturer. If the readings are significantly different, you may need to recheck your wiring connections.
Troubleshooting common issues and resolving them effectively
Despite careful installation, you may encounter common issues with your amp setup. Some common problems include inadequate ground connections, incorrect wiring, or interference. Here are a few troubleshooting steps to help you resolve these issues effectively:
- Check all ground connections and ensure they are secure and properly connected to a clean metal surface. A loose or faulty ground connection can cause noise or poor audio quality.
- Verify that all the wiring connections are correct and that no wires are frayed or damaged. Incorrect wiring can lead to inconsistent audio output or no sound at all.
- If you are experiencing interference, such as engine noise or alternator whine, consider using a ground loop isolator to eliminate the issue.
- Regularly inspect and clean your amp and audio system to prevent dust or debris buildup, which can affect performance over time.
By following these troubleshooting steps, you can identify and resolve common issues, ensuring optimal performance from your amp and audio system.
Remember, adjusting amp settings and fine-tuning the audio is an iterative process. Take your time, experiment with the different settings, and listen attentively to achieve the best sound quality for your preferences.
Integrating The Amp With The Factory Radio
When it comes to upgrading your car’s audio system, integrating an amp with the factory radio is essential for that enhanced sound experience. Not only does it allow you to retain the factory features and controls you love, but it also ensures a seamless integration of the amp into the existing audio system. However, there are a few considerations to keep in mind to avoid potential interference and compatibility issues. In this guide, we will walk you through the steps to successfully install an amp with your factory radio, ensuring optimal functionality and sound quality.
Retaining Factory Features and Controls
One of the main advantages of integrating an amp with the factory radio is the ability to retain the features and controls you are accustomed to. Whether it’s the steering wheel controls, Bluetooth connectivity, or navigation system, keeping these functionalities intact is crucial. To achieve this, make sure to choose an amp that supports these factory features. Additionally, you may need to purchase specific harnesses or adapters that allow seamless integration between the amp and the factory radio.
Avoiding Potential Interference and Compatibility Issues
To avoid potential interference and compatibility issues, it is important to choose an amp that is compatible with your car’s factory radio. Conduct thorough research or consult a professional to ensure compatibility. Additionally, consider potential interference from other electronic components in your car, such as the power windows or the ignition. Proper grounding and wiring techniques should be followed to minimize any potential noise or interference that could affect the sound quality of your audio system.
Ensuring a Seamless Integration of the Amp into the Existing Audio System
A seamless integration of the amp into the existing audio system is crucial to achieve optimal performance. Start by locating an appropriate location for mounting the amp, ensuring it is securely fastened and away from any moving parts. Carefully connect the amp to the factory radio using the appropriate connectors and wires. Double-check all connections to ensure they are secure and follow the provided instructions from the amp manufacturer for the best integration. By closely following these steps, you can ensure that your amp seamlessly integrates into your existing audio system.
Testing the Overall Functionality and Sound Quality after Installation
Once the installation is complete, it is important to test the overall functionality and sound quality of your new amp and audio system. Start by turning on your car’s radio and testing each speaker to ensure they are working correctly. Verify that all factory features and controls are still functioning as intended. Additionally, test the sound quality by playing various audio sources and adjusting the settings on the amp for optimal sound output. Tweak the settings as needed until you are satisfied with the overall performance.
In conclusion, integrating an amp with your factory radio is a fantastic way to enhance your car’s audio system. By following these steps, you can retain factory features and controls, avoid potential interference and compatibility issues, ensure seamless integration, and test the overall functionality and sound quality. Take your time during the installation and consult professionals if needed to ensure the best possible outcome for your car’s audio upgrade.
Frequently Asked Questions Of How To Install Amp With Factory Radio
Can I Hook Up An Amp To My Factory Stereo?
Yes, you can connect an amp to your factory stereo. It allows you to enhance your audio system and improve sound quality without replacing the entire stereo. Simply install an amplifier and connect it to your factory stereo using a wiring harness or line output converter.
Can I Hook Up An Amp And Subs To A Factory Radio?
Yes, you can connect an amp and subs to a factory radio. It requires a line output converter (LOC) to convert speaker-level signals into RCA signals. The LOC connects to the factory radio’s speaker wires, allowing you to connect the amp and subs using RCA cables.
How Do I Connect My Amp To My Car Stereo?
To connect your amp to your car stereo, follow these steps:
- Disconnect the negative battery terminal.
- Connect the amp’s power wire to the positive battery terminal.
- Run the amp’s remote wire to the stereo’s remote output.
- Connect the amp’s ground wire to a clean, metal area in the car.
- Connect the amp’s RCA cables to the stereo’s RCA outputs.
Can You Hook Up An Amp To A Home Stereo?
Yes, you can connect an amp to a home stereo. Simply connect the RCA output of the stereo to the RCA input of the amp using audio cables. Then, connect the speakers to the amp’s speaker outputs. This allows you to enhance the audio quality of your home stereo system.
Conclusion
Installing an amp with a factory radio may seem daunting, but with the right guidance, it can be a straightforward process. By following the steps outlined in this blog post, you’ll be able to enhance your car’s audio system and experience upgraded sound quality.
Remember to carefully consult your vehicle’s manual and wiring diagram, and take your time to ensure a proper and secure installation. Before you know it, you’ll be enjoying your favorite tunes with impressive clarity and power. Happy installing!