To install a touch screen radio in your car, first, gather the necessary tools such as a trim removal tool, wiring harness adapter, and mounting kit. Secondly, disconnect the negative terminal of your car’s battery to avoid any electrical issues.
Then, remove the existing radio by carefully prying off the trim panels and unscrewing the radio unit. After that, connect the wiring harness adapter to the new touchscreen radio and attach the mounting kit. Finally, slide the new radio into place, secure it with screws, and reassemble the trim panels.
Reconnect the car battery, and your touch screen radio installation is complete.
Factors To Consider When Choosing A Touch Screen Radio
Installing a touchscreen radio in your car can greatly enhance your driving experience, giving you access to a wide range of entertainment and connectivity options. However, with so many options available in the market, it’s important to consider various factors before making a purchase. Here are the key factors you should keep in mind:
Compatibility with your car’s make and model
One of the crucial aspects to consider when choosing a touch screen radio is its compatibility with your car’s make and model. Not all touch screen radios are universal, and different car manufacturers may have their own specific requirements. Before making a decision, ensure that the radio you choose is designed to work seamlessly with your car’s system. This will avoid any installation issues and ensure that all features and functions work perfectly.
Screen size and resolution
The screen size and resolution of a touch screen radio play a significant role in enhancing user experience. A larger screen size can provide better visibility and ease of use, allowing you to operate the radio effortlessly while driving. Additionally, a higher resolution ensures crisp and clear visuals, making it easier to read song titles, navigation instructions, and other on-screen information. Consider your personal preferences and the size of your car’s dashboard when choosing the screen size.
Connectivity options (Bluetooth, USB, AUX)
When selecting a touch screen radio, it’s important to evaluate the connectivity options it offers. Bluetooth connectivity allows you to seamlessly connect your phone to the radio, enabling you to stream music and make hands-free calls. USB and aux inputs provide flexibility in connecting various devices such as smartphones, mp3 players, and other audio sources. Prioritize a touch screen radio that offers a wide range of connectivity options to ensure compatibility with your devices and convenient usage.
Audio quality and features
The audio quality and additional features of a touch screen radio are crucial factors to consider. Look for a radio that provides high-quality sound output and has adjustable settings to customize the audio according to your preferences. Some touch screen radios come with additional features like equalizers, built-in amplifiers, and preamp outputs, which enhance the audio experience even further. Take the time to research and compare the audio capabilities and features of different touch screen radios to choose the one that best suits your preferences.
Budget considerations
While exploring touch screen radios, it’s essential to consider your budget. The market offers a wide range of options, varying in price based on brand, features, and overall quality. Determine your budget beforehand, and look for touch screen radios that offer a good balance between cost and features. It’s important to strike a balance between what you need and what you can afford to ensure a satisfactory purchase.
Essential Tools For Installing A Touch Screen Radio
Installing a touch screen radio in your car can bring a whole new level of entertainment and convenience to your driving experience. However, before you get started, it’s important to have the right tools on hand. Here are the essential tools you’ll need to successfully install a touch screen radio in your car.
Screwdriver Set
A screwdriver set is an indispensable tool for any car installation project. When it comes to installing a touch screen radio, you’ll need a variety of screwdrivers to remove and secure the necessary screws. Make sure your set includes both Phillips and flathead screwdrivers to accommodate different types of screws.
Trim Removal Tools
Trim removal tools are essential for safely removing the trim panels on your car’s dashboard. These panels often hide screws and clips that need to be accessed during the installation process. With the right trim removal tools, you can remove these panels without causing any damage to your car’s interior.
Wire Stripper and Crimping Tool
Properly connecting and securing the wires is crucial for a successful touch screen radio installation. A wire stripper and crimping tool will help you strip the insulation off the wires and make clean, secure connections. This ensures that your touch screen radio functions properly and maintains a reliable connection with your car’s electrical system.
Electrical Tape
Electrical tape is a must-have item for any car electrical project, including installing a touch screen radio. It provides insulation and protects the exposed wires from moisture and friction, reducing the risk of short circuits or other electrical issues. Wrap the wires tightly with electrical tape to secure them and provide added protection.
Multimeter
A multimeter is a versatile tool that can be used to measure voltage, current, and resistance. Having a multimeter on hand during the touch screen radio installation will help you accurately test the electrical connections and ensure everything is working properly. This will save you time troubleshooting any potential issues down the line.
In conclusion, having the essential tools for installing a touch screen radio in your car is crucial for a successful and hassle-free installation. A screwdriver set, trim removal tools, wire stripper and crimping tool, electrical tape, and a multimeter will equip you with everything you need to complete the installation with ease. Once you have the right tools, you’ll be ready to enjoy the benefits of a touch screen radio in your car.
Disconnecting The Battery And Removing The Existing Radio
Safety Precautions Before Starting the Process
Before you begin installing a touch screen radio in your car, remember to prioritize safety. Taking the necessary precautions will ensure a smooth and accident-free installation process. Here are a few safety measures to keep in mind:
- Make sure you are working in a well-ventilated area to avoid inhaling any potentially harmful fumes.
- Wear safety goggles and gloves to protect your eyes and hands from any debris or sharp edges.
- Use the appropriate tools for the job to prevent any accidents or damage to your vehicle.
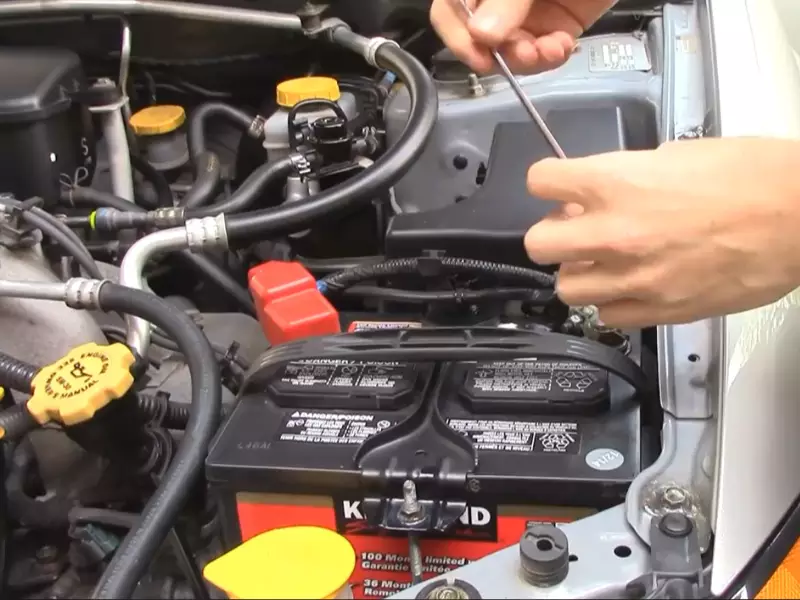
Removing the Negative Terminal of the Car Battery
Disconnecting the battery is an important step to avoid any electrical shocks or short circuits during the installation process. To safely disconnect the negative terminal of the car battery, follow these steps:
- Locate the car battery under the hood.
- Identify the negative terminal, usually marked with a “-” symbol.
- Using an appropriate wrench or pliers, loosen the nut securing the negative terminal.
- Once the nut is loose, gently remove the negative terminal from the battery.
- Place the disconnected negative terminal in a secure location to prevent accidental contact.
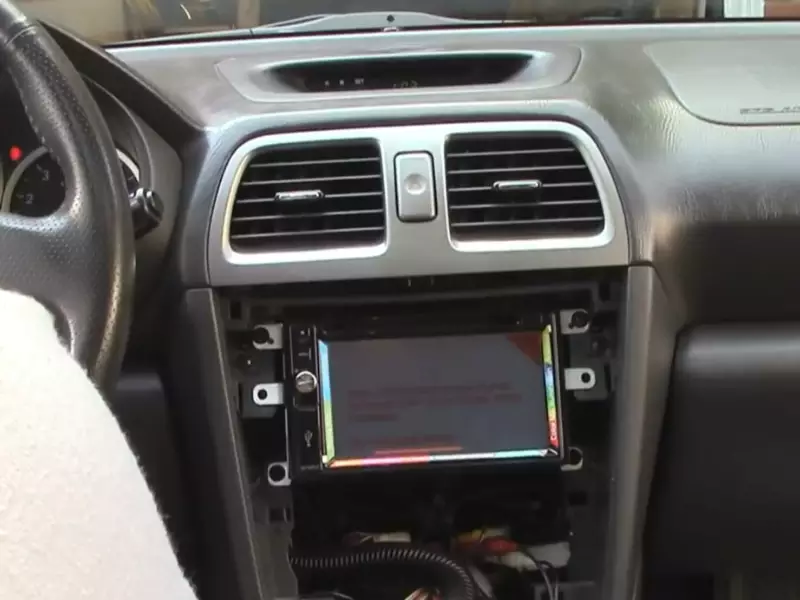
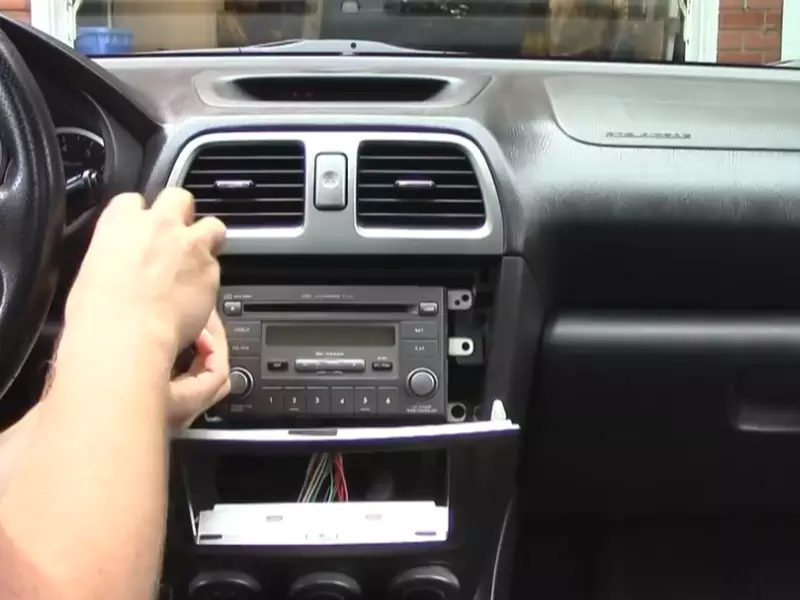
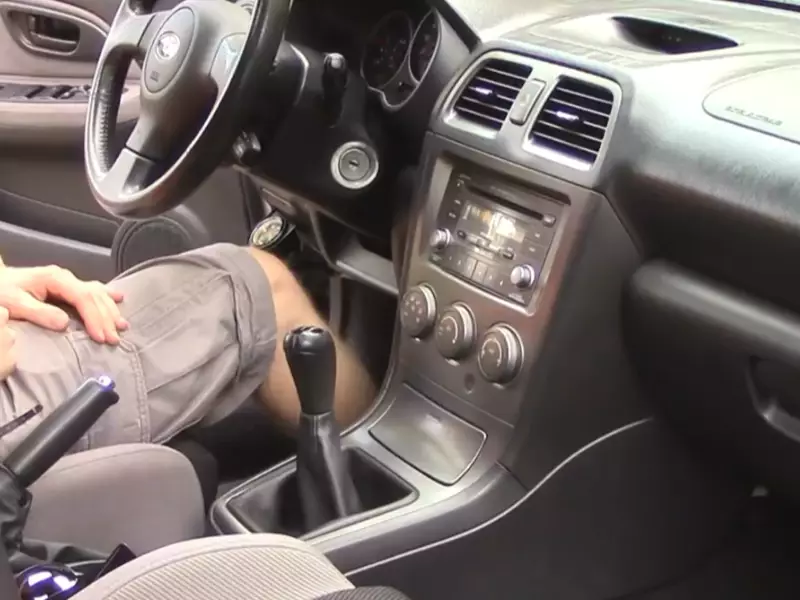
Removing the Trim and Dashboard Panels
In order to access the existing radio, you will need to remove the trim and dashboard panels surrounding it. Follow these steps to do so:
- Refer to your car’s user manual or an online resource to identify the specific location and attachment points of the trim and dashboard panels.
- Using a screwdriver or a panel removal tool, carefully remove any screws or fasteners holding the panels in place.
- Gently pry the panels away from the dashboard, starting from the edges and working your way towards the center.
- Be cautious not to apply excessive force or use sharp objects that may damage the panels or the dashboard.
- Set aside the removed panels in a safe location, ensuring they don’t get damaged.
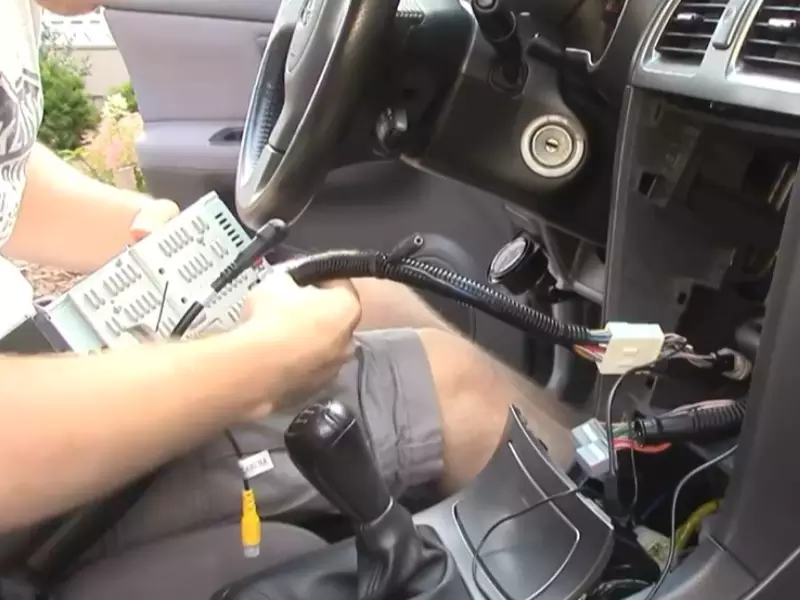
Detaching the Wiring Harness and Antenna Connections
With the trim and dashboard panels removed, you can now focus on detaching the wiring harness and antenna connections from the existing radio. Follow these steps:
- Locate the wiring harness and antenna connections at the back of the radio.
- Identify the clip or locking mechanism holding each connection in place.
- Using your fingers or a small tool, carefully release the clip or unlock the mechanism to disconnect the wiring harness and antenna connections.
- Take your time to ensure each connection is properly detached, avoiding any unnecessary force that may lead to damage.
- Set the disconnected wiring harness and antenna connections aside. You may need to reconnect them later if necessary.
By following these steps, you have successfully disconnected the battery and removed the existing radio, laying the groundwork for installing your new touch screen radio. Proceed to the next steps of the installation process to complete the transformation of your car’s audio system.
Evaluating The Wiring And Connections
Before you start the installation process of a touch screen radio in your car, it’s crucial to evaluate the wiring and connections. This step ensures that your new radio functions properly and seamlessly integrates with your vehicle’s existing electrical system. In this section, we will discuss how to inspect the wiring compatibility, identify the factory radio harness and antenna connections, and verify the wiring diagram and color codes.
Inspecting the Wiring Compatibility
To begin, it’s important to inspect the wiring compatibility of your car and the touch screen radio you plan to install. Check if your vehicle’s wiring system matches the requirements of the radio. This can be done by consulting the car’s manual or reaching out to the manufacturer for information. Additionally, you might want to consider the age of your car, as older models may not be compatible with newer touch screen radios.
If your car’s wiring is not compatible with the new radio, you may need to purchase an adapter harness. This harness acts as a bridge between your car’s factory wiring and the new radio, ensuring a proper connection without any cutting or splicing of wires.
Identifying the Factory Radio Harness and Antenna Connections
Next, you need to identify the factory radio harness and antenna connections in your car. This step will allow you to locate the correct wires and ensure a smooth installation process.
The factory radio harness consists of a set of wires and connectors that connect the radio to the car’s electrical system. It is usually located behind the radio, inside the dashboard. To locate it, you may need to remove the trim panel or any other obstructions.
Similarly, the antenna connection is necessary for the radio to receive signals. It can typically be found near the rear of the radio or on the exterior of the car, depending on the model. Once you identify these connections, you’ll be well on your way to installing your touch screen radio.
Verifying the Wiring Diagram and Color Codes
Before proceeding further, it is essential to verify the wiring diagram and color codes provided by the touch screen radio’s manufacturer. These diagrams will help you match the wires correctly and ensure the proper functioning of the radio.
Consult the wiring diagram and identify each wire’s purpose, such as power, ground, speaker connections, and other necessary functions. Also, pay attention to the color codes specified. These codes will help you match the wires with their corresponding connections without any confusion.
Ensure that you carefully follow the diagram and double-check every connection before moving forward with the installation process. Any mismatched wire or incorrect connection can lead to malfunctioning or damage to the radio.
Now that you have evaluated the wiring compatibility, identified the factory radio harness and antenna connections, and verified the wiring diagram and color codes, you are ready to proceed with the installation process. In the next section, we will guide you through the steps of removing the old radio and preparing for the installation.
Mounting The Touch Screen Radio Unit
Once you have properly connected all the necessary wires and cables, it’s time to mount the touch screen radio unit in your car. This step is crucial as it ensures that the unit is securely fixed in place and easily accessible while driving. Follow the steps below to mount the touch screen radio unit in your car:
Aligning the mounting bracket to the radio
The first step in mounting the touch screen radio unit is aligning the mounting bracket to the radio. The mounting bracket is designed to provide stability and support to the touch screen radio unit. To align the bracket, follow these steps:
- Place the mounting bracket against the back of the touch screen radio unit, ensuring that it fits securely.
- Check that the screw holes on the bracket align with the corresponding holes on the radio unit.
- If needed, adjust the bracket until it aligns perfectly with the radio unit, ensuring a snug fit.
Securing the unit into the dash slot
After aligning the mounting bracket, it’s time to secure the touch screen radio unit into the dash slot. The dash slot is typically located in the center of your car’s dashboard and is specifically designed to accommodate the radio unit. To secure the unit into the dash slot, follow these steps:
- Position the touch screen radio unit in the dash slot, ensuring that it fits securely and snugly.
- Use the appropriate screws or mounting clips provided with the unit to fix it in place.
- Tighten the screws or fasten the mounting clips firmly, but be cautious not to overtighten or damage the unit.
Double-checking the unit’s stability
Once you have secured the touch screen radio unit in the dash slot, it’s essential to double-check its stability. This step ensures that the unit is properly installed and won’t wobble while driving. To confirm the unit’s stability, follow these steps:
- Gently shake the touch screen radio unit to check if there is any movement or looseness.
- If you notice any instability, carefully tighten the screws or adjust the mounting clips to eliminate any play.
- Recheck the stability by shaking the unit again to ensure it is securely fixed in place.
Ensuring the touch screen radio unit is properly mounted guarantees a hassle-free and enjoyable experience while using it in your car. Take the time to align the mounting bracket, securely fix the unit into the dash slot, and double-check its stability for a seamless installation process.
Wiring The Touch Screen Radio
Connecting the wiring harness to the new radio
To ensure a successful installation of your touch screen radio, you’ll need to properly connect the wiring harness to the new unit. The wiring harness is a crucial link between your car’s electrical system and the touch screen radio. This step is essential for establishing a seamless connection and ensuring that all features of the radio work as intended.
Matching the wire connections based on the diagram
Before you begin connecting the wires, it’s important to refer to the wiring diagram provided with your touch screen radio. This diagram will serve as your guide to properly match each wire connection. If you’re unsure about a particular connection, consult the radio’s manual or manufacturer’s website for assistance.
Securing the connections with crimp connectors
Once you’ve matched the wire connections based on the diagram, it’s time to secure them using crimp connectors. Crimp connectors are designed to provide a reliable and durable connection between wires. Simply strip the ends of the wires, insert them into the appropriate crimp connector, and use a wire crimper tool to secure the connection. This will help prevent any loose or unstable connections that may cause issues down the road.
Tidying up the wires with zip ties or electrical tape
After securing the connections, it’s important to tidy up the wires to ensure a clean and organized installation. This can be accomplished by using zip ties or electrical tape to bundle the wires together. Start by grouping together wires that are related to each other, such as the power and ground wires. Then, use zip ties or electrical tape to secure the bundles, keeping them neat and organized. This not only enhances the overall appearance of the installation but also helps prevent any accidental damage to the wires.
Now that you’ve learned how to properly wire your touch screen radio, you can confidently proceed with the installation process. Remember to refer to the wiring diagram, secure the connections with crimp connectors, and tidy up the wires using zip ties or electrical tape. By following these steps, you’ll be enjoying your new touch screen radio in no time. Safe travels!
Testing And Verifying Connections
Once you have successfully installed your touch screen radio in your car, the next step is to test and verify the connections to ensure everything is working properly. This will not only give you peace of mind but also ensure a smooth and enjoyable driving experience with your new radio.
Reconnecting the car battery
Before testing the touch screen radio, it is important to reconnect the car battery. This step is crucial to establish a strong and stable power source for the radio. Simply locate the positive and negative terminals on your car battery and connect the cables securely. Take caution to connect the positive cable first and the negative cable last to avoid any potential electrical hazards.
Turning on the touch screen radio and checking for power
After reconnecting the car battery, turn on the ignition to power up the touch screen radio. Check if the radio displays a power-on indicator or if the screen lights up. This will confirm that the radio is receiving power and is functioning properly.
Testing all functions and features of the new radio
Once you have verified that the touch screen radio is powered on, it is time to test all the functions and features. Start by navigating through various menus to ensure that the touch screen is responsive and accurate. Test the radio tuner, CD or DVD player, USB and AUX inputs, Bluetooth connectivity, and any other functionalities that your touch screen radio offers. This will ensure that every aspect of the radio is working as intended.
Troubleshooting common installation issues
If you encounter any issues during the testing phase, it is important to troubleshoot and address them promptly. Some common installation issues include poor sound quality, malfunctioning buttons, non-functional touch screen, or connectivity problems. Refer to the installation manual provided by the manufacturer for troubleshooting steps specific to your touch screen radio model. In case you are unable to resolve the issue on your own, it is advisable to seek professional assistance.
By following these testing and verifying steps, you can ensure a successful installation of your touch screen radio and enjoy the enhanced functionality and entertainment options it offers during your car rides.
Putting The Trim And Dashboard Panels Back
Reattaching the Trim Panels and Securing Them Properly
Now that you have successfully installed the touch screen radio in your car, it’s time to put the trim and dashboard panels back in place to give your vehicle a polished look. Reattaching these panels may seem like a simple task, but it’s crucial to do it properly to ensure they are secured firmly and won’t come loose while you’re on the road.
To begin, gather all the trim panels you removed earlier and carefully align them with their respective slots on the dashboard. It’s important to take your time and make sure each panel is properly aligned before moving on to the next step. Once you’ve aligned the panels, firmly press them into place to secure them properly.
Next, double-check that all the clips and fasteners are properly attached. You can give each panel a gentle tug to ensure it is securely in place. If you encounter any resistance or find that a panel is not staying put, carefully adjust it until it fits snugly. Taking these extra precautions will prevent any rattling sounds or loose panels, ensuring a seamless installation.
Ensuring All Buttons and Knobs are Functional
Now that the trim panels are securely in place, it’s time to test all the buttons and knobs on your touch screen radio. This step is essential to ensure that every function is working correctly and that you can operate your new system without any issues.
Start by turning on the radio and testing the volume control. Adjust it up and down to make sure the output is clear and that there are no distorted sounds. Additionally, check that all the buttons, including the power button, source select, and menu buttons, are responsive and functioning properly.
If you have any other controls on your touch screen radio, such as Bluetooth connectivity or navigation features, test those as well. Ensure that each function operates smoothly and that you can easily navigate through different menus and settings.
Remember, it’s always better to be thorough and ensure everything is working perfectly before finishing the installation process.
Checking for Any Loose Connections or Rattling Sounds
Before concluding the installation process, it’s important to check for any loose connections or potential issues that may cause rattling sounds. These can be indicators of an incomplete installation or loose components that need adjustment.
Start by gently tapping on the trim and dashboard panels you reattached. Listen closely for any rattling or loose sounds. If you hear anything, carefully examine the area and make any necessary adjustments to eliminate the source of the sound.
Next, check all the wiring connections behind the touch screen radio. Make sure they are secure and properly connected to the corresponding ports. Any loose wires can impact the functionality of your radio and may result in poor sound quality or other issues.
Take your time to meticulously inspect all the connections and components, ensuring everything is in its proper place. By doing so, you’ll have the peace of mind knowing that your touch screen radio is installed correctly and will function optimally.
Calibration And Fine-Tuning
Once you have successfully installed a touch screen radio in your car, the next step is to calibrate and fine-tune the settings to ensure optimal performance and user experience. This involves adjusting various audio settings, configuring Bluetooth connectivity, and customizing the interface to your personal preferences.
Adjusting the audio settings for optimal sound quality
To enjoy premium sound quality from your new touch screen radio, it is crucial to adjust the audio settings accordingly. Here are a few key steps to follow:
- Access the audio settings menu on your touch screen radio.
- Adjust the equalizer settings to enhance the frequencies that matter most to you. Whether you prefer booming bass or crisp treble, fine-tuning the equalizer to your liking will make a noticeable difference.
- Experiment with the balance and fader controls to ensure the audio is evenly distributed across all speakers in your car.
- Consider enabling any additional audio enhancements, such as virtual surround sound or dynamic range compression, to further enhance your listening experience.
Configuring Bluetooth connectivity and pairing devices
One of the advantages of a touch screen radio is the ability to connect your phone and other devices via Bluetooth. To configure Bluetooth connectivity and pair devices, follow these steps:
- Access the Bluetooth settings menu on your touch screen radio.
- Ensure that Bluetooth is enabled and set your radio to discoverable mode.
- On your phone or device, navigate to the Bluetooth settings and search for available devices.
- Select your touch screen radio from the list of available devices to establish a connection.
- Once paired, you can now stream music, make hands-free calls, and enjoy other Bluetooth-enabled features directly through your touch screen radio.
Customizing the interface and settings to personal preferences
Every car owner has unique preferences when it comes to the user interface and settings of their touch screen radio. Fortunately, most touch screen radios offer a variety of customizable options. Here are some ways to personalize your radio:
- Change the wallpaper or background image to something that reflects your style.
- Organize your favorite apps and features by rearranging the icons on the home screen.
- Adjust the screen brightness and color settings to optimize visibility and reduce eye strain.
- Set up shortcuts or quick access buttons for frequently used functions, such as navigation or media playback.
- Explore the advanced settings menu to fine-tune additional options based on your preferences.
By taking the time to calibrate and fine-tune your touch screen radio, you can ensure optimal sound quality, seamless Bluetooth connectivity, and a personalized user interface that enhances your overall driving experience.
Enjoying Your Upgraded Car Audio Experience
Installing a touch screen radio in your car can greatly enhance your driving experience. Not only does it provide convenience and ease of use, but it also offers a range of benefits that can take your car audio to a whole new level. From improved sound quality to access to a variety of entertainment options, a touch screen radio can truly transform your ride. In this post, we’ll explore the benefits of installing a touch screen radio, as well as tips for maintaining and upgrading your audio system and exploring additional car audio enhancements.
Benefits of installing a touch screen radio
1. Enhanced sound quality: A touch screen radio often comes with advanced audio features, such as built-in equalizers and sound processors, allowing you to tailor the audio output to your liking. This means you can enjoy crisp, clear sound and make your music or favorite podcasts sound even better than before.
2. Easy access to features: With a touch screen radio, controlling your car audio system becomes a breeze. The intuitive interface allows you to navigate through menus effortlessly, change radio stations with a single touch, and adjust volume levels with ease. Say goodbye to fumbling with buttons and knobs while driving.
3. Entertainment options at your fingertips: A touch screen radio opens up a world of entertainment possibilities. Many models come equipped with various media options, such as Bluetooth connectivity, USB ports, and even DVD players. This means you can connect your smartphone, play your favorite songs, watch movies, or even stream music from popular platforms, all while on the road.
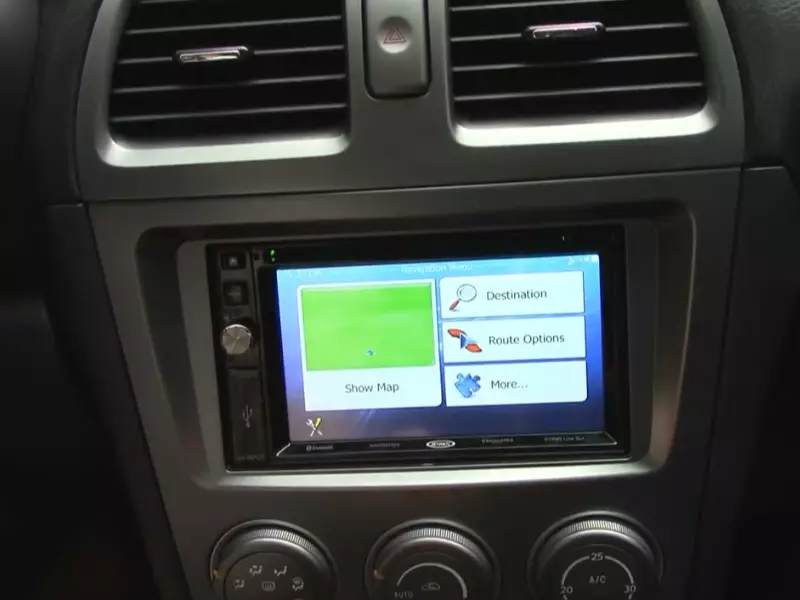
4. Navigation made simple: Some touch screen radios offer built-in GPS navigation systems, eliminating the need for a separate device or relying solely on your phone for directions. With a touch screen radio, you can easily input your destination and enjoy turn-by-turn guidance, ensuring you reach your destination hassle-free.
Tips for maintaining and upgrading your audio system
Maintaining and upgrading your car audio system is essential to ensure optimal performance and longevity. Here are a few tips to keep in mind:
- Regularly clean the touch screen: To maintain the clarity of the display, use a soft, lint-free cloth to wipe away any dust or fingerprints from the touch screen. Avoid using harsh chemicals or abrasive materials that may damage the screen.
- Update firmware and software: Manufacturers often release firmware and software updates for touch screen radios. These updates can improve performance, add new features, and fix any bugs or issues. Check the manufacturer’s website regularly to see if any updates are available and follow the instructions for installation.
- Choose reputable audio brands: When upgrading your audio system, opt for reputable audio brands known for their quality and reliability. This ensures that you get the most out of your investment and enjoy superior sound performance.
Exploring additional car audio enhancements
If you’re looking to further enhance your car audio experience, here are some additional enhancements to consider:
| 1. Subwoofers | Add deep, powerful bass to your audio system with a dedicated subwoofer. Subwoofers are designed to reproduce low-frequency sounds, adding richness and depth to your music. |
| 2. Amplifiers | Amplifiers provide more power to your speakers, allowing them to produce louder, cleaner sound. They can greatly enhance the overall audio quality and clarity of your car audio system. |
| 3. Soundproofing | If you want to eliminate unwanted external noise and improve the acoustics inside your car, consider soundproofing. This involves adding sound-dampening materials to reduce vibrations and enhance sound quality. |
By incorporating these enhancements, you can take your car audio experience to the next level and enjoy crystal-clear sound with powerful bass and immersive audio.
Installing a touch screen radio in your car not only improves your audio experience but also adds convenience and entertainment options to your daily commute or road trips. With the benefits, maintenance tips, and additional enhancements covered in this post, you’re well on your way to enjoying a truly upgraded car audio experience.
Frequently Asked Questions For How To Install A Touch Screen Radio In Your Car
Can I Install A Touch Screen Radio In My Car?
Yes, you can install a touch screen radio in your car. Just make sure it is compatible with your car model and seek professional help for the installation process.
How Much Does It Cost To Put A Touch Screen In A Car?
The cost of adding a touch screen to a car varies depending on the brand and model. It can range from a few hundred to several thousand dollars, including installation. Prices may vary based on features and customization options.
Can You Install A New Car Radio Yourself?
Yes, you can install a new car radio yourself. It’s a straightforward process that doesn’t require professional help. Follow the instructions in the manual, gather the necessary tools, and you’ll have your new radio up and running in no time.
Happy installing!
Do I Need A Wiring Harness To Install A Car Stereo?
Yes, you need a wiring harness to install a car stereo. A wiring harness connects the car’s electrical system to the stereo, making the installation process easier and ensuring proper functionality. It’s an essential component to ensure a hassle-free and successful installation of your car stereo.
Conclusion
Installing a touch screen radio in your car is a straightforward process that can enhance your driving experience. By following the steps outlined in this guide, you can enjoy the convenience and entertainment options that come with a modern car stereo.
Remember to gather the necessary tools, carefully connect the wires, and test your new radio before finalizing the installation. With a little patience and effort, you’ll be cruising to your favorite tunes in no time.