To install a temperature gauge in a car, follow these steps: locate the appropriate spot on the engine block, disconnect the negative battery cable, mount the temperature gauge sensor, connect the gauge to the sensor using the provided wiring, and finally, reconnect the negative battery cable. Installing a temperature gauge in your car can provide crucial information about your engine’s temperature, helping you prevent overheating and maintain optimal performance.
By following a few simple steps, you can easily add this useful tool to your vehicle. We will discuss the step-by-step process of installing a temperature gauge in your car, allowing you to monitor your engine’s temperature accurately and efficiently.
So, let’s get started with the installation process and ensure your engine’s health and longevity.
Choosing The Right Temperature Gauge For Your Car
When it comes to keeping your car engine in optimal condition, monitoring its temperature is crucial. A temperature gauge is an indispensable tool that gives you real-time information about the engine’s temperature, allowing you to detect and address any potential issues before they turn into major problems.
In this section, we will explore the factors to consider when choosing the right temperature gauge for your car.

Importance of a Temperature Gauge
An engine’s temperature can fluctuate due to various factors such as weather conditions, coolant levels, and engine load. Monitoring the engine temperature is vital as it helps you avoid overheating, which can lead to engine damage and costly repairs. A temperature gauge provides you with the necessary information to prevent such situations, ensuring that your car runs efficiently and smoothly.
Factors to Consider When Selecting a Temperature Gauge
When selecting a temperature gauge for your car, several key factors should be taken into account:
- Compatibility with your car model
- Type of gauge (analog or digital)
- Display features and readability
Compatibility with Your Car Model
Before purchasing a temperature gauge, ensure that it is compatible with your car model. Different car models have varying specifications, and it’s essential to choose a gauge that fits your vehicle’s requirements. Consult your car’s manual or seek advice from a professional if you are unsure about compatibility.
Type of Gauge (Analog or Digital)
Temperature gauges are available in two main types: analog and digital. Analog gauges use a needle to indicate temperature levels, while digital gauges display the temperature numerically. Each type has its advantages, and the choice ultimately depends on personal preference. Analog gauges provide a classic and aesthetic appeal, while digital gauges offer precise temperature readings and often have additional features.
Display Features and Readability
When choosing a temperature gauge, consider the display features and readability. Look for gauges with clear and easy-to-read displays, especially if you frequently drive in varying light conditions. Some temperature gauges come with additional features such as customizable backlight colors or warning alerts, providing added convenience and safety.
Preparing For Installation
Installing a temperature gauge is an important step in keeping track of your car’s engine’s performance and preventing overheating. Before diving into the installation process, it is crucial to prepare yourself with the necessary tools and materials and familiarize yourself with your car’s engine and cooling system. Additionally, understanding the proper placement of the temperature gauge is essential to ensure accurate readings. Let’s begin by gathering the necessary tools and materials for a smooth installation process.
Gathering the necessary tools and materials
To install a temperature gauge in your car, you will need a few tools and materials to complete the job. Here is a list of essentials:
| Tools | Materials |
|---|---|
|
|
Make sure to gather all the tools and materials beforehand, ensuring a hassle-free installation process.
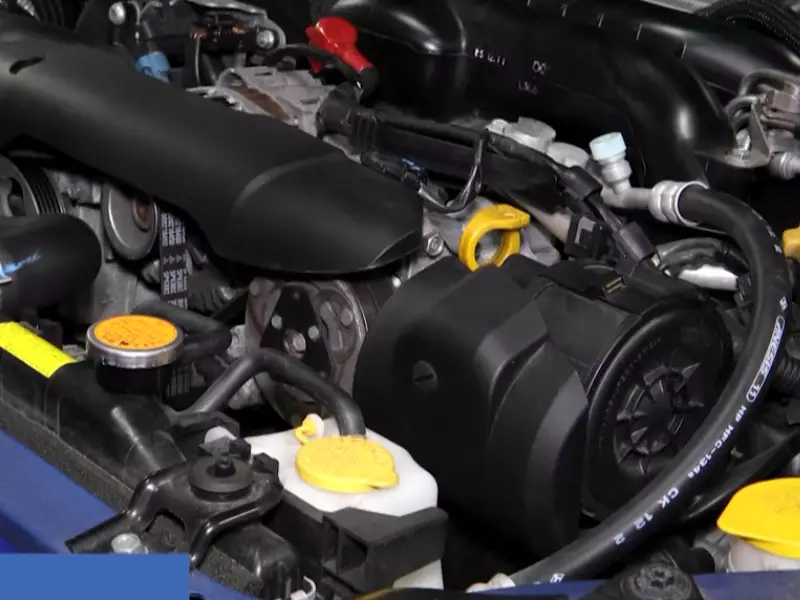
Familiarizing yourself with the car’s engine and cooling system
Before installing a temperature gauge, it is important to have a basic understanding of your car’s engine and cooling system. Take some time to identify the various components and their locations, which will help you determine the best placement for the temperature gauge.
Some key components to familiarize yourself with include:
- Radiator
- Coolant reservoir
- Thermostat
- Water pump
- Engine block
By understanding how these components work together to regulate the engine’s temperature, you’ll be better equipped to install the temperature gauge effectively.
Understanding the placement of the temperature gauge
The placement of the temperature gauge is crucial for accurate readings. Different car models have varying locations for the gauge, but it is typically installed near the engine or on the dashboard. Refer to your car’s manual or consult a professional to determine the ideal placement and ensure easy visibility while driving.
Remember to choose a location that allows for easy wiring and accessibility. Additionally, ensure that the gauge is securely mounted to prevent any movement or vibration that might affect its accuracy.
By understanding the proper placement and adhering to the manufacturer’s guidelines, you can rely on accurate temperature readings and effectively monitor your car’s engine performance.
Installing The Temperature Gauge
Installing the Temperature Gauge
When it comes to monitoring your car’s engine temperature, installing a temperature gauge is a must. This simple device provides you with valuable information about the engine’s temperature, allowing you to take preventive measures before any damage occurs. In this guide, we will walk you through the steps of installing a temperature gauge in your car, ensuring that you have all the necessary information to complete the task safely and accurately.
Disconnecting the battery and ensuring safety
Before you start tinkering with your car’s electrical system, it is crucial to disconnect the battery to ensure safety. This step will prevent any accidental shocks or short circuits. To disconnect the battery, follow these steps:
- Turn off your car and remove the keys from the ignition
- Locate the battery, usually found in the engine bay or trunk
- Using a wrench or socket, loosen the nut on the negative terminal
- Once the nut is loose, remove the negative terminal from the battery
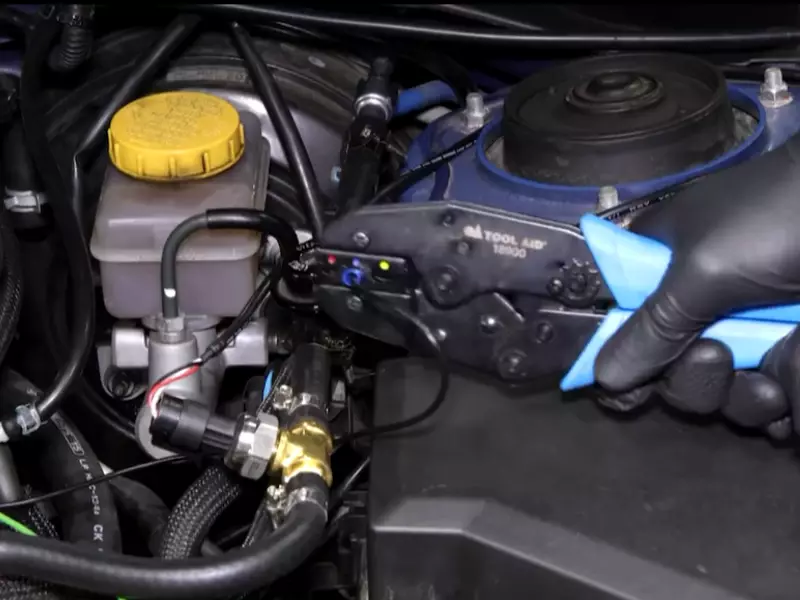
Locating the appropriate wires and connectors
To install the temperature gauge, you will need to identify the appropriate wires and connectors in your car’s electrical system. These wires and connectors are usually located near the engine compartment or the dashboard. To locate them:
- Refer to your car’s wiring diagram to identify the wires and connectors associated with the temperature gauge
- Consult the manufacturer’s instructions for specific guidance based on your car’s make and model
- Use a flashlight and inspect the wires and connectors carefully, taking note of their color and location
Using a wiring diagram
A wiring diagram is a valuable resource that provides you with a visual representation of your car’s electrical system. It shows the various connections, wires, and components involved in the installation process. To use a wiring diagram effectively:
- Refer to the manufacturer’s instructions or search online for a wiring diagram specific to your car’s make and model
- Study the diagram and familiarize yourself with the various symbols, colors, and connections
- Use the diagram as a reference during the installation process to ensure proper wiring
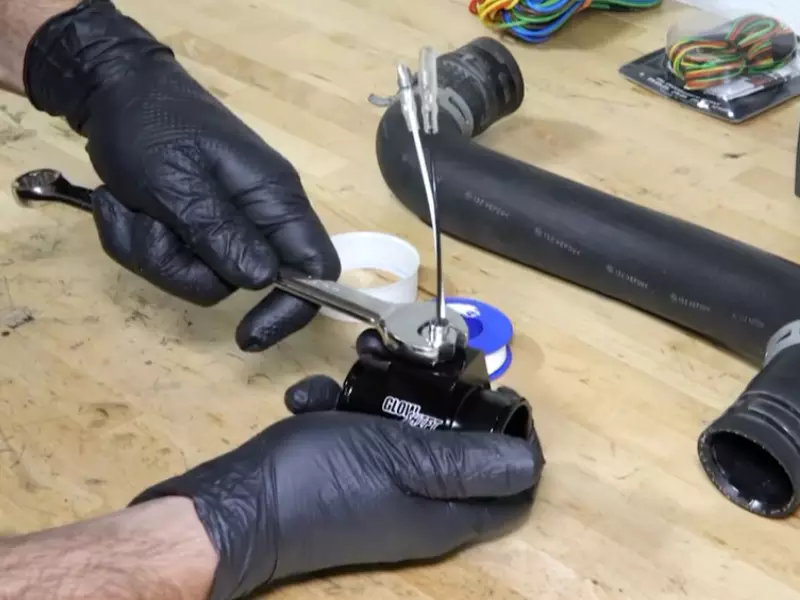
Identifying the coolant temperature sensor
Before installing the temperature gauge, you need to locate the coolant temperature sensor. This sensor measures the temperature of the coolant circulating in the engine. To identify the coolant temperature sensor:
- Refer to your car’s wiring diagram to determine the location of the coolant temperature sensor
- Inspect the engine compartment and look for a sensor with wires connected to it
- Verify the sensor’s location based on the information provided in the wiring diagram
Installing the gauge into the dashboard or instrument cluster
Once you have identified the appropriate wires, connectors, and coolant temperature sensor, it’s time to install the gauge into the dashboard or instrument cluster. This step may vary depending on your car’s make and model. Generally, the installation process involves:
- Removing the dashboard or instrument cluster cover
- Drilling a hole for the gauge
- Securing the gauge in place using the provided mounting bracket or screws
- Reattaching the dashboard or instrument cluster cover
Connecting the gauge to the wires and power source
With the gauge installed, it’s time to connect it to the wires and power source. The specific connections may vary depending on the gauge and car model, so it’s essential to follow the manufacturer’s instructions carefully. Generally, the process involves:
- Matching the color-coded wires from the gauge to the corresponding wires in your car’s electrical system
- Using a crimping tool or soldering iron, secure the connections by crimping or soldering the wires together
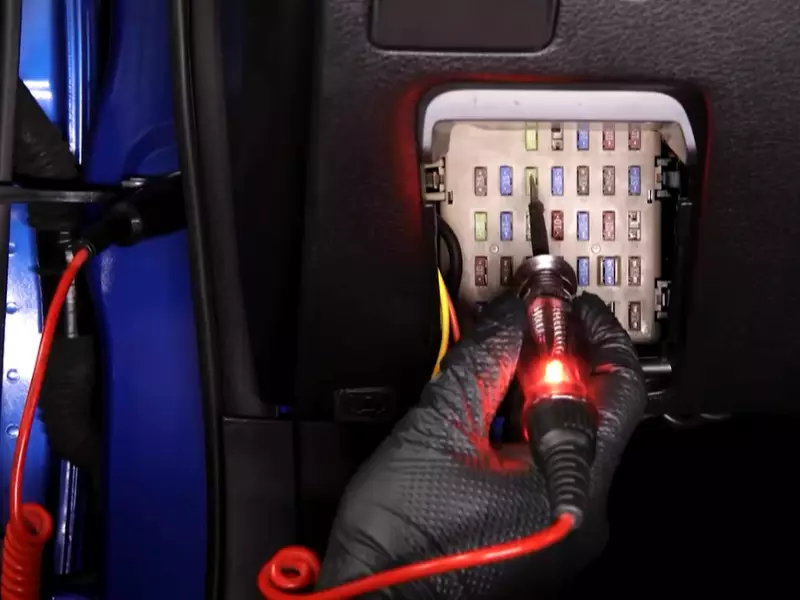
- Connecting the gauge’s power wire to a suitable power source, such as a fuse box or ignition switch
- Ensuring all connections are secure and properly insulated to prevent any electrical issues
Wiring And Connection
When it comes to installing a temperature gauge in your car, understanding the electrical connections is crucial. This step ensures that the gauge functions properly and provides accurate readings. In this section, we will walk you through the process of wiring and connecting the temperature gauge in your car.
Understanding the electrical connections
The first step in the installation process is understanding the electrical connections involved. Before you begin, refer to your car’s manual or wiring diagram to identify the appropriate wires for the temperature gauge. Typically, you will need to connect the gauge to the temperature sensor, power source, and backlighting.
Grounding the gauge
The next step is to ground the gauge. Grounding helps to eliminate any electrical interference and ensures an accurate reading. To ground the gauge, locate a suitable grounding point near the gauge location. It is recommended to use a clean metal surface, free from paint or rust. Once you have identified a suitable grounding point, connect a wire from the gauge’s grounding terminal to the grounding point, using a ring terminal or a similar connector.
Connecting the gauge to the power source and backlighting
Now, it’s time to connect the temperature gauge to the power source and backlighting. Start by identifying the power source wire, which is responsible for providing electrical power to the gauge. Connect the power wire from the gauge to a switched power source, such as the ignition switch or fuse box. Ensure that the power source can handle the gauge’s voltage requirements.
Note: If your temperature gauge comes with backlighting, you will need to connect the backlighting wire to a power source that is activated when the headlights are turned on. This allows the gauge to be illuminated for better visibility at night.
Protecting the wires and ensuring a secure connection
Lastly, it is essential to protect the wires and ensure a secure connection. You can achieve this by using wire loom or conduit to cover the wires and protect them from heat, moisture, and any potential damage. Additionally, make sure that all wire connections are secure by using crimp connectors or soldering the wires together. This will prevent loose connections and ensure the gauge functions reliably.
By following these steps and taking the necessary precautions, you can easily wire and connect a temperature gauge in your car. Remember to refer to your car’s manual or wiring diagram for specific instructions and ensure that you handle the electrical connections with care.
Mounting And Placement
Mounting and placement of a temperature gauge in your car are crucial for accurate readings and easy visibility. In this section, we will guide you through the process of choosing the optimal location for the gauge, installing the mounting bracket or panel, and securing the gauge in place.
Choosing the optimal location for the gauge
When it comes to selecting the ideal spot for your temperature gauge, there are a few factors to consider. First and foremost, you need to ensure that it is easily visible to the driver. Placing it too low or too high could obstruct your view of the road, causing potential safety hazards. Additionally, it is essential to position the gauge where it can receive accurate temperature readings without interference.
One optimal location is on the dashboard, near the driver’s line of sight. This ensures that you can quickly glance at the gauge without diverting your attention from the road for an extended period. Alternatively, you can choose to mount it on the A-pillar or in the center console, depending on your preferences and the layout of your car.
Installing the mounting bracket or panel
Once you have determined the ideal location for the temperature gauge, the next step is to install the mounting bracket or panel. Start by removing any existing panels or trim pieces in the chosen area to create a clean surface for installation.
Most temperature gauge kits come with a mounting bracket or panel included. Carefully follow the manufacturer’s instructions to attach the bracket securely. Ensure that it is level and aligned correctly for optimal gauge visibility.
Securing the gauge in place
After installing the mounting bracket or panel, it’s time to secure the temperature gauge in place. Depending on your chosen location and the provided accessories in the kit, you may use screws or adhesive to achieve a sturdy fit.
If using screws, mark the drilling points on the mounting bracket according to the gauge’s mounting holes. Carefully drill through the bracket, ensuring not to damage any internal wiring or components. Secure the gauge using the provided screws, making sure they are tight enough but not overly tightened.
If the gauge kit offers adhesive as a mounting option, clean the mounting surface thoroughly and apply the adhesive according to the manufacturer’s instructions. Press the gauge firmly against the adhesive to create a strong bond.
With the gauge securely mounted, double-check its alignment and accessibility. Ensure that it does not obstruct any essential controls or impede your driving comfort. Once you are satisfied with the placement, you can proceed to connect the necessary wiring to complete the installation process.
Making accurate temperature readings easily visible in your car is crucial for monitoring your engine’s health. By following these steps for mounting and placement, you can install a temperature gauge that not only serves its purpose but also enhances your driving experience.
Testing And Calibrating The Gauge
Once you have successfully installed a temperature gauge in your car, it is essential to test and calibrate it to ensure accurate readings. This step not only verifies the functionality of the gauge but also guarantees that it provides reliable temperature information for your vehicle. Follow the instructions below to properly test and calibrate your newly installed temperature gauge.
Reconnecting the battery and checking for any issues
Before testing the accuracy of the temperature gauge, it is important to reconnect the car’s battery and check for any potential issues. Start by making sure the ignition is turned off. Then, reconnect the negative (-) terminal of the battery and ensure a secure connection. Check the wiring and connections of the temperature gauge to ensure there are no loose or damaged wires. Inspect the gauge itself for any physical defects or irregularities.
Testing the accuracy of the gauge
To test the accuracy of the temperature gauge, you will need an infrared thermometer or a temperature probe. Start the engine and allow it to reach operating temperature. Use the infrared thermometer or the temperature probe to measure the temperature directly from the engine block or the radiator. Compare the readings from the gauge with the actual temperature to identify any discrepancies. If the readings are significantly different, proceed to the calibration step.
Calibrating the gauge if necessary
If the temperature gauge’s readings do not match the actual temperature, calibration is required. Each gauge may have slightly different calibration procedures, so refer to the manufacturer’s instructions for specific guidelines. In general, calibration involves adjusting the gauge’s settings or modifying its internal components to ensure accurate temperature readings. Follow the step-by-step instructions provided by the manufacturer to calibrate the gauge properly. Once completed, retest the accuracy to ensure the calibration was successful.
Verifying the functionality of the gauge with a test drive
After reconnecting the battery, testing the accuracy, and calibrating if necessary, it is crucial to verify the functionality of the temperature gauge through a test drive. Start the engine and drive your car for a sufficient distance, monitoring the gauge’s readings. Pay attention to any temperature fluctuations or unusual behavior. If the gauge remains stable and accurately reflects the engine’s temperature throughout the test drive, then congratulations! You have successfully installed, tested, and calibrated a temperature gauge in your car.
Maintenance And Troubleshooting
Maintaining and troubleshooting your car’s temperature gauge is essential to ensure the accurate monitoring of your engine’s temperature. Regular steps such as cleaning and monitoring the gauge can help identify any issues early on, preventing further damage to your vehicle. In this section, we will discuss the importance of regular maintenance, how to monitor the gauge for abnormalities, as well as troubleshoot some common issues that you may encounter.
Regular maintenance and cleaning of the gauge
Regular maintenance and cleaning of your car’s temperature gauge is important to ensure its functionality. Over time, the gauge may accumulate dirt, dust, or debris that can affect its accuracy. Here are a few steps you can take to maintain and clean your temperature gauge:
- Start by disconnecting the negative terminal of your car’s battery to avoid any electrical mishaps.
- Use a soft cloth or a gentle cleaning solution to wipe the surface of the gauge. Avoid using harsh chemicals or abrasive materials that could damage the gauge.
- Check for any loose or detached connections and tighten them if necessary.
- If you notice any cracks or damage to the gauge, consider replacing it with a new one.
- Lastly, reconnect the negative terminal of the battery once the cleaning process is complete.
Monitoring the gauge for any abnormalities
Monitoring your car’s temperature gauge for any abnormalities can help you identify potential issues with your engine’s cooling system. Here are some things to look out for:
- Observe the gauge regularly while driving to ensure that the temperature stays within the normal range. If you notice the needle fluctuating erratically or reaching high temperatures, it could indicate a problem with the cooling system.
- Listen for any strange noises, such as hissing or knocking sounds, which could imply a coolant leak or a malfunctioning thermostat.
- Keep an eye out for warning lights on your dashboard, such as the engine temperature warning light. If this light comes on, it’s crucial to address the issue promptly.
Troubleshooting common gauge issues
Despite regular maintenance, you may encounter some common issues with your car’s temperature gauge. Here are a few problems you might face:
- Gauge not displaying accurate temperature readings: If your gauge consistently shows incorrect temperature readings, it could be due to a faulty sensor or a problem with the gauge itself. Consider replacing the sensor or consulting a professional to diagnose and fix the issue.
- Gauge malfunctioning or not turning on: If your gauge fails to turn on or malfunctions, it could be a result of a blown fuse, loose wiring, or a problem with the gauge unit. Check the fuses and connections first, and if the issue persists, seek professional assistance.
By following these maintenance and troubleshooting practices, you can ensure that your car’s temperature gauge remains accurate and in good working condition. Regular monitoring and addressing any abnormalities promptly can help prevent potential engine overheating and costly repairs in the long run.
Frequently Asked Questions Of How To Install A Temperature Gauge In A Car
How Do You Install A Water Temperature Gauge On A Car?
To install a water temperature gauge on your car, start by locating the temperature sensor on your engine block. Disconnect the sensor and attach the gauge’s sensor in its place. Connect the gauge’s wiring to a 12V power source and ground, and mount the gauge in a convenient location.
What If Your Car Doesn’T Have A Temperature Gauge?
If your car doesn’t have a temperature gauge, it’s essential to watch for warning signs like steam or overheating. Regularly check the coolant level and ensure the radiator fan is working. If there are any concerns, consult a professional mechanic for a proper diagnosis.
How Do You Hook Up An Electric Temperature Gauge?
To hook up an electric temperature gauge, first, locate the sensor connection point on the engine. Then, connect one wire from the gauge to the sensor using a suitable connector. Next, connect another wire from the gauge to a power source, like the fuse box.
Finally, secure all connections, ensuring they are tight and insulated.
Where Do You Put A Temperature Sensor In A Car?
A temperature sensor in a car is usually placed near the engine or radiator. It helps monitor the temperature and provides accurate readings for the car’s cooling system.
Conclusion
To sum up, installing a temperature gauge in your car is a straightforward and essential task that can help you monitor the engine’s temperature accurately. By following the steps outlined in this guide, you can ensure your engine’s optimal performance and prevent any potential damage.
Remember to always consult your car’s manual and seek professional help if needed. Stay informed and proactive when it comes to your vehicle’s temperature gauge, and enjoy a safer and smoother driving experience.