To install a sun visor, start by locating the screws or clips holding the old visor in place. Remove the old visor and install the new one by securing it with the screws or clips.
A sun visor in a vehicle plays a crucial role in blocking sunlight and glare, enhancing visibility for the driver. Installing a sun visor is a simple process that requires just a few steps. We will provide you with a clear and concise guide to installing a sun visor in your car.
Whether you need to replace a damaged visor or upgrade to a more stylish one, follow these instructions to easily install a sun visor and enjoy a more comfortable driving experience.
Tools You’ll Need
Screwdriver
To install a sun visor, the first tool you’ll need is a screwdriver. A screwdriver is necessary to remove the screws that hold the old sun visor in place.
Pair of pliers
Next on the list is a pair of pliers. Pliers will come in handy when you need to grip and twist small nuts or bolts during the installation process. They provide the necessary leverage to loosen and tighten fasteners, ensuring a secure fit for your new sun visor.
Safety goggles
Safety should always be a top priority when working with any tools. To protect your eyes from any potential debris or flying particles, it’s important to wear safety goggles. Safety goggles shield your eyes from harm and ensure you can complete the installation process without any accidents.
When using a screwdriver or pliers, there is a risk of slipping or breaking small parts. Safety goggles offer the necessary protection, preventing any injuries that could occur during the installation process.
Sun visor replacement
The final tool you’ll need is a sun visor replacement. This is the new sun visor that you’ll be installing in place of the old one. It’s important to choose a replacement sun visor that is compatible with your specific make and model of vehicle. Ensure that the dimensions and attachments of the replacement sun visor match the original one.
A well-chosen sun visor replacement will not only improve your driving experience but also enhance the overall appearance of your vehicle’s interior.
Now that we’ve discussed the essential tools you’ll need, let’s move on to the step-by-step instructions for installing a sun visor.
Removing The Old Sun Visor
When it’s time to replace your old sun visor with a new one, the first step is to remove the old sun visor. This process may vary depending on the make and model of your car, but the general steps are relatively straightforward. In this section, we will guide you through the process, ensuring that you can complete this task with ease.
Locate the screws holding the sun visor in place
The first thing you need to do is locate the screws that are holding the sun visor in place. These screws are usually located on the bracket or mounting plate of the sun visor. They can be easily identified as small, threaded metal fasteners.
Use the screwdriver to remove the screws
Once you have located the screws, you will need a screwdriver to remove them. It’s important to choose the right size and type of screwdriver to ensure a secure grip on the screws. Insert the screwdriver into the head of each screw and rotate it counterclockwise to loosen and remove the screws.
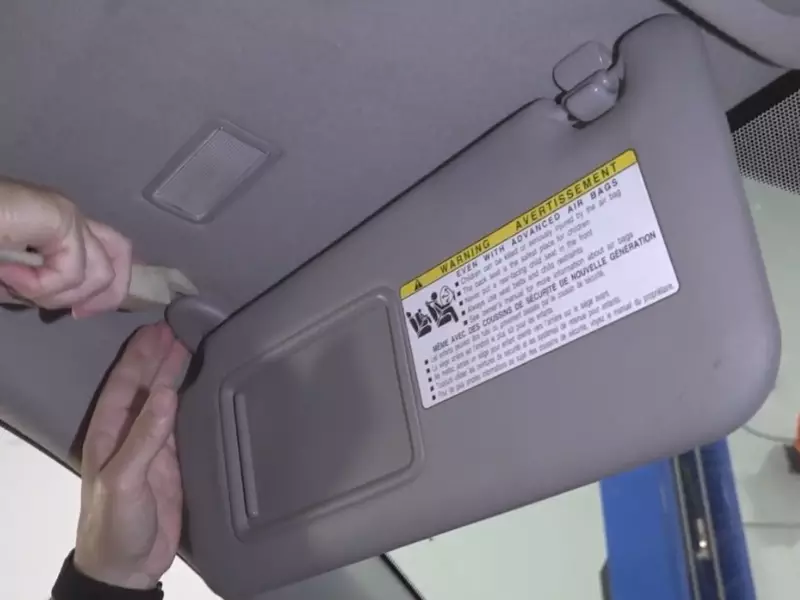
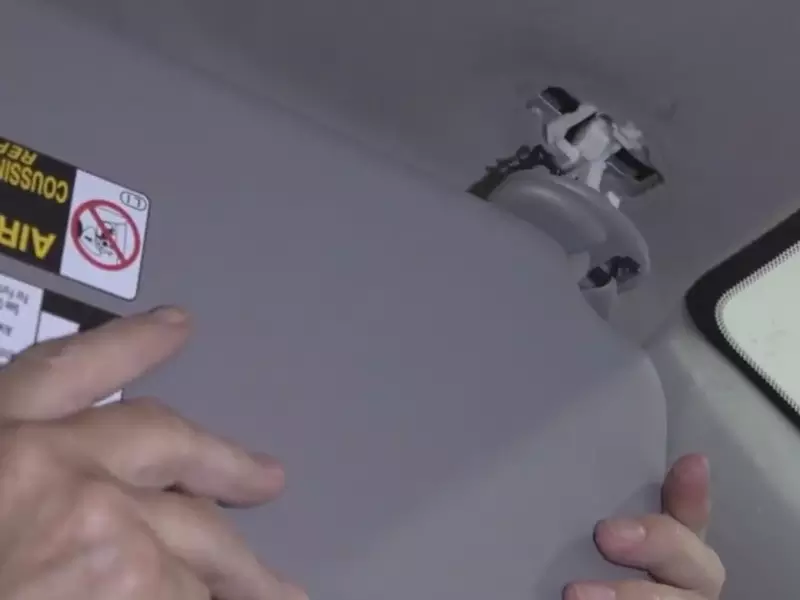
Gently pull the old sun visor off the mount
With the screws removed, you can now gently pull the old sun visor off the mount. Take care not to apply excessive force, as this may damage the mounting bracket or other components. Slowly and steadily, apply uniform pressure to detach the sun visor from its mounting position.
Disconnect any electrical connections, if applicable
In some vehicles, the sun visor may have electrical connections for features such as vanity mirrors or lights. If your sun visor has any electrical connections, it’s important to disconnect them before removing the visor completely. Look for any wiring harnesses or connectors attached to the sun visor and gently unplug them.
By following this step-by-step guide, you will be able to remove your old sun visor efficiently and effectively. Make sure to keep track of any screws, electrical connections, or other small parts during the process. With the old sun visor removed, you are now ready to install the new one and enjoy a clear, stylish, and functional sun visor for your car.
Installing The New Sun Visor
Once you have removed the old sun visor and have your new one ready, it’s time to install it. Follow these steps to correctly align and secure your new sun visor:
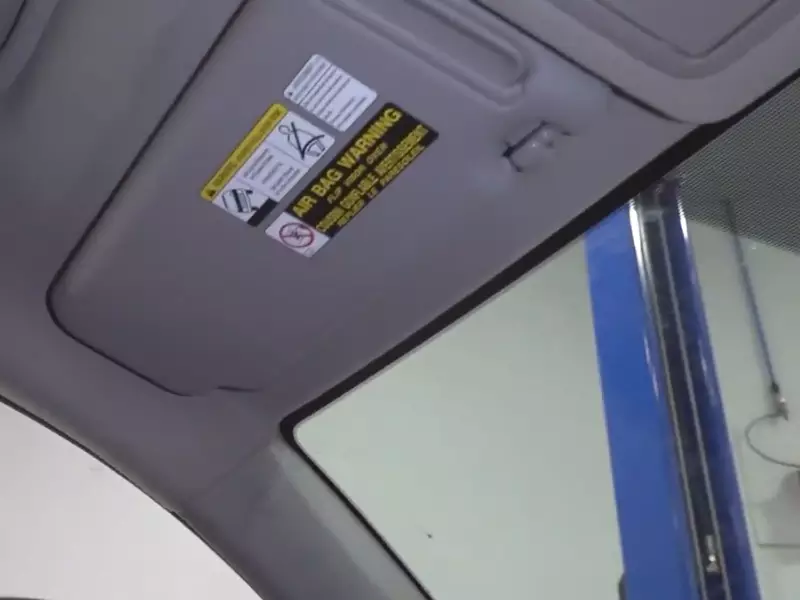
Align the new sun visor with the mount
Before inserting the screws, it’s important to align the new sun visor with the mount. This ensures a proper fit and function. Take the new sun visor and position it in the same location where the old one was attached. Make sure it is oriented correctly, with the visor facing the correct direction.
Insert and tighten the screws using the screwdriver
With the new sun visor properly aligned, it’s time to secure it in place. Grab your screwdriver and insert the screws into the designated holes on the mount. Start by loosely screwing them in, making sure each screw catches the threads. Once all the screws are in place, use your screwdriver to tighten them securely. This will ensure the sun visor stays firmly attached while you are driving.
Reconnect any electrical connections, if applicable
If your vehicle’s sun visor has any electrical connections, such as for lights or mirrors, it’s important to reattach them to the new sun visor. Check for any wires or connectors near the mount and carefully reconnect them. Take note of any labels or markings to ensure you are connecting the wires correctly. Once connected, make sure everything is securely fastened.
Make sure the new sun visor is secure and doesn’t wobble
After completing the installation, take a moment to inspect your new sun visor. Give it a gentle tug to ensure it is securely attached and doesn’t wobble. If you notice any movement or instability, double-check that all screws are tightened properly and that there are no loose connections. Having a securely installed sun visor is essential for its functionality and your safety on the road.
Congratulations! You have successfully installed your new sun visor. Now you can enjoy enhanced sun protection while driving, ensuring a safer and more comfortable journey.
Tips For Installing A Sun Visor
When it comes to installing a sun visor in your car, there are a few important tips to keep in mind. Proper installation is crucial for the functionality and safety of your sun visor. In this guide, we will explore three key tips that will ensure a successful installation:
Double-check the compatibility of the replacement sun visor
Before starting the installation, it is essential to double-check the compatibility of the replacement sun visor with your car model. Different car models may have variations in their sun visor design and attachment points.
To ensure a perfect fit, consult your car’s manual or contact the manufacturer to find the specific sun visor model that is compatible with your car. Installing an incompatible sun visor can lead to improper fitment and compromised safety.
Be careful not to strip the screws while tightening them
During the installation process, you will need to secure the sun visor with screws. It is crucial to handle these screws with caution to avoid stripping them.
When tightening the screws, make sure to apply gentle pressure and avoid using excessive force. If you encounter resistance while tightening, stop immediately to prevent damage. To provide additional stability and prevent stripping, you may want to consider applying a small amount of thread-locking adhesive to the screws.
Wear safety goggles to protect your eyes from debris
Installing a sun visor may involve working with small parts and screws. To protect your eyes from debris that may be released during the installation process, it is important to wear safety goggles.
Safety goggles will shield your eyes from any potential hazards, such as metal shavings or broken pieces of the old sun visor. By wearing safety goggles, you can ensure that your eyes stay safe and free from any injury or irritation during the installation process.
Use the pliers to hold the screws in place if they are hard to reach
In some cases, the screws used to secure the sun visor may be located in areas that are difficult to access using just your fingers. If this is the case, using pliers can provide you with a better grip and control.
To use pliers effectively, insert the screw into the appropriate hole, and then use the pliers to hold and guide the screw into position. This will help you securely tighten the screw, even in hard-to-reach spaces.
By following these tips for installing a sun visor, you can ensure a smooth and successful installation process. Remember to always pay attention to compatibility, handle screws with care, protect your eyes with safety goggles, and utilize pliers when necessary. With these tips in mind, your sun visor will be fully functional and provide you with the shade and protection you need while driving.
Frequently Asked Questions Of How To Install A Sun Visor
How Do You Attach A Sun Visor To A Car?
To attach a sun visor to a car: 1. Locate the sun visor mounting brackets. 2. Align the brackets with the designated holes on the roof of the car. 3. Insert the screws provided into the holes and tighten them securely.
4. Make sure the sun visor is properly aligned and can be easily adjusted. 5. Test the visor by adjusting it to block the sun’s glare at different angles.
What Keeps A Sun Visor Up?
The sun visor stays up due to a tension spring mechanism that is built into its hinge.
Can I Replace My Sun Visor?
Yes, you can replace your sun visor. Just follow these simple steps: 1. Remove the old visor by unscrewing the mounting screws. 2. Disconnect any electrical connections if applicable. 3. Install the new visor by aligning it with the mounting holes and screwing it in place.
4. Reconnect any electrical connections. Enjoy your new sun visor!
How To Install A Sun Visor On A 2007 Toyota Camry?
To install a sun visor on a 2007 Toyota Camry: first, find the mounting bracket above the windshield. Next, line up the holes on the visor with the bracket. After that, insert the screws into the holes and tighten them.
Finally, repeat the process for the other side. Enjoy your new sun visors!
Conclusion
Installing a sun visor may seem daunting at first, but with the right tools and steps, it can be a straightforward process. By following the provided guide, you can easily install a sun visor to enhance your visibility and protect yourself from the sun’s glare while driving.
Remember to stay patient and take your time during the installation. With a little effort, you’ll have a new sun visor that will make your driving experience more comfortable and safer. Happy driving!