To install a spoiler on a car, start by cleaning the surface, positioning the spoiler, marking the drill holes, and attaching the spoiler using screws and adhesive. A spoiler can enhance the style and aerodynamics of a car, giving it a more aggressive and sporty appearance.
If you’re looking to add a spoiler to your vehicle, it’s important to follow the proper installation process to ensure it’s secure and effective. In this guide, we’ll walk you through the step-by-step process of installing a spoiler on your car.
From preparing the surface to attaching the spoiler, you’ll have all the information you need to complete the installation successfully. Keep reading to learn how to give your car a stylish and functional upgrade with a spoiler installation.
Choosing The Right Spoiler For Your Car
Installing a spoiler on your car not only enhances its appearance but also improves its aerodynamics and performance. However, with a wide range of options available in the market, it can be overwhelming to choose the right spoiler for your specific car make and model. By considering factors such as aerodynamics, compatibility, and personal style, you can ensure that the spoiler you choose not only looks great but also functions effectively. In this section, we will delve into these factors to help you make an informed decision.
Aerodynamics and Performance
When it comes to choosing a spoiler, understanding the impact it has on your car’s aerodynamics and performance is crucial. A well-designed spoiler can create downforce, which improves stability and traction, particularly at high speeds. By pushing the rear of the car downwards, the spoiler helps to prevent lift and keep the tires firmly planted on the road.
It’s important to select a spoiler that complements the aerodynamic characteristics of your car. Different spoilers are designed for specific purposes, such as reducing drag or enhancing cornering ability. Before making a purchase, consider the overall purpose of the spoiler and how it aligns with your driving style and needs. For instance, if you frequently engage in spirited driving or track days, a high-performance spoiler may be more suitable.
Compatibility with Car Make and Model
When choosing a spoiler, it is essential to ensure that it is compatible with your car’s make and model. Spoilers are designed to fit specific vehicles, taking into account their unique characteristics and dimensions. Installing an incompatible spoiler can not only compromise its functionality but also lead to damage to your car.
To determine compatibility, check the specifications provided by the spoiler manufacturer. Look for information on compatibility with your specific car make and model. Additionally, consult online forums or seek advice from reputable automotive specialists who can guide you in selecting a spoiler that will fit your car perfectly.
Personal Style and Preferences
While aerodynamics and compatibility are crucial factors, personal style and preferences should not be overlooked. A spoiler not only affects the performance of your car but also serves as a visual enhancement. It allows you to express your personal taste and can significantly contribute to the overall aesthetics of your vehicle.
Consider the different designs and styles available in the market. Do you prefer a subtle lip spoiler or a more aggressive wing? Think about how the spoiler complements the overall design of your car. Choosing a spoiler that matches your personal style will ensure that you feel confident and satisfied with your car’s appearance.
To make the selection process easier, create a shortlist of spoilers that meet your aerodynamic requirements, and compatibility criteria, and reflect your personal style. Compare their features, materials, and reviews to make an informed decision that will ultimately enhance the performance and look of your car.
Understanding The Different Types Of Car Spoilers
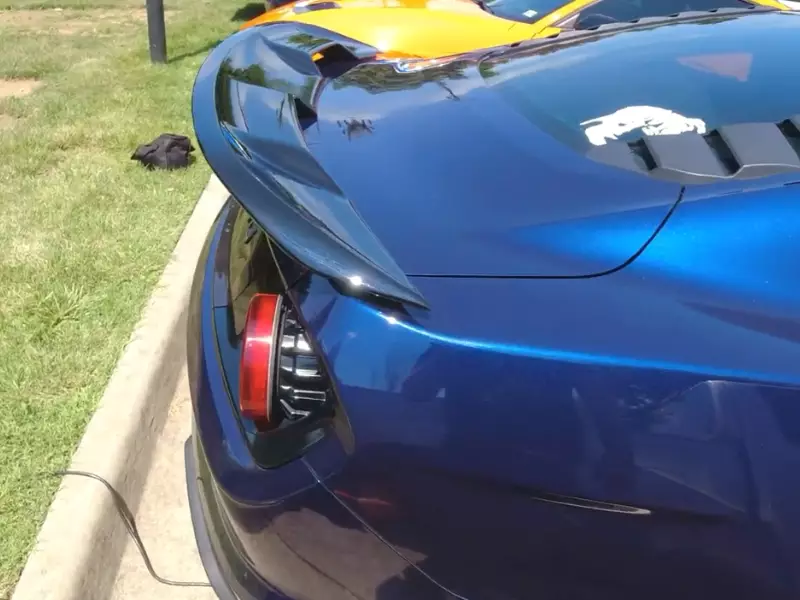
Rear Wing Spoiler
A rear wing spoiler is a popular choice among car enthusiasts who want to enhance the aerodynamics and sporty appearance of their vehicles. This type of spoiler is installed on the rear trunk or tailgate and is designed to create downforce, which improves traction and stability at high speeds.
One of the key features of a rear wing spoiler is its elevated design, with the spoiler sitting above the car’s trunk. This elevated position allows air to flow smoothly over the vehicle’s rear, reducing drag and increasing overall performance.
Rear wing spoilers come in various materials, including fiberglass, carbon fiber, and ABS plastic. Fiberglass offers durability and affordability, while carbon fiber provides lightweight and high strength. ABS plastic is a common choice due to its flexibility and ease of installation.
Lip Spoiler
A lip spoiler, also known as a trunk spoiler or ducktail spoiler, is a subtler option for car owners who want a touch of sportiness without the aggressive look of a rear wing spoiler. Unlike the elevated design of a rear wing spoiler, a lip spoiler is attached directly to the edge of the trunk or tailgate.
In terms of aerodynamics, a lip spoiler helps to minimize lift and improve stability at high speeds. It generates a downforce that presses the rear tires firmly against the road, enhancing grip and control.
Lip spoilers are typically made from lightweight materials such as ABS plastic or carbon fiber. They are available in various styles and sizes to suit different car models and personal preferences.
Roof Spoiler
A roof spoiler is a stylish option that adds a touch of flair to a car’s overall appearance. As the name suggests, it is mounted on the roof of the vehicle, usually at the rear. While a roof spoiler may not have a significant impact on aerodynamics, it can create a sense of balance and visual enhancement.
Roof spoilers are commonly made from ABS plastic or fiberglass, with some models featuring a carbon fiber finish. They are available in different shapes and sizes, ranging from subtle additions to more striking designs.
It is important to note that not all cars are compatible with roof spoilers. Factors such as the car’s roof design and dimensions must be considered to ensure proper fitment.
Gathering The Necessary Tools And Materials
If you’re looking to enhance the appearance of your car and add a touch of sportiness, installing a spoiler is a great option. While it may seem like a daunting task, rest assured that with the right tools and materials, it can be a relatively straightforward process. In this section, we’ll guide you through gathering the necessary tools and materials to make your spoiler installation a success.
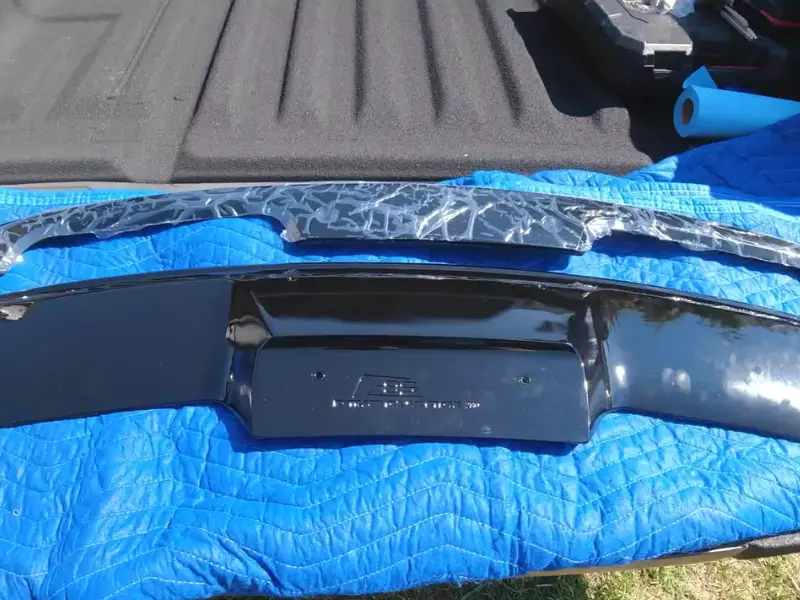
Spoiler Kit
First and foremost, you’ll need to acquire a spoiler kit that is compatible with your car model. Spoiler kits typically include the spoiler itself, mounting brackets, screws, and any necessary adhesive. Before purchasing a kit, ensure that it is designed to fit your specific car make and model to avoid compatibility issues.
Drill or Screwdriver
To securely attach the spoiler to your car, you’ll need either a drill (if the spoiler requires drilling into the body of the car) or a screwdriver (if the spoiler uses screws and brackets for installation). Make sure you have the appropriate tool on hand to avoid any delays during the installation process.
Tape Measure
Accuracy is key when it comes to installing a spoiler, and a tape measure will be your best friend in ensuring proper alignment. Measure the distance between your car’s rear end and the edges of the trunk lid to determine the optimal placement for your spoiler. This will help achieve a symmetrical and balanced look.
Masking Tape
Masking tape comes in handy for marking the drilling or screwing points on your car. By placing small pieces of masking tape on the surface where you plan to attach the spoiler, you can easily mark the exact spots for drilling or screw placement. This will help prevent any accidental damage to your car’s paintwork.
Level
To ensure your spoiler is perfectly aligned, use a level during the installation process. Placing the level on top of the spoiler will help you adjust its position until it’s perfectly horizontal. This will not only enhance the aesthetics but also guarantee the spoiler functions optimally.
Now that you have a good understanding of the essential tools and materials required for installing a spoiler, you’re one step closer to giving your car a sleek and sporty look. Stay tuned for the next section, where we will walk you through the step-by-step process of installing the spoiler and turning your car into a head-turning powerhouse.
Preparing Your Car For Spoiler Installation
Before you can start installing a spoiler on your car, it’s important to properly prepare the surface to ensure a secure and long-lasting attachment. This involves a few key steps, including cleaning the surface and marking the drilling points. By following these steps, you’ll create an optimal foundation for your spoiler installation.
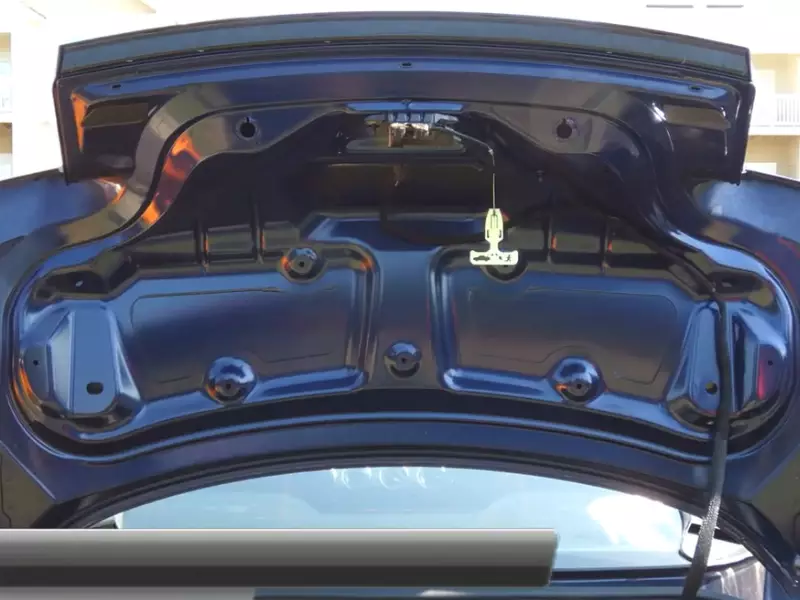
Cleaning the Surface
To begin, you’ll want to thoroughly clean the area where the spoiler will be installed. This ensures that there are no dirt, dust, or other contaminants that could interfere with the adhesive or drilling process. Here’s how you can clean the surface effectively:
- Gather the necessary cleaning supplies, such as a mild car detergent, water, microfiber cloth, and rubbing alcohol.
- Mix the car detergent with water according to the instructions on the product.
- Dampen the microfiber cloth with the soapy water solution and gently wipe down the area where the spoiler will be installed, paying attention to any dirt or grime buildup.
- Once the surface is clean, dampen another microfiber cloth with rubbing alcohol and wipe down the area to remove any remaining residue or grease.
- Allow the surface to air-dry completely before moving on to the next step.
Marking the Drilling Points
Once the surface is clean and dry, you’ll need to mark the drilling points for your spoiler installation. This ensures accuracy and helps prevent any damage to your car. Here’s how you can mark the drilling points:
- Measure and mark the centerline of your car’s trunk, as this will serve as a starting point for the spoiler installation.
- Hold the spoiler up to the trunk, aligning it with the centerline and making sure it’s positioned properly.
- Using a pencil or marker, carefully mark the drilling points on the surface of the trunk where the spoiler’s mounting holes will go.
- Double-check the markings to ensure accuracy and make any necessary adjustments before proceeding.
By cleaning the surface and marking the drilling points correctly, you’re taking crucial steps toward a successful spoiler installation. These preparations help ensure a secure and professional-looking result, giving your car the sleek and sporty appearance you desire.
Installing The Car Spoiler
Installing a spoiler on your car is an excellent way to enhance its sporty and aggressive appearance. Not only does a spoiler add visual appeal, but it can also improve aerodynamics and handling at higher speeds.
If you’re wondering how to install a car spoiler, this guide will walk you through each step of the process, ensuring a seamless installation. In this section, we will focus on attaching the spoiler brackets, aligning and securing the spoiler, and checking for stability and adjustment.
Attaching the spoiler brackets
The first step in installing a car spoiler is attaching the spoiler brackets. These brackets typically come with the spoiler kit and are essential for securely mounting the spoiler to your car’s trunk or rear hatch. Here’s how to do it:
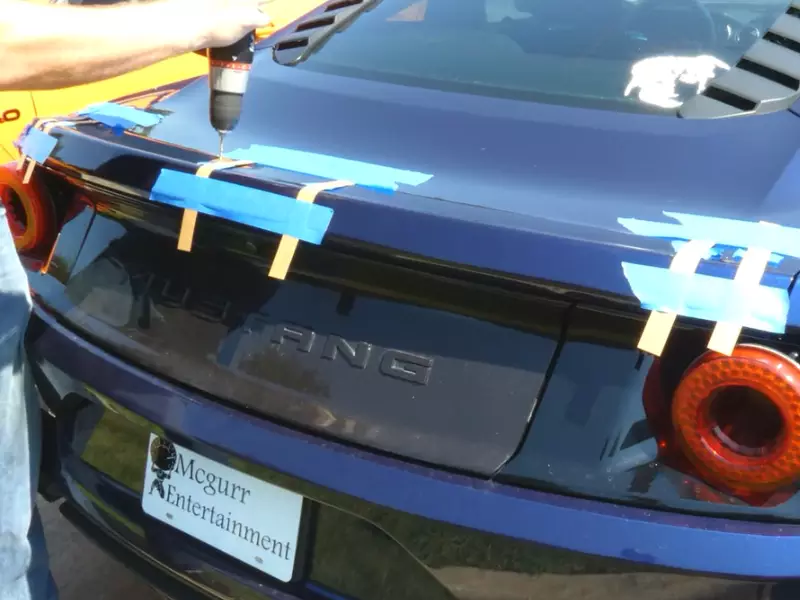
- Begin by carefully positioning the spoiler brackets against the surface where the spoiler will be installed. Make sure to align them with the pre-drilled holes on the spoiler.
- Using a drill and appropriate-sized drill bit, create pilot holes in the surface where the spoiler brackets will be mounted. Ensure that the pilot holes match the alignment of the pre-drilled holes on the brackets.
- Secure the spoiler brackets in place by inserting screws into the pilot holes and tightening them using a screwdriver or drill. Make sure the brackets are firmly attached to the surface and there is no play or movement.
Aligning and securing the spoiler
Once the brackets are properly installed, it’s time to align and secure the spoiler itself. Follow these steps to ensure a precise and secure fit:
- Place the spoiler on top of the mounted brackets, aligning the pre-drilled holes on the spoiler with the brackets.
- Once aligned, carefully insert the screws provided in the spoiler kit through the brackets and into the pre-drilled holes. Use a screwdriver or drill to tighten the screws, ensuring they are snug but not overtightened.
- Double-check the alignment of the spoiler to ensure it is centered and level. Adjust if necessary.
Checking for stability and adjustment
After securing the spoiler, it’s crucial to check its stability and make any necessary adjustments. This step will help ensure the spoiler is securely attached and won’t cause any issues while driving. Here’s what to do:
- Gently shake the spoiler to check for any movement or rattling. If there is any looseness, tighten the mounting screws until the spoiler feels stable.
- Go for a test drive at various speeds to assess the spoiler’s performance. Pay attention to any strange noises or vibrations that could indicate a need for readjustment.
- If needed, make further adjustments by loosening the mounting screws slightly and repositioning the spoiler. Then, tighten the screws again to secure it in the new position.
By following these steps, you can confidently install a car spoiler on your vehicle. Remember to refer to the manufacturer’s instructions and seek professional assistance if necessary. Not only will your car gain a sleek and stylish aesthetic, but you may also experience improved handling and performance at higher speeds.
Wrapping Up The Installation Process
Removing any masking tape
Before fully wrapping up the installation process, make sure to remove any masking tape that was used during the installation. This includes any tape that was used to protect the car’s paint or to temporarily hold the spoiler in place.
Start by carefully peeling off the tape, making sure not to damage the paint or any other surfaces. Take your time and use a steady hand. If you encounter any resistance, pause and try to gently loosen the tape before continuing.
Once you have removed all the tape, inspect the area to ensure that there are no remaining pieces or residue. Clean up any sticky residue with a mild adhesive remover or rubbing alcohol. This will help maintain the appearance of your car and prevent any damage.
Cleaning up the workspace
After removing the masking tape, it’s important to clean up your workspace. This will not only leave your work area looking tidy, but it will also help prevent any loose debris from causing damage to other parts of your car.
Dispose of any used tape, packaging materials, and other waste in a proper manner. If you have any cleaning supplies or tools that were used during the installation, clean them thoroughly and put them away in their designated place. This will ensure that your workspace is ready for future projects.
Lastly, give the area a quick wipe-down with a microfiber cloth or a damp cloth to remove any dust or residue that may have accumulated during the installation process.
Admiring the new spoiler on your car
Now that the installation process is complete and the workspace is clean, it’s time to take a moment to admire your newly installed spoiler. Stand back and take in the enhanced appearance of your car. Note how the spoiler adds a touch of style and sportiness.
Getting a spoiler installed on your car is not only a practical modification but also a visual upgrade. It can give your car a more aggressive and aerodynamic look, while also enhancing its performance on the road.
Before taking your car for a spin, give the spoiler a final inspection to ensure that it is securely in place. Gently tug at it from different angles to make sure it doesn’t wiggle or move. If everything looks good, then you can confidently hit the road with your newly installed spoiler.
Frequently Asked Questions For How To Install A Spoiler On A Car
Can You Install Spoilers Yourself?
Yes, you can install spoilers yourself. Just ensure you have the necessary tools, follow instructions carefully, and take your time for accurate installation.
Can You Install Any Spoiler On Any Car?
Yes, you can install a spoiler on any car as long as it is compatible with the car’s design and specifications. It is important to choose a spoiler that fits properly and enhances the aerodynamics and appearance of the car.
How Do You Stick A Car Spoiler?
To stick a car spoiler, first clean the surface thoroughly. Apply adhesive tape or tape primer to the spoiler and car. Line up the spoiler with the desired position and firmly press it against the car. Secure it in place with additional tape or screws if needed.
How Do You Install A Spoiler With Drilling?
To install a spoiler with drilling, follow these steps:
- Gather necessary tools and materials.
- Measure and mark the precise position of the spoiler.
- Use a drill to create holes at the marked spots.
- Attach the spoiler securely to the holes using screws.
- Double-check the installation for stability. Done!
Conclusion
Installing a spoiler on your car enhances its appearance and can improve aerodynamics, resulting in better stability and fuel efficiency. By following the steps outlined in this blog post, you can easily install a spoiler on your own. Remember to choose a spoiler that complements your car’s design and consult the manufacturer’s instructions for a seamless installation.
With a little effort and the right tools, your car will turn heads on the road in no time. Happy spoiler installation!