To install a speaker, first, gather the necessary tools. Then, locate a suitable spot, connect the speaker wires, and mount the speaker securely.
Installing a speaker requires basic tools and proper placement for optimal sound quality. Whether you want to upgrade your home theater system or enhance your car audio, installing a speaker is a straightforward process. By following a few simple steps, you can enjoy better sound performance in no time.
This guide will walk you through the process of installing a speaker with ease. Let’s get started!
Important Tools And Materials
Installing a speaker is a relatively simple process that can greatly enhance your audio experience. To ensure a successful installation, it is important to have the right tools and materials at your disposal. Without them, you may find yourself frustrated and unable to complete the task. In this guide, we will outline the necessary tools and materials needed for a seamless speaker installation.
Required Tools for Installation
Before you begin the installation process, it is essential to have the following tools readily available:
- Screwdriver set – A variety of screwdrivers, including Phillips and flathead, will be necessary for securing the speaker to its mounting location.
- Wire strippers – These tools are used to remove the insulation from the wires, allowing for proper connection.
- Wire cutters – Used to trim excess wire length and ensure a clean installation.
- Drill – Depending on the mounting technique, you may need a drill to create holes for screws or brackets.
- Level – A level will help ensure that your speaker is installed straight and level.
- Tape measure – Precise measurements are crucial for locating the optimal placement for your speaker.
Necessary Materials for Installation
In addition to the tools listed above, you will also need the following materials:
- Speakers – Of course, you will need the speakers themselves. Choose speakers that are compatible with your audio system and desired sound quality.
- Speaker wire – High-quality speaker wire is essential for delivering optimal audio performance. Ensure that the wire length is sufficient for your installation needs.
- Mounting brackets or stands – Depending on the location of your speakers, you may need mounting brackets or stands to secure them in place.
- Screws and anchors – If you are mounting the speakers to a wall, you will need screws and anchors to ensure a secure installation.
- Cable ties – These can be used to neatly organize and manage the speaker wire, preventing tangles and mess.
By having the necessary tools and materials on hand, you will be well-prepared for a successful speaker installation. Take the time to gather everything you need before starting the process, and you will save yourself time and frustration along the way.
Preparation
Choosing the right location for the speaker
Before diving into the installation process, it’s crucial to carefully choose the perfect location for your speaker. This step guarantees optimal sound quality and performance. Consider the following factors when zeroing in on the ideal spot:
- Room Acoustics: Analyze the acoustics of the room where you plan to install the speaker. Look out for any potential echo or reverberation, as it may affect the audio output. Opt for a room with minimal ambient noise for a pleasurable listening experience.
- Speaker Placement: Determine where you want the speaker to be positioned. Whether you prefer a wall-mounted speaker or one placed on a surface, ensure it aligns with your audio preferences and fits harmoniously with the room’s aesthetics.
- Optimal Listening Position: Identify the spot where you spend most of your time enjoying your audio system – your sweet spot. Place the speaker in a way that directs the sound toward this sweet spot. By doing so, you’ll be able to appreciate every note and beat to the fullest.
Preparing the mounting surface
After choosing the perfect location, it’s time to prepare the mounting surface. Pay attention to the following steps:
- Clean the Surface: Ensure the surface is free from any dust, dirt, or debris before mounting the speaker. This step guarantees a smooth and secure installation.
- Measure and Mark: Take precise measurements and mark the exact position where you’ll be mounting the speaker. Use a level to guarantee a straight installation, enhancing both the appearance and functionality.
- Choose Appropriate Tools: Prepare the necessary tools required for installation. These tools may include a drill, screws, screwdriver, and any additional accessories that come with the speaker.
- Drilling and Mounting: If necessary, use a drill to create pilot holes at the marked positions. This will ensure a secure hold for the speaker. Finally, attach the mount or bracket using the provided screws, carefully aligning it with the pre-drilled holes.
Ensuring proper wiring and connections
After mounting the speaker, it’s time to focus on wiring and connections. Follow these steps for a seamless installation:
- Route Wires Strategically: Plan the wire route to avoid unsightly cable tangling or potential tripping hazards. Concealing wires within walls or using wire covers can provide a clean and organized appearance.
- Connect Speaker Wires: Strip the protective insulation from the speaker wires and connect them securely to the corresponding terminals on the speaker. Ensure the polarity is correct to avoid any phase cancellation or distortion.
- Verify Connections: Double-check the connections to the amplifier or receiver. Tighten any loose connections and verify that all components are securely in place.
- Test the System: Before completing the installation process, conduct a test to ensure the speaker is functioning correctly. Play a variety of audio tracks, adjusting any necessary settings to achieve the desired sound output.
Mounting The Speaker
Once you have chosen the perfect speaker for your audio setup, the next step is to mount it securely in your desired location. Properly mounting your speaker not only ensures optimal sound quality but also enhances the overall aesthetics of the room. In this section, we will guide you through the process of marking the speaker placement, drilling holes for mounting brackets, and attaching the brackets securely.
Marking the speaker placement on the surface
The first step in mounting your speaker is to accurately mark its placement on the surface. Take into consideration the room acoustics and the desired sound projection. Before proceeding, ensure that you have all the necessary tools handy, such as a measuring tape, pencil, and a level. Here’s a step-by-step guide to marking the speaker placement:
- Start by determining the ideal height for your speaker. This will depend on various factors, such as the size and type of speaker, as well as the room layout.
- Using the measuring tape, measure the distance from the floor or any reference point to ensure uniformity.
- Once you have determined the desired height, place the speaker against the wall or ceiling and align it horizontally using the level.
- With the speaker in the correct position, carefully mark the top and bottom corners of the speaker using a pencil. This will serve as a guide for the placement of the mounting brackets.
Drilling holes for mounting brackets
Now that you have marked the speaker placement, it’s time to drill holes for mounting brackets. This step requires precision and patience to ensure a secure and level installation. Follow these steps to drill the holes:
- Referencing the marked corners, measure the distance between them to determine the bracket placement. If your speaker requires multiple brackets, ensure equal spacing between them.
- Using an appropriate drill bit size for the mounting brackets, carefully drill pilot holes at the marked corners. Be mindful of the wall material to avoid any damage.
- Once the pilot holes are drilled, enlarge them to the required size for the mounting brackets. Use a drill bit that matches the size needed for a snug fit.
- After drilling the holes, remove any debris or dust around the area to ensure a clean and smooth installation.
Attaching the mounting brackets securely
With the holes drilled, it’s time to attach the mounting brackets securely. This step ensures that your speaker remains firmly in place, preventing any accidental falls. Follow these steps to attach the brackets:
- Insert the screws provided with the mounting brackets through the holes from the speaker side.
- On the other side of the wall or surface, align the mounting brackets with the screws.
- Tighten the screws using a screwdriver or a suitable tool. Ensure that the brackets are securely attached and the speaker is level.
- Once the brackets are attached, give them a gentle shake to check for stability. Make any adjustments if necessary.
By following these steps, you can easily mount your speaker with confidence. Remember to double-check the alignment and stability of the speaker before letting it securely sit in place. With the speaker now properly mounted, you can sit back, relax, and enjoy high-quality audio in your desired location.
Wiring And Connections
Installing a speaker involves more than just placing it in the desired location. Proper wiring and connections are essential to ensure optimal sound output and functionality. In this section, we will guide you through the process of wiring and connecting the speaker effectively.
Identifying the speaker wire polarity
Before you start connecting the speaker wire, it is crucial to determine the polarity of the wires. Polarity refers to the positive (+) and negative (-) terminals of the speaker. Correctly identifying the wire polarity is essential to ensure that the speaker operates as intended and produces high-quality sound.
Tip: Most speaker wires come with color coding. The wire jacket’s color, such as black or red, usually indicates the polarity.
Connecting the speaker wire to the speaker
Once you have identified the wire polarity, it is time to connect the wires to the speaker. Follow these steps:
- Strip the wire: Use a wire stripper or a sharp tool to strip about half an inch of insulation from the ends of the speaker wires. This will expose the bare copper conductors.
- Twist the wires: After stripping the wire, twist the individual copper wires gently to prevent any fraying or loose strands.
- Connect the wires: Locate the speaker terminals on the back of the speaker. Each terminal is labeled with a “+” or “-” symbol. Slide the exposed copper wire into the corresponding terminal. Ensure that the positive wire connects to the positive terminal and the negative wire to the negative terminal for the correct polarity.
- Tighten the terminals: Once the wires are inserted, tighten the terminals securely to establish a solid connection. Loose connections can result in poor sound quality or even damage to the speakers.
Securing the wire connections properly
After connecting the speaker wire, it is essential to secure the connections properly to prevent accidental disconnection or damage. Here are a few tips:
- Use electrical tape: Wrap a small piece of electrical tape around the terminals where the wires connect to the speaker. This will provide extra insulation and prevent the wires from accidentally coming loose.
- Organize the wires: Bundle and secure the speaker wires together using cable ties or wire clips. This will help keep the wires organized and minimize the risk of tripping or tangling.
- Conceal the wires: If desired, hide the wires by routing them along baseboards or behind furniture. This will give your speaker installation a clean and professional look.
By following these steps and securing the wire connections properly, you can ensure a reliable and high-quality speaker installation. Take your time to double-check the polarity and tighten the connections, and soon you’ll be enjoying crystal-clear sound from your newly installed speakers.
Testing And Finishing
Once you have successfully installed your speaker following the previous steps, it is time to test its functionality and add those finishing touches to ensure a seamless appearance. This section will guide you through the important steps of verifying the speaker’s functionality, adjusting its position and angle, and concealing the wiring for a neat finish.
Verifying the speaker’s functionality
Before you can appreciate the amazing sound quality your new speaker will provide, it is crucial to verify its functionality. Follow these steps to ensure everything is in working order:
- Turn on your audio source and play some test music or a sound recording.
- Gradually increase the volume to your desired level and make sure the sound is clear without any distortions.
- Test all the speaker channels by playing music that utilizes different audio channels. Ensure that each channel plays the sound correctly and is balanced with the others.
- Check all the input ports on the speaker and connect different audio devices to ensure that they are recognized and produce sound.
Adjusting the speaker position and angle
The position and angle of your speaker can significantly impact the audio experience. By making a few adjustments, you can optimize the sound projection and ensure that it suits your preferences. Follow these steps to find the ideal position and angle:
- Experiment with different locations in the room. Place the speaker at various heights, corners, or wall mounts to find the best spot for optimal sound dispersion.
- Angle the speakers towards the listening area to achieve better sound projection and a more immersive experience.
- Consider using speaker stands or wall mounts to elevate or position the speakers at the desired level.
- Make small adjustments and listen to the sound quality until you find the position and angle that delivers the best audio experience.
Concealing the wiring for a neat finish
To maintain a clean and organized appearance, it is crucial to conceal the wires connected to your speaker. Here are some tips to achieve a neat finish:
- Use cable management solutions such as cable clips, wall covers, or cable tunnels to hide the wires along the walls, baseboards, or furniture.
- If you have carpeted flooring, consider using cable raceways to hide the wires underneath to prevent tripping hazards.
- If possible, run the wires behind furniture or through pre-existing channels like conduit pipes for a seamless and concealed look.
- Label the wires and use wire ties or Velcro wraps to bundle them neatly together, minimizing clutter.
By following these steps, you can ensure that your speaker is not only functioning perfectly but also flawlessly integrated into your living space, providing an enhanced audio experience while maintaining a tidy appearance.
Frequently Asked Questions For How To Install A Speaker
How Do You Hook Up Speakers?
To hook up speakers, follow these simple steps:
- Identify the audio output source on your device.
- Connect one end of the speaker wire to the speaker’s input terminals.
- Connect the other end of the wire to the corresponding audio output source.
4. Ensure the connections are secure and tight. 5. Power on the speakers and test the sound.
Is It Hard To Install Speakers In A Car?
Installing speakers in a car is a relatively straightforward process. With basic tools and some knowledge, you can easily do it yourself. Just follow the instructions provided by the manufacturer or seek professional help for a hassle-free installation.
Is It Easy To Install Your Own Car Speakers?
Installing your own car speakers can be quite easy if you follow a few steps. You’ll need some basic tools and knowledge of your car’s wiring. Simply remove the old speakers, connect the new ones correctly, and secure them in place.
It’s a rewarding DIY project.
How To Install Car Speakers?
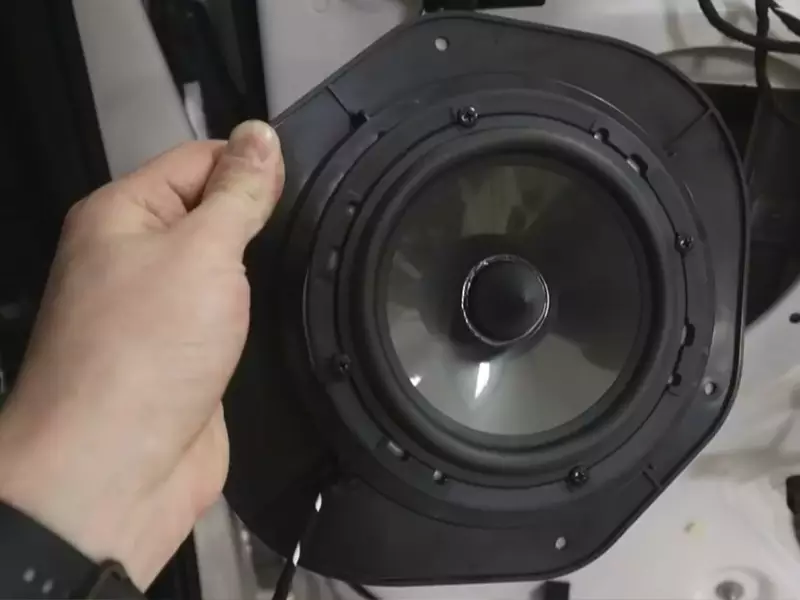
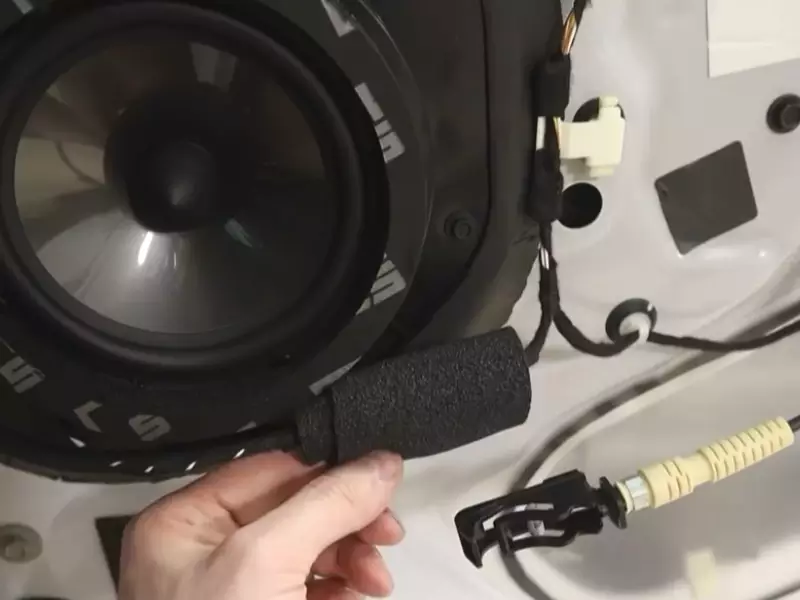
To install car speakers, follow these steps: 1. Disconnect the car battery to prevent any electrical shock. 2. Remove the door panels or rear deck covers to access the existing speakers. 3. Disconnect the wiring harness and remove the old speakers.
4. Connect the new speakers to the wiring harness, ensuring proper polarity. 5. Securely mount the new speakers in place and reassemble the panels or covers.
Conclusion
Installing a speaker doesn’t have to be a daunting task. By following these step-by-step instructions, you can easily set up your speaker and enjoy your favorite music or podcasts in no time. Remember to carefully choose the location, connect the wires properly, and test the sound quality.
With a little patience and attention to detail, you’ll be able to enhance your audio experience effortlessly. Don’t wait any longer – get started on installing your new speaker today!