To install a spare tire, position the jack underneath the vehicle and raise it until the tire is off the ground. Then, remove the lug nuts, take off the flat tire, and replace it with the spare.
Tighten the lug nuts securely and lower the vehicle back to the ground.
Preparing For A Flat Tire Emergency
No driver wants to experience the inconvenience of a flat tire, but it’s an unfortunate reality that many of us will face at some point. Being prepared for this unexpected mishap can save you time, money, and stress. One essential element of preparedness is having a spare tire in your vehicle. In this section, we will explore the importance of having a spare tire and how to choose the right one for your car.

Importance of a Spare Tire in your Vehicle
A spare tire is like a hidden superhero in your trunk, ready to come to the rescue when you least expect it. When a flat tire occurs, having a spare allows you to quickly get back on the road without waiting for towing services or roadside assistance. It’s a convenient and cost-effective solution that ensures you won’t be stranded on the side of the road for hours.
The benefits of having a spare tire include:
- Immediate solution to a flat tire
- Ability to continue your journey without delay
- No need to rely on others for assistance
- Cost savings from not requiring a tow truck
- Peace of mind knowing you are prepared
The importance of a spare tire cannot be emphasized enough. It’s a simple yet powerful tool that every driver should have in their vehicle at all times.
Picking the Right Spare Tire for your Car
Not all spare tires are created equal. It’s crucial to select the right one that matches your car’s specifications and provides optimal performance. Here are a few factors to consider when choosing a spare tire:
- Tire Size: Ensure that the spare tire you choose has the same size specifications as the other tires on your car. This is essential for maintaining proper alignment and avoiding any handling issues.
- Tire Type: There are different types of spare tires available, including full-size spares, compact temporary spares (also known as donuts), and collapsible spares. Each option has its advantages and limitations, so make sure to research and choose the type that suits your needs and vehicle.
- Tire Condition: Regularly inspect your spare tire to ensure it is properly inflated, in good condition, and free from any visible damage or signs of wear. If your spare tire is old or shows signs of deterioration, consider replacing it with a new one to ensure reliability in case of an emergency.
Making the right choice when it comes to your spare tire will result in a smooth and convenient tire change in the event of a flat. Don’t overlook this important component of preparedness!
Essential Tools And Equipment
Gathering the necessary tools for the installation
One of the most crucial steps in installing a spare tire is having the necessary tools and equipment at your disposal. Without the right tools, a straightforward task can quickly become frustrating and time-consuming. To ensure a smooth installation process, gather the following tools before you begin:
- Lug wrench or tire iron: This tool is used to loosen and tighten the lug nuts on the wheel.
- Jack: A car jack is essential for lifting the vehicle off the ground and safely removing the flat tire.
- Spare tire: Make sure you have a properly inflated spare tire ready for installation. It should match the type and size of the flat tire.
- Owner’s manual: Refer to your vehicle’s owner’s manual for specific instructions on where to find the spare tire and how to safely install it.
- Flashlight: Sometimes, tire issues can occur in low-light situations, so having a flashlight handy will help you see what you’re doing.
- Gloves: A pair of gloves will protect your hands from dirt and grime while handling the spare tire and tools.
Understanding the components of a spare tire kit
Before diving into the spare tire installation process, it’s important to understand the various components that make up a spare tire kit. These components typically include:
- Spare tire: As mentioned earlier, the spare tire is an essential component of the kit. It should be in good condition and ready for use.
- Jack: The car jack is used to raise the vehicle off the ground, allowing you to remove and install the tire. Different vehicle models may have different types of jacks, so familiarize yourself with the specific jack in your vehicle.
- Lug wrench: The lug wrench or tire iron is specifically designed to loosen and tighten the lug nuts that secure the wheel to the car’s axle.
- Wheel chocks: These small blocks prevent the vehicle from rolling while you’re working on it. They are placed in front of and behind the tire opposite to the one you’re changing.
- Extension bar: In some cases, the lug wrench might be difficult to use or require extra leverage. An extension bar can be attached to the wrench to make the task easier.
- Gloves or tire covers: Some spare tire kits come with gloves or tire covers to protect your hands and clothing from dirt and grime while handling the tire.
- Storage bag: A storage bag is often provided to keep all the spare tire kit components organized and easily accessible.
By gathering the necessary tools and understanding the components of the spare tire kit, you’ll be well-prepared to handle any unexpected flat tire situations. Now, let’s move on to the actual installation process in the next section.
Locating And Safely Accessing The Spare Tire
When it comes to being prepared on the road, having a spare tire is essential. However, in order to utilize it in case of a flat tire, you need to know how to locate and safely access it. In this section, we will walk you through the steps of identifying the spare tire location in your vehicle and removing any obstructions or securing straps. Let’s get started!
Identifying the spare tire location in your vehicle
The spare tire in your vehicle is typically located in one of three places: the trunk, underneath the vehicle, or on the back of an SUV or truck. To identify the exact location, follow these steps:
- Refer to your vehicle’s owner manual: The owner’s manual is a valuable resource that provides specific details about your vehicle, including the spare tire location. Check the table of contents or index for the relevant section.
- Inspect the trunk: If your vehicle has a trunk, look for a panel or compartment where the spare tire might be stored. Some vehicles have a designated well with a cover, while others may have the spare tire secured by a bolt or strap.
- Check underneath the vehicle: In some cars, especially SUVs and trucks, the spare tire is mounted underneath. Locate the spare tire well underneath the vehicle, often located near the rear bumper. Look for a hatch cover or a release mechanism.
- Examine the back of an SUV or truck: If your vehicle is an SUV or truck, the spare tire may be visible on the back. Look for any latches, bolts, or straps holding the spare tire in place.
Removing any obstructions or securing straps
Now that you’ve identified the location of your spare tire, it’s important to ensure there are no obstructions or securing straps preventing you from accessing it. Follow these steps to remove any obstructions safely:
- Inspect the surrounding area: Before attempting to remove the spare tire, make sure there are no loose objects or debris that could interfere with the process. Clear away any items that may hinder your access.
- Remove securing straps or bolts: Depending on the location of the spare tire, there may be securing straps or bolts holding it in place. Use the necessary tools – such as a wrench or screwdriver – to loosen and remove these fasteners.
- Gently lower the spare tire: Once the securing straps or bolts are removed, safely lower the spare tire from its storage location. Be cautious as it may be heavy, so it’s advisable to have someone assist you.
- Closely inspect the spare tire: Before installing the spare tire, inspect it for any damage, such as cuts, bulges, or signs of wear. If the spare tire is in poor condition, it’s recommended to replace it before hitting the road.
By following these steps to locate and safely access your spare tire, you’ll be well-prepared to handle unexpected flat tires and continue your journey without major interruptions. Remember to always prioritize your safety and seek professional assistance if needed. Stay tuned for the next section, where we will guide you through the process of installing the spare tire onto your vehicle.
Removing The Flat Tire
When it comes to replacing a flat tire with a spare tire, the first step is to remove the flat tire from your vehicle. This may seem like a daunting task, but with the right tools and a little know-how, it can be done quickly and easily. In this section, we’ll guide you through the process of removing the flat tire so that you can get back on the road in no time.
Loosening the lug nuts with a tire iron
The lug nuts are what hold the tire in place on your vehicle’s wheel. Before you can remove the flat tire, you’ll need to loosen these lug nuts. To do this, you’ll need a tire iron or a lug wrench. This tool has a hooked end that fits over the lug nuts, allowing you to turn them counterclockwise.
To loosen the lug nuts, follow these steps:
- Locate the lug nuts on the flat tire. There are usually five or six of them, evenly spaced around the wheel.
- Position the tire iron over the first lug nut, making sure it is securely in place.
- Apply downward pressure on the tire iron to loosen the lug nut by turning it counterclockwise.
- Repeat this process for each of the remaining lug nuts, loosening them just enough to be able to remove them later with your hands.
Lifting the vehicle with a jack
After you have loosened the lug nuts, the next step is to lift your vehicle off the ground using a jack. This will create enough clearance to remove the flat tire and install the spare tire. It’s important to note that jacks should only be used on hard, level surfaces to ensure stability and safety.
To lift your vehicle with a jack, follow these steps:
- Locate the designated jack points on your vehicle. These are usually marked with arrows or notches on the car’s frame.
- Place the jack in the designated jack point closest to the flat tire. Make sure the jack is securely positioned.
- Use the jack handle to pump the jack up and lift the vehicle off the ground. You may need to make several pumps to achieve the desired height.
- Monitor the jack and ensure that the vehicle is lifted evenly and securely.
With the lug nuts loosened and the vehicle safely lifted, you are now ready to remove the flat tire and proceed with installing the spare tire. Remember to always exercise caution and follow safety guidelines when working with your vehicle.
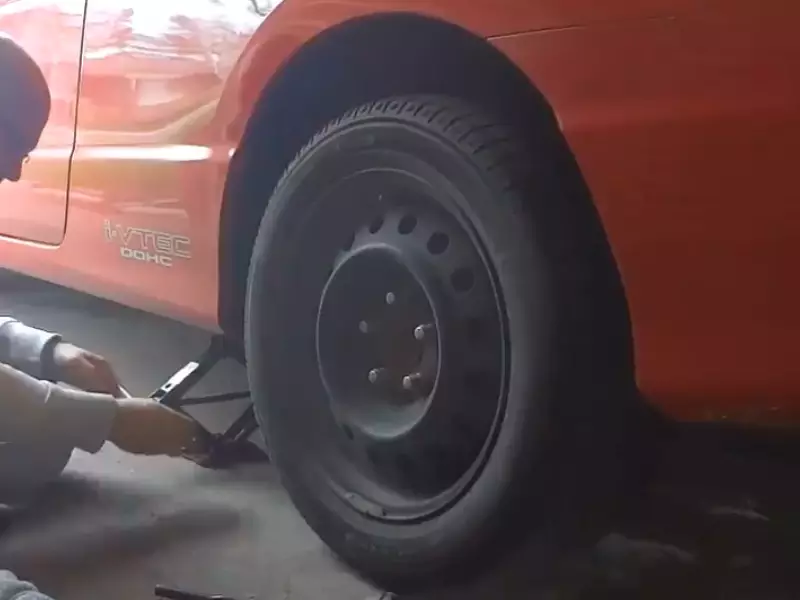
Mounting The Spare Tire
Mounting the spare tire is a crucial step in dealing with unexpected tire issues on the road. It requires proper alignment of the spare tire with the wheel studs and secure hand-tightening of the lug nuts. By following these steps, you can ensure a safe and efficient installation of your spare tire.
Aligning the Spare Tire with the Wheel Studs
Before mounting the spare tire, make sure to align it correctly with the wheel studs. This is important as it ensures a proper fit and prevents any potential issues while driving. Here’s a step-by-step guide:
- Begin by removing the spare tire from its storage location in your vehicle. It is usually located in the trunk or under the rear of the car.
- Place the spare tire near the wheel hub, ensuring that it is facing the correct way. Refer to the arrow or rotational direction marked on the tire.
- Gently align the holes in the spare tire with the wheel studs. Take your time to ensure proper alignment to avoid any difficulty while mounting.
- Note: If you are installing a full-size spare tire, it may be heavier than a compact spare tire. Consider using a jack stand or asking for assistance to support the weight while aligning it.
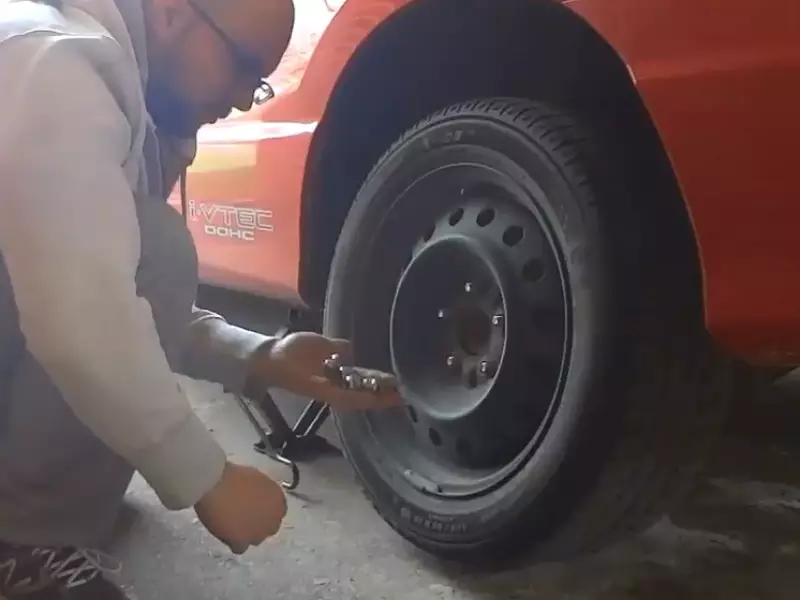
Hand-tightening the Lug Nuts
Once the spare tire is aligned with the wheel studs, it’s time to hand-tighten the lug nuts. Hand-tightening the lug nuts properly ensures a secure fit and prevents any accidents while driving. Follow these steps:
- Start by hand-threading each lug nut onto the wheel stud, turning it clockwise. Ensure that each lug nut is threaded evenly and not cross-threaded.
- Using a lug wrench or tire iron, continue tightening each lug nut in a star pattern. This helps distribute the pressure evenly and ensures a tight fit.
- Note: Be cautious not to overtighten the lug nuts, as this can lead to difficulties in future tire changes. Hand-tightening is generally sufficient, and you can finalize the tightening process once the vehicle is on the ground.
By following these steps, you can successfully mount your spare tire and be ready to continue your journey with peace of mind. Remember to have your damaged tire repaired or replaced as soon as possible to maintain the safety of your vehicle.
Lowering The Vehicle And Tightening The Lug Nuts
Lowering the Vehicle with the Jack
Once you have successfully removed the flat tire from your car, it is time to lower the vehicle using a jack. This step is crucial as it ensures that you have enough clearance to securely tighten the lug nuts on the spare tire.
Before proceeding, it is important to note that every car has different specifications regarding the proper placement of the jack. To ensure that you are following the manufacturer’s guidelines, refer to your car’s user manual. Generally, the jack points are located under the vehicle’s frame, near the wheels.
To lower the vehicle safely, follow these steps:
- Place the jack in the designated jack point, making sure it is securely in place.
- Using the jack handle, start pumping the jack upward. This will begin to raise the vehicle.
- Continue pumping the jack until you have lifted the vehicle to a height where there is enough clearance to freely remove the flat tire and install the spare tire.
- Ensure that the vehicle is stable and secure before moving on to the next step.
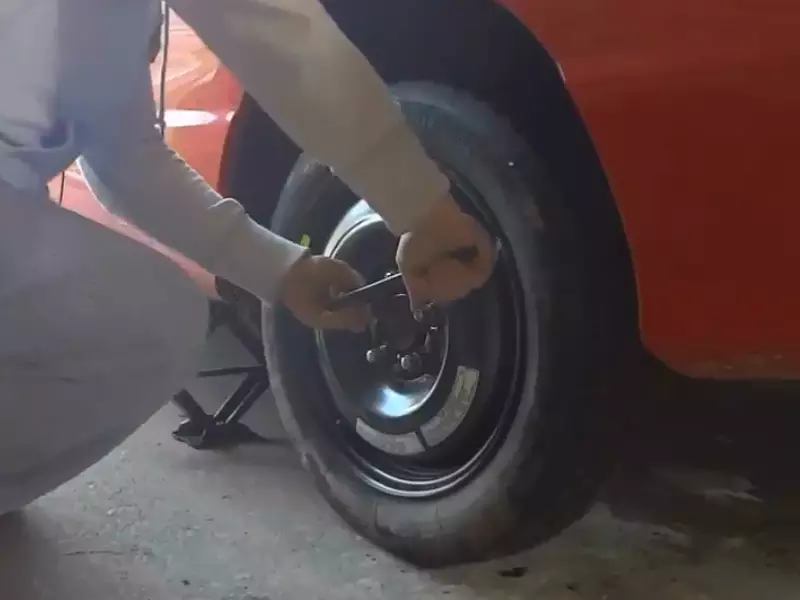
Fully Tightening the Lug Nuts in a Star Pattern
Once the vehicle is safely lowered onto the spare tire, it is important to fully tighten the lug nuts to ensure the wheel is securely attached. This step is essential for your safety while driving.
Here is how you can properly tighten the lug nuts:
- Start by hand-tightening each lug nut in a star pattern. This means that you tighten one lug nut, then move diagonally to the opposite lug nut and tighten that one. Repeat this process until all the lug nuts are snug.
- Using a lug wrench or a wrench that fits the lug nut, begin tightening the lug nuts in the same star pattern. Apply firm, steady pressure and ensure that each lug nut is fully tightened.
- Double-check each lug nut to ensure it is properly tightened. This will further enhance the security of the spare tire.
Remember, it is important not to overtighten the lug nuts, as this may cause damage to the wheel or the studs. Refer to your car’s manual for the recommended torque specification for your specific vehicle.
With the vehicle lowered and the lug nuts fully tightened, you can now proceed with caution by carefully driving your car to the nearest service station or tire shop to repair or replace the flat tire.
Checking The Spare Tire Pressure
When it comes to changing a flat tire on the road, having a properly inflated spare tire is crucial. The last thing you want is to be stranded and realize that your spare tire is also flat or overinflated. That’s why it’s important to regularly check the spare tire pressure. This step-by-step guide will show you how to check the inflation level of your spare tire using a tire pressure gauge and make any necessary adjustments.
Using a tire pressure gauge to check the inflation level
The first step in checking the spare tire pressure is to gather the necessary tools. You will need a tire pressure gauge and, of course, your spare tire. Start by removing the spare tire from its storage location. Place it on a flat surface where you can easily access it.
Next, locate the valve stem on the spare tire. This is the small cylindrical part where you would attach an air hose to fill the tire. Remove the valve cap and keep it in a safe place, as it’s easy to misplace.
Now, take the tire pressure gauge and firmly press it onto the valve stem. You will hear a hiss of air as the gauge takes the reading. After a few seconds, the gauge will display the current tire pressure. Make note of this value as you will need it for the next step.
Inflating or deflating the spare tire as needed
Based on the reading you obtained from the tire pressure gauge, you can determine whether your spare tire needs to be inflated or deflated. If the pressure is too low, you will need to inflate the tire. On the other hand, if the pressure is too high, you will need to release some air to bring it to the correct level.
Using an air compressor or a manual air pump, connect the device to the valve stem and add more air if necessary. Refer to your vehicle’s user manual or the spare tire itself for the recommended tire pressure. Ensure that you do not overinflate the tire, as this can lead to poor handling or even a blowout.
Alternatively, if the spare tire pressure is too high, you will need to release some air. Take a small tool like a valve stem cap or the back of a pen and gently press the pin inside the valve stem to release air. Check the tire pressure again using the gauge to ensure it is at the correct level.
In conclusion, checking the spare tire pressure is an essential step in maintaining your vehicle’s safety on the road. By using a tire pressure gauge to obtain an accurate reading and making any necessary adjustments, you can ensure that your spare tire is ready to save the day in case of a flat tire emergency.
Storing The Flat Tire And Tools
Once you have successfully installed the spare tire and gotten back on the road, it’s crucial to properly store the flat tire and tools. This ensures that everything is organized for future use and maintains the longevity of your equipment. In this section, we will discuss two key steps: cleaning and storing the flat tire securely which includes returning the tools to their proper location.
Cleaning and storing the flat tire securely
Cleaning the flat tire should be your first step in the process. Start by removing any debris or mud that may have accumulated during your tire change. You can use a brush or cloth to gently scrub off any dirt. This not only keeps your flat tire in good condition but also prevents any dirt from transferring onto other items in your vehicle.
After cleaning, it’s time to store the flat tire securely. Placing it in the trunk or cargo area is a common option, but it’s important to ensure that it won’t slide or shift during your drive. Consider using a tire storage bag or container to keep it stable and protected. These bags are designed specifically for tire storage and often come with handles for easy transportation. If you don’t have a storage bag, you can also wrap the tire in an old bedsheet or tarp to prevent damage.
When storing the flat tire, keep it away from any sharp objects or chemicals that could potentially cause damage. Additionally, make sure it is not in direct contact with the interior upholstery of your vehicle to avoid any stains or marks.
Returning the tools to their proper location
Returning the tools to their designated location is essential for easy access in case of future tire emergencies. Each vehicle has a specific storage area, such as a spare tire well or compartment, where the tools should be placed.
Start by inspecting each tool to ensure it is clean and free of dirt or debris. Wipe them down if necessary. Then, organize the tools in a logical manner, such as arranging them by size or function. This makes it easier to find the specific tool you need when changing a tire.
If your vehicle has a tire storage well, place the tools back into it along with any other necessary equipment, such as the jack handle or lug wrench. If there isn’t a designated storage area, you can use a toolbox or bag to keep the tools together and easily accessible.
Remember, keeping your tools properly stored not only saves you time during a tire change but also ensures their longevity. Regularly checking the tools for any signs of wear or damage is also important to maintain their effectiveness.
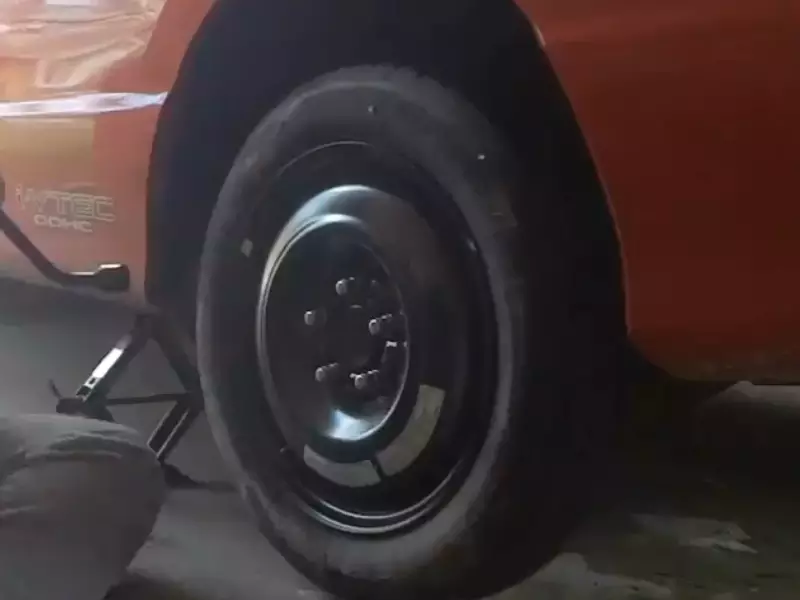
Testing The Spare Tire
Take a short test drive to ensure the spare tire is secure
Once you have successfully installed the spare tire, it is crucial to test its security before hitting the road. Taking a short test drive allows you to assess if the spare tire is securely positioned and if it’s functioning as intended. It also gives you an opportunity to detect any unusual vibrations or noises that may indicate an installation error. Here’s how you can perform a quick test drive to ensure the spare tire is secure:
- Start by driving at a moderate speed on a smooth road. This will help you gauge if the spare tire is properly balanced and aligned.
- Pay close attention to any vibrations or wobbling sensations. While it’s normal to feel some differences due to the difference in tire type, excessive vibrations can indicate a loose or improperly installed spare tire.
- Listen for any unusual noises such as squeaking or rattling. These can be signs that the spare tire is not properly fastened or that there is an issue with the mounting mechanism.
- Make a few turns and observe the tire’s response. If you notice any odd handling or instability, it’s advisable to stop and reassess the installation.
By taking a short test drive and following these steps, you can ensure that your spare tire is secure and ready to support you in case of an emergency.
Monitoring the spare tire in the following days
Even after successfully installing and testing the spare tire, it’s essential to continue monitoring its condition in the following days. This will help you identify any potential issues that may arise and ensure the spare tire remains in optimal condition. Here are some tips on how to monitor your spare tire:
- Check the tire pressure regularly. This can be done using a tire pressure gauge. Refer to the manufacturer’s guidelines for the recommended pressure.
- Inspect the tire for any signs of damage, such as cuts or bulges. If you notice any abnormalities, it’s best to have the tire inspected by a professional.
- Ensure that the spare tire is stored appropriately. It should be kept in a clean and dry environment, away from direct sunlight and extreme temperatures.
- Consider rotating the spare tire with the other tires on your vehicle periodically. This can help prevent uneven wear and prolong the lifespan of all the tires.
By regularly monitoring the spare tire and taking necessary precautions, you can have peace of mind knowing that it will be reliable whenever you need it.
Engaging A Professional If Needed
While installing a spare tire can be a relatively straightforward process, there are instances where seeking the help of a professional tire service is necessary. Engaging a professional ensures that tire repairs and replacements are done correctly, efficiently, and in adherence to safety standards. In this section, we will explore when it is appropriate to seek professional assistance with spare tire installation.
When to seek professional help with spare tire installation
While changing a flat tire can save you time and money, there are situations where it may be more appropriate to engage a professional. Below are a few scenarios in which seeking professional help is recommended:
1. Complex tire repair
If your spare tire installation requires more than a simple tire rotation or replacement, it is best to consult a professional. They have the expertise to handle complex repairs such as patching tire punctures, fixing sidewall damage, or addressing issues with the tire pressure monitoring system.
2. Lack of experience or knowledge
If you are unfamiliar with the process of installing a spare tire or lack the necessary tools and knowledge, it may be safer to engage a professional. They can ensure that the spare tire is properly aligned, mounted, and inflated, reducing the risk of accidents caused by improper installation.
3. Safety concerns
If you are in a situation where safety is a primary concern, it is wise to involve a professional. For example, if you are on a busy highway or in adverse weather conditions, a professional tire service can help to swiftly and safely get you back on the road.
4. Warranty considerations
If your vehicle or tire has an active warranty, utilizing a professional service for tire repairs and replacements can help you avoid voiding the warranty. Professional tire service providers adhere to manufacturer guidelines and use approved replacement parts, safeguarding your warranty coverage.
In conclusion, while it is possible to install a spare tire yourself in many cases, there are scenarios where engaging a professional tire service is the best course of action. From complex repairs to safety concerns and warranty considerations, knowing when to seek help ensures the proper installation and longevity of your spare tire.
Frequently Asked Questions For How To Install A Spare Tire
How Do You Put A Spare Tire Back In A Car?
To put a spare tire back in your car, follow these steps: 1. Locate the spare tire compartment. 2. Lift the tire into the compartment and align it with the lug bolts. 3. Slide the tire into place and make sure it’s secure.
4. Lower the jack and remove it from under the car. 5. Double-check that the lug nuts are tightened properly.
Which Side Of the Spare Tire Faces Out?
The outside of the spare tire faces outward.
What Are The Steps To Replacing A Spare Tire?
To replace a spare tire, follow these steps: 1. Park your vehicle on a flat, safe surface. 2. Locate the spare tire and tools in your car’s trunk. 3. Loosen the lug nuts of the flat tire using the lug wrench.
4. Use the car jack to lift the vehicle off the ground. 5. Remove the flat tire and replace it with the spare tire.
Where Is The Safest Place To Put A Spare Tire?
The safest place to put a spare tire is in the trunk of your car. Storing it securely in the trunk ensures it won’t become a projectile in case of an accident and keeps it protected from the elements.
Conclusion
Installing a spare tire is a necessary skill for every driver. By following a few simple steps, you can ensure your safety and reduce the stress of being stranded with a flat tire. Remember to regularly check the condition of your spare tire and keep it properly inflated.
A little preparation goes a long way in ensuring a smooth journey on the road. Stay safe and happy driving!