To install a sound system in a car, start by disconnecting the battery and removing the existing stereo. Then, connect the wiring harness and mount the new stereo in the dash.
Once in place, connect the speakers, subwoofers, and amplifier to the stereo. Finally, test the system to ensure proper functioning. Installing a sound system in your car can greatly enhance the audio quality of your driving experience. Whether you’re a music aficionado or simply enjoy crystal-clear sound while on the road, upgrading your car’s sound system can make a significant difference.
However, the installation process may seem daunting at first, especially if you’re not familiar with car electronics. In this guide, we will provide a step-by-step approach to help you install a sound system in your car efficiently and accurately. By following these instructions, you’ll be able to enjoy a superior audio experience in your vehicle. So, let’s dive in and get started on this exciting DIY project.
Factors To Consider When Selecting A Sound System
When it comes to installing a sound system in your car, there are several factors that you need to take into consideration. These factors will ensure that you choose the right system that suits your needs and preferences. From the size of your car to your budget and sound quality preferences, each factor plays a crucial role in determining the perfect sound system for your vehicle.
- Car size and space availability: Car size and space availability are important considerations when selecting a sound system for your car. Depending on the size of your vehicle, you need to choose a sound system that fits perfectly and doesn’t take up too much space. Consider the available space in your car and choose a sound system that can be easily installed without obstructing other components or causing discomfort.
- Budget: Budget is another crucial factor to consider when selecting a sound system for your car. Determine how much you are willing to spend on a sound system and stick to that budget. While it may be tempting to go for high-end and expensive options, it’s important to remember that there are plenty of affordable and reliable sound systems available in the market. Research different brands and models within your budget range to find the perfect fit.
- Sound quality preferences: Your sound quality preferences should also be taken into account when selecting a sound system. Whether you prefer a deep bass or a balanced sound, it’s essential to choose a system that delivers the audio experience you desire. Consider the specifications of the sound system, such as wattage, frequency range, and speaker configuration, to ensure it meets your sound quality expectations.
- Compatibility with your car’s electrical system: Ensuring that the sound system is compatible with your car’s electrical system is vital for a smooth installation and optimal performance. Check the voltage requirements and wiring compatibility of the sound system to avoid any electrical issues. Consult the user manual or seek professional advice to ensure seamless integration of the sound system with your car’s electrical system.
Selecting the right sound system for your car involves considering various factors such as car size and space availability, budget, sound quality preferences, and compatibility with your car’s electrical system. By carefully evaluating these factors, you can choose a sound system that enhances your driving experience and brings your favorite tunes to life.
Researching Sound System Options
Installing a sound system in your car can greatly enhance your driving experience, allowing you to enjoy your favorite music with crisp and immersive audio. However, with so many options available in the market, it can be overwhelming to choose the right sound system for your car. Fortunately, there are effective ways to narrow down your choices and find the perfect sound system that suits your preferences and budget. In this section, we will explore two important steps in researching sound system options: online reviews and ratings, and seeking recommendations from experts or car audio enthusiasts.
Online Reviews and Ratings
When delving into the world of car audio systems, one valuable resource that can help you make an informed decision is online reviews and ratings. Online platforms, such as specialized audio forums, e-commerce websites, and social media groups dedicated to car audio enthusiasts, provide a wealth of information shared by individuals who have firsthand experience with various sound systems. By reading through these reviews, you can gain insight into the performance, durability, and overall quality of different sound system models.
While browsing reviews, pay attention to the key features that are important to you, such as sound clarity, bass performance, durability, and ease of installation. Look for patterns and consistent feedback from multiple sources to ensure a more accurate representation of the product. Additionally, keep an eye out for any special promotions or discounts that may be mentioned in the reviews, as this can help you save some money while still getting a high-quality sound system.
Seeking Recommendations from Experts or Car Audio Enthusiasts
Another effective way to research sound system options is by seeking recommendations from experts or car audio enthusiasts. These individuals have extensive knowledge and experience in the field and can provide valuable insights and advice. Connecting with experts can be done through online car audio forums, where you can post specific questions about sound systems or browse through existing threads for recommendations.
Car audio enthusiasts, on the other hand, can be found within your own network or at local car meets and shows. Strike up conversations with individuals who have installed sound systems in their cars and ask about their experiences and recommendations. Their first-hand experiences can help you discover hidden gem sound systems or avoid potential pitfalls.
Finally, consider visiting car audio stores for demonstrations. This step allows you to hear the sound system in action and assess its performance. By experiencing the sound quality firsthand, you can make a more informed decision about which sound system will best suit your preferences and needs.
Take the time to research and gather information before making a final decision. This will ensure that you choose a sound system that not only meets your expectations but also provides a stellar audio experience for all your future car rides.
Essential Tools For Installing A Car Audio System
Installing a sound system in your car can transform your driving experience and elevate your favorite tunes to a whole new level. However, to ensure a smooth installation process, you’ll need a set of essential tools to get the job done right. In this article, we’ll discuss the tools you should have on hand for installing a car audio system.
Screwdrivers
A set of screwdrivers is indispensable for any car audio installation. Different types of screws may be used in various parts of your car’s interior, and having a range of screwdriver sizes will ensure you have the right tool for the job. Whether it’s removing panels, mounting brackets, or securing components, your trusty screwdrivers will come in handy.
Wire strippers and cutters
When it comes to connecting wires, having the right tools is crucial. Wire strippers are specifically designed to remove the insulation from the ends of wires without damaging the conductor. This ensures a proper connection and prevents signal loss. Additionally, wire cutters are essential for neatly trimming excess wire length.
Electrical tape
Electrical tape is a must-have tool for any car audio installation. It is used to insulate and protect electrical connections, preventing short circuits and ensuring a secure and reliable connection. Make sure to use high-quality electrical tape that is resistant to heat and moisture for the best results.
Crimping tool
A crimping tool is essential for securing electrical connections. It allows you to join wires together by compressing a metal connector onto the stripped ends of the wires. This creates a strong and durable connection that won’t easily come loose, even with the vibrations experienced in a car.
Panel removal tools
Removing panels in your car’s interior is often necessary to access the wiring and components you’ll be working with during the installation. Panel removal tools, such as trim pry tools and clip pliers, are designed to safely pry and remove panels without causing damage. These tools are crucial for a clean and professional-looking installation.
Multimeter
A multimeter is an invaluable tool for troubleshooting and testing electrical connections. With a multimeter, you can measure voltage, resistance, and continuity, ensuring that your connections are properly functioning. This tool helps you identify any issues and make the necessary adjustments for optimal performance.
With these essential tools at your disposal, you’ll be ready to tackle the installation of a car audio system with confidence. Remember to always follow the manufacturer’s instructions and take the necessary safety precautions to ensure a successful and seamless installation.
Additional Equipment Needed For Installing A Sound System
When it comes to upgrading the sound system in your car, having the right equipment is crucial. To ensure a seamless installation process, you’ll need a few additional components to complement the main components, such as the head unit, speakers, subwoofer, and amplifier. In this article, we’ll discuss the essential additional equipment and accessories needed for installing a sound system in your car.
Head unit or receiver
The head unit, also known as the receiver, is the control center of your car’s sound system. It allows you to control various audio functions, including volume, tuning, and input selection. To install a new head unit, you’ll need a few tools such as wire strippers, crimping tool, and screwdrivers to remove the old unit and install the new one. Additionally, you may need a dash kit and wiring harness adapter to ensure compatibility with your car’s wiring system.
Speakers
Upgrading your car’s speakers can greatly improve the overall sound quality. To install new speakers, you’ll need to remove the old ones and mount the new ones in their place. Depending on the type of speakers you choose, you may need additional accessories like speaker brackets, mounting adapters, and screwdrivers. Make sure to check the specifications of your car’s speakers to ensure compatibility with the new ones you plan to install.
Subwoofer
If you’re looking to add deep bass and low-frequency impact to your car’s audio system, a subwoofer is a must-have. When installing a subwoofer, you’ll need to find a suitable location in your car for mounting, which could be in the trunk or under a seat. Additionally, you’ll need a subwoofer enclosure or box to ensure optimal performance. Don’t forget to connect the subwoofer to the amplifier for power and signal input.

Amplifier
An amplifier is essential for providing sufficient power to your speakers and subwoofer. It boosts the audio signals and ensures clear and distortion-free sound. To install an amplifier, you’ll need to connect it to your head unit using RCA cables and speaker wire. Depending on the size and power requirements of the amplifier, you may also need to install a separate power cable connected directly to the car battery.
Wiring harness
A wiring harness is a necessary component that connects your head unit to your car’s electrical system. It simplifies the installation process and ensures proper electrical connections. With a wiring harness, you don’t have to cut into your car’s factory wiring, which makes it easier to revert back to the original system if needed. Simply plug the wiring harness into the back of the head unit and connect the other end to the corresponding factory wiring harness in your car.
RCA cables
RCA cables are essential for transferring audio signals between the head unit, amplifier, and other audio components. These cables have red and white connectors that carry the left and right audio channels respectively. To install the RCA cables, connect one end to the output jacks on the back of the head unit and the other end to the corresponding input jacks on the amplifier.
Speaker wire
Speaker wire is used to connect your speakers to the amplifier. It carries the audio signal from the amplifier to the speakers, ensuring proper sound reproduction. It’s important to use the appropriate gauge of speaker wire based on the power requirements and distance between the amplifier and speakers. Connect one end of the speaker wire to the amplifier’s output terminals and the other end to the corresponding input terminals on the speakers.
Fuse holder and fuse
To protect your car’s sound system from electrical faults and prevent damage, it’s crucial to install a fuse holder and fuse. The fuse holder acts as a safeguard and is typically installed near the car battery. It should be connected to the positive (+) terminal of the battery, with the fuse inserted into the holder. The fuse rating should match the maximum power output of your amplifier.
By having these additional equipment and accessories, you’ll be well-prepared to install a sound system in your car. Whether you’re a car audio enthusiast or simply looking to enhance your driving experience, upgrading your car’s sound system can make a significant difference in the quality of audio playback. Remember to prioritize safety and consult professional help if needed to ensure a successful installation.
Disconnecting The Battery
Ensuring Safety During the Installation Process
When it comes to installing a sound system in your car, your safety should be your top priority. Before you start any installation work, it is crucial to take the necessary precautions to ensure a safe and smooth process.
Unhooking the Negative Terminal of the Battery
The first step in installing a sound system in your car is to disconnect the battery. This step is essential to prevent any potential electrical shocks or short circuits during the installation process.
To unhook the negative terminal of the battery, follow these steps:
- Identify the negative terminal: Locate the battery in your car’s engine compartment. The negative terminal is usually distinguished by a minus (-) sign and is colored black.
- Gather the necessary tools: Before proceeding, make sure you have the required tools at hand. You might need a wrench or a socket set to loosen the battery terminal.
- Put on safety gloves: To protect yourself from any potential injuries, wear safety gloves before working with the battery.
- Loosen the connector: Use the appropriate tool (wrench or socket set) to loosen the connector on the negative terminal. Turn it counterclockwise until it comes loose.
- Detach the negative terminal: Once the connector is loosened, carefully remove the negative terminal from the battery.
Note: It is important to remember that the negative terminal should always be disconnected first to avoid any accidental short circuits.
By following these steps, you have successfully disconnected the battery’s negative terminal, ensuring a safe environment to continue with the sound system installation.
Removing Existing Audio Components
Before you can install a new sound system in your car, it’s important to remove the old audio components. This step will ensure a clean and efficient installation process. There are two main components that need to be removed: the old head unit and speakers.
Removing the old head unit and speakers
The head unit is the control center of your car’s audio system, typically located in the center console or dashboard. To remove it, follow these steps:
- Start by disconnecting the car’s battery to prevent any electrical mishaps.
- Use a trim removal tool to gently pry off the trim panel surrounding the head unit.
- Locate the mounting screws or clips that secure the head unit in place and remove them using the appropriate tools.
- Once the screws or clips are removed, carefully pull out the head unit from its housing.
- Disconnect the wiring harnesses and antenna cable from the back of the head unit. Note down how they are connected to ensure a smooth reinstallation process.
Next, let’s move on to removing the old speakers:
- Start by accessing the speakers, which are usually located in the car doors or rear deck.
- If necessary, remove the door panels by unscrewing any visible screws and gently prying off the panel using a trim removal tool.
- Once the speakers are accessible, locate the mounting screws securing them in place and remove them using the appropriate tools.
- Gently pull out the speakers and disconnect the wiring harnesses attached to them.
Detaching any additional accessories or components
In addition to the head unit and speakers, your car might have additional accessories or components attached to the audio system. These could include amplifiers, equalizers, or crossover units. To remove these components, follow these steps:
- Disconnect the power supply to the accessory or component by removing the fuse or disconnecting the wiring harness.
- Remove any mounting screws or clips securing the accessory or component in place.
- Carefully detach the accessory or component from its mounting location.
By adhering to these steps, you’ll be able to successfully remove the existing audio components from your car to make way for the new sound system. Keep in mind that the process may vary based on your specific car model, so consult the user manual or seek professional guidance if needed.
Preparing the car’s Wiring
Identifying the wiring harness and speaker wires
Before you can start connecting your new sound system in your car, you need to first identify the wiring harness and speaker wires. These wires carry the audio signals from your head unit to the speakers, allowing you to enjoy your favorite music while you’re on the road.
To begin, locate the wiring harness in your car. The wiring harness is a bundle of wires that connect the head unit to the car’s electrical system. It’s usually located behind the head unit or in the dashboard. Once you’ve found it, carefully examine the wires to identify the color-coded ones.
The next step is to identify the speaker wires. These wires are responsible for carrying the audio signals from the head unit to each speaker in your car. Look for a bundle of wires that lead to each speaker location. Each wire should be labeled with a positive (+) or negative (-) sign, or they may be color-coded. Make a note of the colors or labels to help you during the installation process.
Connecting the wiring harness to the new head unit
After identifying the wiring harness and speaker wires, it’s time to connect the wiring harness to your new head unit. This will allow the sound system to communicate with the car’s electrical system.
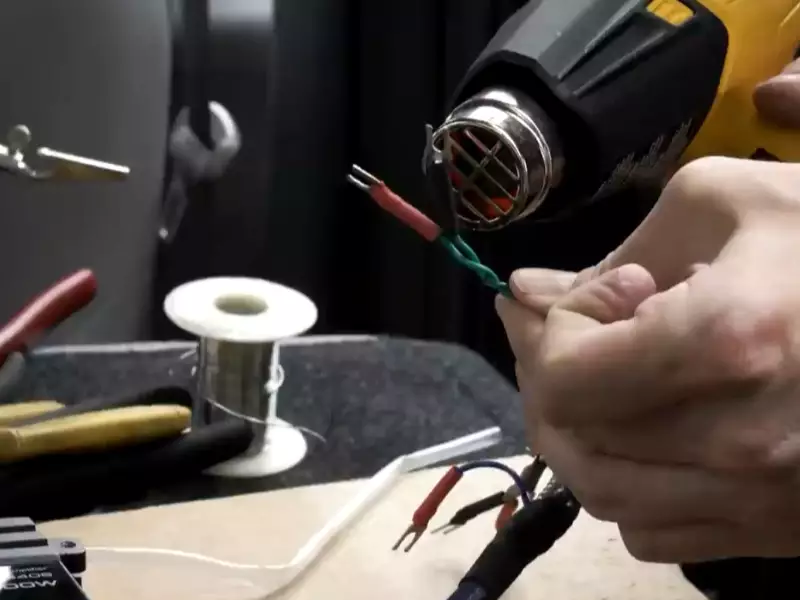
If your new head unit came with its own wiring harness, match the color-coded wires from the harness to those of the car’s wiring harness. Connect the wires by twisting them together and securing them with electrical tape or heat shrink tubing.
If your new head unit doesn’t come with a wiring harness, you’ll need to purchase one separately. Refer to the manufacturer’s instructions or consult a professional for guidance on matching the wires correctly.
Important tip: Before connecting the wiring harness to the new head unit, make sure to disconnect the car’s battery to avoid any electrical mishaps.
Once the wiring harness is securely connected, gently push the head unit into the mounting bracket and secure it in place. Use screws or the provided clips to ensure a snug fit.
With the wiring harness successfully connected and the head unit securely in place, you’re one step closer to enjoying a high-quality sound system in your car. In the next step, we will move on to installing the speakers.
Installing The Head Unit
Once you’ve gathered all the necessary tools and materials, it’s time to start installing the head unit in your car’s dashboard. This crucial step ensures that your new sound system will be integrated seamlessly into your vehicle.
Mounting the new head unit into the dashboard
The first task is to mount the new head unit securely in the dashboard of your car. To do this, follow these steps:
- Identify the appropriate location in the dashboard where the head unit will be installed.
- Ensure that there is enough space and clearance to accommodate the new unit.
- Use a mounting kit or bracket specifically designed for your car’s make and model to secure the head unit in place.
- Align the bracket or mounting kit with the holes on the head unit and the holes in the dashboard.
- Tighten the screws or fasteners to firmly secure the head unit in place. Be careful not to over-tighten, as this may damage the unit or the dashboard.
By correctly mounting the head unit, you can ensure stability and prevent any vibrations or loose connections that may affect the sound quality or functionality of your new sound system.
Connecting the wiring harness and antenna adapter
With the head unit securely mounted, the next step is to connect the wiring harness and antenna adapter. Follow these steps:
- Locate the wiring harness that came with your new head unit. It should be included in the packaging.
- Connect the wiring harness to the corresponding wiring in your car. The colors of the wires should match.
- Attach the antenna adapter to the antenna wire. This ensures that you’ll still be able to pick up radio signals with your new head unit.
- Connect the other end of the wiring harness and antenna adapter to the back of the head unit.
- Double-check all connections to ensure they are secure and properly fitted.
By connecting the wiring harness and antenna adapter correctly, you’ll be able to power the head unit and ensure that all audio signals are transmitted accurately.
Now that you’ve completed the installation of the head unit, you’re one step closer to enjoying a powerful and immersive sound experience in your car. In the next step, we’ll explain how to properly install the speakers to enhance the overall audio quality.
Installing The Speakers
Now that you have prepared the speaker mounting locations and wired the new speakers to the car’s electrical system, it’s time to install the speakers themselves. This step is crucial for achieving that high-quality sound experience you’ve been craving in your car.
Preparing the speaker mounting locations
Before you begin the speaker installation process, make sure you have chosen the appropriate locations to mount them. Keep in mind that the ideal placement for speakers is often on the doors or rear deck.
To prepare the speaker mounting locations, follow these steps:
- Remove any existing speakers or speaker grilles from the chosen locations.
- Clean the mounting areas thoroughly to ensure a secure fit. Remove any dirt, dust, or debris that may interfere with the installation process.
- Measure the dimensions of your speakers and mark the mounting holes accordingly. It’s important to get precise measurements to avoid misaligned holes.
- Using a drill, carefully make the necessary holes for mounting the speakers. Be sure to use a drill bit size that matches the diameter of the mounting screws provided with your speakers.
By properly preparing the speaker mounting locations, you ensure that the speakers will be securely installed, allowing for optimal sound performance in your car.
Wiring the new speakers to the car’s electrical system
Once you have prepared the mounting locations, the next step is to wire the new speakers to your car’s electrical system. Follow these steps to ensure a proper connection:
- Identify the positive (+) and negative (-) terminals on your new speakers. These are usually indicated by the color-coded red and black wires.
- Locate the corresponding speaker wire harnesses or terminals in your car. These are commonly found behind the stereo unit or in the doors.
- Strip a small portion of insulation off the end of each speaker wire.
- Connect the positive (+) terminal of the speaker to the positive (+) wire harness/terminal in your car. Similarly, connect the negative (-) terminal of the speaker to the negative (-) wire harness/terminal.
- Secure the connections using electrical tape or wire connectors to ensure a solid connection.
- Repeat these steps for each speaker, ensuring that each speaker is correctly wired to the car’s electrical system.
By properly wiring the new speakers to your car’s electrical system, you guarantee a seamless integration that allows for smooth audio playback and an enhanced sound experience.
Adding A Subwoofer And Amplifier
Mounting the Subwoofer and Amplifier in the Appropriate Locations
Once you have chosen the perfect subwoofer and amplifier for your car’s sound system, it’s time to install them in the appropriate locations. Proper mounting ensures that the subwoofer and amplifier are secure and won’t rattle or cause any damage while driving. Here’s how you can do it:
- Find a suitable location: Identify a spot in your car where you can mount the subwoofer and amplifier. It’s best to choose a location that is out of the way and won’t interfere with your car’s functionality or safety features. Common locations include the trunk or under the seats.
- Prepare the mounting surface: Clean the mounting surface thoroughly to ensure that the subwoofer and amplifier adhere properly. Remove any dirt, grease, or debris that might affect the adhesion.
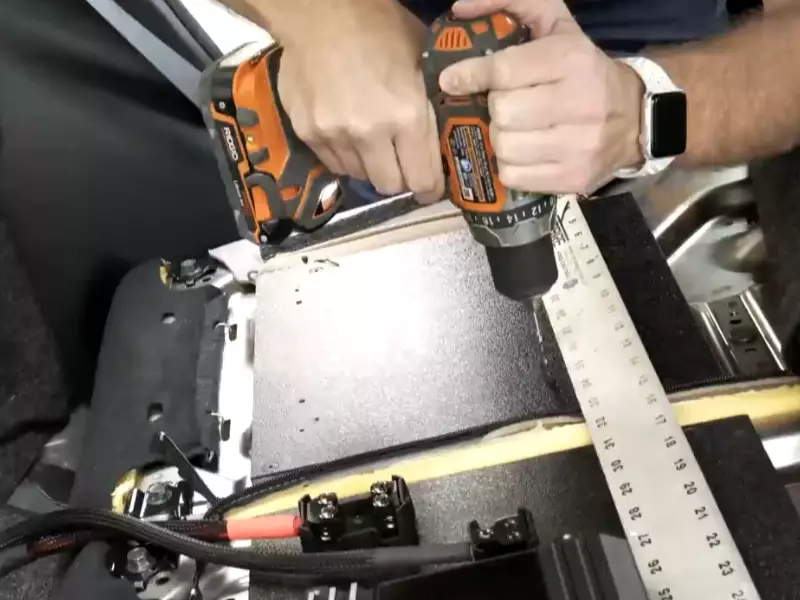
- Secure the subwoofer: Use screws or mounting brackets to securely attach the subwoofer to the chosen location. Ensure that it is firmly in place and won’t move or vibrate. You can refer to the manufacturer’s instructions for specific mounting details.
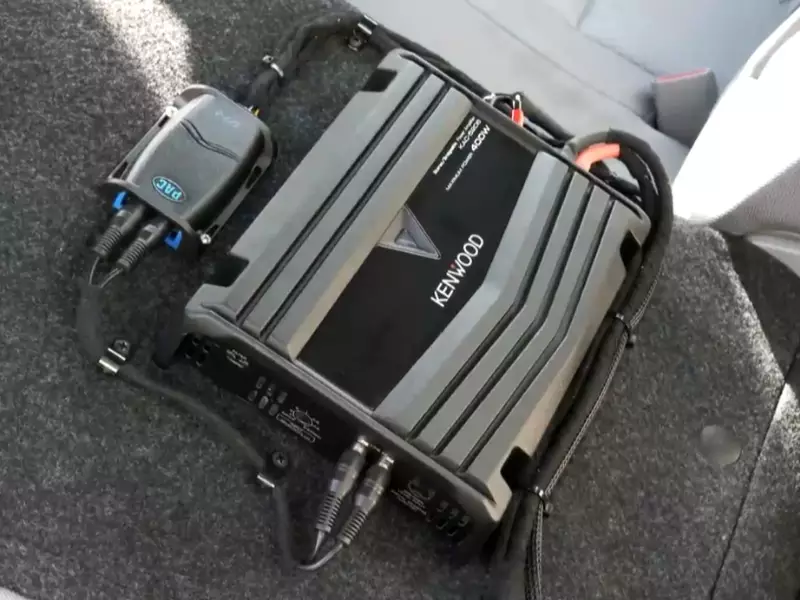
- Mount the amplifier: Similarly, mount the amplifier in a suitable location using screws or mounting brackets. It’s important to keep the amplifier away from heat sources and ensure proper ventilation to prevent overheating.
Double-check the stability: Before moving on to the wiring process, give both the subwoofer and amplifier a gentle shake to make sure they are securely mounted and won’t come loose during use.
Wiring the Subwoofer and Amplifier to the Head Unit and Speakers
Now that the subwoofer and amplifier are securely mounted, it’s time to connect them to the head unit and speakers. This wiring process ensures that your new sound system delivers the best audio experience. Follow these steps to get it done:
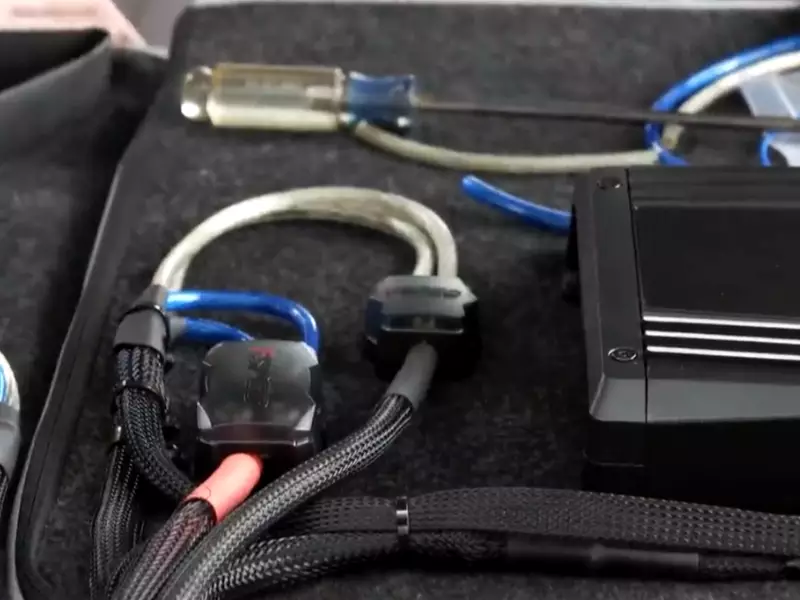
- Gather the necessary tools: Before you start wiring, gather the required tools such as wire cutters, crimpers, electrical tape, and wire connectors. These tools will make the wiring process easier and ensure proper connections.
- Connect the subwoofer to the amplifier: Take the subwoofer cable and connect one end to the subwoofer’s input terminal and the other end to the corresponding output terminal on the amplifier. Make sure to match the positive (+) and negative (-) connections correctly.
- Wire the amplifier to the head unit: Locate the RCA preamp outputs on your head unit and connect them to the corresponding inputs on the amplifier using RCA cables. These cables will transmit the audio signal from the head unit to the amplifier.
- Connect the amplifier to the speakers: Use speaker wire to connect the amplifier’s output terminals to the respective speakers. Ensure that the positive (+) and negative (-) wires are connected correctly to avoid any sound discrepancies.
- Double-check all connections: Once all the wiring is complete, carefully check all the connections to make sure they are secure and properly connected. Inspect for any loose wires or potential short circuits.
With the subwoofer and amplifier mounted correctly and properly wired, your car’s sound system is now ready to deliver booming bass and enhanced audio quality. Enjoy the immersive and powerful audio experience as you hit the road.
Testing And Adjusting The Sound System
After successfully installing the sound system in your car, it’s time to test and adjust the settings to ensure optimal sound quality. This step is crucial as it allows you to fine-tune the sound system according to your preferences and ensure an immersive audio experience on the road.
Reconnecting the Battery and Turning on the Sound System
Before you start testing the sound system, it’s important to reconnect the battery to ensure everything is powered up. Follow these steps to do so:
- Double-check all the connections you made during the installation process. Make sure everything is securely connected.
- Attach the positive (red) terminal of the battery to its respective connection point, and then attach the negative (black) terminal.
- Ensure that the battery is properly secured and doesn’t move around when driving.
- Now, turn on the sound system by pressing the power button. You should hear a familiar sound indicating that it is active and ready for testing.
Once the sound system is up and running, it’s time to adjust the settings for optimal sound quality.
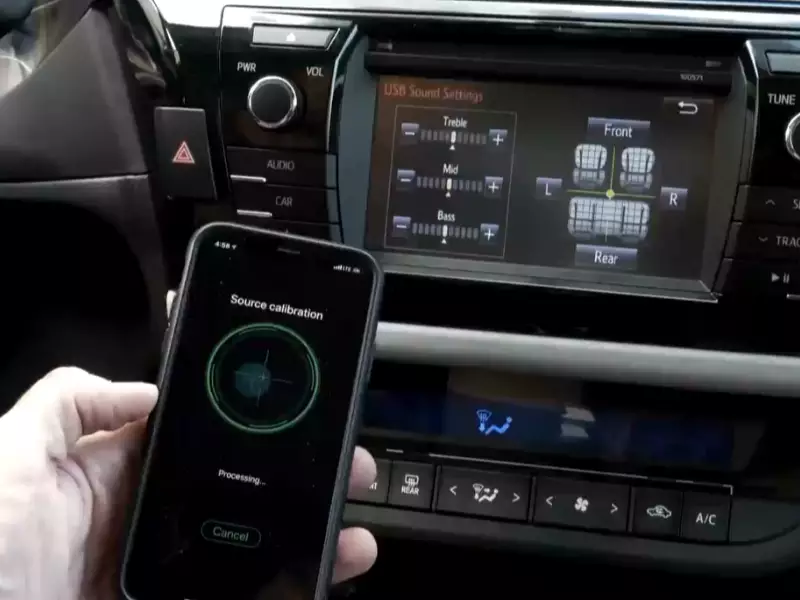
Adjusting the Settings for Optimal Sound Quality
Follow these steps to ensure that your sound system delivers the best audio experience:
| Step | Process |
|---|---|
| Step 1 | Start with the volume at a low level to avoid any sudden loud noises. |
| Step 2 | Next, adjust the balance and fade controls to ensure a balanced output between the speakers. This will ensure that the sound is evenly distributed throughout the car. |
| Step 3 | Experiment with the equalizer settings to enhance the sound quality to your liking. Adjust the bass, midrange, and treble frequencies until you achieve the desired audio balance. |
| Step 4 | If your sound system includes additional features like surround sound or sound effects, explore these options and adjust them accordingly. |
| Step 5 | Take some time to listen to different genres of music and evaluate the sound quality. This will help you fine-tune the settings based on your preferences. |
| Step 6 | If needed, make further adjustments to the settings until you are satisfied with the audio output. |
Remember, the ideal sound quality may vary from person to person. Spend some time getting acquainted with your new sound system and experimenting with different settings until you achieve the desired audio experience.
Once you are satisfied with the sound quality, you can sit back, relax, and enjoy the excellent audio performance of your newly installed car sound system. Safe travels!
Securing And Reassembling The Car’s Interior
Now that you have successfully installed your sound system in your car, it’s time to properly secure and reassemble the car’s interior. This step is crucial to ensure that everything stays in place and doesn’t cause any distractions while you’re on the road. Follow the steps below to secure loose wires and cables and reassemble any panels or trim pieces that were removed during the installation process.
Securing Loose Wires and Cables
First, check all the wires and cables to make sure none of them are loose or hanging in the way. Loose wires can not only be a safety hazard but also interfere with the sound quality of your system. Here are a few tips to help you secure them:
- Use zip ties or cable clips to group and organize wires together. This will not only keep them neat but also prevent them from getting tangled or causing a mess.
- Find suitable anchor points within the car’s interior to secure the wires. Look for existing wiring harnesses or brackets that you can use to keep the wires in place.
- Avoid placing wires in areas that could potentially get damaged, such as beneath moving parts or near hot components.
By properly securing your wires, you can minimize the risk of them getting damaged or causing any issues with your sound system.
Reassembling Any Panels or Trim Pieces
Next, it’s time to put everything back together. This step involves reattaching any panels or trim pieces that were removed during the installation process. Here’s how you can do it:
- Refer to your notes or photographs taken during the disassembly process to ensure that you remember where each panel or trim piece goes.
- Carefully align the panel or trim piece with its corresponding spot and gently press it into place.
- Use the appropriate tools, such as a screwdriver or trim removal tool, to reinstall any screws or clips that need to be secured.
- Double-check the tightness and alignment of each panel or trim piece to ensure a seamless reassembly.
Take your time and pay attention to detail while reassembling the car’s interior. This will help maintain the integrity and appearance of your vehicle while ensuring a professional-looking installation.
Once you have securely fastened all the wires and reassembled the car’s interior, you can sit back, relax, and enjoy the enhanced sound experience that your new sound system provides.
Enjoying Your New Car Sound System
After successfully installing your new car sound system and fine-tuning it for optimal performance, it’s finally time to sit back, relax, and enjoy your favorite music like never before. In this step, we’ll guide you on how to test the sound system with your favorite tracks and make any necessary adjustments for an immersive audio experience.
Testing the Sound System with Your Favorite Music
Now that your new car sound system is up and running, it’s time to put it to the test. Playing your favorite music through the revamped speakers will give you a clear picture of the system’s capabilities and help you gauge the quality of the sound produced. Follow these simple steps to test your sound system:
- Connect your music device, such as a smartphone or MP3 player, to the car’s audio system using an auxiliary cable or Bluetooth.
- Choose a song or album that you are familiar with and resonates well across different genres.
- Start with a moderate volume level and gradually increase it until you reach a comfortable listening level.
- Pay attention to the clarity of the vocals, the depth of the bass, and the overall balance of the sound.
- Test the sound system at various frequencies and volume levels to ensure consistent performance throughout.
By testing your sound system with a range of music tracks and genres, you’ll be able to spot any inconsistencies or issues that may require fine-tuning adjustments.
Making Any Necessary Fine-Tuning Adjustments for Optimal Performance
To truly achieve optimal performance from your car sound system, it may be necessary to make some fine-tuning adjustments. Here are a few areas you can focus on:
- Bass and Treble: Adjust the bass and treble levels to your preference, finding the right balance that complements the type of music you enjoy listening to.
- Equalizer Settings: Experiment with the equalizer settings to tailor the sound output based on your preference and the characteristics of your car’s interior.
- Spatial Balance: Fine-tune the speaker balance to ensure that the sound is evenly distributed throughout the car, providing an immersive experience for all passengers.
- Sound Placement: Consider adjusting the speaker placement and orientation to optimize the sound imaging and localization within the car.
By making these fine-tuning adjustments, you can customize the sound system to your liking and maximize its performance based on the acoustics of your car’s interior.
Now that you have successfully tested and fine-tuned your new car sound system, it’s time to hit the road and enjoy an incredible audio experience during your commutes, road trips, or simple drives around town.
Frequently Asked Questions For How To Install A Sound System In A Car
Is It Hard To Install A Car Sound System?
Installing a car sound system can be challenging. It requires knowledge of wiring, car specifications, and technical skills. Seek professional help unless you’re familiar with car electronics and installation procedures.
How Much Would It Cost To Put A New Sound System In My Car?
The cost of a new sound system for your car will vary depending on the brand, features, and installation. Generally, prices can range from $100 for a basic system to over $1000 for a high-end setup.
Can I Install the Car Stereo Myself?
Yes, you can install a car stereo yourself. It’s a DIY task that requires basic knowledge and tools. Just follow the instructions in the manual, use proper wiring connections, and secure it properly. It’s important to be cautious and double-check everything for a successful installation.
What Is Need For A Car Sound System?
A car sound system is necessary for an enjoyable driving experience. It provides high-quality audio, allowing you to listen to your favorite music, podcasts, or audiobooks while on the road. A good sound system enhances the overall ambience and entertainment value inside the car.
Conclusion
With these step-by-step instructions and a little patience, you can easily install a sound system in your car. By following the proper guidelines and using the right tools, you can enjoy a premium audio experience on the road. So get ready to rev up your music and enhance your driving journey with your new car sound system.
Happy listening!