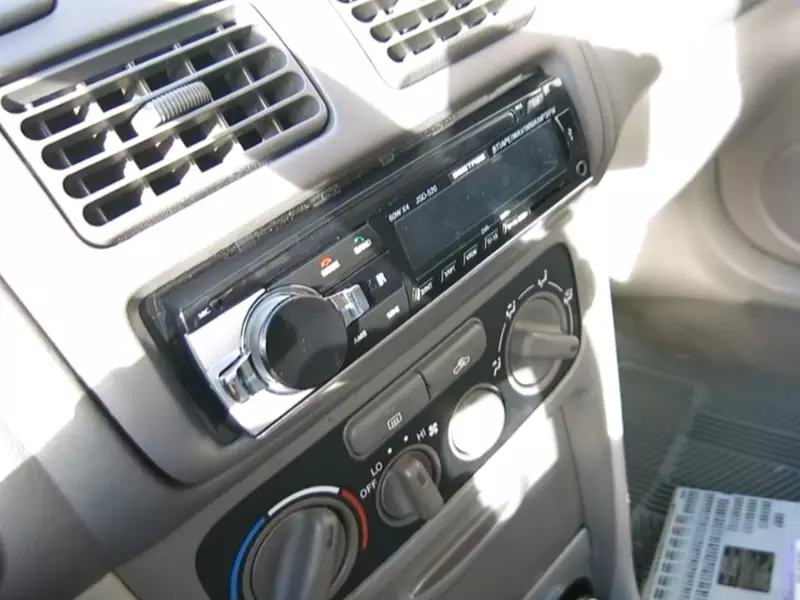
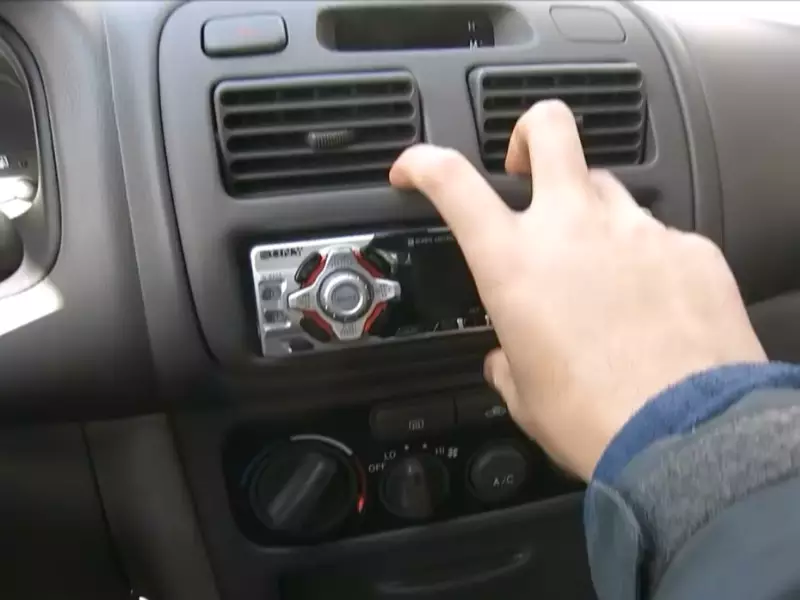
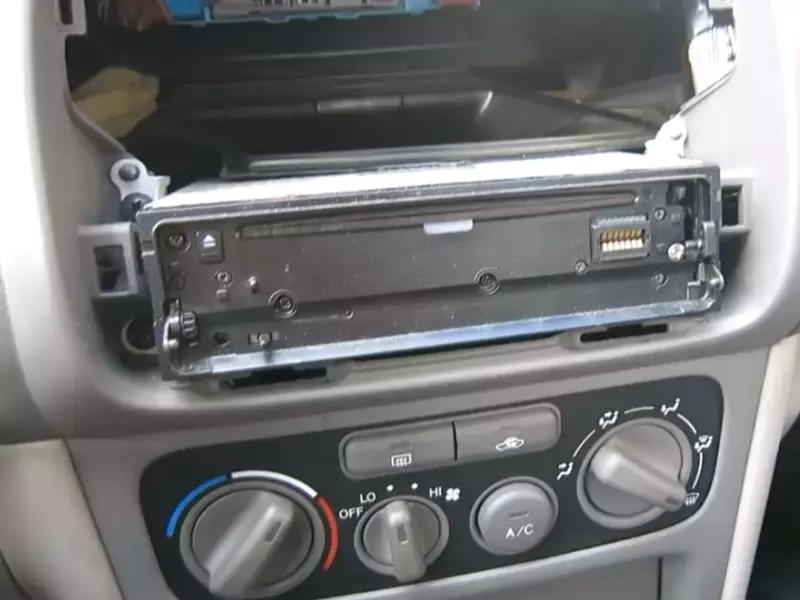
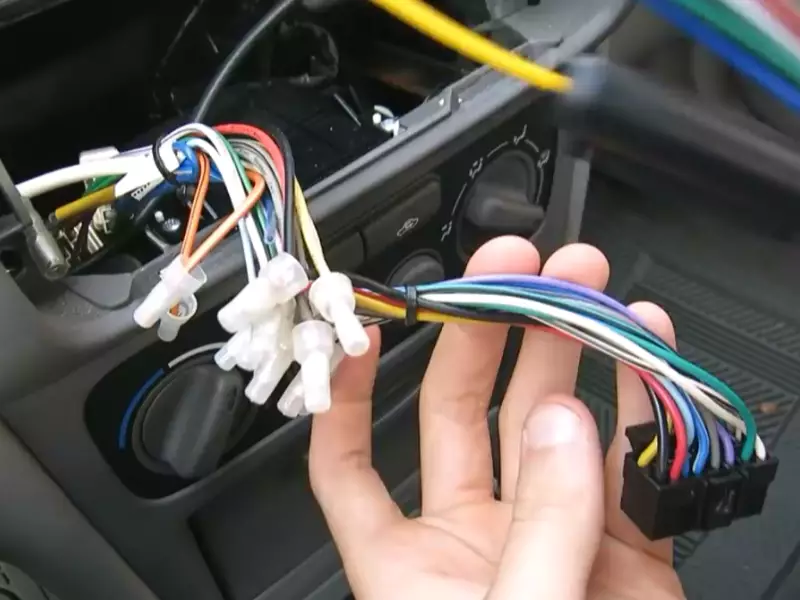
To install a radio in a car, you need to gather the necessary tools, disconnect the car battery, remove the old radio, install the new radio, and reconnect the battery. First, gather the required tools, including a screwdriver and wire connectors.
Next, disconnect the car battery to ensure safety during the installation process. Then, remove the old radio by unfastening the screws or clips holding it in place and disconnecting the wiring harness. Install the new radio by connecting the wiring harness and sliding it into the dash until it clicks.
Finally, reconnect the car battery and test the radio to ensure it’s functioning properly.

Gather The Necessary Tools And Materials
Installing a radio in your car can be a great upgrade that enhances your driving experience. However, before you begin the installation process, it is crucial to gather all the necessary tools and materials. This ensures a successful and seamless installation, saving you time and effort in the long run.
Tools needed for the installation
Here is a list of the essential tools you will need:
- Screwdriver set: Make sure you have a variety of screwdrivers, including flathead and Phillips heads, as they often come in handy during the installation process. Different car models may require different types of screwdrivers, so it’s best to be prepared.
- Pliers: Pliers are essential for cutting and stripping wires. They can help you remove any stubborn connectors or connectors that are difficult to access.
- Wire stripper: This tool allows you to safely remove the insulation from the wires without damaging them. It ensures a clean and secure connection between the radio and the car’s electrical system.
- Tape measure: A tape measure can help you accurately measure the size and dimensions of the radio and the mounting space in your car. This ensures that the radio you choose fits perfectly in your vehicle.
- Electrical tape: Electrical tape is essential for insulating and protecting the exposed wires. It ensures a secure and reliable connection, minimizing any risk of electrical shorts or damage.
Materials required for a successful installation
In addition to the tools, you will also need the following materials:
- Radio installation kit: A radio installation kit includes the necessary brackets, harnesses, and adapters to securely mount the radio in your car. It ensures a professional and OEM-like fit.
- Wiring harness: A wiring harness connects the radio to the car’s electrical system. It simplifies the installation process and eliminates the need for cutting or splicing wires.
- Antenna adapter: An antenna adapter allows you to connect the car’s existing antenna to the new radio. It ensures a strong and clear radio reception.
- Mounting screws: Depending on the radio installation kit, you may need mounting screws to secure the radio in place. These screws should be compatible with the kit and the mounting space in your car.
Choosing the right radio for your car
Before gathering the tools and materials, it’s important to choose the right radio for your car. Consider the following factors:
- Compatibility: Ensure that the radio you choose is compatible with your car’s make, model, and year. Check the dimensions, connector types, and wiring specifications to guarantee a seamless installation.
- Features: Determine what features you desire, such as Bluetooth connectivity, USB ports, navigation, or satellite radio compatibility. Make a list of the features that are important to you and prioritize them.
- Budget: Set a budget for your radio purchase. Research different options and compare prices to find the best radio that fits within your budget without compromising on quality.
By gathering all the necessary tools and materials and choosing the right radio, you can ensure a successful installation and enjoy your new car radio to the fullest.

Preparing For Installation
Disconnecting the car battery
Before starting the installation process, it is crucial to ensure the safety of your vehicle’s electrical system. Disconnecting the car battery is an essential step that will prevent any accidental electrical shocks and protect your car’s electronic components. To do this, follow these simple steps:
- Turn off your car’s engine completely and remove the ignition key.
- Open the car’s hood and locate the car battery. It is usually situated near the front of the engine compartment.
- Using a wrench or pliers, loosen and remove the negative terminal clamp from the battery. The negative terminal is usually labeled with a minus (-) sign.
- Secure the loose negative terminal clamp by wrapping it with electrical tape to prevent accidental contact with the battery.
- Repeat the same process for the positive terminal clamp, which is labeled with a plus (+) sign.
- Once both clamps are removed, ensure that they do not make contact with the battery terminals throughout the installation process. This will minimize the risk of a short circuit.
Removing the existing car radio
With the car battery safely disconnected, it’s time to remove the old radio from your vehicle. Following these steps will guide you through the process:
- Locate the existing car radio, which is typically found in the center console or dashboard of your car.
- Depress any securing clips, screws, or bolts that hold the radio in place. Refer to your car’s user manual or consult an online resource if you are unsure about the location of these fasteners.
- Gently pull out the radio unit, being careful not to damage any surrounding panels or wires. Apply even pressure to all sides to ensure a smooth removal.
- Once the radio is free from its mounting, carefully disconnect the wiring harness at the back of the unit. This includes the antenna cable, power connector, and any other connectors specific to your car’s model.
- Set aside the disconnected radio in a safe place for potential use or disposal.
Preparing the space for the new radio
Now that the previous radio has been removed, it is important to prepare the space for the installation of your new radio. These steps will help ensure a smooth and successful installation:
- Clean the area around the mounting opening to remove any dust, debris, or residue left behind by the old radio.
- Check the compatibility of the new radio with your car’s dashboard opening. Ensure that the dimensions match and any additional accessories, such as a mounting kit or wiring harness, are available if needed.
- If required, assemble the mounting kit and attach it to the new radio according to the manufacturer’s instructions.
- Connect the necessary wiring harnesses to the back of the new radio, including the power connector, antenna cable, and any other connectors specific to your car’s model.
- Double-check all connections to ensure they are secure and properly aligned. This will prevent any potential audio or electrical issues later on.

Installing The New Radio
Now that you have removed the old radio, it’s time to install the new one! The process may seem daunting at first, but with the right tools and know-how, you’ll be able to enjoy your favorite tunes in no time. In this section, we will go through each step of the installation process, from mounting the new radio in the car to securing it in place.
Mounting the new radio in the car
The first step is to mount the new radio in your car’s dash. Before you begin, make sure to read the instruction manual that came with your radio to understand the specific mounting requirements. Once you have familiarized yourself with the instructions, follow these general steps:
- Identify the suitable location in your car’s dash where the new radio will be mounted. It should be easily accessible for both the driver and any passengers.
- Use a mounting bracket or the supplied mounting sleeve to secure the radio in place. The mounting bracket or sleeve will typically have pre-drilled holes that align with the screw holes on the radio.
- Insert the radio into the mounting bracket or sleeve, making sure it fits snugly. If needed, use the provided screws or brackets to secure the radio to the mounting framework.
Connecting the wiring harness
Once the radio is mounted, it’s time to connect the wiring harness. The wiring harness is a set of wires that will connect the radio to your car’s electrical system. Follow these steps to ensure a proper connection:
- Identify the wiring harness that came with your new radio. It should have color-coded wires.
- Match each wire from the radio’s wiring harness to the corresponding wire from your car’s wiring harness. The colors should align, making it easier to connect them.
- Once all the wires are matched, use crimp connectors or soldering to secure each connection. Ensure that each connection is tight and secure to avoid any electrical issues.
Attaching the radio antenna
Now that the wiring harness is connected, it’s time to attach the radio antenna. Follow these steps to ensure a proper connection:
- Locate the antenna plug on the back of the new radio.
- Connect the antenna plug to the antenna wire. The plug should fit snugly into the corresponding port.
- Once connected, make sure the antenna wire is properly routed to avoid interference or signal loss.
Securing the radio in place
Before you complete the installation process, it’s crucial to secure the radio in place to prevent any movement or damage. Follow these steps to ensure a secure installation:
- Push the radio back into the dash until it fits snugly and is flush with the surrounding panel.
- Check that all the mounting screws or brackets are tightened to securely hold the radio in place.
- Test the radio by gently pulling on it to ensure it remains securely mounted.
With the radio securely in place and all the necessary connections made, you’re now ready to enjoy your new car audio system! Take a moment to admire your handiwork before turning on the radio and adjusting the settings to your liking. Sit back, relax, and enjoy the ride with your favorite music or radio stations!
Testing And Finalizing The Installation
Now that you have successfully installed your new radio in your car, it’s time to test and finalize the installation. This crucial step ensures that everything is working properly and allows you to make any necessary adjustments to the radio settings and controls. In this section, we’ll cover all the important steps to ensure a smooth and error-free installation process.

Reconnecting the car battery
The first step in testing your new radio installation is to reconnect the car battery. This step is important as it allows the radio to power up and function correctly. To reconnect the car battery, simply locate the positive (+) and negative (-) terminals on the battery and attach the corresponding cables. Make sure the connections are secure and tighten any loose terminals.
Checking the functionality of the new radio
Once the car battery is reconnected, turn on the ignition and power up the new radio. Check if the radio powers on and if the lights and display are functioning properly. Test the volume control, radio tuner, and any other features or functions that your new radio offers. Ensure that you can hear the sound clearly through the car speakers. If you notice any issues or abnormalities during this test, refer to the troubleshooting section below.
Adjusting the radio settings and controls
Now that you have confirmed the functionality of the new radio, it’s time to adjust the settings and controls to suit your preferences. Use the control knobs or buttons on the radio to adjust the volume, bass, treble, and other sound settings. Try out different radio stations and use the tuner to find the best reception. Additionally, explore any additional features your radio may have, such as Bluetooth connectivity or auxiliary inputs, and configure them according to your needs.
Troubleshooting common installation issues
If you encounter any problems during the testing phase or notice any issues with the new radio, it’s important to troubleshoot and address them promptly. Here are a few common installation issues and their possible solutions:
| Issue | Solution |
|---|---|
| No power or radio won’t turn on | Check the wiring connections, fuse, and ensure the car battery is properly connected. |
| Distorted or no sound | Check the speaker connections and ensure they are securely attached. Adjust the sound settings on the radio. |
| Poor radio reception | Ensure the antenna is properly connected and positioned. Try a different location if needed. |
By following these troubleshooting steps, you can quickly identify and resolve any issues that may arise during the radio installation process.
Once you have tested and finalized the installation of your new radio, you can enjoy your favorite tunes and radio stations as you cruise on the road. Remember to keep the installation instructions and any documentation provided by the manufacturer in case you need to refer to them in the future.
Frequently Asked Questions Of How To Install A Radio In A Car
Is It Hard To Install A Radio In A Car?
Installing a radio in a car isn’t difficult. With the right tools and instructions, you can do it yourself. Just follow the steps and connect the wires properly. It’s a simple process that won’t take too much time. Enjoy your favorite tunes while driving!
Can You Install A Radio In Any Car?
Yes, it is possible to install a radio in any car.
How To Wire Up A Car Radio?
To wire up a car radio, follow these steps:
- Disconnect the car battery to avoid electric shock
- Remove the old car radio and disconnect its wiring harness.
- Connect the wiring harness of the new radio to the car’s wiring harness.
- Insert the new radio into the dashboard and secure it in place.
- Reconnect the car battery and test the new radio for proper functionality.
Do You Need A Wiring Harness To Install A New Radio?
Yes, a wiring harness is required to install a new radio. It ensures proper connection between the radio and the vehicle’s electrical system, making installation easier and preventing any damage to the wiring.
Conclusion
Installing a radio in your car doesn’t have to be a daunting task. By following the step-by-step instructions provided in this blog post, you can successfully install a radio in your car and enjoy your favorite tunes on the go.
Remember to carefully read the car and radio manuals, gather the necessary tools, and take your time during the installation process. Soon enough, you’ll be cruising with a new radio that enhances your driving experience.
