To install an overhead DVD player, you’ll need to follow these steps: mount the unit securely to the ceiling of your car, connect the power and audio cables to the player, and wire the unit to the car’s electrical system. Then, test the player to ensure it’s working properly.
Introducing an overhead DVD player to your car can provide entertainment for passengers during long drives. Whether you’re going on a road trip or simply want to keep your kids entertained, having a DVD player installed can make the journey more enjoyable.
While it may seem like a complicated task, installing an overhead DVD player is actually a straightforward process that can be done with basic tools and some patience. We will guide you through the necessary steps to successfully install an overhead DVD player in your car.
Choosing The Right Overhead DVD Player
When it comes to entertaining passengers during long road trips, an overhead DVD player is a fantastic addition to your vehicle. These devices provide hours of entertainment and can make any journey more enjoyable. However, with so many options available in the market, it can be overwhelming to choose the right overhead DVD player for your car. In this section, we will discuss the factors to consider when selecting an overhead DVD player and recommend some popular brands and models.
Factors to Consider when Selecting an Overhead DVD Player
Before investing in an overhead DVD player, it’s crucial to consider certain factors to ensure you make the right choice. Take a look at the following considerations:
- Budget: Determine your budget range to narrow down your options and avoid overspending. Overhead DVD players come in a variety of price ranges, so knowing your budget will help you make an informed decision.
- Screen Size: Consider the size of the screen you prefer for your overhead DVD player. Larger screens offer a more immersive viewing experience, but they might be more expensive and can obstruct rearview visibility.
- Resolution: Opt for a high-resolution screen to ensure clear and sharp visuals. Look for models with at least 720p resolution or higher for enhanced image quality.
- Compatibility: Ensure that the overhead DVD player is compatible with the audio and video formats you intend to use. It’s also important to check if it can connect with other devices such as gaming consoles or smartphones.
- Installation: Evaluate the installation process of the overhead DVD player. Some models may require professional installation, while others are designed for easy and DIY installation. Choose one that suits your convenience and skill level.
- Additional Features: Consider any additional features you might want, such as wireless headphones, remote control, built-in speakers, or USB/SD card slots. These features can enhance the overall entertainment experience.
Recommended Brands and Models for Overhead DVD Players
Now that you understand the key factors to consider, let’s explore some recommended brands and models that offer excellent overhead DVD players:
| Brand | Model | Screen Size | Resolution | Additional Features |
|---|---|---|---|---|
| Boss | BV12.1MCH | 12.1 inches | 1366×768 | Wireless headphones, USB/SD card slots |
| Pyle | PLRD103F | 10.1 inches | 1024×600 | Remote control, built-in speakers |
| Road Entertainment | RDVD10 | 10.1 inches | 1024×600 | USB/SD card slots |
The above brands and models are known for their reliability, quality, and customer satisfaction. Of course, it’s always advisable to read customer reviews and compare prices before making a final decision.
By considering these factors and exploring the recommended brands and models, you’ll be well on your way to choosing the perfect overhead DVD player that suits your budget and entertainment needs.
Gathering The Necessary Tools And Materials
List of tools required for overhead DVD player installation
Now that you’ve decided to install an overhead DVD player in your vehicle, the first step is to gather all the necessary tools and materials. Having the right tools on hand will not only make the installation process smoother but also ensure a successful outcome. Here is a list of tools you’ll need for the overhead DVD player installation:
- Phillips screwdriver
- Flathead screwdriver
- Wire strippers
- Wire crimpers
- Pliers
- Socket and ratchet set
- Electrical tape
- Wire connectors
- Zip ties
- Drill and drill bits
- Panel removal tool
Make sure to gather all these tools beforehand to avoid any unnecessary delays during the installation process. Ensure that your tools are of good quality and suitable for automotive use. Having the right tools will save you time and frustration.
Types of cables and connectors needed for the installation
In addition to the tools mentioned above, you’ll also need various cables and connectors to connect your overhead DVD player properly. The types of cables and connectors required may vary depending on the model and make of your vehicle, as well as the overhead DVD player you’re installing. Here are some commonly used cables and connectors for overhead DVD player installation:
- Power cables: These cables supply power to the overhead DVD player. They typically feature a red and black wire for positive and negative connections.
- AV cables: These cables are responsible for audio and video transfer. They connect the overhead DVD player to the vehicle’s audio and video system.
- HDMI cables: If your overhead DVD player supports HDMI connectivity, you’ll need an HDMI cable to enjoy high-definition video and audio.
- Speaker wires: These wires transmit audio signals from the DVD player to the speakers.
- Antenna adapters: If your vehicle has a factory-installed antenna, you may need an antenna adapter to ensure proper reception.
Remember to check the specifications of your overhead DVD player and vehicle to determine the specific cables and connectors you’ll need. It’s always a good idea to consult the user manual or contact the manufacturer for guidance.
Now that you know the list of tools and materials required for the installation, you’re one step closer to enjoying your favorite movies and shows on the go. In the next section, we’ll walk you through the installation process, so stay tuned!
Preparing The Vehicle For Installation
Are you planning to install an overhead DVD player in your vehicle? If you want to enjoy movies or music during long road trips, this is a great addition to your car. However, before you start the installation process, you need to prepare your vehicle properly. In this section, we will guide you through the necessary steps to prepare your vehicle for the installation.
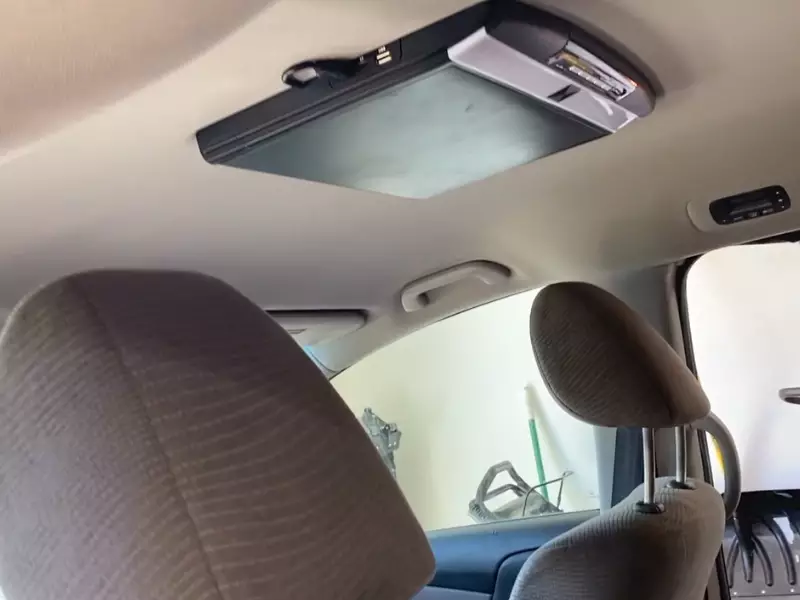
Removing any existing electronics or accessories from the overhead console
If you already have electronics or accessories installed in the overhead console of your vehicle, you need to remove them before proceeding with the installation of the DVD player. Removing these existing components will give you a clean slate to work with and ensure that the installation process goes smoothly. Here’s how you can remove them:
- Start by carefully inspecting the overhead console. Look for any screws or fasteners that may be holding the electronics or accessories in place.
- Using the appropriate screwdriver or tool, remove these screws or fasteners one by one. Be sure to keep track of these small parts to avoid misplacing them.
- Gently detach the electronics or accessories from the console, taking care not to damage any wires or connectors.
- Once everything has been removed, check the console for any residue or dirt. Use a clean cloth to wipe it clean, ensuring a smooth surface for the DVD player installation.
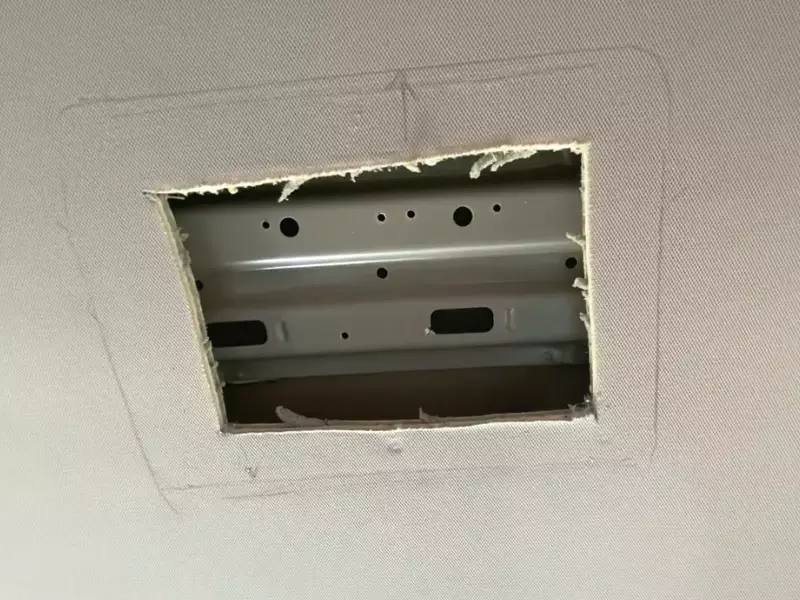
Preparing the wiring and mounting area for the DVD player
Now that you have a clean overhead console, it’s time to prepare the wiring and mounting area for the DVD player. Follow the steps below to ensure a secure and efficient installation:
- Identify the wiring harness for the overhead console. This harness typically consists of several wires that connect the console to the vehicle’s electrical system.
- Inspect the wiring and ensure that there are no damaged or frayed wires. If you come across any, it’s important to repair or replace them before proceeding with the installation to avoid electrical issues.
- Next, find a suitable mounting location for the DVD player within the overhead console. Make sure the chosen spot is sturdy and will hold the player securely.
- If necessary, use a measuring tape to determine the exact dimensions of the mounting area. This will help you ensure a perfect fit for the DVD player.
- Once you have identified the mounting spot, use a drill and appropriate bits to create holes for the mounting screws. This will anchor the DVD player firmly in place.
- After drilling the holes, clean up any debris or metal shavings from the console to prevent any potential damage to the DVD player or electrical connections.
- Finally, position the wiring harness in a way that allows easy access to connect it to the DVD player. Ensure that there is enough slack for the wires to comfortably reach the player without being too tight or tangled.
By following these steps, you will be well on your way to installing an overhead DVD player in your vehicle. With a clean overhead console and properly prepared wiring and mounting area, the installation process will be much smoother and hassle-free. Stay tuned for the next section on how to connect and secure the DVD player to complete the installation!
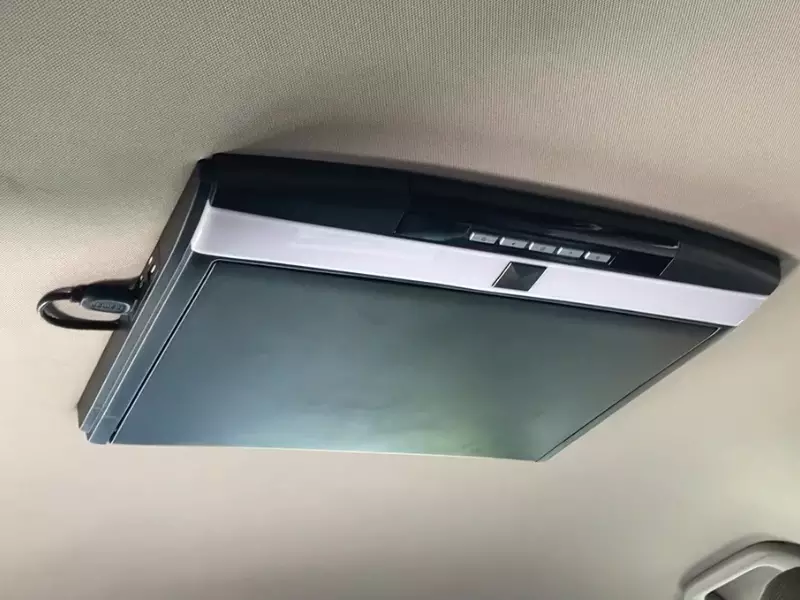
Mounting The DVD player On The Overhead Console
Installing an overhead DVD player in your vehicle can enhance your passengers’ entertainment experience during long trips. Mounting the DVD player securely on the overhead console is crucial to ensure optimal positioning and alignment. In this section, we will guide you through the process of securing the DVD player to the overhead console and ensuring proper alignment.
Securing the DVD player to the overhead console
To begin, gather the necessary tools for the installation, such as a screwdriver, screws, and brackets. Refer to the instruction manual provided with your DVD player for specific requirements, as mounting methods may vary depending on the model.
First, locate the ideal position on the overhead console to mount the DVD player. Take into consideration the viewing angles and accessibility for passengers. It is recommended to mount the DVD player a few inches behind the front seats, ensuring that it does not obstruct the driver’s view.
Next, attach the mounting brackets to the DVD player. Insert the screws into the designated holes on the brackets but avoid tightening them completely at this stage. This will allow for adjustments and alignment once the DVD player is placed on the console.
Position the DVD player on the overhead console according to the chosen location. Ensure that the brackets align with the pre-drilled holes or mounting points on the console. Once aligned, tighten the screws on the brackets securely, but be careful not to overtighten and damage the console or DVD player.
Ensuring proper alignment and positioning of the DVD player
Once the DVD player is securely mounted on the overhead console, it’s important to check its alignment and positioning. A properly aligned DVD player will provide an optimal viewing experience for all passengers.
To ensure the DVD player’s alignment, adjust its position if necessary. Some DVD players come with adjustable brackets or swivel mounts, allowing you to fine-tune the angle and tilt for better viewing. Test the adjustment by sitting in various seats within the vehicle to verify that the screen is visible and comfortable from different angles.
In addition to alignment, make sure the DVD player is leveled with the vehicle’s interior. Use a carpenter’s level or a smartphone level app to check that the display screen is straight and parallel to the ground. Adjust the mounting brackets if needed to achieve a level position.
Lastly, verify that all connections are properly secured and that the DVD player functions correctly. Connect the necessary cables, including power and audio/video cables, following the manufacturer’s instructions. Test the DVD player by inserting a DVD or playing a video to ensure that both audio and video output are functioning properly.
By following these steps to mount and align your overhead DVD player on the console, you can provide an enjoyable and convenient entertainment system for all passengers during your journeys.

Connecting The Power Supply
Identifying the Power Source for the DVD Player
Before diving into the installation process of an overhead DVD player, it is crucial to identify the power source that will be used. The power source will provide the necessary electrical current to ensure the DVD player functions optimally. In most cases, the power source can be either the vehicle’s electrical system or an external power supply.
If you opt to connect the DVD player to the vehicle’s electrical system, start by locating the fuse box. This can usually be found under the hood or within the cabin of the vehicle. Once you’ve located the fuse box, find a fuse that is linked to an accessory or the entertainment system. This fuse should be labeled accordingly, making it easier to identify.
If, on the other hand, you choose to use an external power supply, you can connect the DVD player to a power inverter. A power inverter allows you to convert the DC (direct current) power from the vehicle’s electrical system to AC (alternating current) power, which the DVD player requires.
Connecting the Power Cable and Ensuring a Secure Connection
Now that you’ve identified the power source, it’s time to connect the power cable to the overhead DVD player. This step is crucial as it ensures a steady and uninterrupted power supply, enabling the DVD player to function at its best.
- Begin by locating the power cable that came with your DVD player. This cable should have connectors on both ends, which will be used to establish the connection.
- Find the power input port on the back of the DVD player. It is typically labeled “Power” or “DC Input.” Insert one end of the power cable into this port, ensuring a snug fit.
- Next, identify the power source you have chosen and its corresponding power outlet. If you are connecting to the vehicle’s electrical system, locate the fuse box or the power inverter.
- If connecting to the vehicle’s electrical system, carefully remove the labeled fuse for the entertainment system. Insert the other end of the power cable into the fuse slot, where the original fuse was located. Ensure a secure connection by pushing the connector in firmly.
- If using a power inverter, connect the power cable to the inverter’s designated power outlet. It is essential to follow the manufacturer’s instructions for a proper and secure connection.
Once you have successfully connected the power cable to both the DVD player and the power source, double-check the connections. Ensure they are secure and free from any obstructions that may cause interference or disruptions in power supply. Once satisfied with the connections, it’s time to test your installation.
Now that you’re equipped with the knowledge of identifying the power source and securely connecting the power cable, you’re ready to enjoy endless entertainment during your journeys. Whether you choose to connect to the vehicle’s electrical system or an external power supply, following these steps will ensure a smooth installation process.
Wiring The Video And Audio Connections
When installing an overhead DVD player, one of the crucial steps is wiring the video and audio connections. Properly connecting these cables ensures that you can enjoy your favorite movies and music with high-quality sound and pictures. In this section, we will guide you through the process of routing the video and audio cables to the DVD player and connecting them to the appropriate ports.
Routing the video and audio cables to the DVD player
The first step is to route the video and audio cables from the front of the vehicle to the overhead DVD player. This can be done by following these steps:
- Identify the video and audio cables that came with your DVD player. Usually, these cables are color-coded for easy identification. The video cable is typically yellow, while the audio cables are red and white.
- Locate the video and audio input ports on the overhead DVD player. These ports are usually located on the back of the unit.
- Begin routing the cables by carefully threading them through the vehicle’s headliner or any other designated cable routing channels. It’s essential to avoid sharp edges or areas that may cause damage to the cables.
- Continue routing the cables toward the backseat area until they reach the overhead DVD player. Be sure to keep the cables neat and organized, securing them in place with clips or cable ties if necessary.
Connecting the cables to the appropriate ports on the DVD player
Now that you have routed the cables to the overhead DVD player, you can proceed to connect them to the appropriate ports. Follow these simple steps:
- Locate the video and audio input ports on the back of the DVD player.
- Match the colors of the cables with the corresponding video and audio input ports. Connect the yellow video cable to the yellow video input port, and the red and white audio cables to their respective audio input ports.
- Ensure a secure connection by firmly inserting each cable into its corresponding port. This will help prevent any loose connections that may result in poor audio or video quality.
Once you have successfully wired the video and audio connections, you can move on to the next steps of the installation process, such as mounting the DVD player and connecting it to power. Following these guidelines will ensure that your overhead DVD player is properly installed, allowing you to enjoy endless entertainment during your journeys.
Integrating with the vehicle’s Audio System
Installing an overhead DVD player in your vehicle is a great way to enhance your passengers’ entertainment experience during long journeys. However, to fully integrate it with your vehicle’s audio system, you need to connect the DVD player to the speakers and configure the audio settings for optimal sound quality. In this article, we will guide you through the process step by step.
Connecting the DVD player to the vehicle’s speakers
To ensure that the sound from your overhead DVD player is transmitted through your vehicle’s speakers, you will need to make the necessary connections. Here’s how to do it:
- Locate the audio output ports on the DVD player. These are typically labeled as “Audio Out” or “Line Out”.
- Identify the corresponding audio input ports on your vehicle’s audio system. These can usually be found on the back of the stereo unit.
- Connect one end of the audio cables to the DVD player’s audio output ports and the other end to the vehicle’s audio input ports. Make sure to match the colors of the cables with the ports (red to red, white to white).
- Once the connections are made, secure the cables in place to prevent them from becoming loose during travel. You can use zip ties or adhesive clips for this purpose.
- Turn on the DVD player and test the audio by playing a DVD or CD. Adjust the volume levels on both the DVD player and the vehicle’s audio system to achieve the desired sound.
By following these steps, you can establish a seamless connection between your overhead DVD player and your vehicle’s audio system, ensuring that the sound is distributed evenly throughout the cabin.
Configuring the audio settings for optimal sound quality
To ensure that you get the best possible sound quality from your overhead DVD player, it’s essential to configure the audio settings appropriately. Here are some tips to help you achieve optimal sound:
- Equalizer settings: Adjust the equalizer settings on your vehicle’s audio system to match your personal preferences. You can experiment with different presets or manually adjust the frequencies to enhance the bass, treble, and overall balance.
- Speaker balance and fade: Set the speaker balance and fade controls on your vehicle’s audio system to ensure that the sound is evenly distributed between the front and rear speakers. This will help create a surround sound effect.
- Volume control: Avoid setting the volume too high, as it can lead to audio distortion. Find the optimal volume level that provides clear and immersive sound without causing discomfort or distortion.
Take the time to play around with the audio settings on both the DVD player and your vehicle’s audio system until you achieve the desired sound quality. Remember, each vehicle and audio system may have unique settings, so it’s essential to experiment and find what works best for you.
In conclusion, integrating an overhead DVD player with your vehicle’s audio system is a straightforward process that involves connecting the DVD player to the speakers and configuring the audio settings. By following the steps outlined in this article, you can ensure that your passengers enjoy a high-quality audio experience during their travels.
Verifying The DVD Player Functionality
After successfully installing the overhead DVD player in your vehicle, the next step is to ensure that it is working perfectly. Verifying the functionality of the DVD player is crucial to enjoy uninterrupted entertainment during your journeys. In this section, we will guide you through the steps to test the DVD player and make sure both the audio and video are working flawlessly.
Testing the DVD player by inserting a disc and playing it
The first step in verifying the functionality of your overhead DVD player is to test it by inserting a disc and playing it. Follow these simple steps to do so:
- Make sure the vehicle is parked and the ignition is off for safety.
- Take your favorite DVD and insert it carefully into the disc slot of the player.
- Turn on the DVD player by pressing the power button.
- Observe the display screen to check if the disc is being read and displayed correctly.
- Use the control buttons to navigate through the DVD menu and select the desired options.
- Press the play button to start playing the DVD.
By following these steps, you can ensure that your overhead DVD player is capable of reading and playing discs effectively.
Checking if the audio and video are working properly
Once you have successfully played a DVD, it is essential to check if both the audio and video components of the DVD player are working properly. Follow these steps to perform an audio and video check:
- Adjust the volume knob or press the volume control buttons to hear the audio from the speakers. Ensure that the volume is audible and clear.
- Observe the display screen to ensure that the video quality is crisp and the colors are vivid.
- Pay attention to any flickering, distortion, or abnormal behavior of the audio or video.
- If you encounter any issues with audio or video, refer to the user manual for troubleshooting tips or contact customer support for further assistance.
By performing these checks, you can guarantee a pleasant and enjoyable viewing experience for yourself and your passengers.
Troubleshooting Common Installation Issues
Installing an overhead DVD player in your vehicle can be a great addition to keep your passengers entertained during long drives. However, like any electronic device, it may run into some common installation issues that can hinder its performance. In this section, we will discuss how to troubleshoot power issues and audio/video problems to ensure a seamless experience with your overhead DVD player.
Resolving power issues such as no power or intermittent power
If you encounter a power issue with your overhead DVD player, where there is no power at all or the power comes on and off intermittently, there are a few steps you can take to resolve it:
- First, ensure that the power cables are properly connected. Check if the cables are securely plugged into the power source and the DVD player.
- Inspect the fuse. A blown fuse can cause power failure. Locate the fuse in the power cable and check if it is intact. If it has blown, replace it with a new one of the same rating.
- Check the power source. Make sure that the power source you are using is supplying a stable and sufficient amount of power to operate the DVD player. Try plugging the player into a different power outlet or using a compatible power adapter.
- Verify the remote control battery. If your overhead DVD player comes with a remote control, ensure that the batteries are not depleted. Replace them if necessary.
By following these steps, you can troubleshoot and resolve power issues that may arise during the installation of your overhead DVD player.
Fixing audio or video problems like distorted sound or no picture
Another common installation issue with overhead DVD players is related to audio or video problems. Your DVD player may exhibit distorted sound or no picture at all. Here’s what you can do to fix these issues:
- Check the audio connections. Ensure that the audio cables are correctly plugged into the appropriate ports of the DVD player and the vehicle’s audio system. Make sure the connections are tight and secure.
- Inspect the video connections. Similar to audio, confirm that the video cables are properly connected to the DVD player and the vehicle’s display device. Ensure that the connections are secure and snug.
- Adjust the audio settings. Sometimes, audio problems can be resolved by adjusting the audio settings on the DVD player. Check the player’s menu options for any sound-related settings and make adjustments if needed.
- Confirm the correct input source. If you have multiple input sources (such as HDMI, AV, or USB), double-check that the correct input source is selected on both the DVD player and the display device.
Following these steps should help you fix common audio/video problems with your overhead DVD player, ensuring that you can enjoy crystal-clear sound and a vivid picture.
By troubleshooting power issues and audio/video problems, you can overcome common installation hurdles related to overhead DVD players. These solutions will help you get the most out of your device and provide an enjoyable entertainment experience for your passengers during every journey.
Finalizing The Installation
Securing any loose cables and ensuring a tidy installation
After successfully mounting your overhead DVD player in your vehicle, it’s essential to secure any loose cables and ensure a tidy installation. This not only provides a clean and professional look but also helps prevent any potential hazards or interference. Here are a few steps you can follow to achieve this:
- Begin by carefully inspecting all the cables connected to the DVD player. Make sure they are tightly fastened and properly routed.
- If you notice any loose cables, use zip ties or cable clips to secure them. This will prevent them from dangling or getting entangled with other components.
- Ensure that the power cables are neatly tucked away and not obstructing any other parts of the vehicle. You can use adhesive-backed cable clips to hold them in place.
- Keep audio and video cables organized by bundling them together using Velcro straps or zip ties.
- If necessary, use wire loom or split tubing to protect the cables from any potential damage.
- Perform a final check to ensure all cables are secure, properly connected, and free from any twists or knots.
Reassembling the overhead console and restoring the vehicle’s interior appearance
Now that the cables are secured and the installation is looking tidy, it’s time to reassemble the overhead console and restore the vehicle’s interior appearance. This step will not only give your DVD player a polished look but also ensure it blends seamlessly with the rest of your car’s design. Follow these steps to complete the final stage of the installation process:
- Gently reattach the overhead console to its original position, aligning it with the mounting points.
- Make sure the console is firmly secured and all screws or clips are tightened accordingly.
- Reconnect any electrical connectors or switches that were disconnected during the installation process, ensuring everything is properly aligned and functioning.
- Check for any gaps or misalignments between the console and the surrounding interior components. If necessary, gently adjust and align them to achieve a seamless appearance.
- Finally, do a general inspection of the vehicle’s interior, making sure there are no loose screws, tools, or debris left behind.
By following these steps and taking the time to securely fasten cables and restore the vehicle’s interior, you can finalize the installation of your overhead DVD player with confidence. Not only will you have a functional entertainment system but also a visually appealing addition to your car. So, sit back, relax, and enjoy your favorite movies or music during those long road trips!
Frequently Asked Questions For How To Install A Overhead DVD Player
What Channel Does The TV Need To Be On For Dvd Player?
To watch a DVD, tune your TV to the “Video” or “AV” channel.
Can You Add A DVD System To A Car?
Yes, a DVD system can be added to a car. It provides entertainment on the go, allowing passengers to watch movies and enjoy multimedia content while traveling. Adding a DVD system enhances the in-car experience and keeps everyone entertained during long journeys.
How Do I Install An Overhead DVD player?
To install an overhead DVD player, start by selecting the right player for your vehicle. Then, locate the mounting area and carefully remove any existing components. Next, secure the mounting bracket and attach the player. Connect the power and audiovisual cables, and test the player to ensure proper functionality.
What Tools Do I Need To Install An Overhead DVD player?
To install an overhead DVD player, you’ll need a few tools. These may include a screwdriver, wire strippers, electrical tape, a panel removal tool, and a socket wrench set. It’s also helpful to have a trim removal tool, a drill with various drill bits, and a voltage meter for testing the connections.
Conclusion
Installing an overhead DVD player is a simple and efficient way to enhance your car’s entertainment system. By following these step-by-step instructions, you can successfully install the player and enjoy your favorite movies and shows on the go. Remember to gather all the necessary tools and materials, carefully read the instructions, and take your time during the installation process.
With a little patience and attention to detail, you’ll soon be enjoying a whole new level of entertainment in your vehicle. Happy driving!