To install a new car stereo, disconnect the negative battery terminal and remove the old stereo unit before connecting and securing the new one. Are you looking to upgrade your car’s audio system?
One of the easiest ways to do that is by installing a new car stereo. Whether you want better sound quality or additional features like Bluetooth connectivity, installing a new car stereo can greatly enhance your driving experience. We will provide you with a step-by-step guide on how to install a new car stereo.
From disconnecting the negative battery terminal to removing the old stereo and connecting and securing the new one, we will cover all the necessary steps. So, let’s begin!
Choosing The Right Car Stereo
When it comes to upgrading your car’s audio system, selecting the right car stereo is crucial. A high-quality car stereo can enhance your driving experience and make those long road trips more enjoyable. With numerous options available in the market, it can be overwhelming to make the right choice. However, by considering a few factors, researching different options, and seeking recommendations, you can find the perfect car stereo to suit your needs and preferences.
Factors to consider when selecting a new car stereo
When choosing a new car stereo, there are several important factors to consider to ensure compatibility and satisfaction. These factors include:
- Sound quality and power: The primary purpose of a car stereo is to deliver high-quality sound. Look for a stereo that offers clear audio, balanced tones, and sufficient power output to meet your listening preferences. Whether you enjoy deep bass or crisp highs, the sound quality and power of the stereo should match your musical tastes.
- Compatibility with your car’s make and model: Before making a purchase, it is essential to check the compatibility of the car stereo with your car’s make and model. Different car models might have different wiring configurations and connections, so it is crucial to choose a stereo that seamlessly integrates with your vehicle’s existing system. Ensure the stereo model is compatible with your car’s dashboard layout and dimensions.
- Features and functionalities: Car stereos come with a wide range of features and functionalities. Consider your specific needs and preferences when selecting a car stereo. Some common features include Bluetooth connectivity, USB ports, auxiliary inputs, built-in navigation systems, Apple CarPlay or Android Auto compatibility, and compatibility with satellite radio. Choose a stereo that offers the features that are most important to you.
- Researching and comparing different car stereo options: Research is key when selecting a car stereo. Take the time to explore different brands and models to determine which ones are known for their reliability and performance. Compare specifications, prices, and features to identify the models that align with your requirements.
- Reading customer reviews and ratings: Customer reviews and ratings are valuable sources of information when selecting a car stereo. Reading honest and unbiased reviews from other car enthusiasts can provide insights into the performance, durability, and user-friendliness of different stereo models. Look for reviews that specifically mention the factors that are important to you.
- Seeking recommendations from experts or car enthusiasts: If you are unsure about which car stereo to choose, reaching out to experts or car enthusiasts can be helpful. They can provide recommendations based on their experience and expertise. Forums, online communities, and car audio specialists can provide valuable advice and guide you toward the right choice.
- Exploring different brands and models: There are numerous reputable brands in the car stereo market, each with its own strengths and weaknesses. Take the time to explore different brands and models to find the one that matches your preferences and budget. Consider factors such as brand reputation, customer support, warranty coverage, and long-term reliability.
By considering these factors and conducting thorough research, you can confidently choose the right car stereo that enhances your driving experience and elevates your audio enjoyment.
Gathering The Required Tools And Materials
Before diving into the exciting process of installing a new car stereo, it’s important to gather all the necessary tools and materials. Having everything ready and within reach will save you time and frustration during the installation process. So, let’s take a look at the essential tools and materials:
Tools needed for car stereo installation:
- Screwdriver set: A reliable set of screwdrivers will come in handy for removing the old stereo and securing the new one into place.
- Wire strippers: These will help you strip the insulation from the wires, allowing for proper connections.
- Crimping tool: A crimping tool is essential for creating secure connections between wires or attaching connectors.
- Panel removal tool: This tool will make it easier to remove panels and trim pieces without damaging them.
Materials needed for the installation process:
- Car stereo wiring harness: A wiring harness ensures a seamless connection between your new stereo and your car’s electrical system, making the installation process smoother.
- Dash kit: A dash kit allows you to mount the new stereo securely in your car’s dash, providing a clean and professional look.
- Antenna adapter: An antenna adapter is necessary to connect your car’s antenna to the new stereo, ensuring proper reception.
- Electrical tape: Electrical tape is essential for insulating and protecting the connected wires from potential damage.
- Zip ties: These handy little fasteners will help you organize and secure any loose wires, preventing them from interfering with the functionality of your new stereo.
Now that you know all the tools and materials needed, you’re ready to move on to the next step in installing your new car stereo. Stay tuned!
Removing The Old Car Stereo And Preparing The Dashboard
Installing a new car stereo can be an exciting upgrade that enhances your driving experience. Whether you’re looking to replace a malfunctioning stereo or simply want to upgrade to a more modern system with advanced features, the first step is to remove the old car stereo and prepare the dashboard for the installation of the new one. In this guide, we’ll walk you through the process of removing the existing car stereo and preparing the dashboard, making the installation of your new car stereo a breeze.
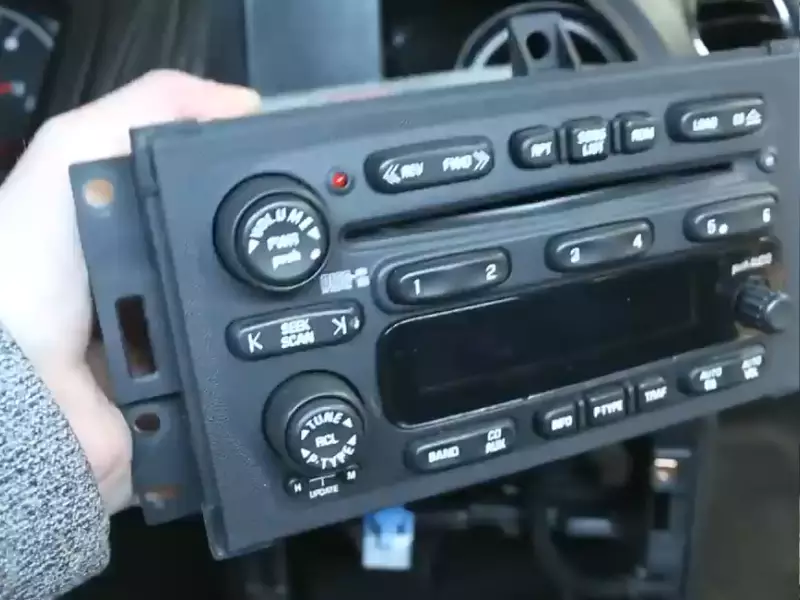
Removing the existing car stereo
The first task is to remove the existing car stereo from your vehicle. Start by disconnecting the negative battery terminal to prevent any electrical mishaps. This ensures your safety during the process. Locate the negative terminal, usually labeled with a “-” sign, and use a wrench or a socket wrench to loosen the nut and disconnect the terminal.
Removing trim panels and fasteners
Next, carefully remove any trim panels that are covering the car stereo. These panels might be secured with screws, clips, or a combination of both. Use a screwdriver or panel removal tool to remove the screws or gently pry the panels off. Be sure to keep track of the screws and clips as you’ll need them for later reinstallation.
Detaching the wiring harness and antenna cable
Once you’ve removed the trim panels, you’ll find the wiring harness and antenna cable connected to the back of the car stereo. Carefully detach the wiring harness by disengaging the clips or connectors. Similarly, disconnect the antenna cable by removing the plug or unscrewing it from the car stereo. Take note of the color-coded wires and their connections as this will make the installation of the new car stereo easier.
Preparing the dashboard for the new car stereo installation
Now that the old car stereo is removed, it’s time to prepare the dashboard for the installation of the new one. Start by removing any remaining mounting brackets or adapters that were used to secure the old stereo. These brackets or adapters might be screwed in or clipped into place. Once removed, keep them aside in case you need them for the new installation.
Cleaning the area for the new stereo
With the old mounting brackets or adapters out of the way, take this opportunity to clean the area around the car stereo. Use a soft cloth or a microfiber cloth to wipe away any dust, dirt, or debris that may have accumulated during the removal process. A clean surface will ensure a secure and stable installation for your new car stereo.
Checking for compatibility with the dash kit
Lastly, before proceeding with the installation, check if your new car stereo is compatible with the dash kit. The dash kit acts as an interface between the car stereo and the dashboard, providing a seamless fit and finish. Refer to the instructions provided with your new car stereo and dash kit to ensure compatibility. If there are any compatibility issues, you may need to purchase additional adapters or modify the dashboard to accommodate the new stereo.
By following these steps, you’re now ready to proceed with the installation of your new car stereo. Stay tuned for the next part of our guide where we’ll walk you through the installation process in detail.
Installing The New Car Stereo And Connecting The Wiring
Installing a new car stereo is a great way to upgrade your vehicle’s audio system and enhance your driving experience. One of the most important steps in this process is connecting the wiring to ensure the stereo functions properly. In this article, we’ll walk you through the process of installing a new car stereo and connecting the wiring step by step. Let’s get started!
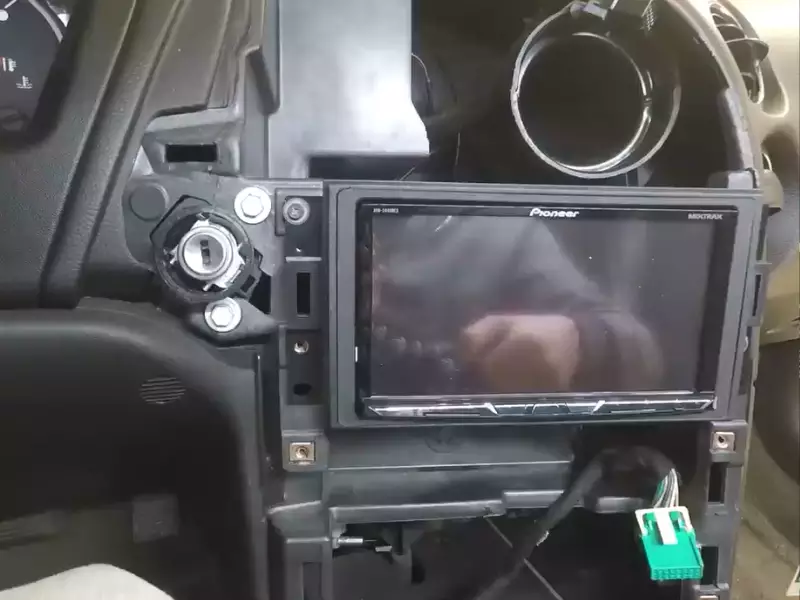
Installing the dash kit and mounting the new stereo
The first step in installing your new car stereo is to install the dash kit, which provides a frame for the stereo and fits it into the dash of your vehicle. Begin by removing the existing stereo from the dash, if necessary, and attach the dash kit to the mounting brackets.
Attaching the dash kit to the mounting brackets
Once the dash kit is securely attached to the mounting brackets, align it with the opening in the dash and push it in until it snaps into place. Make sure it is centered and level to ensure a proper fit.
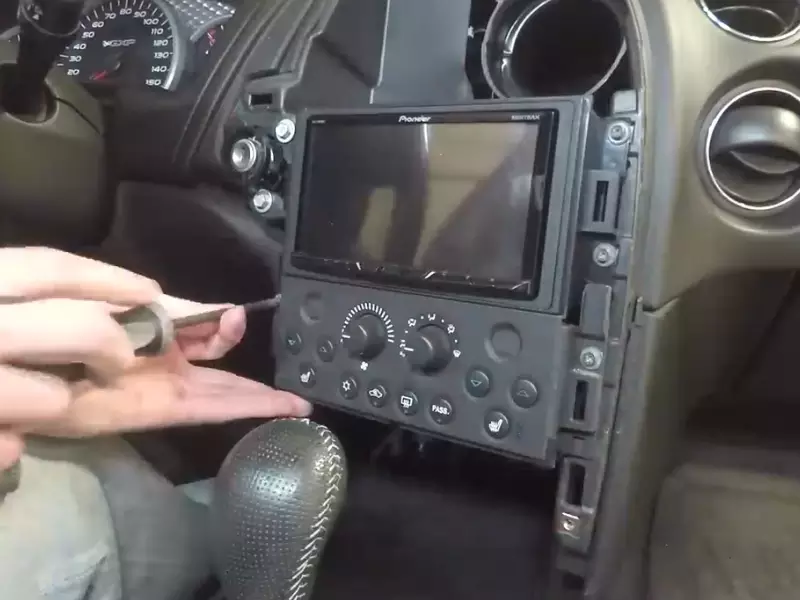
Securing the new stereo into the dash kit
With the dash kit in place, it’s time to secure the new stereo into the kit. Carefully slide the stereo into the kit until it is flush with the dash. Use the screws provided in the kit to secure the stereo tightly.
Testing the fit and making necessary adjustments
After securing the new stereo, it’s important to test the fit and functionality before proceeding with the wiring connections. Turn on the stereo and test all the functions, such as volume control and radio tuning, to ensure everything is working properly. If there are any issues, make any necessary adjustments or repairs before continuing.
Connecting the wiring harness and antenna
Now that the new stereo is securely installed, it’s time to connect the wiring harness and antenna. Start by unplugging the wiring harness from the back of the original stereo, and plug it into the wiring harness of the new stereo. Connect the antenna adapter to the back of the new stereo as well.
Matching and connecting color-coded wires
The next step is to match and connect the color-coded wires from the wiring harness to the corresponding wires on the new stereo. This ensures that the electrical connections are correct and secure. Use crimp connectors or soldering to make reliable and secure connections.
Connecting the antenna adapter to the new stereo
Finally, connect the antenna adapter to the back of the new stereo. This will ensure clear reception of radio signals. Secure the connection to prevent any loose connections.
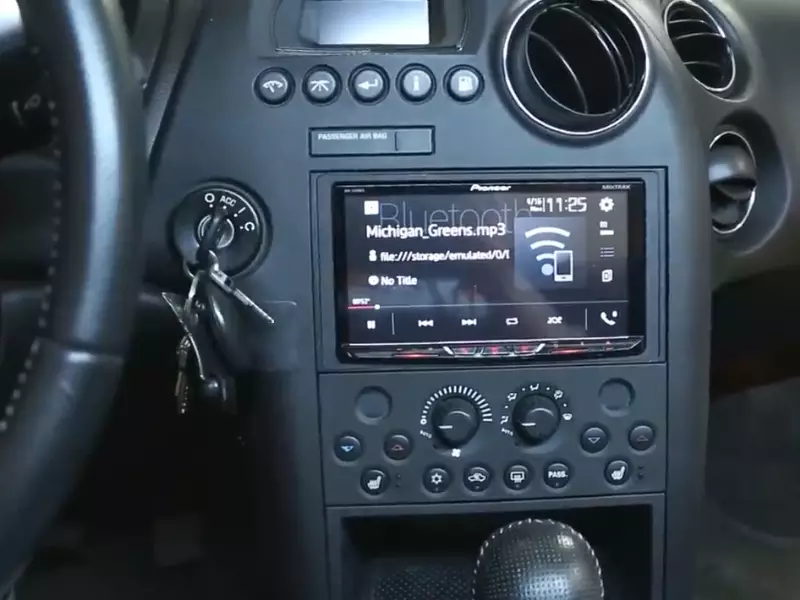
With the wiring connections secure and the new stereo properly installed, you can now enjoy your upgraded audio system. Take a moment to test all the functions and adjust any settings as needed. Congratulations on successfully installing a new car stereo!
Testing And Finalizing The Installation
Reconnecting the negative battery terminal
Before proceeding with testing the new car stereo, it is crucial to reconnect the negative battery terminal to avoid any electrical mishaps. Detaching the negative terminal during installation helps prevent damage to the stereo system and ensures your safety.
Testing the new car stereo functionality
Once the battery is reconnected, it’s time to put your new car stereo to the test. Start by turning on the ignition and powering up the stereo. Check if the buttons and knobs are responsive and if the display lights up properly. Ensure that all basic functions, such as adjusting volume, tuning radio stations, and changing input sources, work smoothly.
Checking audio output and sound quality
A car stereo is only as good as its sound quality. To evaluate the audio output, play different types of music with varying frequencies and volumes. Listen for any distortion, hissing, or buzzing noises. If the sound is not clear or lacks depth, you may need to troubleshoot the speaker connections or consider upgrading your car’s speakers for a better audio experience.
Testing radio reception and antenna performance
Radio reception is an integral part of any car stereo system, so it’s important to check its performance as well. Tune into different radio stations and observe how well the stereo receives signals. Pay attention to the strength of the reception, the clarity of the sound, and the ability to lock onto stations without interference. Adjust the antenna if needed to optimize radio reception.
Verifying compatibility with other car features
If your car has additional features like steering wheel controls or Bluetooth connectivity, make sure to test their compatibility with the new stereo system. Test if the steering wheel controls effectively interact with the stereo functions without any issues. Connect your phone via Bluetooth and check if the audio streaming, hands-free calling, and voice commands work seamlessly. Adjust any settings or consult the stereo’s manual for troubleshooting steps if needed.
Finalizing the installation and cleanup
Once you are satisfied with the performance and compatibility of the new car stereo, it’s time to finalize the installation and clean up the area. Secure any loose wires or cables using zip ties to prevent them from interfering with other car components. Reattach the trim panels and fasteners, ensuring they fit securely without any gaps or misalignment. Finally, clean the installed car stereo and dashboard area using a mild, non-abrasive cleaner to remove any fingerprints or dust particles, leaving the interior of your car looking neat and refreshed.
Frequently Asked Questions Of How To Install A New Car Stereo
Can I Install A New Car Stereo Myself?
Yes, you can install a new car stereo yourself. Just follow the instructions carefully and make sure you have the necessary tools. It’s a relatively simple process and can save you money on professional installation fees.
Is It Hard To Install A New Car Stereo?
Installing a new car stereo is not difficult. It’s a simple process that can be done by following the provided instructions. With basic knowledge and tools, you can easily replace your old stereo with a new one and enjoy enhanced audio in your car.
What All Do I Need To Install A New Car Stereo?
To install a new car stereo, you will need the following: the specific stereo unit you want to install, a compatible wiring harness, a dash kit to fit the stereo into your car’s dashboard, a set of tools (screwdrivers, wire strippers, etc.
Do I Need A Wiring Harness To Install A Car Stereo?
Yes, a wiring harness is necessary to install a car stereo. It connects the stereo to the vehicle’s electrical system and ensures proper functioning.
Conclusion
Installing a new car stereo doesn’t have to be a daunting task. With the right tools and guidance, you can achieve a professional installation and enhance your driving experience. Remember to carefully follow the steps outlined in this guide to ensure a successful installation.
By taking the time to properly install your new car stereo, you’ll be able to enjoy improved sound quality and a more customized in-car entertainment system. Get ready to hit the road with style and your favorite tunes!