To install a new car radio, follow these steps:
- Disconnect the car battery,
- Remove the old radio,
- Install the new radio using a wiring harness adapter,
- And finally reconnecting the car battery.
Installing a new car radio can enhance your driving experience by providing better sound quality and more advanced features. Whether you want to upgrade to a new stereo system or replace a malfunctioning one, this guide will help you through the installation process.
Follow the steps below to install a new car radio successfully.
Gathering The Necessary Tools And Equipment
When it comes to installing a new car radio, having the right tools and equipment is essential. Not only will it make the process smoother, but it will also help you avoid any unnecessary complications later on. In this section, we’ll explore the list of tools needed for car radio installation, ensuring compatibility with your car’s make and model, and the safety precautions to take before starting the installation process.
List of Tools Needed for Car Radio Installation
Before diving into the installation process, it’s crucial to gather the tools required to get the job done. Here is a comprehensive list of the necessary tools:
| Tools | Description |
|---|---|
| Screwdriver Set | For removing screws and panels |
| Wire Cutter/Stripper | For cutting and stripping wires |
| Multimeter | To check electrical connections |
| Pliers | For gripping and bending wires |
| Trim Removal Tools | To safely remove trim without damage |
| Electrical Tape | For insulating and securing wires |
Ensuring Compatibility with Your Car’s Make and Model
Before purchasing a new car radio, it’s important to ensure that it is a compatible fit for your specific car’s make and model. Different car models may have variations in wiring harnesses, mounting brackets, and antenna adapters. To avoid any compatibility issues, it’s recommended to take the following steps:
- Check the car’s manual or consult the manufacturer’s website for compatibility information.
- Measure the dimensions of the current radio to ensure the new one will fit properly.
- Look for car radio installation kits that are specifically designed for your car’s make and model.
- If in doubt, consult a professional or seek advice from car audio specialists.
Safety Precautions to Take Before Starting the Installation Process
Before diving into the car radio installation process, it’s important to take the necessary safety precautions to protect yourself and your vehicle. Here are a few steps to ensure a safe installation:
- Disconnect the car battery to avoid any electrical mishaps.
- Handle wires and connections with care to prevent damage or short circuits.
- Wear safety glasses and gloves to protect yourself from potential hazards.
- Read the installation manual thoroughly and follow the instructions step by step.
- If uncertain about any step, consult a professional or seek guidance from reliable sources.
By gathering the necessary tools, ensuring compatibility with your car’s make and model, and taking the necessary safety precautions, you’ll be well-prepared to install a new car radio with confidence.
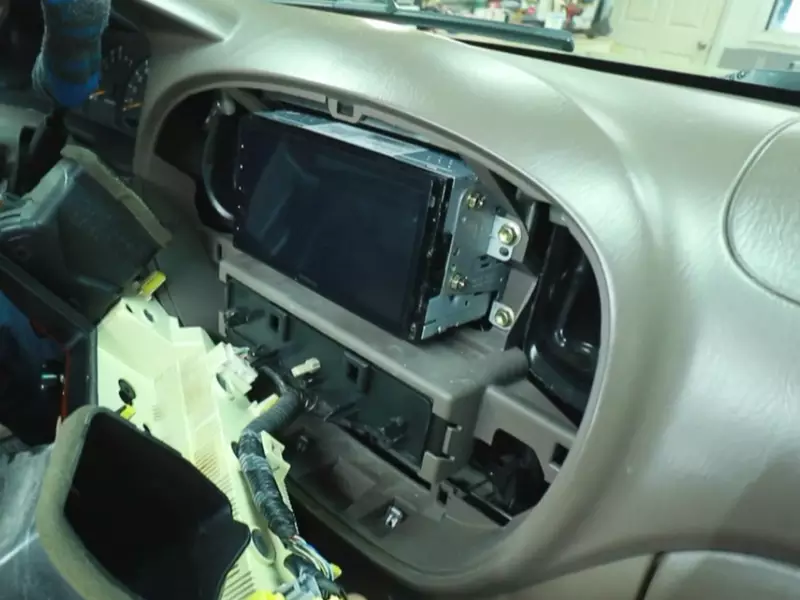
Removing The Old Car Radio
Before you can install a new car radio, you need to remove the old one. This step is crucial to ensure a smooth installation process. In this section, we will discuss the necessary steps for removing the old car radio. Make sure to follow each step carefully to avoid any damage to your vehicle or the radio itself.
Locating and removing the trim panel
The first step in removing the old car radio is to locate and remove the trim panel. The trim panel is the piece of plastic or metal that surrounds the radio. To access it, you will need to use a trim panel removal tool or a flathead screwdriver. Here’s how to do it:
- Start by inserting the trim panel removal tool or flathead screwdriver into the edges of the trim panel.
- Gently pry the trim panel away from the dashboard, applying even pressure to release the clips that hold it in place.
- Continue prying and releasing the clips until the trim panel is completely free.
Once the trim panel is removed, set it aside in a safe place to avoid any damage.
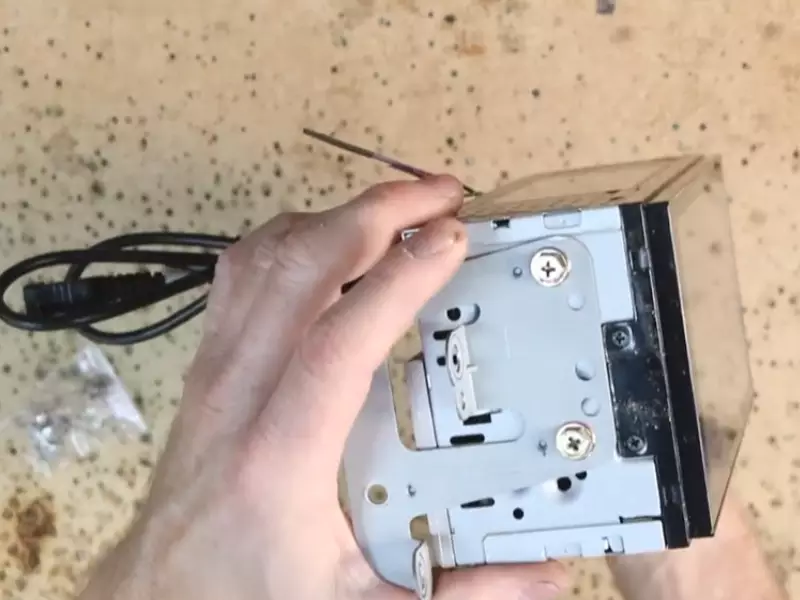
Disconnecting the wiring harness and antenna cable
After removing the trim panel, you will need to disconnect the wiring harness and antenna cable that are connected to the old car radio. Follow these steps to do so:
- Locate the wiring harness and antenna cable at the back of the radio.
- Gently press the release tab on the wiring harness and antenna cable connectors to unlock them.
- Pull the connectors apart to disconnect them from the radio.
Make sure to handle the connectors with care to avoid any accidental damage.
Removing the mounting screws or brackets
The final step in removing the old car radio is to remove the mounting screws or brackets that secure it in place. Here’s how:
- Identify the mounting screws or brackets that hold the radio in place.
- Use a screwdriver or socket wrench to loosen and remove the screws or brackets.
- Set aside the screws or brackets in a safe place.
Once you have removed all the mounting screws or brackets, the old car radio should be free from its position.
Congratulations! You have successfully removed the old car radio. Now you can proceed with installing the new one, following the instructions provided by the manufacturer.
Installing The New Car Radio
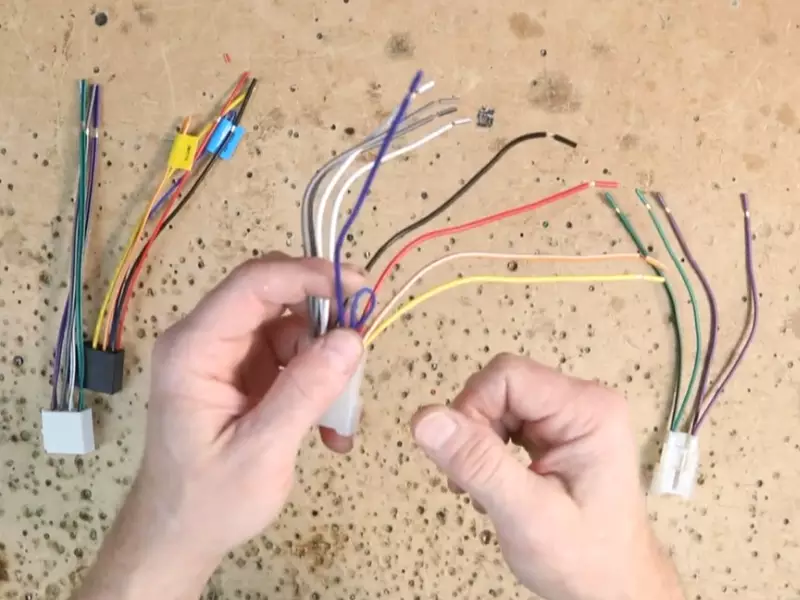
Connecting the Wiring Harness and Antenna Cable
Before you can fully enjoy your new car radio, you’ll need to connect the wiring harness and antenna cable. This step is crucial as it ensures that the radio receives power and the antenna functions properly. Here’s how:
- Start by disconnecting the negative terminal of the car battery to prevent any electrical mishaps.
- Locate the wiring harness that came with your new radio. It should have recognizable connectors that match those in your car’s wiring system.
- Match the colors of the wires on the harness and the wires in the car. This step ensures that the right connections are made.
- Securely connect the wiring harness by plugging each corresponding connector together. Pay close attention to ensure that each connection is firm and snug.
- Next, connect the antenna cable to the radio’s antenna input. This cable is typically located at the back of the new radio. Make sure it is securely plugged in to ensure optimal radio reception.
- Once everything is connected, double-check all the connections and make sure they are secure.
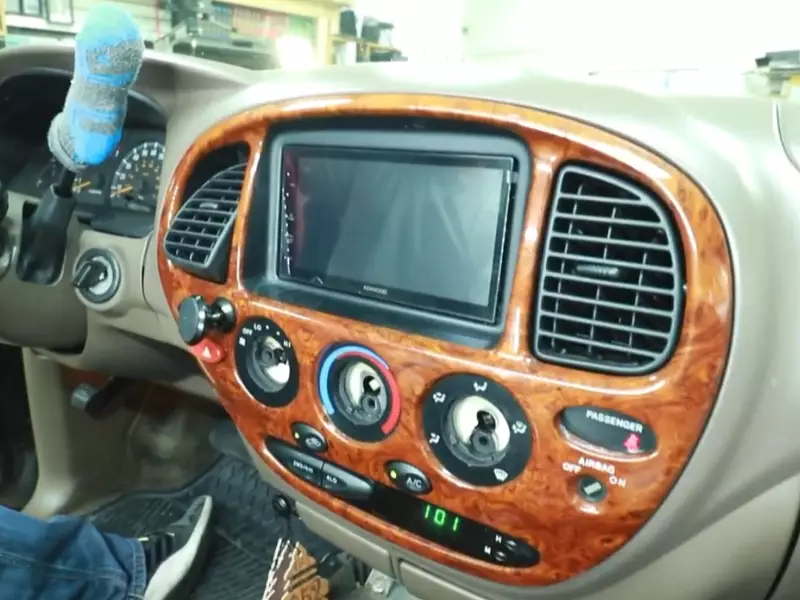
Mounting the New Radio onto the Dash
Now that the wiring is complete, it’s time to mount the new radio onto the dash. Follow these steps:
- Determine the correct mounting kit for your specific car make and model. This kit will ensure that the new radio fits perfectly into your car’s dashboard.
- Take the mounting bracket from the kit and attach it to the new radio. Use the screws provided to secure the bracket in place.
- Remove the factory radio from the dash by safely loosening the screws or clips that hold it in place. Carefully disconnect any remaining wiring connections.
- Slide the new radio into the empty space left by the factory radio. Ensure that it fits properly and aligns with the dash. Use the instructions provided with the mounting kit if necessary.
- Secure the new radio in place by tightening the screws or clips that hold it in position. Be careful not to overtighten, as this could damage the dash or the radio.
Testing the Functionality of the New Radio
With the new car radio installed and mounted, it’s time to test its functionality. Follow these steps:
- Reconnect the negative terminal of the car battery to restore power to the vehicle.
- Turn on the new car radio and ensure that it powers up correctly. Check that the display is clear and the buttons respond as expected.
- Try tuning in to different radio stations to test the reception quality. Listen for any static or weak signal and adjust the antenna if necessary.
- Test other features, such as CD or MP3 playback, USB or Bluetooth connectivity, and any additional functions specific to your radio model.
- If everything appears to be working properly, congratulations! You have successfully installed your new car radio. If any issues arise, refer to the instruction manual or seek professional assistance.
By following these steps and testing the functionality of the new car radio, you can ensure a successful installation process. Without a doubt, your newfound ability to enjoy high-quality music and convenient features will greatly enhance your driving experience.
Troubleshooting Common Installation Issues
Installing a new car radio can be an exciting project, but it can also come with its fair share of challenges. In this section, we will discuss some common installation issues and how to troubleshoot them. Whether you are experiencing problems with wiring connections, the radio not turning on or receiving signals, or poor audio quality or reception, we’ve got you covered. Let’s dive in and find solutions to these common issues.
Issues with Wiring Connections
One of the most common problems during a car radio installation is faulty or incorrect wiring connections. To troubleshoot this issue, follow these steps:
- Check the wiring harness: Ensure that you have the correct wiring harness for your car and radio model. Make sure all connections are secure and properly matched.
- Inspect the wiring connections: Look for loose or disconnected wires. Check for any damaged or frayed wires that may be causing a poor connection. Use a multimeter to test and ensure a proper electrical connection.
- Verify the ground connection: A faulty or missing ground connection can result in various issues. Make sure the ground wire is securely connected to a metal surface in your car.
Radio Not Turning On or Receiving Signals
If your new car radio is not turning on or not receiving signals, consider the following steps to troubleshoot the problem:
- Check the power source: Ensure that the radio is properly connected to a stable power source. Double-check the fuse and replace it if necessary.
- Test the antenna connection: Verify that the antenna cable is securely connected to the radio. Additionally, check the condition of the antenna itself for any damages or corrosion.
- Reset the radio: Some radios may require a reset after installation. Consult the user manual or the manufacturer’s website for instructions on how to perform a reset.
Poor Audio Quality or Reception
If you’re experiencing poor audio quality or reception after installing a new car radio, try these troubleshooting steps:
- Check the speaker connections: Ensure that all speaker wires are securely connected and properly insulated. Make sure none of the wires are touching each other or any metal surfaces.
- Adjust the radio settings: Use the radio’s settings to adjust the equalizer, balance, and fade settings for optimal audio quality.
- Consider an external antenna: If you are in an area with weak radio signals, installing an external antenna may improve reception and audio quality. Consult a professional for assistance and recommendations.
By following these troubleshooting steps, you can overcome common issues that may arise during a car radio installation. Remember to consult the user manual specific to your radio model for additional guidance and troubleshooting tips. Now you can enjoy your favorite tunes on the road with ease.
Additional Considerations And Tips
When it comes to installing a new car radio, there are additional considerations and tips that can make the process even more rewarding. In this section, we will explore how to upgrade your car’s speakers along with the radio installation, customize the look of the new radio in the dash, and even what to do with the old radio for future use or resale.
Upgrading the car’s speakers along with the radio installation
If you’re already investing in a new car radio, why not take it a step further and upgrade your car’s speakers as well? Upgrading your speakers can greatly enhance your audio experience, allowing you to enjoy your favorite tunes with improved clarity and depth.
Before selecting new speakers, consider the size and power requirements of your current system. It’s important to choose speakers that are compatible with your car’s electrical system to avoid any potential issues. Once you have the right speakers, follow these steps to install them:
- Disconnect the negative terminal of your car battery to ensure safety during the installation process.
- Remove the door panels or speaker grilles to access the existing speakers.
- Disconnect the wiring harness and mounting screws that secure the old speakers.
- Install the new speakers by connecting the wiring harness and mounting them securely.
- Reattach the door panels or speaker grilles and reconnect the negative terminal of your car battery.
By upgrading your speakers along with the new car radio installation, you’ll enjoy a fully upgraded audio system that will enhance your driving experience.
Customizing the look of the new radio in the dash
Once you have chosen and installed your new car radio, you may want to customize its appearance to match the style of your car’s interior. There are several ways you can achieve this:
- Choose a radio with customizable backlight colors to match your car’s dashboard lighting.
- Consider adding a dash kit or trim plate that matches the color and texture of your car’s interior.
- Use adhesive decals or stickers to personalize the front panel of the radio with your favorite designs or patterns.
Customizing the look of your new radio not only adds a personal touch to your car’s interior but also helps it seamlessly blend in with the existing design.
Keeping the old radio for future use or resale
Even though you have replaced your old radio with a new one, there are still ways to make use of the old radio. Here are a few options:
- Store the old radio safely in case you need it as a backup in the future. It can be handy in case your new radio malfunctions or if you decide to sell your car and want to keep the new radio for your next vehicle.
- Sell the old radio online or to a local car audio shop. Some people may be looking for specific models or vintage radios for their collections or projects.
- Donate the old radio to a charity or organization that accepts electronic donations. This way, you can contribute to a good cause while clearing up some space in your garage or storage area.
By considering these options, you can ensure that your old radio doesn’t go to waste and may even benefit someone else in the process.
Frequently Asked Questions Of How To Install A New Car Radio
Can I Install A New Car Stereo Myself?
Yes, you can install a new car stereo yourself. It is a simple process that can be done with basic tools and a little patience. Just follow the instructions provided with the stereo and take your time to ensure a proper installation.
Is It Hard To Install A New Car Radio?
Installing a new car radio isn’t difficult. With basic tools and instructions, it can be done easily. Just follow the step-by-step process and you’ll have your new radio up and running in no time. Don’t hesitate to ask for professional help if needed.
Can You Put A New Radio In Any Car?
Yes, you can install a new radio in any car.
What All Do I Need To Install A New Car Stereo?
To install a new car stereo, you will need the following: a compatible car stereo unit, a wiring harness adapter, a dash kit to fit the new stereo into your car’s dashboard, a set of wire connectors or crimp caps, and a set of tools, including a screwdriver and wire strippers.
Conclusion
Installing a new car radio may seem daunting at first, but with the right tools and knowledge, it can be a straightforward process. Follow the step-by-step instructions outlined in this blog post to ensure a successful installation. Remember to double-check all connections and test the radio before finishing up.
Enjoy your new radio and the car audio experience it brings!