To install a Graco car seat rear facing, start by adjusting the seat recline angle and attaching the LATCH connectors to the designated anchors in your vehicle. Then, tighten the straps and verify the seat is securely installed before use.
Introducing a car seat to your vehicle is an important step in ensuring your child’s safety during travel. Proper installation of a Graco car seat, specifically when used in rear facing mode, is crucial. We will provide you with clear instructions on how to correctly install a Graco car seat in the rear facing position.
By following these simple steps, you can have peace of mind knowing that your little one will be protected and secure while on the road.
Why Rear Facing Car Seats Are Essential For Your Child’S Safety
Ensuring the safety of your child while on the road is of utmost importance. One essential step in this regard is installing a rear-facing car seat for your little one. Rear-facing car seats are designed to provide maximum protection to your child in the event of a car crash. In this article, we will explore the importance of rear-facing car seats and the numerous benefits they offer in terms of your child’s safety. Let’s dive in!
Importance of rear facing car seats:
When it comes to selecting a car seat for your child, rear-facing car seats are the safest option available. These car seats are specifically designed to protect your child’s vulnerable head, neck, and spine in the event of a collision. The main reasons why rear-facing car seats are essential for your child’s safety include:
- Crash impact absorption: Rear-facing car seats redistribute forces from a car crash across a larger area of the child’s back, reducing the impact on their fragile body parts. This can significantly reduce the risk of head and spinal injuries.
- Protection against whiplash: Rear-facing car seats provide excellent support to your child’s head and neck, effectively reducing the risk of whiplash injuries. The seat cradles the child’s body, preventing excessive forward movement during a sudden stop or crash.
- Shielding from flying debris: In the unfortunate event of a car accident, debris and objects can be propelled towards your child at high speeds. A rear-facing car seat acts as a protective barrier, shielding your child from flying debris and further minimizing the risk of injuries.
- Reducing the risk of ejection: The risk of ejection from a car seat during a collision is significantly lower with rear-facing car seats. The deep recline of these seats, along with the safety harness, keeps your child securely in place, reducing the chances of being thrown out of the seat.
Benefits of rear facing car seats for child safety:
Investing in a rear-facing car seat for your child offers numerous benefits that contribute to their overall safety on the road. Some key benefits include:
- Extended rear-facing: Rear-facing car seats allow you to keep your child facing the rear for a longer duration, as recommended by experts. This extended use ensures maximum protection during the critical early years of your child’s development.
- Reduced risk of severe injuries: Studies have shown that rear-facing car seats significantly reduce the risk of severe injuries in young children involved in car accidents. By providing superior support and protection, these seats minimize the impact forces on your child’s body, reducing the likelihood of sustaining severe injuries.
- Age and weight-appropriate: Rear-facing car seats are available in various sizes and models, catering to the specific needs of children of different ages and weights. By selecting the appropriate rear-facing car seat, you ensure optimal safety and comfort for your child throughout their growth stages.
- Promoting proper spine alignment: Rear-facing car seats encourage a more natural alignment of your child’s spine, as they cradle the child’s body from head to toe. This proper alignment helps to protect the growing bones and delicate spinal cord, promoting healthy development.
In conclusion, opting for a rear-facing car seat is a crucial step in safeguarding your child’s safety during car journeys. These seats offer unparalleled protection, absorbing crash forces, reducing the risk of severe injuries, and keeping your child securely confined. By investing in a rear-facing car seat, you are taking an essential measure to ensure your child’s safety on the road.
Preparing For Installation
Choosing the right car seat model
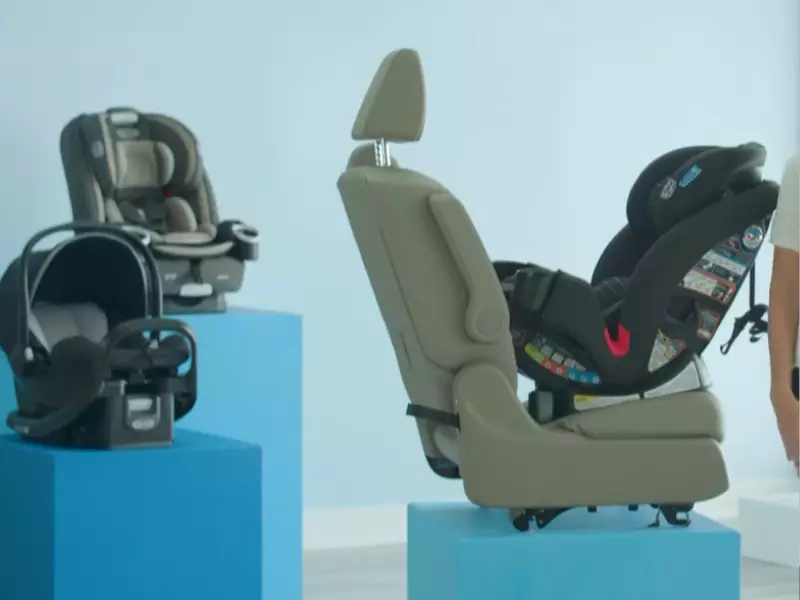
Before installing a Graco car seat rear facing, it is crucial to choose the right car seat model for your child’s age, weight, and height. The appropriate car seat model will ensure your child’s safety and comfort during every journey. Graco offers different car seat models designed for various stages of your child’s development, including infant car seats, convertible car seats, and booster seats. Consider your child’s age and size when selecting the car seat model that will provide the best protection.
Gather the necessary tools and materials
To prepare for the installation, gather all the necessary tools and materials in advance. Having everything within reach will make the installation process smoother and more efficient. Here’s a list of items you may need:
- Screwdriver
- Socket wrench
- Towel or blanket for seat protection
- Car seat base (if applicable)
- Car seat tether (if applicable)
- Car seat instructions
Having these tools and materials ready will save you time and make the installation process much easier.
Reading the car seat instruction manual
After gathering all the necessary tools, it’s important to thoroughly read the car seat instruction manual. The manual provides step-by-step guidance on how to properly install the car seat rear facing. Pay close attention to the instructions and follow them precisely, as each car seat model may have unique installation requirements.
Ensure you understand the different components of the car seat, such as the harness, LATCH system (Lower Anchors and Tethers for Children), and adjustable base (if applicable). Familiarize yourself with the installation steps and any specific precautions mentioned in the manual.
Remember that correctly installing the car seat rear facing is essential for your child’s safety. By choosing the right car seat model, gathering the necessary tools, and carefully reading the car seat instruction manual, you are taking crucial steps to ensure a secure and comfortable ride for your little one.
Determining The Correct Placement Of The Car Seat
Understanding the position of the car seat in the vehicle
When it comes to installing a Graco car seat rear-facing, determining the correct placement of the car seat is crucial for the safety and comfort of your child. The position of the car seat in the vehicle plays a significant role in ensuring optimal protection during travel. By following a few simple guidelines, you can ensure that your car seat is correctly positioned for rear-facing installation.
To determine the correct position, start by consulting the vehicle owner’s manual. The manual will provide specific instructions on where and how to install a car seat in your particular vehicle. Follow these instructions carefully, as they are designed to maximize safety and ensure proper installation. Many vehicles have specific areas designated for car seat installation, such as the backseat or the center position.
Identifying the correct angle for rear-facing installation
Once you have determined the appropriate position for your Graco car seat, the next step is to identify the correct angle for rear-facing installation. Rear-facing car seats are designed to recline at a certain angle to support your child’s head and neck in the event of sudden stops or accidents.
To determine the proper angle, refer to the car seat’s instruction manual. It will provide guidelines on how to achieve the correct recline angle using either built-in recline mechanisms or adjusting the car seat’s base. Make sure to select the appropriate recline position based on your child’s age, weight, and height.
Ensuring proper alignment with vehicle seat and seatbelt
Proper alignment is crucial for the secure installation of your Graco car seat. It ensures that the car seat remains stable and minimizes any potential movement during travel. To achieve proper alignment, follow these steps:
- Place the car seat in the designated position in your vehicle, ensuring that it is securely installed according to the vehicle owner’s manual instructions.
- Adjust the car seat so that it is snug against the vehicle seat back, with minimal movement when pressed from side to side or front to back.
- Use the vehicle seatbelt to secure the car seat in place, making sure to follow the car seat’s instruction manual for proper belt routing and locking techniques.
- Fasten the seatbelt tightly, removing any slack to eliminate excessive movement.
- Verify that the car seat is aligned straight and level, neither angled too far backward nor forward. This will ensure the maximum protection and comfort for your child.
By following these instructions carefully, you can determine the correct placement of your Graco car seat, identify the proper angle for rear-facing installation, and ensure proper alignment with the vehicle seat and seatbelt. Remember, the safety of your child should always be your top priority when installing a car seat.

Installing The Car Seat Using Latch System
Installing a car seat correctly is crucial for the safety of your child. One of the most popular and convenient methods of installing a Graco car seat rear-facing is using the LATCH system. The LATCH system, which stands for Lower Anchors and Tethers for Children, provides an easier way to securely fasten the car seat in your vehicle, minimizing the risk of it moving during a collision.
Understanding the LATCH System and its Components
The LATCH system consists of three main components: the lower anchors, the tether strap, and the top tether anchor. Familiarizing yourself with these components is essential for a successful installation.
Locating and Attaching the Lower Anchors to the Car Seat
Before you begin, it’s important to locate the lower anchors in your vehicle. These anchors are typically found between the seat cushions, marked by small symbols or tabs. Once you’ve located the lower anchors, follow these steps to attach them to the car seat:
- Position the car seat in the rear-facing position in the desired seating position.
- Locate the lower anchor connectors on the car seat. These are usually found on the base of the seat.
- Insert the lower anchor connectors into the lower anchors in your vehicle, ensuring they are properly aligned.
- Apply firm pressure to the car seat and tighten the lower anchor straps until the seat is secure and doesn’t move more than an inch in any direction.
- Double-check the manufacturer’s instructions to ensure you’ve correctly installed the lower anchors.
Securing the Tether Strap for Added Stability
After attaching the lower anchors, securing the tether strap is the next step to provide additional stability to the car seat. Follow these steps:
- Locate the tether anchor point in your vehicle. This can usually be found on the back of the rear seat, the ceiling, or the floor. Check your vehicle’s owner manual for the exact location.
- Attach the tether strap to the tether anchor point and adjust the strap to remove any slack.
- Make sure the tether strap is not twisted and is securely fastened.
- Apply firm pressure to the car seat and tighten the tether strap until the seat is securely in place.
- Recheck the manufacturer’s instructions to ensure you’ve correctly installed the tether strap.
By following these steps for installing a Graco car seat rear-facing using the LATCH system, you can ensure a safe and secure ride for your little one. Remember, always consult the car seat manual and your vehicle’s owner manual for specific instructions and guidelines.

Installing The Car Seat Using Seat Belt
When it comes to installing a Graco car seat rear facing, one of the options parents have is to use the seat belt. This method provides a secure fit for your little one and ensures their safety during every ride. In this section, we will guide you through the process of properly threading the seat belt through the car seat, adjusting it for a secure fit, and checking for proper tension and lack of movement.
Properly threading the seat belt through the car seat
Before threading the seat belt through the car seat, make sure to read the instruction manual provided by Graco. This will give you specific guidelines for your model and ensure you install the car seat correctly. Here are the general steps to follow:
- Position the car seat rear facing in the desired seating position in your vehicle, making sure it’s secure.
- Locate the belt path on the car seat, usually indicated by arrows or clearly marked labels.
- Thread the seat belt through the belt path, ensuring there are no twists or tangles along the way.
- Insert the seat belt latch plate into the buckle and pull the seat belt tight.
Adjusting the seat belt for a secure fit
Once the seat belt is threaded through the car seat, it’s important to adjust it for a secure fit. Here’s what you need to do:
- Apply pressure to the car seat and pull the seat belt to remove any slack.
- While keeping tension on the seat belt, lock it by pulling it all the way out and then allowing it to retract.
- Make sure the seat belt is snug against the car seat, not twisted, and without any excess slack.
Checking for proper tension and lack of movement
After installing the car seat using the seat belt, it’s essential to check for proper tension and lack of movement. This will ensure your child’s safety is maximized. Here’s what you should do:
- With the car seat installed, try to move it side to side and forward to backward. It should not move more than an inch in any direction.
- Check that the seat belt is securely fastened and there are no visible signs of loosening.
- Double-check that the seat belt remains properly threaded through the car seat without any twists or tangles.
By following these steps, you can confidently install a Graco car seat rear facing using the seat belt. Remember, proper installation is crucial for your child’s safety, so always consult the instruction manual and ensure a secure fit. Keep your little one protected during every ride!
Finalizing The Installation
Once you have followed the correct steps to install your Graco car seat rear-facing, it is essential to finalize the installation to ensure the safety and security of your child. This section will guide you through the final checks to make sure your car seat is properly installed.
Checking for a Secure Installation by Performing the “Shake Test”
A secure installation is crucial for the protection of your child in the event of an accident or sudden braking. To determine if your Graco car seat is securely installed, you can perform a simple “shake test”.
Start by firmly grasping the car seat by the base and attempt to move it side to side or front to back. A properly installed car seat should not move more than an inch in any direction. If you notice excessive movement, the seat may not be securely installed.
Adjusting the Harness Straps for a Snug Fit
Ensuring a snug fit of the harness straps is vital to providing your child with maximum safety and comfort. To adjust the harness straps, follow these steps:
- Make sure the straps are laying completely flat and are not twisted.
- Slide the chest clip to the correct position, which should be at armpit level.
- Ensure the straps are snug on your child’s shoulders without being too tight.
- Insert the buckle tongues into the buckle until you hear a click.
- Check the tightness of the straps by trying to pinch them together at your child’s shoulder. You should not be able to pinch any excess strap material.
Verifying the Car Seat’s Recline Angle
The recline angle of your Graco car seat is important to guarantee the safety and comfort of your child. To verify the car seat’s recline angle, follow these steps:
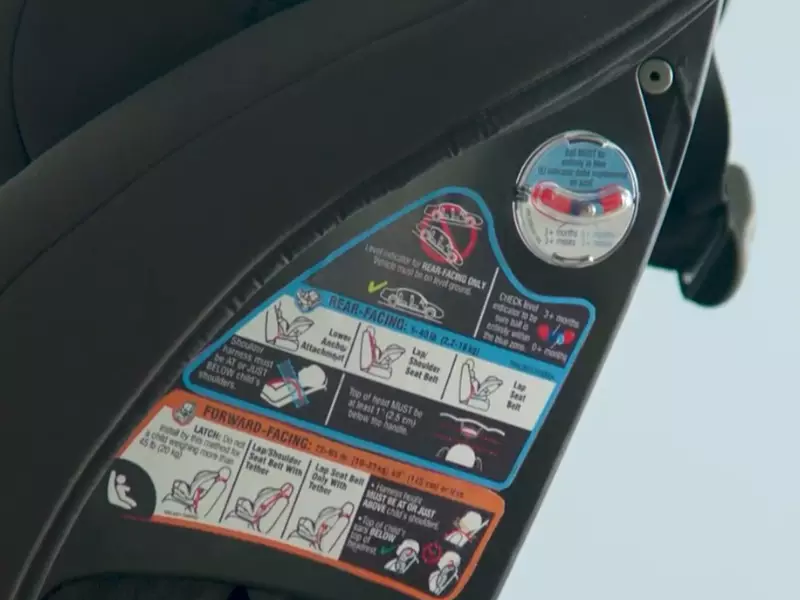
- Ensure the car seat’s recline angle indicator is within the acceptable range specified in the user manual.
- If necessary, adjust the recline angle by using the built-in recline adjuster or by utilizing the recline angle indicator.
- Once the desired recline angle is achieved, verify that the car seat is firmly secured in place, ensuring it does not move more than an inch in any direction.
Finalizing the installation of your Graco car seat rear-facing is essential for the safety and security of your child during every car journey. By performing the necessary checks, such as the “shake test”, adjusting the harness straps, and verifying the recline angle, you can have peace of mind knowing that your little one is protected while on the road.
Additional Safety Precautions And Tips
Installing a Graco car seat rear facing is an important step in ensuring the safety of your child during car journeys. However, there are additional safety precautions and tips that all parents should keep in mind while using a car seat. By regularly inspecting the car seat for damage or wear, avoiding aftermarket accessories that may compromise safety, and understanding the limitations and expiration dates of car seats, you can provide the utmost protection for your little one.
Regularly inspecting the car seat for damage or wear
Inspecting your Graco car seat regularly for any signs of damage or wear is crucial for maintaining its safety. Check for any cracks, broken parts, or loose connections that may compromise the integrity of the car seat. Make sure all the harness straps are intact and functioning properly. Additionally, examine the padding and fabric for any tears or signs of wear. If you notice any damage, refrain from using the car seat and contact the manufacturer for guidance on replacement or repair.
Avoiding aftermarket accessories that may compromise safety
While it may be tempting to personalize your child’s car seat with cute accessories, it’s important to avoid aftermarket products that have not been specifically approved by the car seat manufacturer. These accessories may interfere with the proper functioning of the car seat or compromise its safety features. Stick to the accessories provided or recommended by the manufacturer, such as approved toy attachments or seat protectors, to ensure that your child’s car seat remains secure and safe.
<h3> Understanding the limitations and expiration dates of car seats </h3>
Car seats have specific limitations and expiration dates that all parents should be aware of. These limitations include the maximum weight and height limits for rear-facing installation. Be sure to check the manufacturer’s guidelines and adjust the car seat as your child grows. Additionally, car seats have expiration dates to ensure that they are made with the latest safety standards and materials. Exceeding the expiration date can compromise the effectiveness of the car seat, so be sure to replace it when necessary.
By following these additional safety precautions and tips, you can provide your child with the highest level of protection while using a Graco car seat rear-facing. Remember to regularly inspect the car seat for any damage, avoid aftermarket accessories that could compromise safety, and adhere to the limitations and expiration dates of the car seat. Prioritizing your child’s safety is essential, and these measures will help give you peace of mind during your journeys together.
Frequently Asked Questions On How To Install A Graco Car Seat Rear Facing
How Do You Install A Rear Facing Car Seat Latch?
To install a rear facing car seat with latch, follow these steps:
1. Locate the latch anchors in your vehicle.
2. Attach the car seat’s latch connectors to the anchors firmly.
3. Pull the straps tight for a secure fit.
4. Verify the seat is snug by giving it a firm shake.
5. Double-check the seat is installed correctly on the vehicle’s owner’s manual.
How Do You Install A Graco Rear Facing Car Seat Without Base?
To install a Graco rear-facing car seat without a base, follow these steps:
1. Position the car seat securely on the vehicle seat.
2. Thread the seat belt through the car seat’s rear-facing belt path.
3. Buckle the seat belt and tighten it.
4. Verify the car seat is securely installed by giving it a firm tug.
5. Test the car seat for proper installation before placing your child in it.
What Is The Weight And Height Limit For Rear Facing?
The weight and height limit for rear facing depends on the specific car seat model. It is important to consult the car seat’s manual for the manufacturer’s recommended limits. Keep your child rear facing for as long as possible to ensure their safety.
How Do You Install A Graco 4 In 1 Car Seat?
To install a Graco 4 in 1 car seat, start by reading the user manual for instructions. Position the seat in your vehicle, ensure it’s level, and connect the seatbelt through the appropriate slots. Tighten the seatbelt and check for a secure fit.
Finally, test the seat for stability before using it.
Conclusion
Installing a Graco car seat rear facing is crucial for the safety of your child. By following the step-by-step guide provided in this blog post, you can ensure a secure installation. Remember to double-check the tightness of the seat and use the appropriate recline angle.
Your child’s safety should be the top priority, and this installation method will give you peace of mind. Happy travels!