To install a DVD player in a car, you need to follow a series of steps. Now, let’s dive into the process of installing a DVD player in your car.
If you enjoy watching movies or want to keep your passengers entertained during long drives, installing a DVD player in your car can be a great addition. This article will guide you through the process of installing a DVD player in your car, ensuring a smooth and enjoyable experience for everyone on board.
So, let’s get started and learn how to install a DVD player in your car.
Preparing For Installation
Researching the right DVD player for your car
Before installing a DVD player in your car, it’s important to do your research and find the right one that suits your needs and fits your car’s specifications. With so many options available in the market, it can be overwhelming to make a choice. Here are a few factors to consider while researching:
- Compatibility: Ensure that the DVD player you choose is compatible with your car’s make and model. Check the dimensions and specifications provided by the manufacturer to ensure it will fit properly.
- Features: Look for features that are important to you, such as a touchscreen display, Bluetooth connectivity, USB ports, and support for different audio and video formats.
- Customer Reviews: Read customer reviews and ratings of different DVD players to get an idea of their performance and durability. This can help you make a more informed decision.
- Budget: Determine your budget range and look for DVD players that offer the best value for money within that range.
Gathering the required tools and materials
Once you have decided on the DVD player you want to install, it’s time to gather the necessary tools and materials for a smooth installation process. Here’s a list of the basic tools you’ll need:
| Tools | Materials |
|---|---|
| Screwdriver set | DVD player mounting kit |
| Trim removal tool | Electrical tape |
| Wire strippers | Wire connectors |
| Multimeter | Fuse tap |
These are the basic tools and materials you’ll need, but the specific requirements may vary depending on your car model and the DVD player you choose. Check the installation instructions provided by the manufacturer for any additional tools or materials required.
Understanding the car’s electrical system
Before proceeding with the installation, it’s crucial to have a good understanding of your car’s electrical system to ensure a successful installation and avoid any damage. Here are a few key points to consider:
- Locate the car’s fuse box: This is where you will tap into the electrical system to power the DVD player. Refer to your car’s manual or consult an expert if you’re unsure where the fuse box is located.
- Identify the constant and switched power source: The constant power source provides power even when the ignition is off, allowing the DVD player to retain settings and memory. The switched power source is only active when the ignition is on, powering the DVD player.
- Use a multimeter to test the wires: Before making any connections, use a multimeter to test the wires and ensure you have identified the correct power sources.
- Properly ground the DVD player: Grounding is essential to avoid electrical issues and ensure the smooth operation of the DVD player. Find a suitable grounding point in your car and securely connect the grounding wire.
Understanding the car’s electrical system is crucial for a successful installation. If you’re unsure about any step, it’s always recommended to seek professional help to avoid any damage or safety hazards.
Removing The Existing System
Removing the existing system is the crucial first step in installing a DVD player in your car. In order to ensure a smooth and successful installation process, it is important to disconnect the car battery, remove the old stereo unit, and disconnect the wiring harness and antenna.
Disconnecting the car battery
Before you start removing any components, it is essential to disconnect the car battery to prevent any electrical mishaps. This step is often overlooked but is of utmost importance to prioritize safety. To disconnect the car battery, follow these simple steps:
- Locate the car battery, which is typically found in the engine compartment or trunk.
- Identify the negative terminal, which is labeled with a minus (“-“) sign or the letters “NEG” or “N.”
- Loosen the nut on the negative terminal using a wrench or pliers.
- Once the nut is loose, carefully lift the negative cable off the terminal. Make sure to keep it away from any metal surfaces to prevent accidental reconnection.
Take your time to verify that the battery is properly disconnected before proceeding to the next step.
Removing the old stereo unit
Now that the car battery is safely disconnected, it’s time to remove the old stereo unit. This may vary depending on your car make and model, but here are general steps to follow:
- Locate the trim panel or bezel that surrounds the stereo unit. This may require gently prying with a trim tool or a flathead screwdriver wrapped in tape to avoid scratching the surface.
- Once the trim panel is removed, you will typically find screws or bolts securing the stereo unit. Use the appropriate tools to unscrew or unbolt these fasteners.
- Carefully pull the stereo unit out of its housing. You may need to disconnect any additional wiring harnesses or connectors at the back of the unit.
- Keep the screws or bolts in a secure place to ensure they don’t get misplaced during the installation of the new DVD player.
**Disconnecting the wiring harness and antenna**
With the old stereo unit removed, you can now focus on disconnecting the wiring harness and antenna. This involves disconnecting any wires that were connected to the old stereo unit, as well as the antenna cable. Follow these steps:
1. Identify the wiring harness and the antenna cable connected to the back of the old stereo unit.
2. Disconnect the wiring harness by pressing the release tab or pushing back the retaining clip, depending on the type of connector. Gently pull the harness away from the unit, avoiding any unnecessary tugging or pulling.
3. For the antenna cable, simply grasp the connector and pull it away from the unit. Again, be gentle to prevent any damage to the cable or the connector.
By following these steps and adhering to proper HTML syntax for the subheadings, you can effectively and safely remove the existing system to pave the way for the installation of your new DVD player in your car.
Installing The DVD Player
Installing a DVD player in your car can be a great way to keep passengers entertained on long road trips or during daily commutes. While the process may seem intimidating at first, it can actually be quite straightforward if you follow the correct steps. In this section, we will dive into the specific details of installing the DVD player, including connecting the wiring harness, mounting the player, and connecting it to the car’s electrical system.
Connecting the wiring harness to the new DVD player
The first step in installing your new DVD player is to connect the wiring harness. It is essential to ensure that the wires are properly connected to avoid any electrical issues or malfunctioning of the player. To do this, follow these simple steps:
- Identify the wiring harness that came with your DVD player.
- Locate the corresponding wiring harness in your car.
- Connect the wires from the DVD player’s harness to the matching wires in your car’s harness. It’s essential to double-check the wire colors and their corresponding functions to ensure proper connection.
- Secure the connections using electrical tape or heat shrink tubing to prevent any loose connections or short circuits.
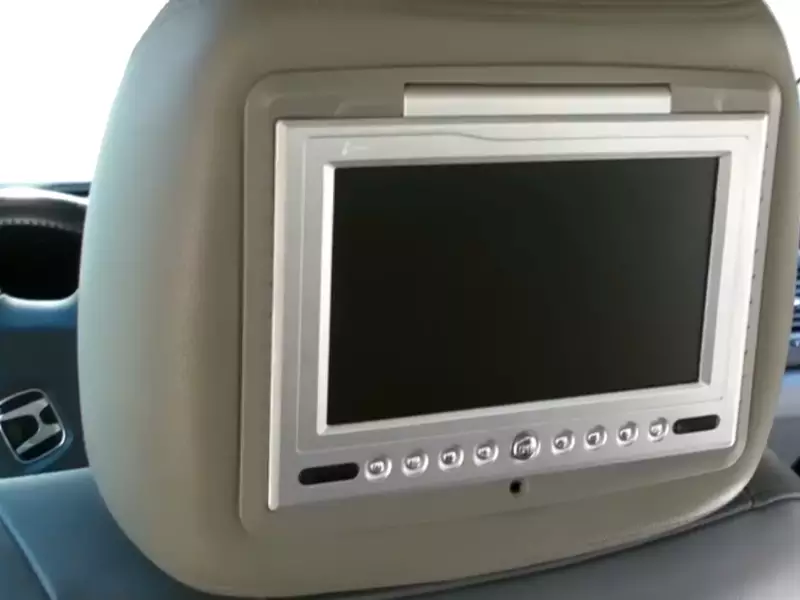
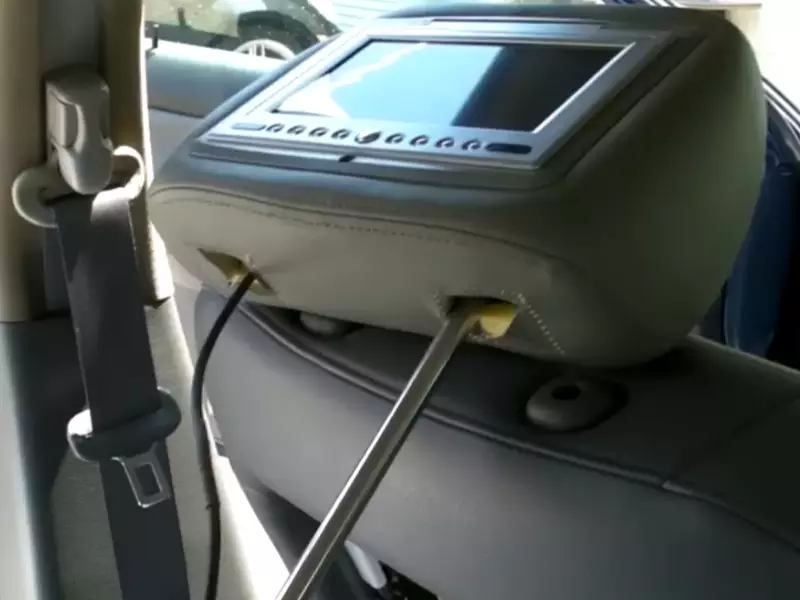
Mounting the player in the dash or headrest
Once the wiring is connected, it’s time to mount the DVD player in your car. Before you proceed, make sure to choose the most convenient and accessible location for the player, whether it’s in the dash or headrest. Follow these steps to mount the DVD player securely:
- Remove the necessary panels or trim to access the mounting area.
- Position the player in the desired location and mark the mounting holes.
- Drill holes into the dash or headrest to accommodate the mounting brackets.
- Attach the brackets to the player using the screws provided or appropriate hardware.
- Securely mount the player onto the dash or headrest using the mounting brackets.
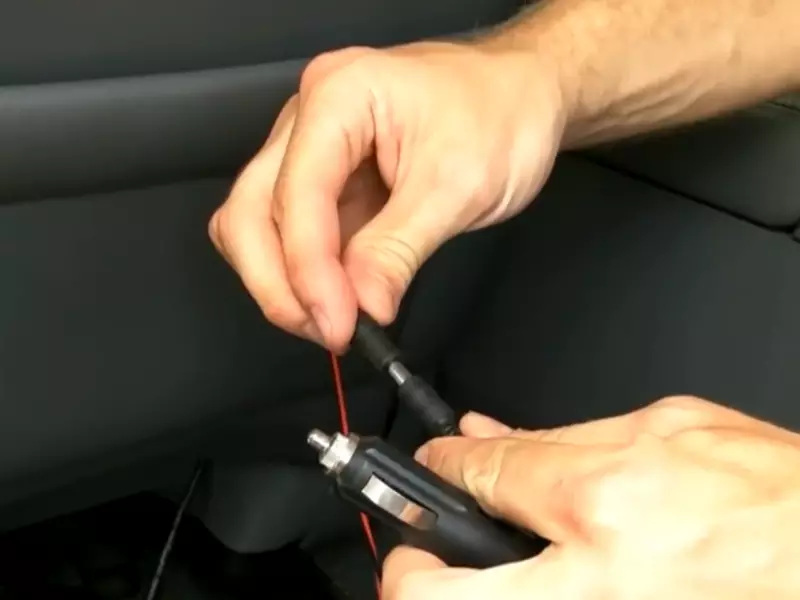
Connecting the player to the car’s electrical system
Once the player is securely mounted, the final step is to connect it to the car’s electrical system. This step ensures that the DVD player receives power and functions properly. Follow these steps to connect the player to the electrical system:
- Identify the appropriate power source in the car, such as the fuse box or stereo wiring.
- Connect the power wire from the DVD player to the power source by splicing into the existing wiring or using an adaptor.
- Ensure that the ground wire of the player is securely connected to a clean metal surface within the car.
- Check the connections to make sure they are secure and properly insulated.
Installing a DVD player in your car can enhance the overall driving experience, providing entertainment for passengers. By carefully following the steps outlined above, you can successfully install a DVD player in your car and enjoy hours of entertainment on the road. Now that you know how to connect the wiring harness, mount the player, and connect it to the car’s electrical system, you’re ready to embark on your next journey with a new level of audiovisual enjoyment in your car.
Testing And Trouble-Shooting
Reconnecting the car battery
Before moving on to testing the DVD player and sound system, make sure to reconnect the car battery securely. This step is crucial because reconnecting the car battery ensures that power is flowing to all the necessary components, including the DVD player. To reconnect the car battery, follow these simple steps:
- Locate the car battery in your vehicle.
- Remove any protective covers or caps that may be present on the battery terminals.
- Identify the positive (+) and negative (-) terminals on the battery.
- Connect the positive cable (usually red) to the positive terminal on the battery.
- Tighten the connection using a wrench or pliers.
- Connect the negative cable (usually black) to the negative terminal on the battery.
- Tighten the connection using a wrench or pliers.
- Ensure that all connections are secure and there is no movement or play in the cables.
- Replace any protective covers or caps that were removed earlier.
Once the car battery is reconnected, you are now ready to move on to the next step – testing the DVD player and sound system.
Testing the DVD player and sound system
After successfully installing the DVD player in your car, it is essential to test it to ensure everything is working correctly. Here are the steps to follow when testing the DVD player and sound system:
- Turn on your car’s ignition.
- Power on the DVD player and navigate to a DVD or CD with known media.
- Insert the disc into the player and wait for it to load.
- Observe the screen to see if the DVD menu or content is displayed correctly.
- Adjust the volume of your car’s sound system to a comfortable level.
- Play the DVD or CD and listen for audio coming from the car’s speakers.
- Make sure all speakers are working correctly and the sound quality is satisfactory.
- Test other features of the DVD player, such as navigation menus, subtitles, or additional audio settings if applicable.
If everything is functioning as expected during the testing phase, congratulations! You have successfully installed and tested the DVD player in your car. However, if you encounter any issues, don’t worry. It’s time to troubleshoot and fix common installation problems.
Troubleshooting common installation issues
During the installation process of a DVD player in a car, it is not uncommon to encounter a few hiccups. Below are some common problems you might face and the corresponding troubleshooting steps:
| Issue | Troubleshooting Steps |
|---|---|
| No power to the DVD player |
|
| No audio or distorted sound |
|
| No video or poor video quality |
|
By following these troubleshooting steps, you should be able to resolve the most common installation issues. However, if the problems persist or if you encounter any other difficulties, it may be helpful to consult a professional car audio technician for further assistance.
Securing The DVD Player
Installing a DVD player in your car can greatly enhance your driving experience, but it’s important to make sure it is securely fastened to prevent damage and theft. In this section, we will discuss two crucial aspects of securing your DVD player: securing loose wires and cables and installing protective covers or cases. Additionally, we will provide some tips on taking precautions to prevent theft.
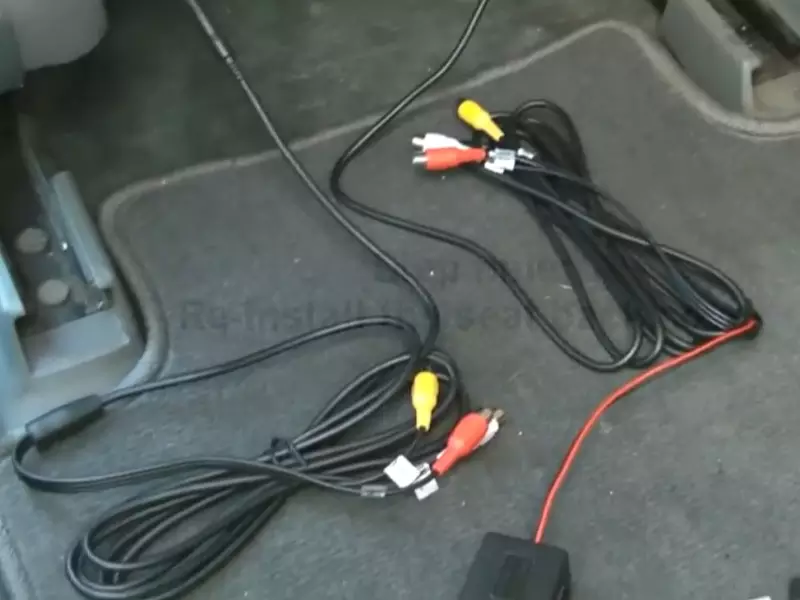
Securing loose wires and cables
When installing a DVD player in your car, it is crucial to secure any loose wires and cables to ensure they do not interfere with your driving or get damaged. Follow these steps to secure the wires and cables effectively:
- Start by identifying all the wires and cables connected to the DVD player. This may include power cords, audio and video cables, and any additional accessories.
- Organize the wires and cables and neatly bundle them together using zip ties or cable clips. This will help prevent tangling and keep everything in place.
- Carefully route the wires and cables to the appropriate locations where they need to be connected. Ensure they are not obstructing any moving parts or blocking access to other essential components in your car.
- If necessary, use adhesive mounts or clips to secure the wires and cables to the interior surfaces of your car. This will prevent them from dangling and potentially getting caught on something.
Installing protective covers or cases
To safeguard your DVD player from damage and extend its lifespan, consider installing protective covers or cases. These covers or cases offer protection against dust, dirt, scratches, and potential accidents. Here are some steps to follow:
- Measure the dimensions of your DVD player to ensure you select a cover or case that fits properly. You can refer to the manufacturer’s specifications or use a measuring tape to determine the exact size.
- Look for covers or cases made from durable materials such as neoprene or hard plastic. These materials provide excellent protection while ensuring easy access to the DVD player’s controls and ports.
- Once you have chosen the appropriate cover or case, carefully place your DVD player inside, ensuring it fits snugly. Some cover or cases may require you to secure the DVD player using straps or clips.
- Confirm that all the necessary openings, such as for cables and ventilation, align correctly with your DVD player. This will allow you to connect any required cables and prevent overheating.
Taking precautions to prevent theft
Taking precautions to prevent theft is essential when installing a DVD player in your car. Follow these tips to minimize the risk of theft:
- Install the DVD player in a discreet location that is not easily visible from the outside. This will discourage thieves from targeting your car.
- Use a security lock or bolt to secure your DVD player to the car’s interior. This added layer of protection will make it harder for thieves to remove the device quickly.
- Consider adding window tinting or blinds to your car windows. This will limit the visibility of your DVD player from the outside, reducing the temptation for potential thieves.
- Additionally, always remember to lock your car doors and windows when leaving your vehicle unattended. It may sound obvious, but many thefts occur due to oversight in this area.
By following these steps, you can ensure that your DVD player is securely installed in your car, protected from damage, and reduce the risk of theft. Enjoy your favorite movies and shows on the go with peace of mind knowing that your DVD player is in safe hands.
Additional Tips And Considerations
Adjusting the screen and audio settings
One of the key factors to consider when installing a DVD player in your car is adjusting the screen and audio settings. Properly adjusting these settings ensures that you have the best viewing and listening experience possible. To adjust the screen settings, locate the display controls on your DVD player, which are usually found on the front panel. Use these controls to adjust the brightness, contrast, and color saturation of the screen until you achieve the desired picture quality. Additionally, you can adjust the aspect ratio to fit the screen size of your car, whether it’s a conventional, widescreen, or overhead display.
Next, let’s look at the audio settings. Most car DVD players have built-in speakers, but some also offer the option to connect external headphones or speakers for a better audio experience. To adjust the audio settings, locate the audio controls on your DVD player and make sure that the volume is at a comfortable level. You can also adjust the bass, treble, and balance settings to customize the sound to your preferences. It’s a good idea to test out different settings and make adjustments until you find the perfect balance for your audio.
Keeping the DVD player clean and well-maintained
Maintaining a clean DVD player in your car is vital to ensure optimal performance and longevity. Dust and dirt can accumulate on the player’s surfaces and affect its functionality. To keep your DVD player clean, start by regularly wiping the exterior with a soft, lint-free cloth. Avoid using abrasive cleaners, as they can damage the player’s finish. Additionally, be sure to clean the DVD discs before inserting them into the player. Use a soft cloth or specialized cleaning solution to remove any smudges or fingerprints from the disc’s surface.
When it comes to maintenance, it’s important to regularly check and clean the DVD player’s optical lens. Dust and debris can build up on the lens over time, diminishing the player’s performance. To clean the lens, use a DVD lens cleaning kit specifically designed for car players. Follow the instructions provided with the kit to safely clean the lens without causing any damage. Regular maintenance and cleaning of your DVD player will ensure that it continues to deliver high-quality video and audio.
Following safety guidelines while driving with a DVD player
While a car DVD player can enhance your entertainment experience during long drives, it’s crucial to prioritize safety first. Here are some important safety guidelines to keep in mind:
- Place the DVD player in a secure and stable location within your car, ensuring that it doesn’t obstruct your view or pose any safety hazards in case of sudden stops or accidents.
- Always keep your eyes on the road while driving. Avoid watching the screen or adjusting settings while your car is in motion to prevent distractions.
- It’s recommended to have a designated passenger manage the DVD player, including selecting and changing discs, adjusting settings, and handling any technical issues, while you focus on driving.
- Ensure that all passengers, especially young children, are properly restrained in their seats while the DVD player is in use. This helps to prevent injuries in the event of a sudden stop or collision.
- Lastly, familiarize yourself with any specific local laws or regulations regarding the use of DVD players in cars, as they may vary from one jurisdiction to another.
By adhering to these safety guidelines, you can enjoy the benefits of a car DVD player while keeping yourself and your passengers safe on the road.
Frequently Asked Questions On How To Install A Dvd Player In A Car
How Much Does It Cost To Install A Rear Entertainment System?
Installing a rear entertainment system can cost between $200 and $2,000, depending on factors like the brand and model of the system, additional features, and installation labor fees. Prices may vary, so it’s best to consult with a professional for an accurate estimate.
How Do You Hook Up A Portable DVD Player?
To hook up a portable DVD player, connect the player to a power source using the included power cable. Then, connect the player to your TV or monitor using an HDMI or AV cable. Insert a DVD into the player and switch on both the player and the TV to start watching.
Can You Add an Entertainment System to the car?
Yes, you can add an entertainment system to your car.
What Format Does Car DVD Player Support?
Car DVD players typically support various formats, including DVD, CD, MP3, WMA, JPEG, and MPEG.
Conclusion
To sum up, installing a DVD player in your car doesn’t have to be a complex or overwhelming task. By following the step-by-step instructions outlined in this guide, you can easily enhance your driving experience and keep your passengers entertained on long road trips.
Remember to gather all the necessary tools and materials, choose the perfect location, and connect the player properly. With a little patience and attention to detail, you’ll soon be enjoying your favorite movies and shows while on the go. Safe travels!