To install a dual battery system in your vehicle, you need to follow a step-by-step process that includes disconnecting the negative battery cable, mounting the second battery, connecting it to the main battery, and installing a battery isolation solenoid. This article will guide you through each of these steps, providing the necessary information to successfully install a dual battery system in your vehicle.
By the end, you’ll have a comprehensive understanding of the process and be able to confidently complete the installation on your own. Don’t miss any detail and make sure to adhere to safety precautions during the entire process.
Understanding The Importance Of A Dual Battery System
Why a Dual Battery System is Essential for Vehicles
1. Increased power and reliability:
With a single battery, your vehicle’s power supply is limited, especially if you have additional accessories like a winch, refrigerator, or auxiliary lights. A dual battery system allows you to have an auxiliary battery to power these accessories and ensure that your primary battery is solely dedicated to starting the engine. This means you won’t have to worry about draining the battery when you’re enjoying your off-grid adventures.
2. Enhanced safety:
One of the biggest concerns for anyone going off-grid is the fear of getting stranded due to a dead battery. A dual battery system provides unparalleled peace of mind as it reduces the risk of being stranded in remote locations. Having a backup battery ensures that you always have enough power to start your vehicle and get back on the road.
3. Longer battery life:
A dual battery system can extend the lifespan of your batteries. By separating the starting battery from the auxiliary battery, it helps to prevent deep discharges that can significantly reduce the life of a battery. This ensures that both batteries are optimally charged, resulting in longer battery life and reducing the need for frequent replacements.
Benefits of Having a Dual Battery System
1. Versatility and flexibility:
Having a dual battery system in your vehicle grants you the freedom to use electrical appliances and accessories without any worries. It allows you to power devices such as camping lights, refrigerators, inverters, and even charging stations for phones and laptops. Whether you’re out on a road trip or simply need to charge your devices while on the go, a dual battery system provides the versatility and flexibility you need.
2. Efficient power management:
With a dual battery system, you have full control over how the power is distributed and managed in your vehicle. You can use a battery isolator or a voltage sensing relay (VSR) to intelligently charge your secondary battery while driving, and prevent any chance of overcharging or damaging the primary battery. This ensures that you have power whenever you need it, without compromising the overall performance of your vehicle.
3. Increased reliability for essential functions:
A dual battery system is a crucial element for those who rely on their vehicle for work or emergencies. If your vehicle is your workplace or if you regularly use it for important tasks, such as operating medical equipment or communication devices, a dual battery system becomes even more essential. It provides an uninterrupted power source, eliminating any potential downtime and ensuring that your essential functions never falter.
Assessing The Vehicle’s Power Requirements
Installing a dual battery system in your vehicle can greatly enhance its power capabilities and ensure you never run out of electricity on the road. However, before jumping into the installation process, it is important to assess your vehicle’s power requirements. This involves determining your power needs and usage patterns, as well as considering factors that will help you decide on the appropriate battery capacity. In this article, we will guide you through these steps, providing useful information and insights to help you make the right choices.
Determining power needs and usage patterns
Before selecting a dual battery system for your vehicle, it is crucial to understand your power needs and analyze your usage patterns. Start by asking yourself a few key questions:
- What electrical devices and accessories do you typically use in your vehicle?
- How much power do these devices require?
- How often and for how long do you use them?
Make a list of all the devices and their power requirements. This could include items such as a refrigerator, camping lights, a sound system, or any other electrical equipment you frequently use on your trips. By estimating the power usage of each device and the total time they are likely to be used, you can get an idea of your overall power needs.
Factors to consider when deciding on battery capacity
When it comes to choosing the right battery capacity for your dual battery system, several factors should be taken into account:
- Power needs: Consider the total power requirements of your devices, as determined in the previous step. Ensure that the battery capacity you choose is sufficient to meet these needs without draining excessively or compromising other essential functions of your vehicle.
- Usage patterns: Evaluate how frequently and for how long you will be using your devices. If you often embark on extended trips with high power usage, you may need a higher-capacity battery to ensure ample power supply throughout your journey.
- Available space: Assess the available space in your vehicle for installing the second battery. Depending on the size, weight, and dimensions of the battery, you may need to make adjustments or consider alternative mounting options.
- Budget: It is important to consider your budget when deciding on the battery capacity. Higher capacity batteries tend to be more expensive, so strike a balance between your power needs and available funds.
By considering these factors and analyzing your power requirements, you will be able to choose the right battery capacity for your dual battery system, ensuring optimal power capabilities for all your adventures on the road.
Selecting The Right Batteries And Components
When it comes to installing a dual battery system in your vehicle, selecting the right batteries and components is crucial. Not only do you want to ensure that you have the appropriate battery types for your dual system, but you also need to review and choose the essential components that will make your system work flawlessly.
Choosing the appropriate battery types for the dual system
When it comes to the battery types for your dual system, you have a few options to choose from. Let’s take a look at the two main battery types:
- Deep Cycle Batteries: These batteries are designed to provide a steady amount of power over a long period of time, making them perfect for powering appliances and accessories in your vehicle while the engine is off. Deep cycle batteries are built to withstand repeated deep discharging and recharging, ensuring they have a long lifespan.
- Starting Batteries: On the other hand, starting batteries are designed to deliver a high burst of power, making them ideal for starting your vehicle’s engine. These batteries are not intended for deep discharging, as it can significantly shorten their lifespan.
Depending on your needs and the electrical demands of your vehicle, you may choose to use one deep cycle battery as your auxiliary power source while using a starting battery for your main starting system. Alternatively, you can opt for two deep cycle batteries in your dual system, providing both auxiliary power and reliable starting capabilities.
Reviewing essential components, such as isolators and battery monitors
Aside from selecting the right batteries, there are essential components that you need to consider when installing a dual battery system. These components ensure the smooth operation and efficient use of your batteries. Here are a few key components to review:
- Isolators: Isolators are designed to separate the two batteries in your dual system, preventing the discharge of your main starting battery when your auxiliary battery is in use. This ensures that you always have enough power to start your vehicle.
- Battery Monitors: Battery monitors provide real-time information about the state of charge and health of your batteries. They help you keep track of your battery levels, ensuring that you never run out of power unexpectedly. With a battery monitor, you can easily monitor the performance of both your starting and auxiliary batteries.
Ensure that you choose high-quality isolators and battery monitors that are compatible with your vehicle’s electrical system. Investing in reliable components will ensure a safe and efficient dual battery system installation.
Planning The Installation Process
Process Planning is an essential step when it comes to installing a dual battery system in your vehicle. Taking the time to gather the necessary tools and materials, as well as ensuring you have a safe and organized workspace, can make the installation process smoother and more efficient. In this section, we will discuss how to gather the necessary tools and materials and create a safe workspace for your installation.
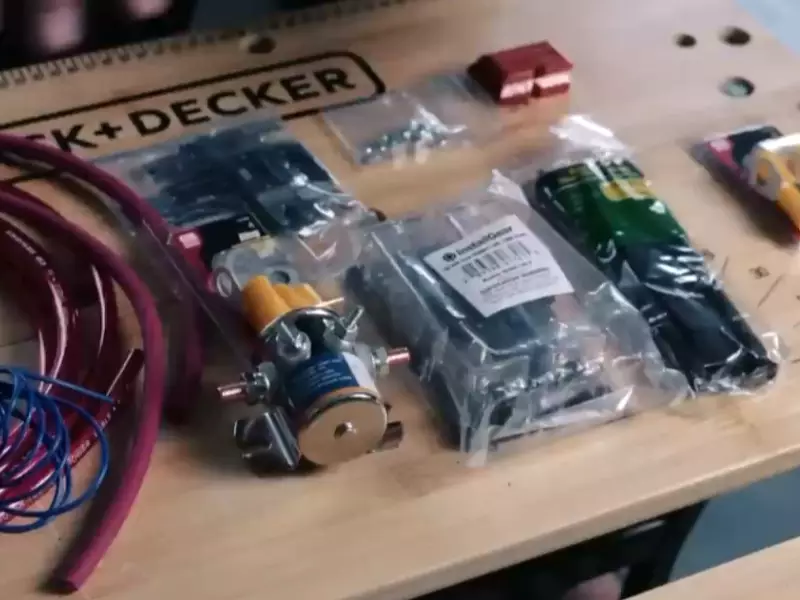
Gathering necessary tools and materials
Before starting the installation process, it’s crucial to gather all the necessary tools and materials. Having everything you need at your fingertips will save time and prevent unnecessary interruptions. Here’s a list of tools and materials you may require:
| Tools | Materials |
|---|---|
|
|
Make sure to have these tools and materials ready before you begin. It’s better to be prepared than to halt the installation process due to missing items.
Ensuring a safe and organized workspace
An organized and safe workspace is vital for a successful installation. Here are some tips to ensure your workspace is suitable:
- Choose a well-ventilated area with good lighting to work in.
- Clear the area of any clutter or unnecessary items.
- Wear appropriate safety gear, such as gloves and safety glasses, to protect yourself.
- Keep a fire extinguisher nearby in case of emergencies.
- Remove any jewelry or accessories that could get caught in tools or equipment.
- Use cable management solutions, such as zip ties or cable clips, to keep wires organized and prevent tripping hazards.
By following these guidelines, you can create a safe and organized workspace that will make the installation process more efficient and reduce the risk of accidents.
Now that you have gathered the necessary tools and materials and prepared a safe and organized workspace, you are ready to move on to the next steps of installing a dual battery system in your vehicle.
Preparing The Vehicle For Installation
Before installing a dual battery system in your vehicle, it is crucial to properly prepare the vehicle. This involves disconnecting the primary battery and taking necessary safety precautions. Additionally, identifying suitable locations for mounting the additional battery is essential.
Disconnecting the Primary Battery and Ensuring Safety Precautions
When starting the process of installing a dual battery system, the first step is to disconnect the primary battery. This ensures that there is no electrical current flowing through the system, reducing the risk of accidents or damage. To do this, follow these steps:
- Locate the primary battery: It is usually found under the hood of the vehicle. Refer to the owner’s manual if needed.
- Turn off the engine: This ensures that the primary battery is not being charged and that there is no power being supplied to the electrical system.
- Disconnect the negative terminal: Using a wrench or socket, loosen the nut on the negative terminal (-) of the battery and remove the cable.
- Secure the disconnected cable: To prevent accidental contact with metal surfaces, cover the end of the disconnected cable with electrical tape.
Identifying Locations for Mounting the Additional Battery
Once the primary battery is disconnected and safety precautions are in place, the next step is to identify suitable locations for mounting the additional battery. Consider the following factors:
- Available space: Look for areas in the vehicle’s engine bay or interior that have enough space to accommodate the additional battery.
- Accessibility: The mounting location should be easily accessible for potential future maintenance or battery replacements.
- Secure mounting points: Ensure that the selected locations have secure mounting points to keep the battery stable while the vehicle is in motion.
- Heat and ventilation: Avoid mounting the additional battery near sources of excessive heat or in a poorly ventilated area, as it may shorten the battery’s lifespan.
Once suitable locations are identified, securely mount the additional battery using appropriate brackets or battery trays. Verify that the mounting is tight and doesn’t interfere with any other components or wiring within the vehicle.
By following the proper steps to prepare the vehicle for installation, including disconnecting the primary battery and identifying suitable mounting locations, you can lay the foundation for a successful dual battery system installation.
Installing The Dual Battery System
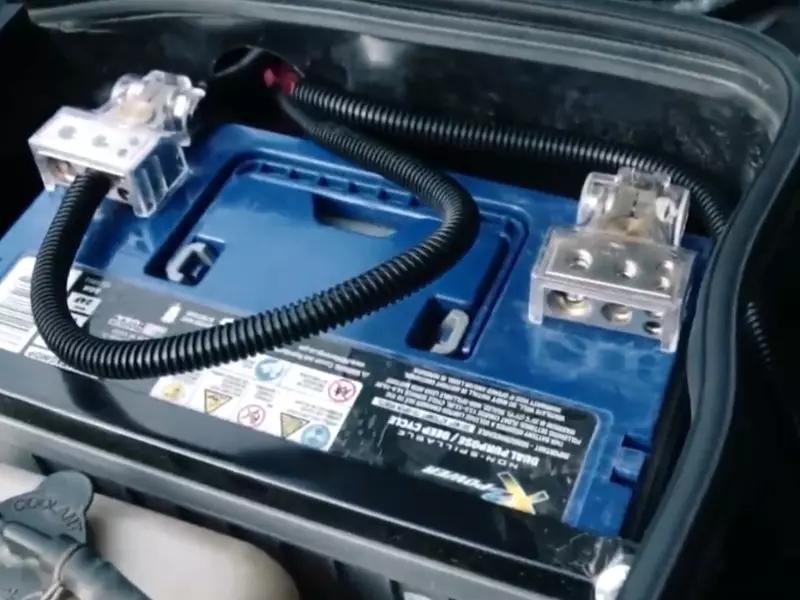
Mounting the second battery in a secure and accessible spot
One crucial step in the process of installing a dual battery system in your vehicle is to ensure that the second battery is securely and conveniently mounted. It is important to find a suitable spot that not only provides physical stability to the battery, but also allows easy access for maintenance and inspection.
A popular choice for mounting the second battery is in the engine bay. This location offers several advantages, including a relatively easy installation process and close proximity to the primary battery. However, it is essential to select a spot that is away from any major heat sources or moving parts to prevent potential damage.
Here are a few key considerations when mounting the second battery in your vehicle:
- Choose a sturdy mounting bracket: Use a robust mounting bracket specifically designed for automotive applications. This ensures the battery is securely held in place and protected from vibrations and shocks during off-road adventures.
- Opt for a ventilated area: Batteries generate heat during operation, so it’s crucial to mount the second battery in a well-ventilated area to prevent overheating. Ensure there is enough space around the battery to allow proper airflow.
- Protect from water and dust: Consider installing a barrier or shield around the second battery to prevent any water or dust from entering. This protects the battery from potential damage caused by environmental factors.
Connecting the batteries in parallel or series, based on requirements
The next step in installing a dual battery system is to connect the batteries in either parallel or series, depending on your requirements. The choice between these two methods will depend on factors such as the desired voltage output and the capacity needed for your vehicle’s electrical load.
Connecting the batteries in parallel:
When connecting the batteries in parallel, the positive terminal of the first battery is connected to the positive terminal of the second battery. Similarly, the negative terminal of the first battery is connected to the negative terminal of the second battery. This configuration ensures that both batteries work together and provide a higher overall capacity, maintaining the same voltage output.
Connecting the batteries in series:
Connecting the batteries in series involves connecting the positive terminal of the first battery to the negative terminal of the second battery. The remaining positive and negative terminals are then connected to the positive and negative terminals of the vehicle’s electrical system, respectively. This setup increases the total voltage of the system while maintaining the same capacity as a single battery.
It is important to follow these steps carefully to ensure a safe and efficient dual battery installation in your vehicle. By mounting the second battery securely and connecting the batteries correctly, you can enjoy the benefits of a reliable power source for your electrical needs, whether it’s for camping, off-roading, or any other adventure.
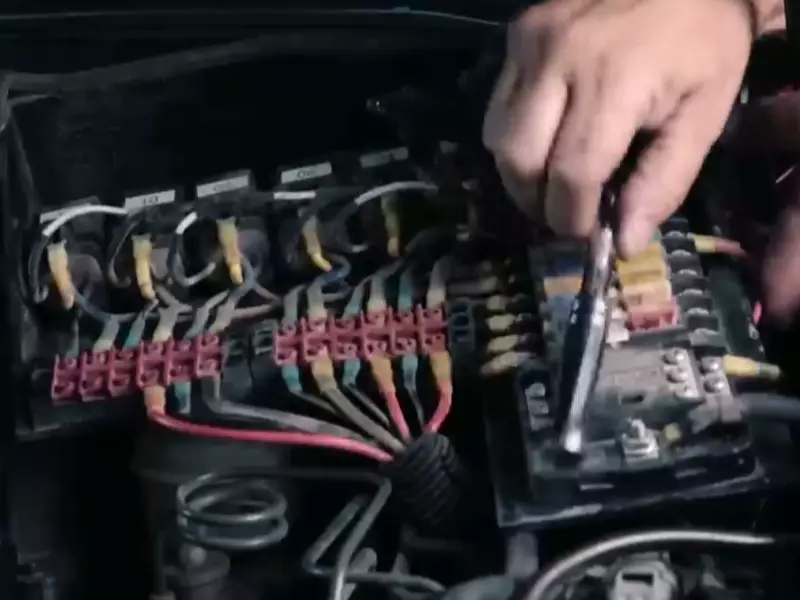
Wiring And Connecting The Components
In this section, we will discuss the important step of wiring and connecting the components when installing a dual battery system in your vehicle. Properly routing and securing battery cables, as well as installing isolators and connecting to the electrical system, are crucial for the overall functionality and safety of your dual battery setup.
Routing and Securing Battery Cables Properly
When it comes to wiring your dual battery system, it is essential to route and secure the battery cables properly. This ensures efficient power transfer and reduces the risk of accidental damage or short circuits. Here are some key considerations:
- Plan your cable routing: Before you begin installing the battery cables, determine the most suitable path for routing them in your vehicle. Take into account factors such as cable length, proximity to other components, and the overall accessibility.
- Use the correct cable gauge: It’s important to use the appropriate gauge of cable for your dual battery system. The cable gauge should be able to handle the current flow without overheating. Consult the manufacturer’s guidelines or seek professional advice to ensure you choose the right cable size.
- Secure the cables: Once you have routed the battery cables, make sure to secure them properly. You can use cable clamps, zip ties, or cable clips to fasten the cables to the vehicle’s frame or other secure locations. This prevents the cables from being exposed to excessive vibrations or rubbing against sharp edges.
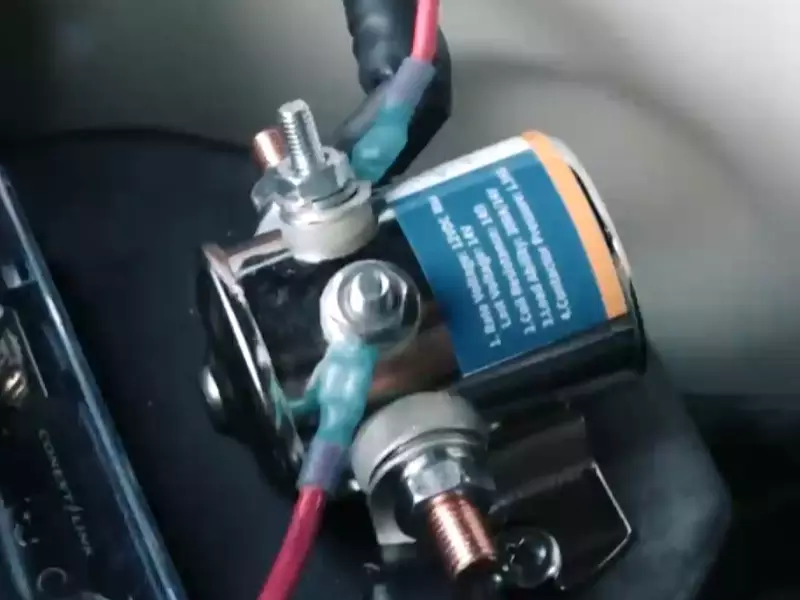
Installing Isolators and Connecting to the Electrical System
Installing isolators is a crucial step in connecting your dual battery system to the electrical system of your vehicle. These devices allow you to charge your auxiliary battery while ensuring that your main battery remains isolated and unaffected. Here’s how to do it:
- Select the right isolator: There are different types of isolators available in the market, such as diode-based or solenoid-based isolators. Choose the one that best suits your needs and vehicle’s electrical system. Consider factors like current rating, voltage drop, and ease of installation.
- Connect the isolator: Follow the manufacturer’s instructions to connect the isolator properly. Typically, this involves connecting the isolator between the main battery and the auxiliary battery. Make sure to use the correct terminals and connectors for a secure connection.
- Connect to the electrical system: Once the isolator is properly installed, you need to connect it to the electrical system of your vehicle. Identify a suitable connection point that provides access to the necessary power sources. This may involve connecting to the alternator, fuse box, or other relevant components.
By following these steps, you can ensure that your dual battery system is properly wired and connected. This will enhance the performance and reliability of your system, allowing you to power your additional electrical accessories with peace of mind.
Testing And Troubleshooting
Once you have successfully installed a dual battery system in your vehicle, it is essential to test and troubleshoot the system to ensure its proper functionality. By following these steps, you will be able to verify the performance of your dual battery system and identify any potential issues:
Verifying the functionality of the dual battery system
To determine if your dual battery system is working properly, you need to perform a series of tests:
- Checking voltage levels: Use a multimeter to measure the voltage of both batteries, starting with the primary battery. Ensure that the readings are within the acceptable range specified by the battery manufacturer.
- Testing battery isolation: With the vehicle turned off, disconnect the negative terminal of the primary battery. Start the vehicle and check if it runs smoothly using only the secondary battery. If it does, it means the battery isolation is functioning correctly. Reconnect the primary battery to prevent draining the secondary battery.
- Testing battery charging: Start the vehicle and let it run for a few minutes. Measure the voltage of both batteries again, focusing on the secondary battery. It should show a higher voltage than before, indicating that the dual battery system is effectively charging the secondary battery while the vehicle is running.
Identifying and resolving any potential issues
During the testing process, you may encounter certain issues that need to be addressed. Here are some common problems and their respective solutions:
| Issue | Solution |
|---|---|
| Battery not charging | Check the connections and wiring to ensure they are secure and correctly installed. Verify that the isolator’s wiring is connected properly and that the alternator is providing sufficient charge to the batteries. If necessary, consult a professional for further assistance. |
| Battery draining quickly | Inspect for any power-draining components or accessories that might be drawing excessive power from the batteries when the vehicle is turned off. Consider installing a switch or disconnecting device for these components to prevent unnecessary battery drain. |
| Overcharging of batteries | If one or both batteries consistently show excessively high voltage readings, it may indicate an overcharging issue. Check the voltage regulator and charging system to ensure they are functioning correctly. Adjustments or repairs may be necessary to prevent further damage to the batteries. |
By performing these tests and troubleshooting any potential issues, you can ensure your dual battery system operates efficiently and reliably. Not only will this provide you with peace of mind during your adventures, but it will also extend the lifespan of your batteries, ensuring they are always ready to power your journey.

Maintenance And Safety Tips
Regular maintenance and adherence to safety precautions are crucial to ensure the optimal performance of your dual battery system in your vehicle. By following these maintenance routines and safety tips, you can prolong the lifespan of your batteries and prevent accidents.
Regular maintenance routines to keep the system in top condition
Performing regular maintenance on your dual battery system is essential to keep it in top condition. Here are some routines you should follow:
- Check the battery connections: Inspect the battery connections periodically to ensure they are clean and tight. Loose or corroded connections can lead to power loss and potentially damage your batteries.
- Monitor the battery charge level: Use a voltmeter to check the charge level of your batteries regularly. A healthy battery should have a voltage between 12.6V and 12.8V.
- Clean the battery terminals: Clean the battery terminals using a mixture of baking soda and water to remove any corrosion. Rinse with clean water and apply a thin layer of petroleum jelly to prevent future corrosion.
- Inspect the battery tray: Check the battery tray for any signs of damage or corrosion. Replace the tray if necessary to prevent further damage to your batteries.
- Test the battery isolator: Test the battery isolator to ensure it is functioning properly. Follow the manufacturer’s instructions for testing and troubleshooting.
Precautions to follow to prevent accidents and ensure safety
When dealing with a dual battery system, safety should be your top priority. Here are some precautions to follow:
- Wear protective gear: Always wear gloves and safety glasses when working with batteries to protect yourself from any potential hazards, such as acid spills or electrical shocks.
- Disconnect the main battery: Before starting any maintenance or installation procedure, disconnect the main battery to prevent accidental electrical shock.
- Avoid smoking or open flames: Batteries emit flammable gases, so it is important to avoid smoking or using open flames in the vicinity of the batteries.
- Proper ventilation: Ensure that the battery compartment is well-ventilated to prevent the buildup of explosive gases. Install a vent hose if necessary.
- Secure the batteries: Make sure the batteries are securely fastened in the battery tray or bracket to prevent them from moving or falling during vehicle operation.
By following these maintenance routines and safety precautions, you can ensure the longevity of your dual battery system while keeping yourself and others safe on the road.
Further Enhancements And Customizations
Once you have successfully installed a dual battery system in your vehicle, you have endless possibilities for further enhancements and customizations. These additions can make your setup more efficient, versatile, and tailored to your specific needs. Here, we will explore some popular options for taking your dual battery system to the next level.
Upgrading the dual battery system with additional features
If you want to enhance the functionality of your dual battery system, there are several additional features you can consider. These upgrades can provide greater control and convenience in managing your vehicle’s power supply. Here are a few options:
- Battery Isolator: An automatic battery isolator helps prevent the main battery from draining when the engine is off. It ensures that power is only drawn from the auxiliary battery, preserving the charge of your main battery. This feature comes in handy when you use your vehicle for camping or other activities that require prolonged use of the auxiliary battery.
- Battery Monitor: Installing a battery monitor allows you to keep track of the voltage, current, and state of charge of both your main and auxiliary batteries. This information helps you monitor power usage, identify any potential issues, and optimize the charging process.
- Smart Charging System: A smart charging system automatically adjusts the charging voltage based on the condition and requirements of your batteries. This ensures that they are charged efficiently, prolonging their lifespan and avoiding overcharging or undercharging. It can be especially beneficial if you frequently use your vehicle in varying conditions.
- DC-DC Charger: A DC-DC charger converts the voltage from your vehicle’s alternator to match the requirements of your auxiliary battery, providing a stable and regulated charge. It is a valuable addition if you have different battery types or want to charge your auxiliary battery more efficiently.
Exploring options for integrating solar panels or inverters
To increase your dual battery system’s autonomy and allow for off-grid adventures, you can consider incorporating solar panels or inverters into your setup. These additions harness renewable energy sources and provide you with more power options on the go. Here are some points to consider:
- Solar Panels: Installing solar panels on the roof of your vehicle can supply a continuous trickle charge to your batteries, even when the engine is not running. This is especially beneficial for extended trips or camping in remote locations where access to electricity is limited.
- Inverters: An inverter converts DC power from your batteries into AC power, allowing you to run household appliances and charge electronic devices while on the road. It opens up possibilities for using devices that require a standard power outlet, such as laptops, refrigerators, or even power tools.
By incorporating solar panels or inverters into your dual battery system, you can significantly expand its capabilities and rely on renewable energy sources for your power needs. This combination of technologies ensures that you have a reliable and sustainable power supply wherever your adventures take you.
Frequently Asked Questions For How To Install A Dual Battery System In A Vehicle
Can You Install A Dual Battery System Yourself?
Yes, you can install a dual battery system yourself. It is important to follow instructions carefully for a successful installation.
How Do You Hook Up Two Batteries In A Car?
To hook up two batteries in a car, connect the positive terminal of one battery to the positive terminal of the other battery. Then, connect the negative terminal of the first battery to the vehicle’s chassis ground. Finally, connect the positive terminal of the second battery to the vehicle’s positive terminal.
Can I Connect A Second Battery To My Alternator?
Yes, you can connect a second battery to your alternator. It can help provide additional power for your vehicle’s electrical needs. However, it is important to ensure that you have the proper wiring and connections in place to avoid any damage to your alternator or electrical system.
Where Do You Put A Second Battery In A Car?
In a car, the second battery is typically placed in the engine compartment or trunk.
Conclusion
Installing a dual battery system in your vehicle can greatly enhance its electrical capacity and ensure a reliable power supply. By following the step-by-step guide provided in this blog post, you can successfully install this system without any professional assistance.
With a dual battery system, you’ll have the convenience of powering additional devices and the peace of mind knowing that your vehicle won’t run out of power unexpectedly. So why wait? Start upgrading your vehicle’s electrical system today!