To install a dash cam front and rear, follow these steps: First, find a suitable location for both cameras using the provided mounts. Then, connect the front camera’s power source to the vehicle’s fuse box or cigarette lighter.
Next, connect the rear camera to the front camera using the provided cables and position it in the rear windshield. Finally, run all the cables along the edges of the vehicle’s interior and secure them with adhesive clips. Introducing a dash cam front and rear to your vehicle can provide you with valuable footage in the event of an accident or unexpected incident on the road.
Installing a dash cam might seem daunting, but with some careful planning and attention to detail, you can have it up and running in no time. We will guide you through the step-by-step process of installing a dash cam front and rear in your vehicle. Follow these instructions and ensure accurate installation for optimal performance.
Why Install A Dash Cam Front And Rear?
Installing a dash cam front and rear in your vehicle is a smart move that can provide numerous benefits. Whether you’re a daily commuter, a long-distance traveler, or simply concerned about your safety on the road, investing in a front and rear dash cam can offer you peace of mind and valuable evidence in case of any road incidents.
Benefits of Having a Front and Rear Dash Cam
Increased Safety and Security on the Road
One of the primary advantages of equipping your vehicle with a front and rear dash cam is the increased safety and security it provides. By having a comprehensive view of the road ahead and behind, you can easily capture any incidents or reckless behavior of other motorists. This footage can be crucial in proving your innocence in accidents or road incidents, which can save you from potential legal troubles and insurance disputes.
Valuable Evidence for Insurance Claims
In the unfortunate event of a car accident, having a front and rear dash cam can provide you with irrefutable evidence for your insurance claim. The recorded footage can present an accurate account of the incident, including the actions of both parties involved. This video evidence can help expedite the claims process by ensuring that your insurance provider has all the information they need to assess the situation accurately.
Protection Against Fraud and Unjust Accusations
Dash cam footage is an excellent defense against fraudulent insurance claims or unjust accusations made against you. With a front and rear dash cam, you can easily disprove false allegations by presenting the recorded evidence. Whether it’s a staged accident or someone falsely claiming you caused damage to their vehicle, the footage from your dash cam can protect you from potential financial loss and legal complications.
Monitoring Young or Inexperienced Drivers
If you have young or inexperienced drivers in your household, installing a front and rear dash cam in their vehicle can help you monitor their driving behavior and provide constructive feedback. This additional level of scrutiny can encourage safe driving habits and ensure that they follow the rules of the road.
Enhanced Parking Protection
In addition to recording incidents on the road, a dash cam with front and rear view capabilities can also provide enhanced parking protection. The motion sensor feature can detect any unauthorized activity around your parked vehicle and automatically start recording. This can be particularly useful in hit-and-run situations or in capturing acts of vandalism.
Choosing The Right Dash Cam For Front And Rear Installation
Installing a dash cam for both front and rear views can provide comprehensive coverage and greater peace of mind while driving. However, with the abundance of options available in the market, choosing the right dash cam for front and rear installation can be a daunting task. To help you make an informed decision, we have outlined some important factors to consider when selecting a dash cam along with a list of recommended models.
Factors to consider when selecting a dashcam
Before purchasing a dash cam for front and rear installation, there are several factors that you should take into account. These factors will ensure that the dash cam meets your specific needs and provides the desired level of performance:
- Video Resolution: The video quality is one of the most important factors to consider in a dash cam. Look for a model that offers high-resolution video capture, preferably in Full HD or 4K, to ensure clear and detailed footage.
- Viewing Angle: The viewing angle determines how much of the road the dash cam can capture. A wider viewing angle, such as 150 degrees or more, helps to provide a broader perspective and reduces blind spots.
- Storage Capacity: Dash cams record video footage onto a memory card. It is important to choose a dash cam with sufficient storage capacity to ensure that you have enough space to store longer recordings without the need for frequent manual deletion.
- Loop Recording: Loop recording automatically overwrites the oldest footage when the memory card is full, ensuring that the dash cam is continuously recording. This feature is essential to make sure you never miss any important footage.
- Night Vision: If you frequently drive at night or in low-light conditions, consider a dash cam with enhanced night vision capabilities. This will ensure that your recordings are clear and well-lit, even in dark environments.
- GPS Functionality: Some dash cams offer built-in GPS functionality, which can provide you with additional information such as speed, location, and route history. This can be useful for documenting incidents or for monitoring your driving habits.
Recommended dash cam models for front and rear installation
After careful consideration, we have compiled a list of highly recommended dash cam models for front and rear installation:
| Model | Video Resolution | Viewing Angle | Storage Capacity |
|---|---|---|---|
| Rexing V1P Pro Dual Dash Cam | 1080p | 170° | 128GB |
| Vantrue N2 Pro Dual Dash Cam | 1440p | 170° | 256GB |
| BlackVue DR750S-2CH | 1080p | 139° | 128GB |
These dash cam models have consistently received positive reviews from drivers and offer a great combination of features for front and rear installation. Remember to choose a model that suits your specific requirements and budget.
By considering the factors mentioned above and exploring our recommended dash cam models, you can confidently choose the right dash cam for front and rear installation. Installing a reliable and high-quality dash cam will not only provide valuable evidence in the event of an accident but also contribute to your overall safety on the road.

Gathering The Necessary Tools And Equipment
Before you begin the installation process of a dash cam front and rear, it is essential to gather all the necessary tools and equipment. Here is a comprehensive list of everything you will need:
List of tools and equipment needed for the installation
- A dash cam front and rear set: This is the main component of the installation. Ensure that you choose a reliable and high-quality dash cam system that suits your specific requirements.
- Mounting brackets: Most dash cam sets come with their own mounting brackets. However, if your set does not include them, you may need to purchase them separately. These brackets will help secure the dash cam in place.
- Power cables: Dash cams typically need to be connected to a power source. Depending on the model you have chosen, you may need a hardwire kit or an additional cable that connects to your vehicle’s 12V port.
- Adhesive tapes: These will aid in firmly attaching the dash cam and mounting brackets to your vehicle’s windshield or dashboard. Look for durable adhesive tapes that provide a strong hold and are specifically designed for automotive use.
- Trim removal tools: These tools are helpful for safely removing any panels or trim pieces in your vehicle that may obstruct the installation process. It is important to have the right tools to prevent any damage to your vehicle’s interior.
- Cable clips: These small clips are useful for organizing and securing the power cables neatly, ensuring they are not dangling or obstructing your view while driving.
- MicroSD card: Dash cams record videos and store them on a memory card. Check the specifications of your dash cam to determine the compatible and recommended capacity of the MicroSD card you will need.
- MicroSD card reader: If your computer does not have an SD card slot, a MicroSD card reader will be necessary to transfer and view the recorded footage on your computer.
Where to purchase the required items
Now that you have a clear idea of the tools and equipment needed, you might be wondering where to purchase them. To ensure you get the right products and avoid counterfeit or low-quality items, it is recommended to purchase from reputable sources. Here are a few reliable options:
- Specialized automotive stores: Visit stores that specialize in car accessories and electronics. These stores usually have a wide selection of dash cams and the necessary installation equipment.
- Online marketplaces: Websites like Amazon, Best Buy, and Walmart offer a wide range of dash cams and related accessories. Read customer reviews, check ratings, and compare prices to make an informed decision.
- Manufacturer’s website: If you have chosen a specific dash cam brand, consider visiting their official website. Many manufacturers offer direct sales and may provide additional information and support for installation.
Now that you know what tools and equipment you need and where to find them, you are one step closer to successfully installing a dash cam front and rear in your vehicle. Make sure to gather all the necessary items before proceeding to the next step.
Preparing The Vehicle For Dash Cam Installation
Before installing a dash cam in your vehicle, it is essential to properly prepare the vehicle to ensure a successful installation. This involves finding a suitable location to park the vehicle and identifying the best positions for the front and rear dash cam placement.
Ensuring the vehicle is parked in a suitable location
Parking your vehicle in a suitable location is crucial for a few reasons. Firstly, make sure you park your vehicle in an area where you have enough space to comfortably move around it. This will allow you to work efficiently during the installation process. Secondly, it is important to park your vehicle in a well-lit area. Sufficient lighting will aid you in identifying the connection points and securely installing the dash cam. Lastly, ensure you park your vehicle in a safe and secure location to minimize any risk of theft or damage during the installation process.
Identifying the best positions for front and rear dash cam placement
The placement of your front and rear dash cams plays a significant role in capturing clear and comprehensive footage. For the front dash cam, the ideal position is behind the rearview mirror. This position provides the best field of view without obstructing your vision while driving. Additionally, consider the height and angle of the dash cam to avoid interference from the windshield wipers or any other obstructions.
When it comes to the rear dash cam, it is typically installed on the rear windshield. Position the camera in the upper corner of the windshield to capture the widest possible view of the rear. This placement ensures that the dash cam is less likely to be obstructed by passengers or any objects in the rear of the vehicle.
Remember to check your vehicle’s user manual or consult with a professional installer for any specific recommendations or restrictions before finalizing the placement of your dash cams.
By taking these steps to prepare your vehicle for dash cam installation, you are setting yourself up for a smooth and successful installation process. Keep in mind the importance of parking in a suitable location and selecting the best positions for both the front and rear dash cams. With proper preparation, you’ll be on your way to enhancing your driving experience and ensuring your safety on the road with a reliable dash cam system.
Installing The Front Dash Cam
When it comes to dashboard cameras, having both a front and rear dash cam can provide you with peace of mind and crucial evidence in case of any accidents or incidents. In this blog post, we will guide you through the process of installing a dash cam, starting with installing the front dash cam.
Mounting options for the front dash cam
Before installing your front dash cam, you need to decide on the best mounting option for your vehicle. Here are some common options:
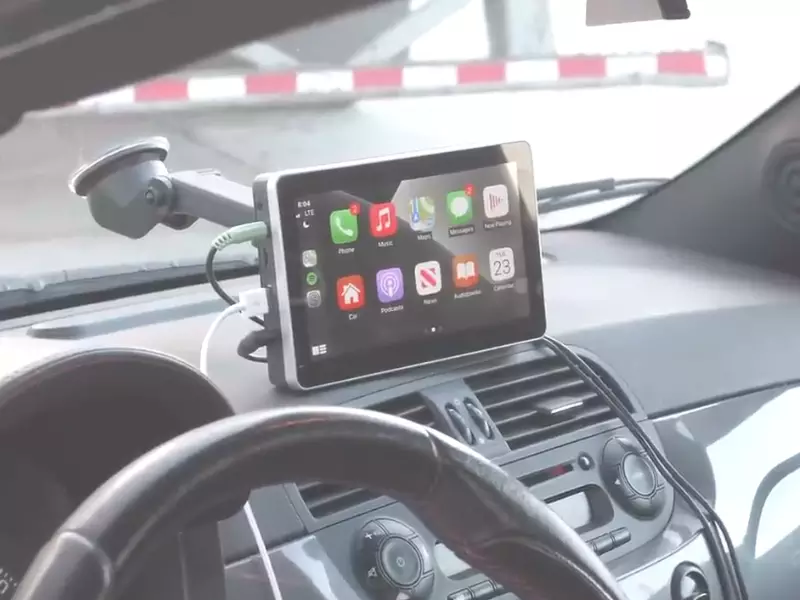
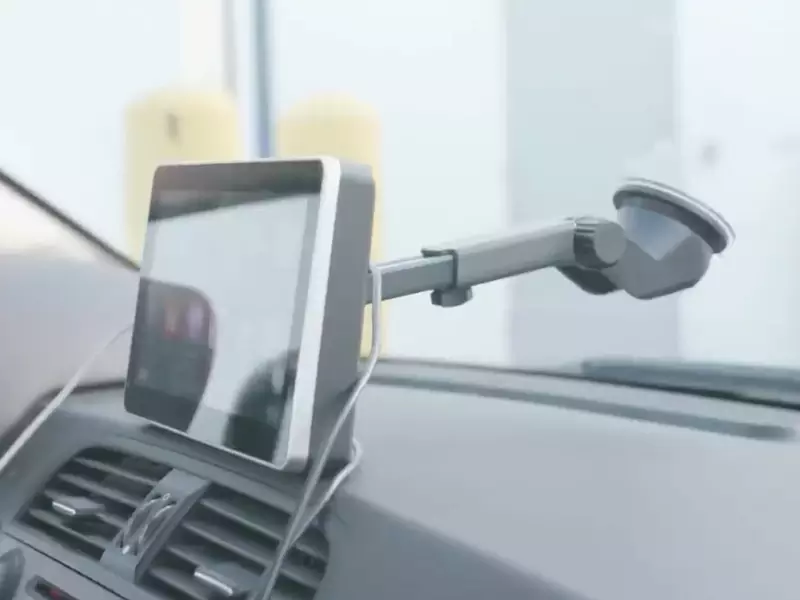
- Suction cup mount: This type of mount uses a suction cup to attach the dash cam to your windshield. It offers the advantage of being easily adjustable and can be removed without leaving any residue. However, be aware that extreme temperatures can affect the suction cup’s effectiveness.
- Adhesive mount: An adhesive mount uses strong adhesive tape to attach the dash cam to your windshield. It provides a more permanent and secure solution, as it is not affected by temperature changes. Make sure to clean the windshield area thoroughly before applying the adhesive to ensure a strong bond.
- Rearview mirror mount: Some dash cams come with a built-in rearview mirror mount, which replaces your existing rearview mirror. This option offers a more discreet and integrated look, but it may require professional installation.
Securing the dash cam in the chosen position
Now that you’ve chosen the mounting option that suits your needs, it’s time to secure the front dash cam in the chosen position. Here’s how to do it:
- Position the dash cam: Place the dash cam in the desired position on your windshield, ensuring it doesn’t obstruct your view while driving. Consider the field of view you want to capture and adjust the angle accordingly.
- Clean the windshield: Clean the area where you plan to mount the dash cam using a glass cleaner and a microfiber cloth. This step is crucial to ensure a secure attachment.
- Attach the mount: If you’re using a suction cup or adhesive mount, follow the manufacturer’s instructions to attach the mount securely to the windshield. Make sure it is firmly pressed against the glass for a stronghold.
- Mount the dash cam: Once the mount is securely attached to the windshield, carefully attach the dash cam to the mount. Ensure it is properly aligned and firmly attached to avoid any vibrations or movement while driving.
- Conceal the cables: To keep your dashboard neat and tidy, consider concealing the dash cam’s cables. Tuck them along the trim or under the headliner for a clean installation. You can also use cable clips or adhesive cable holders to keep the cables organized and out of sight.
Installing a front dash cam is a straightforward process that begins with choosing the right mounting option for your vehicle. Whether you opt for a suction cup mount, adhesive mount, or a rearview mirror mount, ensure that the dash cam is securely attached to your windshield. By following these steps, you can install your front dash cam and start enjoying the benefits of having an extra set of “eyes” on the road.

Running Cables For The Front Dash Cam
Installing a dash cam can provide you with peace of mind and valuable evidence in case of accidents or incidents on the road. To ensure a proper and clean installation, it’s essential to carefully run and hide the cables for your front dash cam. In this section, we’ll provide you with some tips and techniques for hiding and routing cables to achieve a clean and professional-looking installation.
Hiding and routing cables for a clean installation
One of the biggest challenges when installing a front dash cam is managing the cables and keeping them out of sight. Here are some steps you can follow to achieve a clean and neat installation:
- Plan your cable route: Before you begin running the cables, it’s important to plan the route you want them to take. Consider how they will reach from the front dash cam to the power source while keeping them hidden from view. Take into account existing cable routing channels or gaps that can help conceal the wires.
- Use existing gaps and channels: Many vehicles have existing gaps or channels where cables can be neatly tucked away. Look for spaces between the windshield and the dashboard, or along the edges of the windshield or trim. Gently push the cables into these gaps, making sure they don’t interfere with the movement of the steering wheel or the functionality of any other components.
- Conceal under trim panels: If there aren’t any suitable gaps or channels, you can consider removing the trim panels temporarily to hide the cables. Carefully pry off the panels using a trim removal tool and route the cables underneath. Be cautious not to damage any wires or components and ensure a secure fit when reattaching the trim panels.
- Secure with cable clips: Cable clips can be a handy accessory when it comes to securing and organizing the cables. Use adhesive-backed cable clips to attach the cables along the existing wiring harness or interior surfaces. This will not only keep the cables in place but also prevent them from dangling or getting tangled while driving.
Tips for managing excess cable length
Excess cable length can often become a nuisance during the installation process. Here are some tips to help you manage and hide the excess cable:
- Zip-tie and bundle: If you have excess cable length, use zip ties to bundle it neatly together. Make sure to leave enough slack for the cables to remain flexible and not interfere with any moving parts.
- Tuck behind trim panels: If there is an excess cable that you can’t fully bundle, tuck it behind trim panels for a cleaner appearance. Just make sure it doesn’t interfere with any components or obstruct the panel from fitting back snugly.
- Trim excess cable: If you’re comfortable with some basic wiring, you can trim the excess cable length. Be cautious and double-check the connections before cutting any wires, and always leave a small amount of extra cable as a safety measure.
By following these tips, you can achieve a tidy and professional-looking installation, ensuring that your front dash cam is discreetly positioned and the cables are hidden from view. Taking the time to carefully route and manage the cables will not only enhance the aesthetics of your vehicle’s interior but also provide a hassle-free and enjoyable driving experience.
Installing The Rear Dash Cam
Installing a rear dash cam is an important step to ensure comprehensive surveillance and protection while driving. While the front dash cam captures incidents happening ahead, the rear dash cam provides a valuable recording of events happening behind your vehicle. In this section, we will discuss various placement options for the rear dash cam and how to securely attach it in the selected spot.
Placement options for the rear dash cam
Before installing the rear dash cam, it’s crucial to determine the best placement option for optimal coverage and visibility. Here are a few common options:
- Windshield placement: Attaching the rear dash cam to the inside of the rear windshield provides a clear and unobstructed view of the road behind. Make sure to position it in a way that does not obstruct your rearview mirror.
- License plate placement: Some dash cam models come with a license plate mounting option. This placement allows for a discreet installation while capturing a wide-angle view of the road.
- Headliner placement: In certain vehicles, mounting the rear dash cam on the headliner is a viable option. This placement provides a higher vantage point and a broader field of view.
Securely attaching the rear dash cam in the selected spot
Once you have decided on the placement option for your rear dash cam, it’s essential to securely attach it to your vehicle. Here’s a step-by-step guide:
- Clean the installation area: Before attaching the rear dash cam, clean the selected spot with a cloth and a mild cleaning agent. This ensures a clean and smooth surface for proper adhesion.
- Mounting bracket or adhesive tape: Depending on the type of dash cam, you may have a mounting bracket or adhesive tape for installation. Follow the manufacturer’s instructions to attach the rear dash cam securely.
- Positioning and alignment: Carefully position the rear dash cam to ensure it captures the desired view. Ensure it is aligned properly with the center of the rear windshield or license plate area.
- Cable management: Conceal the power cable of the rear dash cam along the car’s interior panels or headliner to keep it neat and avoid obstruction.
- Test and finalize: Once the rear dash cam is attached, test it by turning on your vehicle and checking the recording quality and angle. Make any necessary adjustments before finalizing the installation.
By following these steps, you can install the rear dash cam securely and ensure optimal performance. Don’t forget to consult the installation manual provided by the manufacturer for specific instructions related to your dash cam model.
Connecting And Routing Cables For The Rear Dash Cam
Connecting and routing cables for the rear dash cam is an essential step to ensure optimal performance and functionality of your vehicle’s surveillance system. By properly running and concealing the cables, you can achieve a neat appearance and maintain a clutter-free cabin. In this section, we will guide you through the process of running cables from the rear camera to the front dash cam and concealing them for a seamless installation.
Running cables from the rear camera to the front dash cam
Before you start running the cables, it is crucial to plan the route carefully to ensure a secure and hidden installation. Follow these steps to connect and route the cables:
- Begin by identifying a suitable path to run the cables. Look for existing cable conduits, such as those used for power windows or speakers, to minimize modifications to your vehicle’s interior.
- Securely attach the rear camera to the back windshield using the provided mounting hardware, making sure it is aligned and positioned correctly for optimum video capture.
- Measure the distance from the rear camera to the front dash cam to determine the length of cable required. Most dash cam kits come with sufficient cable length for standard vehicles, but extensions may be necessary for larger vehicles.
- Starting at the rear camera, carefully route the cable along the windshield and headliner, avoiding any airbags or obstructing the driver’s view. Use cable clips or adhesive clips to secure the cable along the path, ensuring a tidy and secure installation.
- Continue routing the cable down the A-pillar, following the interior trim and concealing it as much as possible. Take care to avoid any sharp edges or moving parts that could damage the cable.
- Lastly, feed the cable from the A-pillar into the dashboard and connect it to the front dash cam. Depending on your dash cam model, you may need to connect the cable to a specific port or use an adapter. Refer to the manufacturer’s instructions for accurate installation guidance.
Concealing the cables for a neat appearance
To achieve a clean and professional-looking installation, it is vital to conceal the cables effectively. Here are some tips to help you hide the cables:
- Utilize cable clips or adhesive clips to secure the cables along the path, keeping them hidden from view and minimizing the risk of tangling or snagging.
- Tuck the cables behind the vehicle’s interior trim, such as door panels or dashboard, whenever possible. This will not only provide a neat appearance but also protect the cables from potential damage.
- Use cable sleeves or loom to bundle multiple cables together, creating a more organized and streamlined look. This is especially useful if you have additional accessories connected to your dash cam, such as a GPS module or rearview mirror monitor.
- Consider using cable raceways or conduits for a more advanced installation. These accessories can be attached to the interior surfaces, providing a dedicated path for the cables and ensuring a sleek finish.
By diligently running and concealing the cables for your rear dash cam, you can achieve a professional and integrated installation while maintaining the functionality and aesthetics of your vehicle’s interior.

Powering The Dash Cam System
One of the most important aspects of installing a dash cam is ensuring that it is properly powered. Without a reliable source of power, the dash cam won’t be able to function effectively in capturing crucial footage. In this section, we will discuss the different methods you can use to connect your dash cam to a power source.
Connecting the dash cam to a power source
When it comes to connecting your dash cam to a power source, you have a few options to choose from. The most common method is to utilize the car’s cigarette lighter socket. This is a straightforward solution that allows you to easily plug and unplug the dash cam as needed.
However, if you prefer a more discreet and permanent installation, you can consider utilizing fuse taps or a hardwire kit. By tapping into the car’s fuse box, you can power the dash cam without any visible wires running across your vehicle. This not only provides a cleaner and more professional look but also eliminates the potential of the dash cam being accidentally unplugged.
Utilizing fuse taps or a hardwire kit for a more permanent installation
If you decide to go the route of utilizing fuse taps or a hardwire kit, you will need some basic tools and electrical know-how. Firstly, locate your car’s fuse box, which is usually located under the dashboard or in the engine compartment.
Using a fuse tap or hardwire kit, you can connect the dash cam directly to a constant or switched power source. A constant power source will ensure that the dash cam is always recording, even when the car is turned off. On the other hand, a switched power source will only power the dash cam when the ignition is on, conserving energy.
It’s important to consult your car’s manual or seek professional assistance to identify the appropriate fuse to tap into. Once you have the right fuse, carefully insert the fuse tap or wire into the designated slot, and connect the other end to the dash cam’s power cable.
Remember to properly secure the wiring and avoid any contact with moving parts or obstructing the driver’s view. It may be necessary to use cable ties or adhesive clips to keep the wires neatly tucked away.
Overall, utilizing fuse taps or a hardwire kit for a more permanent installation offers the advantage of a sleek and unobtrusive setup. However, if you prefer the flexibility of a removable dash cam or have concerns about potential damage to your car’s electrical system, the cigarette lighter socket is a viable alternative.
Adjusting Dash Cam Settings And Testing
Configuring Dash Cam Settings for Optimal Performance
After installing your dash cam front and rear, it’s crucial to configure the settings to ensure optimal performance. By fine-tuning the dash cam settings, you can enhance the camera’s ability to capture clear footage and valuable details effectively.
Here are some key settings you should consider adjusting:
- Resolution: Choose the highest resolution available to capture detailed footage. If storage space is a concern, you can opt for a lower resolution.
- Frame rate: Adjust the frame rate to a higher value, such as 30 frames per second (fps), for smoother video playback and clearer details.
- Exposure: Properly adjust the exposure settings to avoid overexposed or underexposed footage. Experiment with different exposure levels to find the optimal balance.
- Timestamp: Enable the timestamp feature to have date and time imprints on your video recordings. This information can be extremely useful when analyzing footage later on.
- Loop recording: Enable loop recording to overwrite old files automatically when the memory card is full. This ensures your dash cam can continuously record without interruptions.
- Driver assistance features: If your dash cam offers additional features like lane departure warnings or collision detection, configure them according to your preferences. These features can provide an extra layer of safety on the road.
Testing the Dash Cam System to Ensure Proper Installation
Properly testing your dash cam system after installation is essential to confirm that everything is working as intended. Here’s a simple checklist to follow:
- Check power supply: Ensure that the dash cam is receiving power and turning on correctly. Confirm that the connection to the vehicle’s power source is secure.
- Verify video recordings: Review the recorded footage to ensure it is clear and properly captured. Pay attention to any potential issues, such as blurry or distorted images.
- Test night vision quality: If your dash cam has night vision capabilities, test its performance in low-light conditions. Make sure the footage remains clear and allows for easy visibility.
- Check GPS functionality: If your dash cam includes GPS, verify that it accurately tracks your vehicle’s location and speed. This information can be valuable for potential insurance claims.
- Ensure proper rear camera alignment: If you installed a rear dash cam, double-check its alignment to capture the desired field of view. Adjust as necessary to avoid missing any crucial details.
- Confirm memory card functionality: Test the memory card by recording and reviewing footage. Ensure that the dash cam is properly saving files and that the memory card has adequate storage space.
By following these steps and thoroughly testing your dash cam system, you can have peace of mind knowing that your dash cam is properly installed and ready to capture important moments on the road.
Troubleshooting Common Installation Issues
Addressing common problems and challenges during installation
Installing a dash cam front and rear in your vehicle can greatly enhance your driving experience and provide you with valuable footage in case of accidents or other incidents. However, like any technology, there can be challenges during the installation process. In this section, we will discuss the common problems that may arise and offer troubleshooting techniques and solutions to help you overcome them.
Troubleshooting techniques and solutions
1. Power connectivity issues
One of the most common problems when installing a dash cam is a power connectivity issue. Whether you are using the dash cam’s built-in battery or connecting it directly to your vehicle’s power source, ensuring a stable power supply is crucial. Here are some troubleshooting techniques:
- Check the power cable: Ensure that the power cable is securely connected to both the dash cam and the power source. You might need to push it in firmly or try a different power outlet in your vehicle.
- Fuse replacement: If the dash cam is not receiving power, check the fuse in your vehicle’s fuse box. A blown fuse can cause a disruption in the power supply. Replace it with a new one if necessary.
2. Positioning and alignment problems
Proper positioning and alignment of the front and rear cameras are essential for optimal performance. Here’s how to troubleshoot these issues:
- Adjust the camera angle: If the footage is too high or low, or if it is capturing too much of the sky or ground, adjust the position of the cameras. Most dash cams have swivel mounts that allow for easy adjustment.
- Optimal height and distance: Ensure that the cameras are positioned at the correct height and distance. Generally, the front camera should be placed behind the rear-view mirror, while the rear camera should be positioned in the center of the rear window.
- Use adhesive tape or suction mounts: If the mounts provided with the dash cam are not providing a stable position, consider using adhesive tape or suction mounts for better stability.
3. SD card errors
An SD card is essential for storing the footage recorded by your dash cam. However, issues related to the SD card can occur. Here’s how to troubleshoot SD card errors:
- Format the SD card: Sometimes, formatting the SD card can resolve any compatibility or storage issues. Make sure to back up any important files before formatting.
- Check for card compatibility: Ensure that the SD card is compatible with your dash cam. Refer to the manufacturer’s recommendations for the type and capacity of SD card suitable for your device.
- Replace the SD card: If the SD card continues to exhibit errors, consider replacing it with a new one. It is recommended to use high-quality and reputable brands for better performance and reliability.
Troubleshooting common installation issues when installing a dash cam front and rear can save you time and frustration. By following these troubleshooting techniques and solutions, you can ensure a smooth installation process and maximize the performance of your dash cam.
Maintaining And Caring For The Dash Cam System
Maintaining and caring for your dash cam system is crucial to ensure its optimal performance and longevity. By regularly cleaning and maintaining the dash cam and camera lenses, as well as checking and updating the firmware, you can enjoy clear and reliable footage when you need it the most.
Cleaning and maintaining the dash cam and camera lenses
Keeping your dash cam and camera lenses clean is essential for capturing high-quality footage. Over time, dust, fingerprints, and dirt can accumulate on the lens, negatively affecting video clarity. To maintain your dash cam and camera lenses:
- Remove any loose debris: Before cleaning, gently remove any loose debris from the dash cam and lens using a soft brush or compressed air.
- Use a microfiber cloth: Use a clean, microfiber cloth to wipe the surface of the dash cam and lens. Avoid using any abrasive materials that could scratch or damage them.
- Mild cleaning solution: If there are stubborn smudges or fingerprints on the lens, you can lightly dampen the microfiber cloth with a mild cleaning solution specifically designed for lenses. Ensure the cloth is only slightly damp and not soaking wet.
- Gently wipe the lens: With the damp cloth, gently wipe the lens in a circular motion. Avoid using excessive pressure, as it could scratch the lens.
- Dry the dash cam: After cleaning, use a dry microfiber cloth to wipe away any remaining moisture on the dash cam and lens.
Regularly checking and updating firmware for optimal performance
The firmware is the software that controls the operation of your dash cam system. Periodically checking for firmware updates can help improve performance, fix bugs, and add new features. To check and update the firmware:
- Visit the manufacturer’s website: Go to the manufacturer’s website and navigate to the dash cam’s support or downloads section.
- Identify your dash cam model: Find your specific dash cam model and check if there are any available firmware updates.
- Download the firmware: If there is an update available, download it to your computer and save it in a location you can easily access.
- Connect dash cam to computer: Connect your dash cam to your computer using the provided USB cable.
- Transfer firmware to dash cam: Copy the downloaded firmware file to the root directory of your dash cam’s memory card.
- Update firmware: Safely disconnect your dash cam from the computer and power it on. The dash cam should recognize the firmware file and prompt you to update. Follow the on-screen instructions to complete the firmware update process.
By following these steps to clean and maintain your dash cam system, as well as regularly checking and updating the firmware, you can ensure that your dash cam continues to deliver reliable and clear footage, providing peace of mind while on the road.
Frequently Asked Questions Of How To Install A Dash Cam Front And Rear
Can I Install Dash Cam Myself?
Yes, you can install a dash cam yourself. It is a simple process that doesn’t require professional help. Just follow the instructions provided with the dash cam and use the required tools. Make sure to power it properly and position it correctly for optimal performance.
How Much Does It Cost To Install A Front And Rear Dash Cam?
The cost to install a front and rear dash cam varies, typically ranging from $100 to $400.
Should You Get Both Front And Rear Dash Cam?
Yes, it is recommended to have both front and rear dash cams. Having both will provide a complete view of the road and enhance your safety.
How Do You Install A Front And Rear Wireless Dash Cam?
To install a front and rear wireless dash cam, start by finding suitable spots for both cameras on your windshield and rear window. Ensure a clear view and secure the mounts with adhesive tape. Next, connect the wireless transmitter to the front camera and the wireless receiver to the rear camera.
Power up the dash cam and adjust the settings as needed for recording.
Conclusion
Installing a dash cam front and rear is a simple yet valuable addition to your vehicle. With its ability to provide visual evidence in case of accidents or other incidents, it brings peace of mind and added security to your daily drive.
By following the step-by-step instructions provided in this guide, you can easily install your dash cam and start benefiting from its features. Remember to properly position and secure both the front and rear cameras for optimal coverage. Get started today and enhance your driving experience with a dash cam!